Anyone who has created a presentation using PowerPoint knows that animations added to objects can be prompted by the click of a mouse when in presentation mode. However, your curiosity may not have brought you deep enough into the animations options to have discovered the trigger function. Great for 1-on-1 or kiosk-style presentations, as well as eLearning, the trigger function allows you to create a more interactive and personalised experience for your audience.
What does a PowerPoint trigger do?
Triggers allow you to initiate a sequence of animations by clicking on a specific object on the slide rather than simply clicking your mouse. This can be helpful for de-cluttering a slide and making a presentation more interactive, however getting triggers to work practically can be a bit tricky.
Preparation is key
Before we begin trying out triggers in PowerPoint, I recommend preparing your slides properly. If you have a lot going on in your slide then the process of finding a desired object can be a bit of a headache. To make things easier on yourself, pull out the selection pane, which is located under the home tab, on the far right side, under the drop down menu select (see image below). This will open the selection pane which lists all of the objects in the slide. If you click on an object in the slide, that object will be highlighted in the list. Now not only do you know the name of that object, but by double clicking on it in the selection pane you can rename it to something more useful than “oval 57”. Rename the key objects on your slide in a way that is helpful to you. In my example below I have renamed key groups A, B, and C.
Adding a trigger
To start working with the trigger function, apply an animation or series of animations to an object, then select them in the animation pane, right click and choose effect options. This will open up a new window with several tabs. Under the timing tab, you will find the trigger button. PowerPoint will default to have the effects animate as part of a click sequence, but by selecting the option start effect on click of… you can have a lot more fun. You now have access to a drop down menu which lists the objects on your slide.
The first slide I’ve provided demonstrates how the trigger function can be used to create a simple eLearning quiz. Clicking any of the three answers triggers a short animation sequence where the appropriate response flies in, pauses, and then flies out.
To find out how to make objects peak out from behind something else, see our blog post on masking effects with a step-by-step guide.
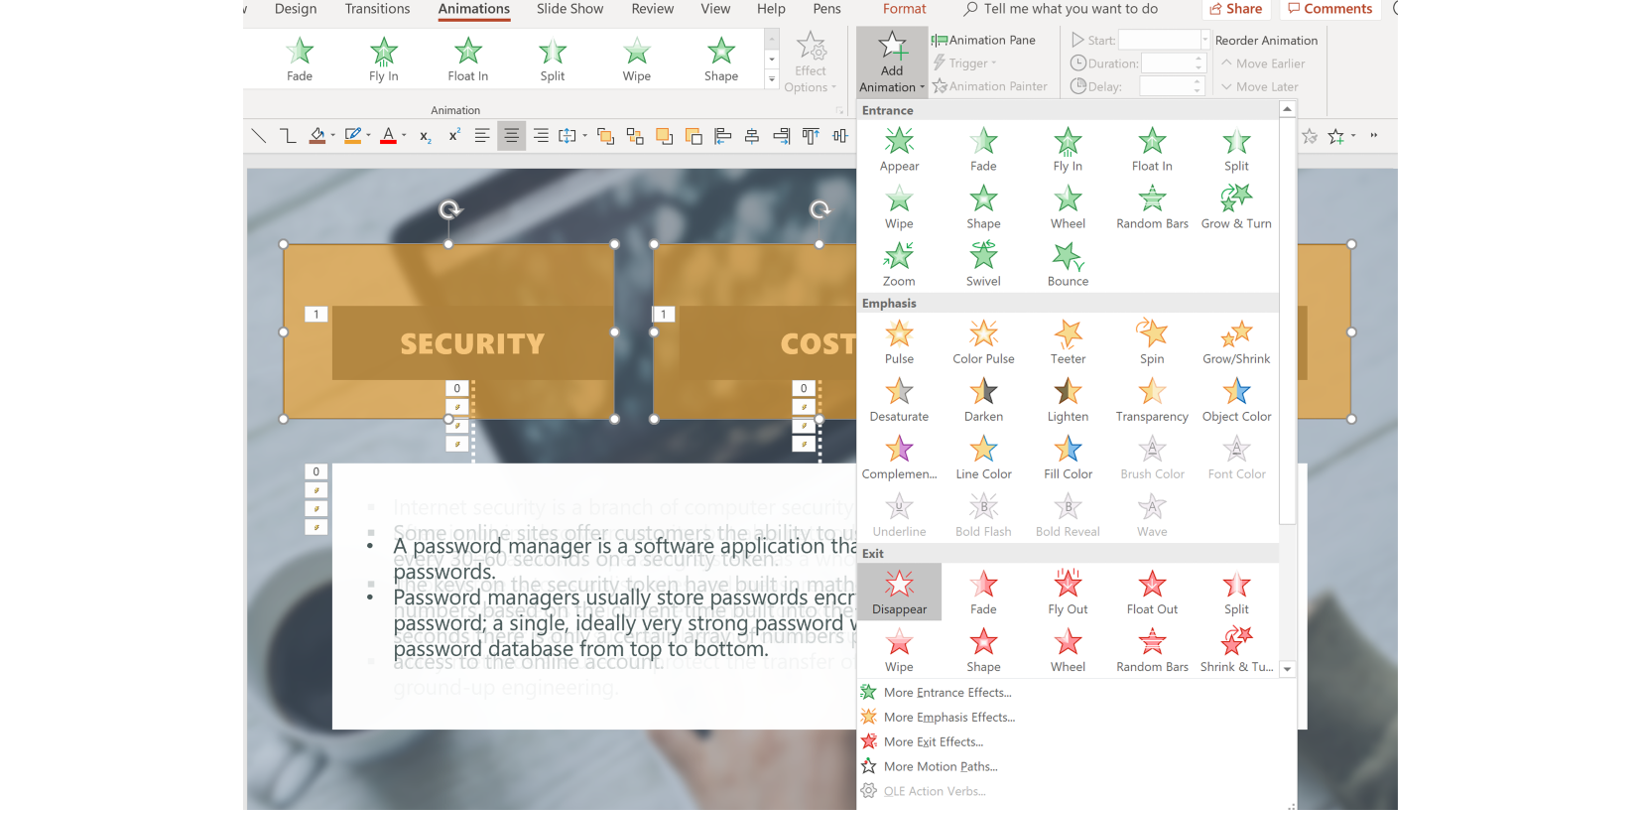
To set this up, start by selecting all the objects you want involved in the trigger sequences (in this case the three response text boxes), and give them a disappear animation. Ensure that this disappear sequence is click one, then highlight and right click the group and select start with previous which will move the group to click 0. This sets up the slide so that these objects are not visible when you open the slide in presentation mode.
Now you can add animation sequences to each object and then make them triggers, as described above. Since my animation sequence ends with an exit effect, you can click any button, in any order, as many times as you like, and it looks fine. I haven’t had to do any tricky formatting to make this slide work.
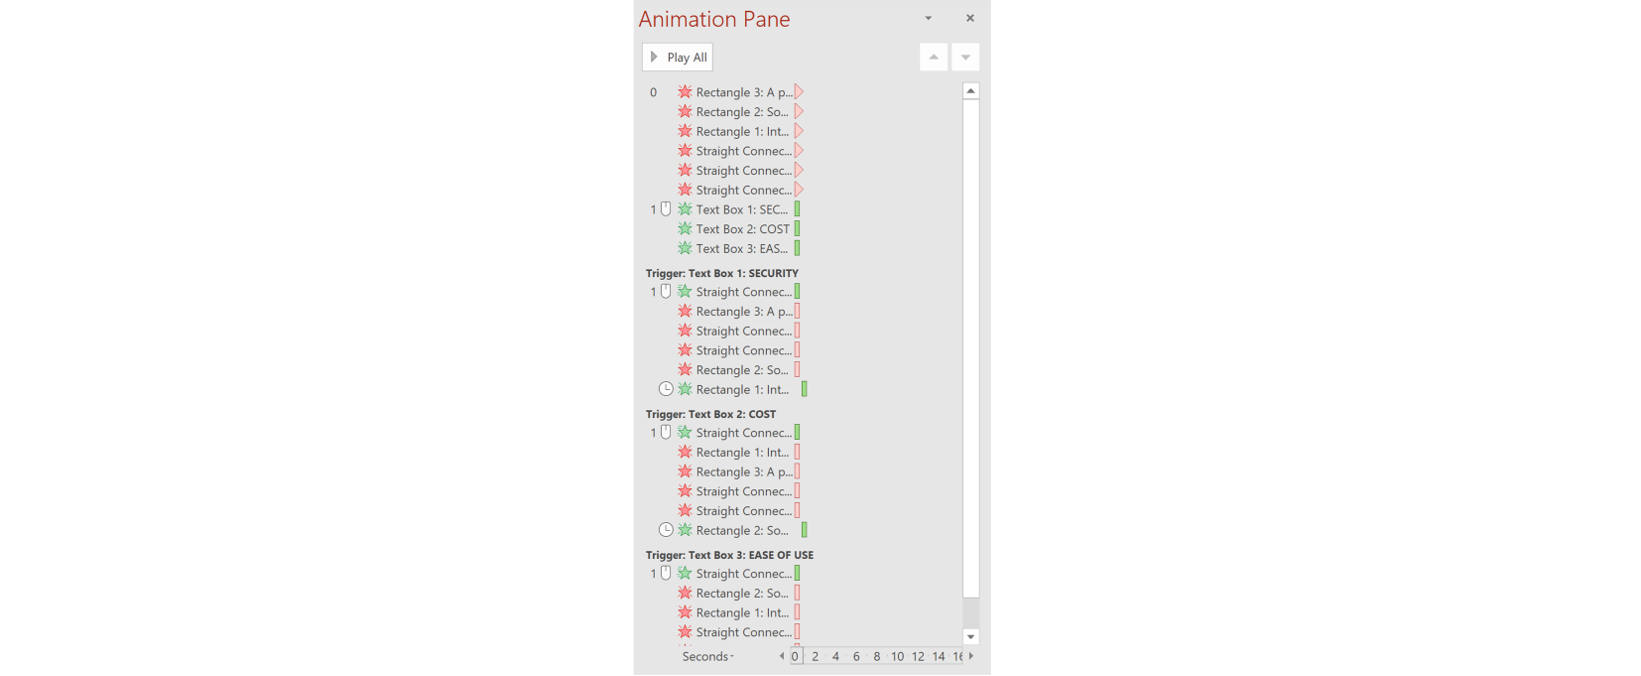
While this sequence looks great, it might not be useful when trying to convey bigger chunks of information as the responses only appear very briefly. So lets try something that might be useful in a different context. For this next example, I’ve changed the triggers so that clicking on the text boxes causes a corresponding box to fade in and remain until the next trigger is clicked. This is a little more complex, but once you’ve cracked it you have a slide which allows viewers to take their time looking at whatever you decide to put in the box before moving on to a different one. An effect like this can help you address the specific needs of your clients, without bombarding them with information they don’t need.
Take a sneak peek at my animation pane:
And the finished product:
Avoiding glitches
But let’s say I’m a curious viewer and I click on the same button over and over again, what happens then? If you give it a shot, you might find that it looks like you are experiencing some kind of ugly computer glitch, which makes the presentation feel unpolished. But, as I’m sure you are expecting, there is a solution to this problem as well.
The answer to this problem is the use of invisible shapes, i.e. inserting a shape and removing its fill and outline. If you make an invisible shape appear over a button as part of that button’s trigger sequence, it prevents the button from being clicked twice.
Firstly, set all the invisible shapes to disappear on click 0. This means your user can click on any of the buttons to start. Then, for each trigger, add an appear animation to the paired invisible shape, and a disappear animation to the other two invisible shapes. The invisible shape protects the trigger from being fired again, and prevents that awful glitchy look. Having the other invisible shapes disappear makes their paired trigger functions available once again for firing.
In order to help you understand what’s going on, I left the fill on my “invisible” shapes and adjusted the transparency so you could still see the objects underneath. I suggest doing the same thing and making the shapes completely invisible once you are finished working on the slide.
Guiding your viewer
One final issue to address is the transition. Since the invisible shapes have no trigger associated with them, clicking on them when in presentation mode is like clicking on nothing. This is good, except that in PowerPoint’s default settings, a click on nothing queues the next slide. This means that if a viewer clicks on a trigger and then goes to click on it again the slide will change, perhaps before they are done going through everything it has to offer. To fix this problem simply go to the transitions tab and, on the far right under advance slide, uncheck on mouse click.
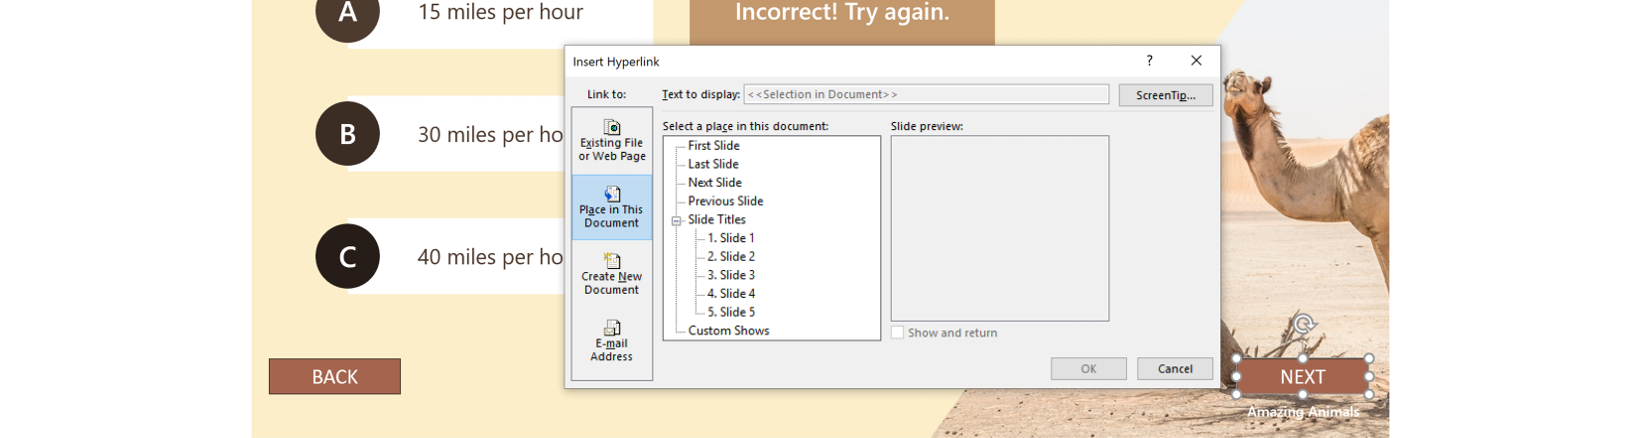
There is a next slide button that can be used to manually change slides in the bottom left corner of presentation mode, however a good alternative is putting in another object and hyperlinking it to direct the user to the next slide as I have done in my eLearning example.
You can learn how to hyperlink things in this article on interactivity, which also gives great ideas on how you can incorporate both hyperlinks and triggers into your presentations.
Now you know how to add triggers to your PowerPoint presentations you are ready to create dynamic, interactive presentations that are sure to impress and engage your audience. If you have any questions, feel free to leave them in the comments below.
The National University of Singapore have developed an add-on software called PowerPointLabs. If you are an ambitious PowerPoint user who doesn’t have time to fiddle around with learning all the tricks that experts such as the BrightCarbon staff have figured out, then you may find PowerPointLabs to be very helpful.
Clark Quinn has made a career out of aligning corporate and organizational goals with learning science and computer science. He kindly agreed to let me pick his brain and find out what led him down the path to melding together technology and education disciplines.
Thank you so much for this hint – hunting through the trigger pulldown was going to be a real pain, and the selection pane makes everything so much easier!
Hi Okang, A trigger sequence will always play forward. If you have multiple animation mouse clicks in it, then each time you click on the trigger object, you’ll start the next on-click animation in the sequence, until you get to the end, and then you’ll go back to the start again. So, say you had the following three animations on click to start: 1. Entrance Fade 2. Emphasis Spin 3. Emphasis Color Change If you want to create a reverse sequence, you’d then have to add three more animations to the same trigger, so that you end up with: 4. Emphasis Color Change (but this time back to the original color) 5. Emphasis Spin 6. Entrance Fade For the user, each time they click, the next animation in the sequence appears, and once you get to #6, you then go back to #1, so the cycle repeats.
This is awesome! Once you add interactivity with links, triggers, etc., if you need your end user to access it as an online e-learning exercise, can these features only be accomplished by using a native PowerPoint file or is there another file format that will keep all the interactivity, animations, triggers if you need them to do this on your web page or even if you email them a file and dont want them to be able to access your native file? does a PPS work or what file type would you use? Thanks.
As a side note, I absolutely love Bright Carbon. I learn more from you guys than anybody else. top notch!
Worked like a charm! The slide I made is definitely more polished and smooth after following the steps you shared! The information was fairly easy to understand and follow. Thanks for the great help!
Hi Bright Carbon, First of all thanks for such an interactive way of presenting important knowledge on ppt. Regarding using Triggers I have a question. As in the example above, I want my learners to click all three options and only then a forward button will appear. How can I build this in a slide? I have managed to let them click on shapes and then additional info is presented, but I just don’t know how to create the animation that only when all Triggers have been seen, the forward button shows. Hope you will have a solution / idea how to go at this?
We delivered this to over 100 people today, and everyone LOVED the presentation and story. We have received wonderful feedback, and have four opportunities already.


I discovered this by accident looking for a manual of power point.
I love it♥ thank you for sharing this information.
Just one question, do you have videos or a youtube channel?
Hey Sigrid,
We actually do have a youtube channel! Check it out here: https://www.youtube.com/channel/UCyipGP3aTqfaiEhbfo4oTxg
Thank you so much for this hint – hunting through the trigger pulldown was going to be a real pain, and the selection pane makes everything so much easier!
I tried this but I my trigger is still active upon the second click. if the fill is present, it works, but it does not work when i remove the fill
Ok, i got it to work.
Ok, so now I can prevent a double click scenario. So how do I allow the user to move backward? in essence, play the trigger sequence backward…
Hi Okang,
A trigger sequence will always play forward. If you have multiple animation mouse clicks in it, then each time you click on the trigger object, you’ll start the next on-click animation in the sequence, until you get to the end, and then you’ll go back to the start again. So, say you had the following three animations on click to start:
1. Entrance Fade
2. Emphasis Spin
3. Emphasis Color Change
If you want to create a reverse sequence, you’d then have to add three more animations to the same trigger, so that you end up with:
4. Emphasis Color Change (but this time back to the original color)
5. Emphasis Spin
6. Entrance Fade
For the user, each time they click, the next animation in the sequence appears, and once you get to #6, you then go back to #1, so the cycle repeats.
This is awesome! Once you add interactivity with links, triggers, etc., if you need your end user to access it as an online e-learning exercise, can these features only be accomplished by using a native PowerPoint file or is there another file format that will keep all the interactivity, animations, triggers if you need them to do this on your web page or even if you email them a file and dont want them to be able to access your native file? does a PPS work or what file type would you use? Thanks.
As a side note, I absolutely love Bright Carbon. I learn more from you guys than anybody else. top notch!
Worked like a charm! The slide I made is definitely more polished and smooth after following the steps you shared! The information was fairly easy to understand and follow. Thanks for the great help!
Hi Bright Carbon,
First of all thanks for such an interactive way of presenting important knowledge on ppt.
Regarding using Triggers I have a question. As in the example above, I want my learners to click all three options and only then a forward button will appear. How can I build this in a slide? I have managed to let them click on shapes and then additional info is presented, but I just don’t know how to create the animation that only when all Triggers have been seen, the forward button shows.
Hope you will have a solution / idea how to go at this?
Kind regards,
David
would it be possible to have a presentation where the slide went to a different slide depending on the score in a quiz?
This is really amazing and it with definitely encourage active engagement with learners