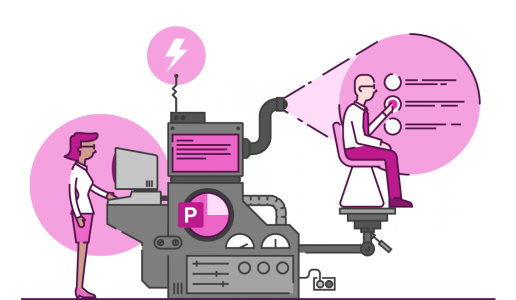
Welcome back to our series on eLearning assessments! Interactive PowerPoint quizzes are a great way of levelling up your eLearning content. Whether used for formative or summative assessment, interactive quizzes help learners to have a more engaging experience, identify areas where they need more help, and retain more of what they learned in the course of their training.
Remember, quizzes made in native PowerPoint cannot be scored. If you’re not sure whether you need scoring or not, go back to Part 1 to read about the arguments for and against assessment scoring. And if you do need to score your assessments, a different authoring tool might be what you need. We’ll get into some options for scored assessments in Part 3 and Part 4 of this series.
What you’ll need: Triggers, hyperlinks, and the Selection Pane
Everything you need to make interactive quizzes is available in PowerPoint. The key features that you’ll need to use are triggers, hyperlinks, and the Selection Pane. We have a dedicated article about triggers and an introduction to using triggers and hyperlinks for eLearning that you can get into if you’re new to using these features. To quickly recap what’s in those articles, triggers are a way of making an animation happen when you select an object on a PowerPoint slide. Hyperlinks are a way of jumping to another slide, section of your deck, or place outside PowerPoint. We’ll show you how to use both of these to make interactive quizzes in PowerPoint.
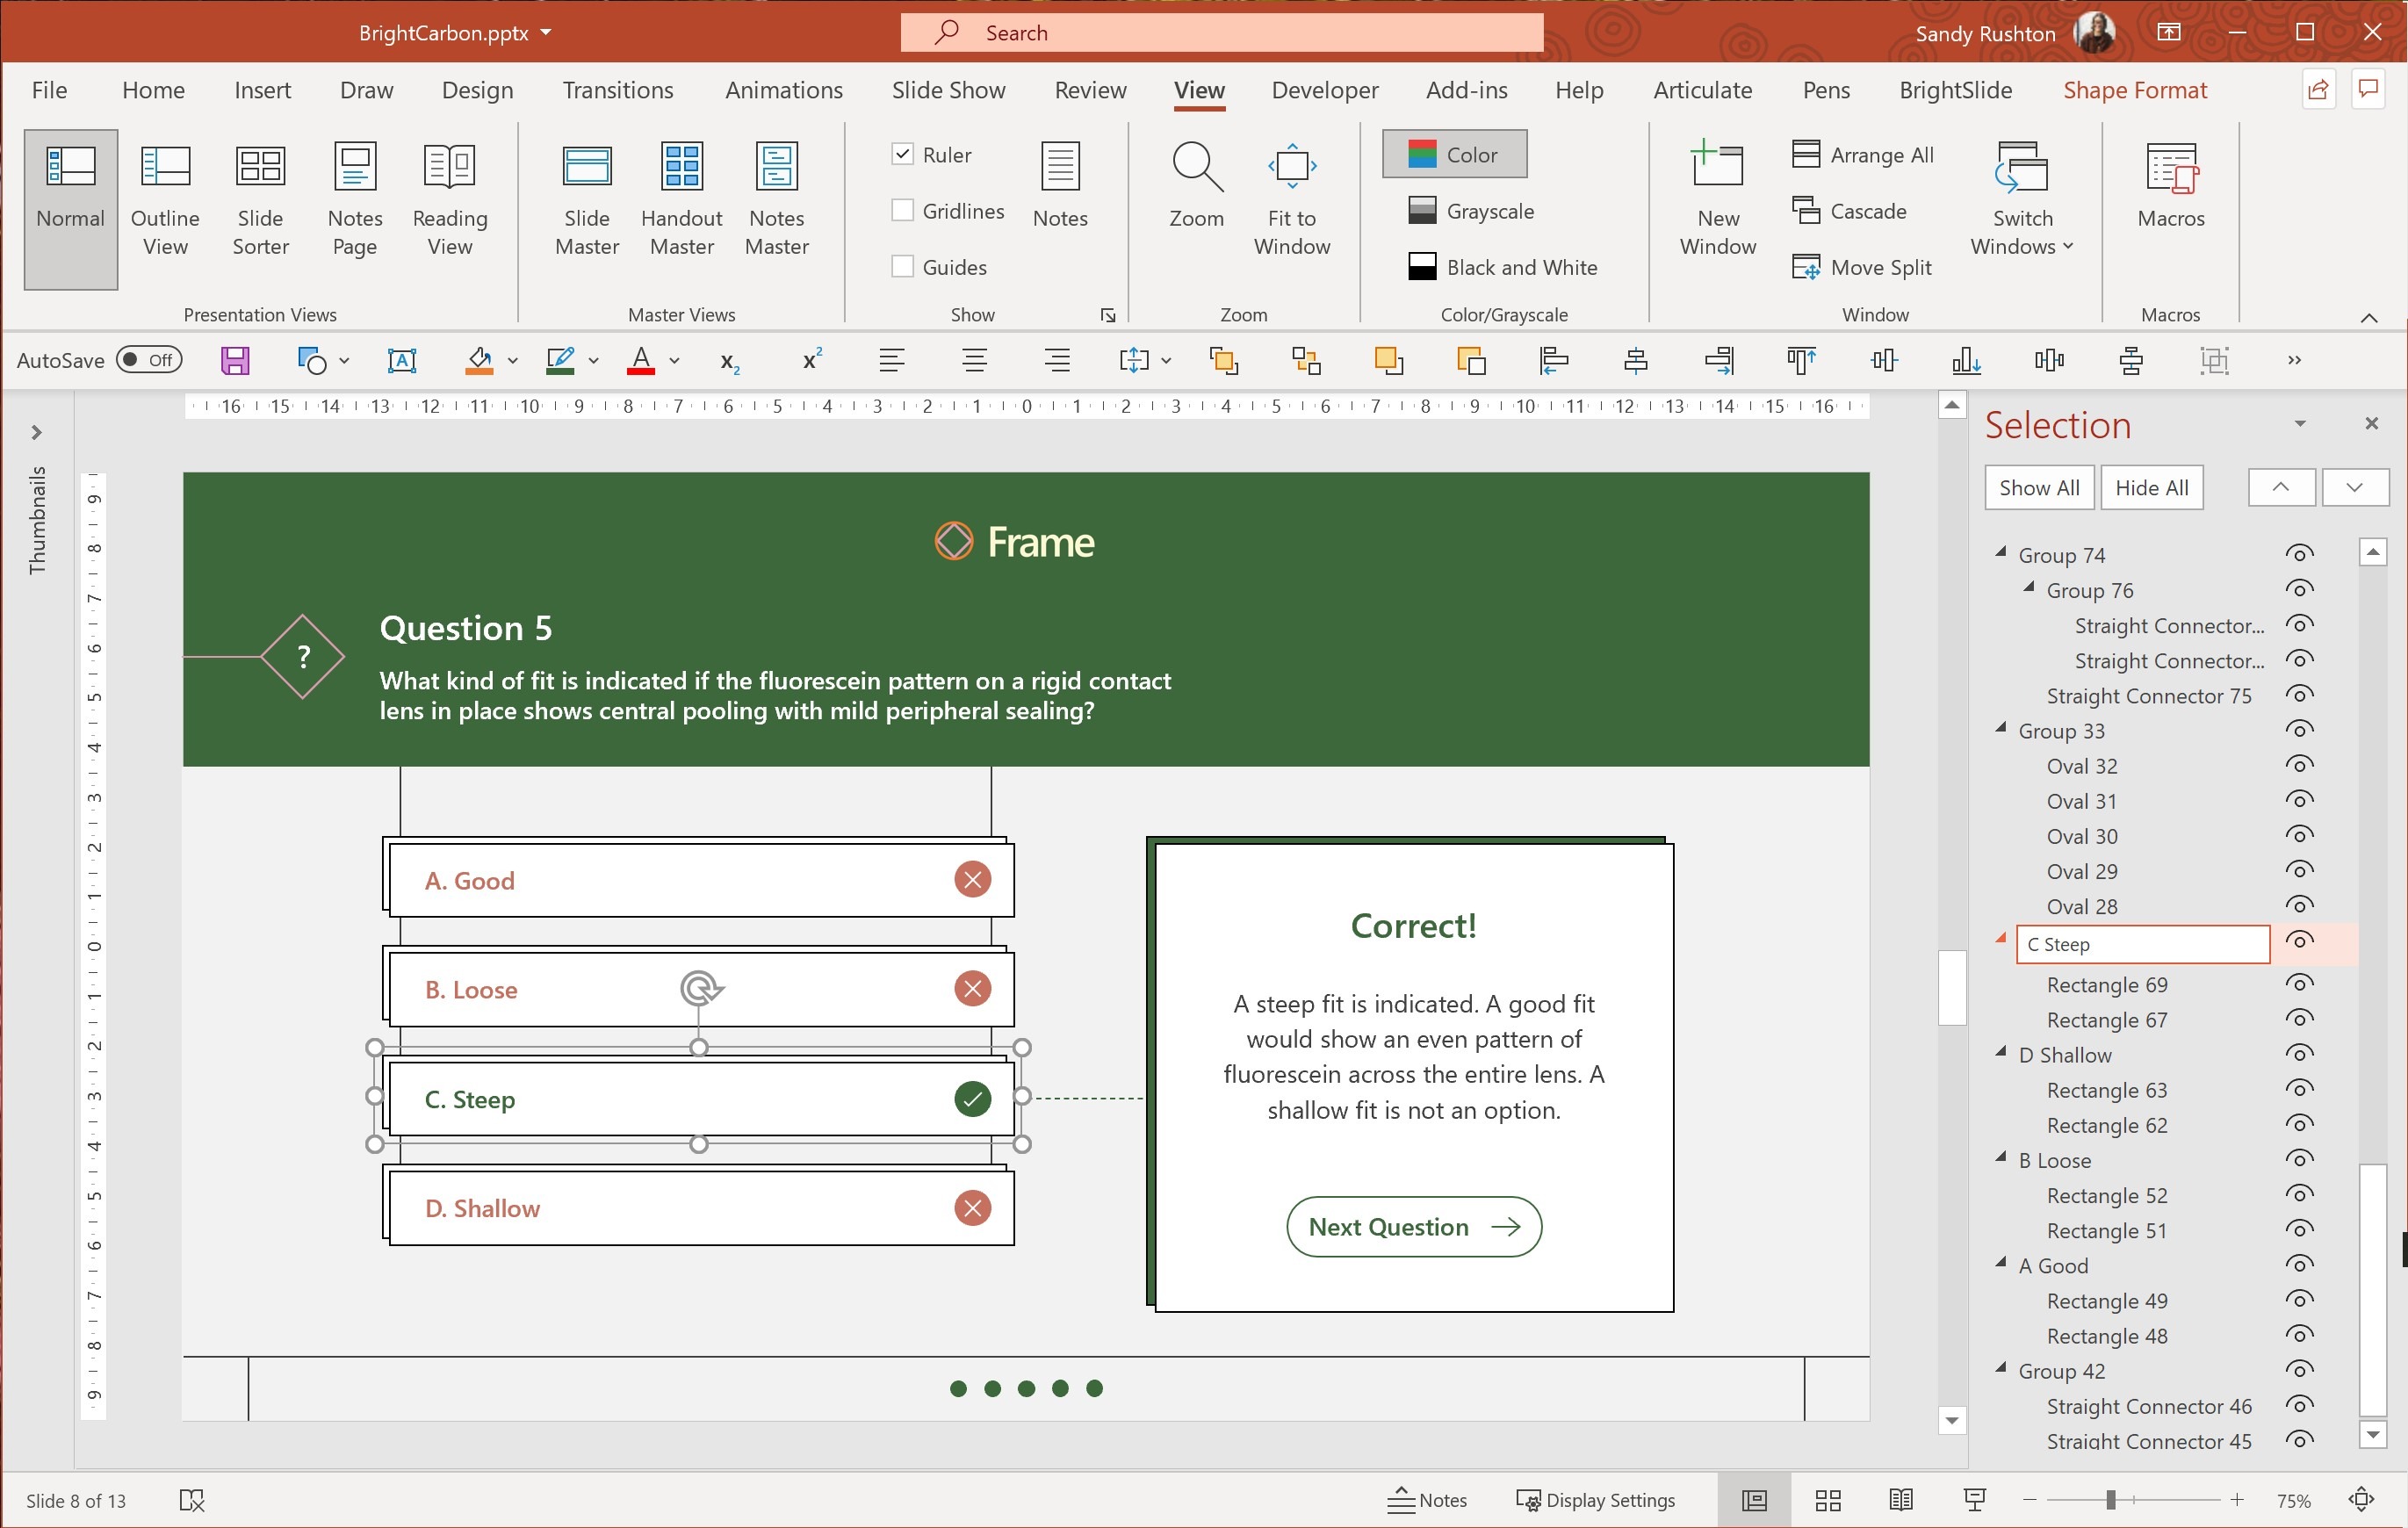
The Selection Pane is a great tool when you’re creating interactive PowerPoint quizzes. You can open it either by going to the Home tab > Arrange > Selection Pane, or straight from your Quick Access Toolbar if (like us) you have it pinned there. The Selection Pane shows you all the objects on your slide and allows you to quickly rename and hide objects. This will come in really handy when you have multiple objects layered on top of one another, which can happen when building interactive quizzes using triggers.
Now that you have all the tools you need, let’s get into setting up your slide.
Setting up questions, answers, and feedback
Making something interactive in PowerPoint is easier than you might think, but you need to do a bit of planning and set-up to make your interactive quiz function as smoothly as can be. Here’s our top tips for setting up:
Pick a layout that works for all the questions in your quiz. Say you have some multiple-choice questions with three possible answers, and some with five. You also have some true/false questions. Perhaps some of the answers are text, but some are photos or icons. Take the time to plan how you will lay out questions, instructions, and answers. The layout doesn’t have to be exactly the same on each slide, but it’s important to keep it as consistent as possible. Consistency means learners don’t have to spend too much time thinking about how to use the interactivity and can instead focus on applying their learning to the question at hand.
Make interactivity clear and obvious. Signalling interactivity is important. How will learners know what parts of your slide are interactive and which aren’t? Include explicit instructions and implicit design features to make objects look interactive. Add Alt Text for learners using a screen reader.
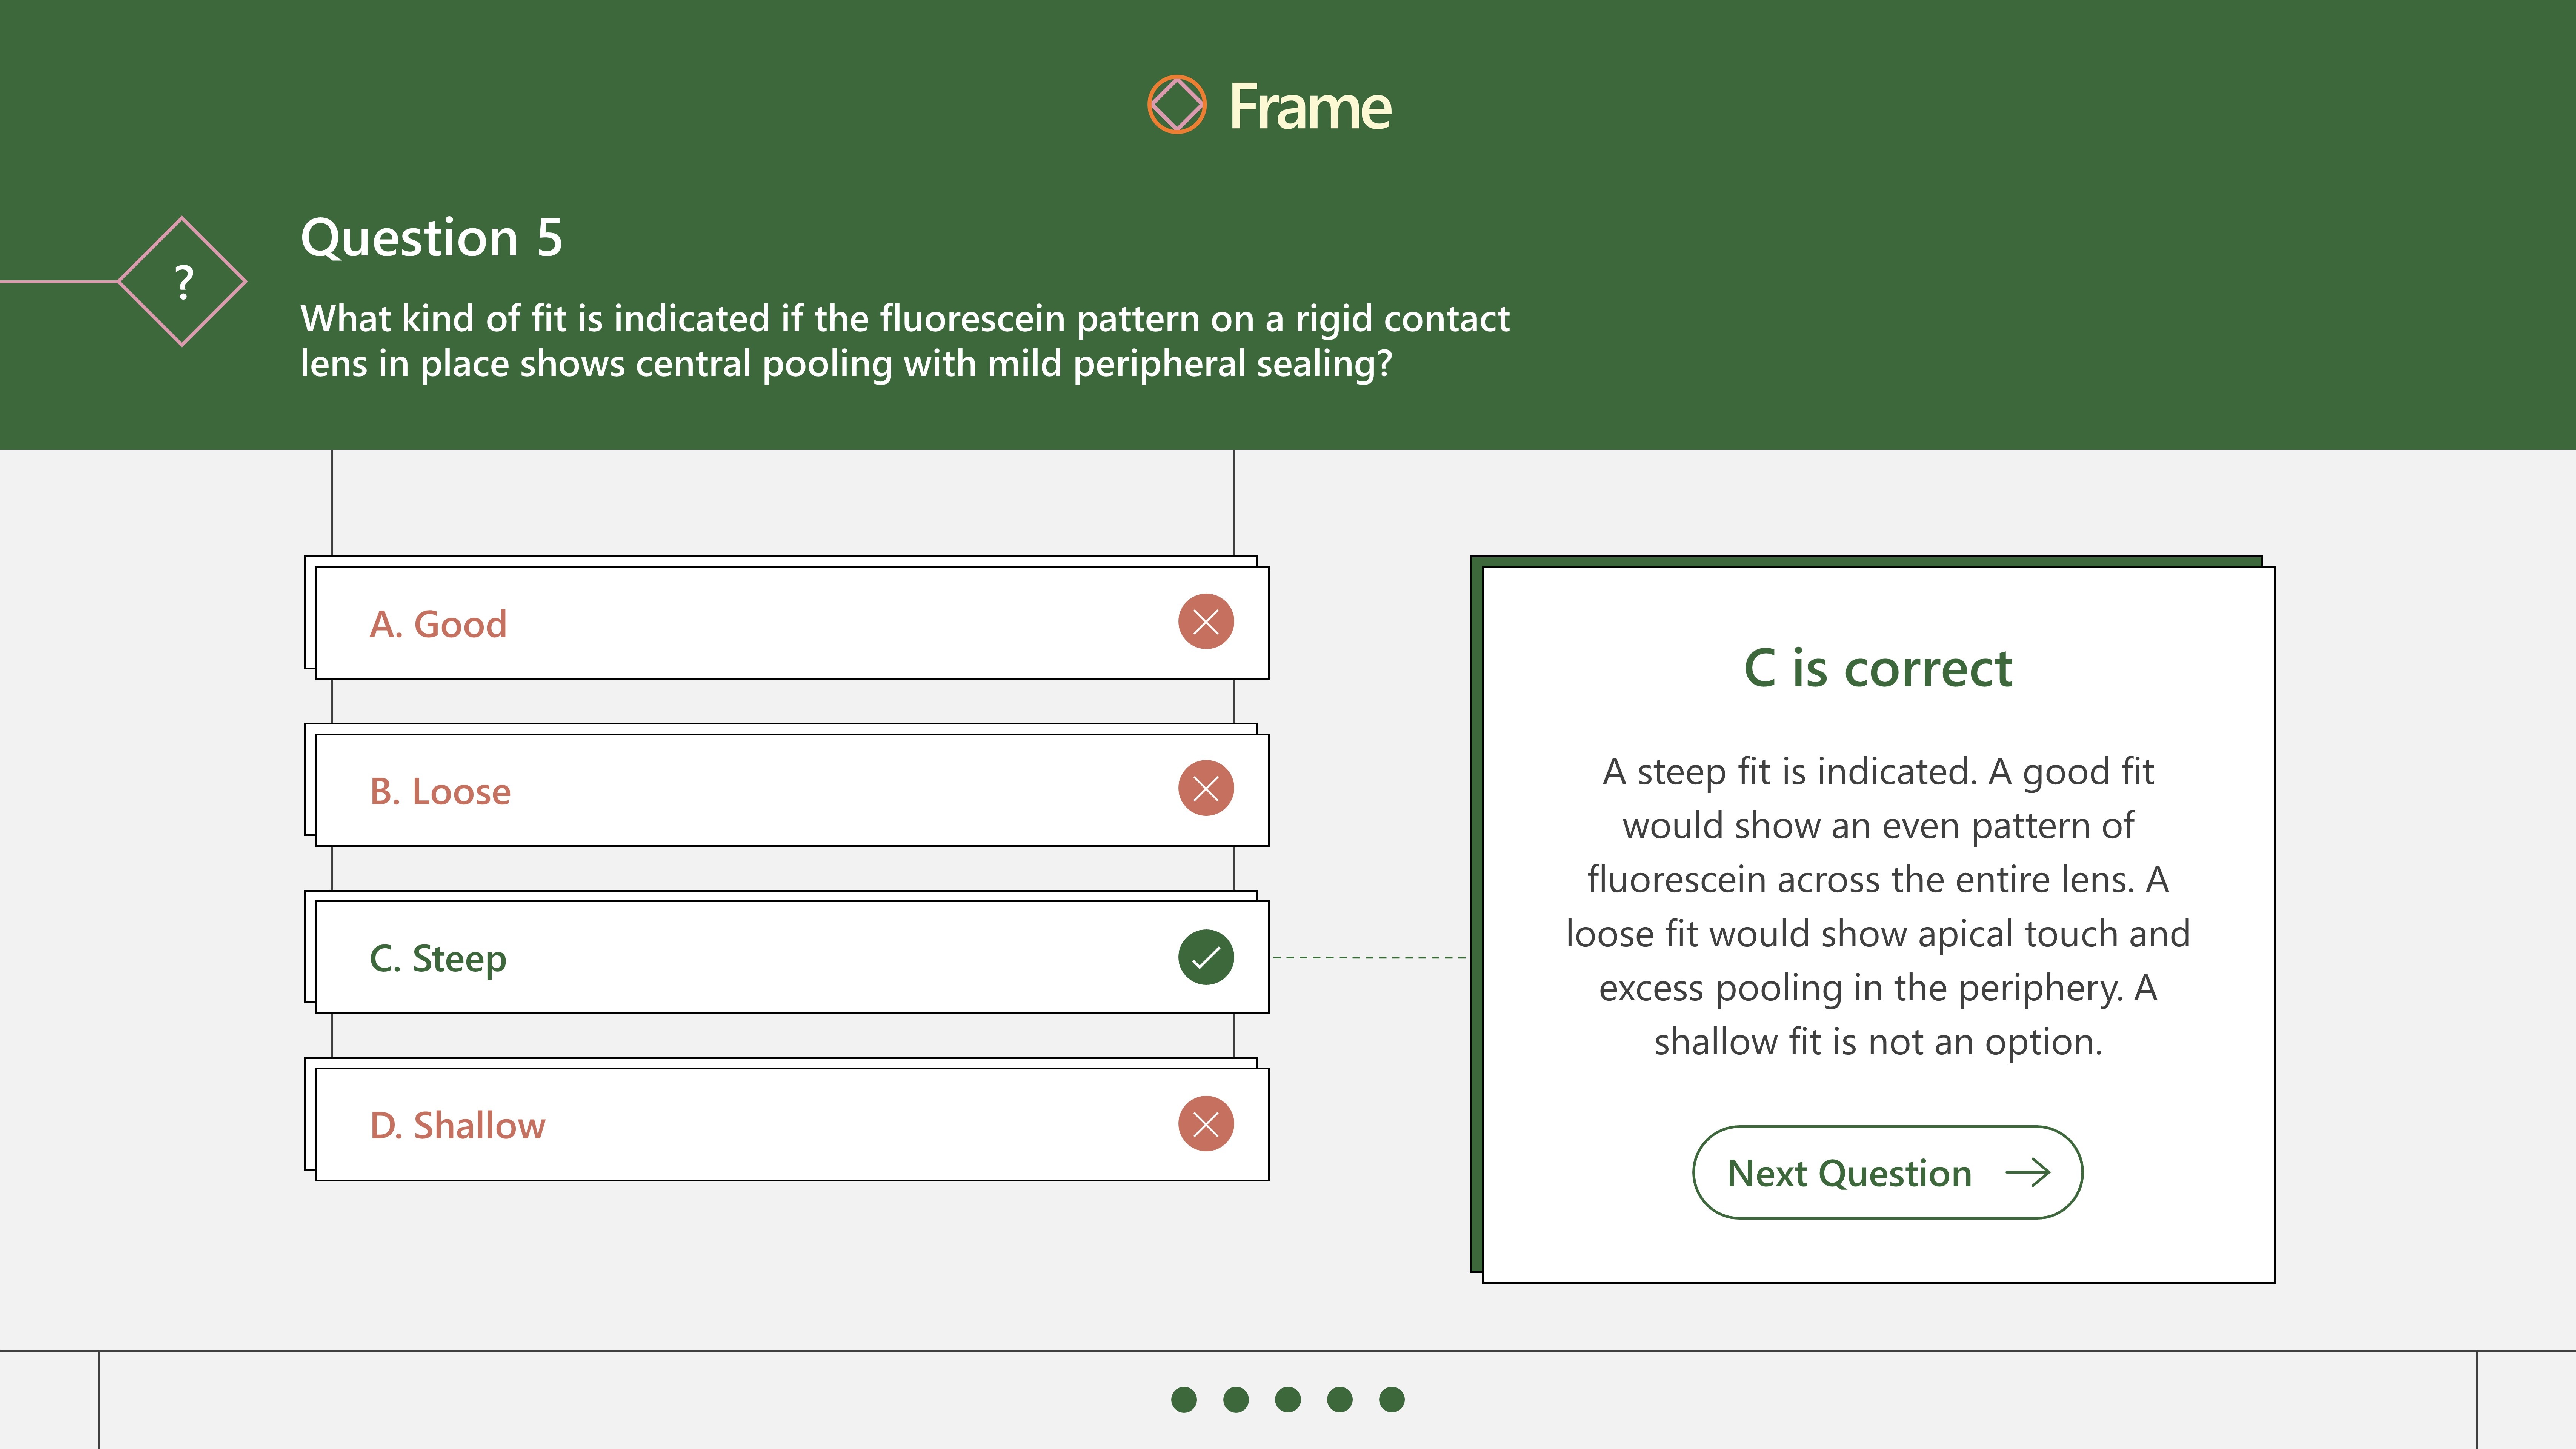
Consider how feedback will be communicated. Feedback is a key part of good assessment design. We talked about different types of feedback in Part 1. When you build your PowerPoint slides, you need to think about how to communicate feedback to learners. If you are providing extrinsic feedback, use text (e.g. “Correct”/ “Incorrect”), colour (e.g. green/red), and icons (e.g. crosses/ticks) to indicate whether a learner got the answer right or wrong. Don’t rely on just one of these methods: a combination will help ensure that your feedback is quickly recognised and accessible: If you have extensive corrective feedback – perhaps a paragraph explaining why a learner got something incorrect – you’ll need to leave space for this in your layout. You also need to decide whether the corrective feedback will be the same for all incorrect answers, or if learners will get different feedback depending on which choice they made.
Think about what’s next. If you have more than one question in your quiz, you need to think about how your learner will get to the next question. Since many of your learners will be clicking around your slide, you may want to disable Advance Slide On Mouse Click in the Transitions tab. That way they can’t accidentally click to the next slide. Add a button with a hyperlink to the next quiz question, instead. Be sure to include Alt Text on that button explaining where it will take the learner.
Adding interactivity to your PowerPoint quiz
There are two different ways to make your questions interactive: triggers and hyperlinks. If you need to keep each quiz question on one slide, triggers are the way to go. This keeps your slide count low, but the layering of each slide makes it a little tricky for novices to edit. Once you get familiar with the selection pane, though, it should be no problem!
If you don’t mind splitting each question out over multiple slides, then hyperlinks could be the best option. Splitting questions out over multiple slides can be quicker to build, but may cause version control issues when it comes to edits: a change to one question now means editing multiple slides. You could also end up with a lot of slides in your deck if you have a large quiz!
We’ll walk through how to build this same multiple-choice quiz question in both ways so that you can see the difference!
Technique 1: Use triggers
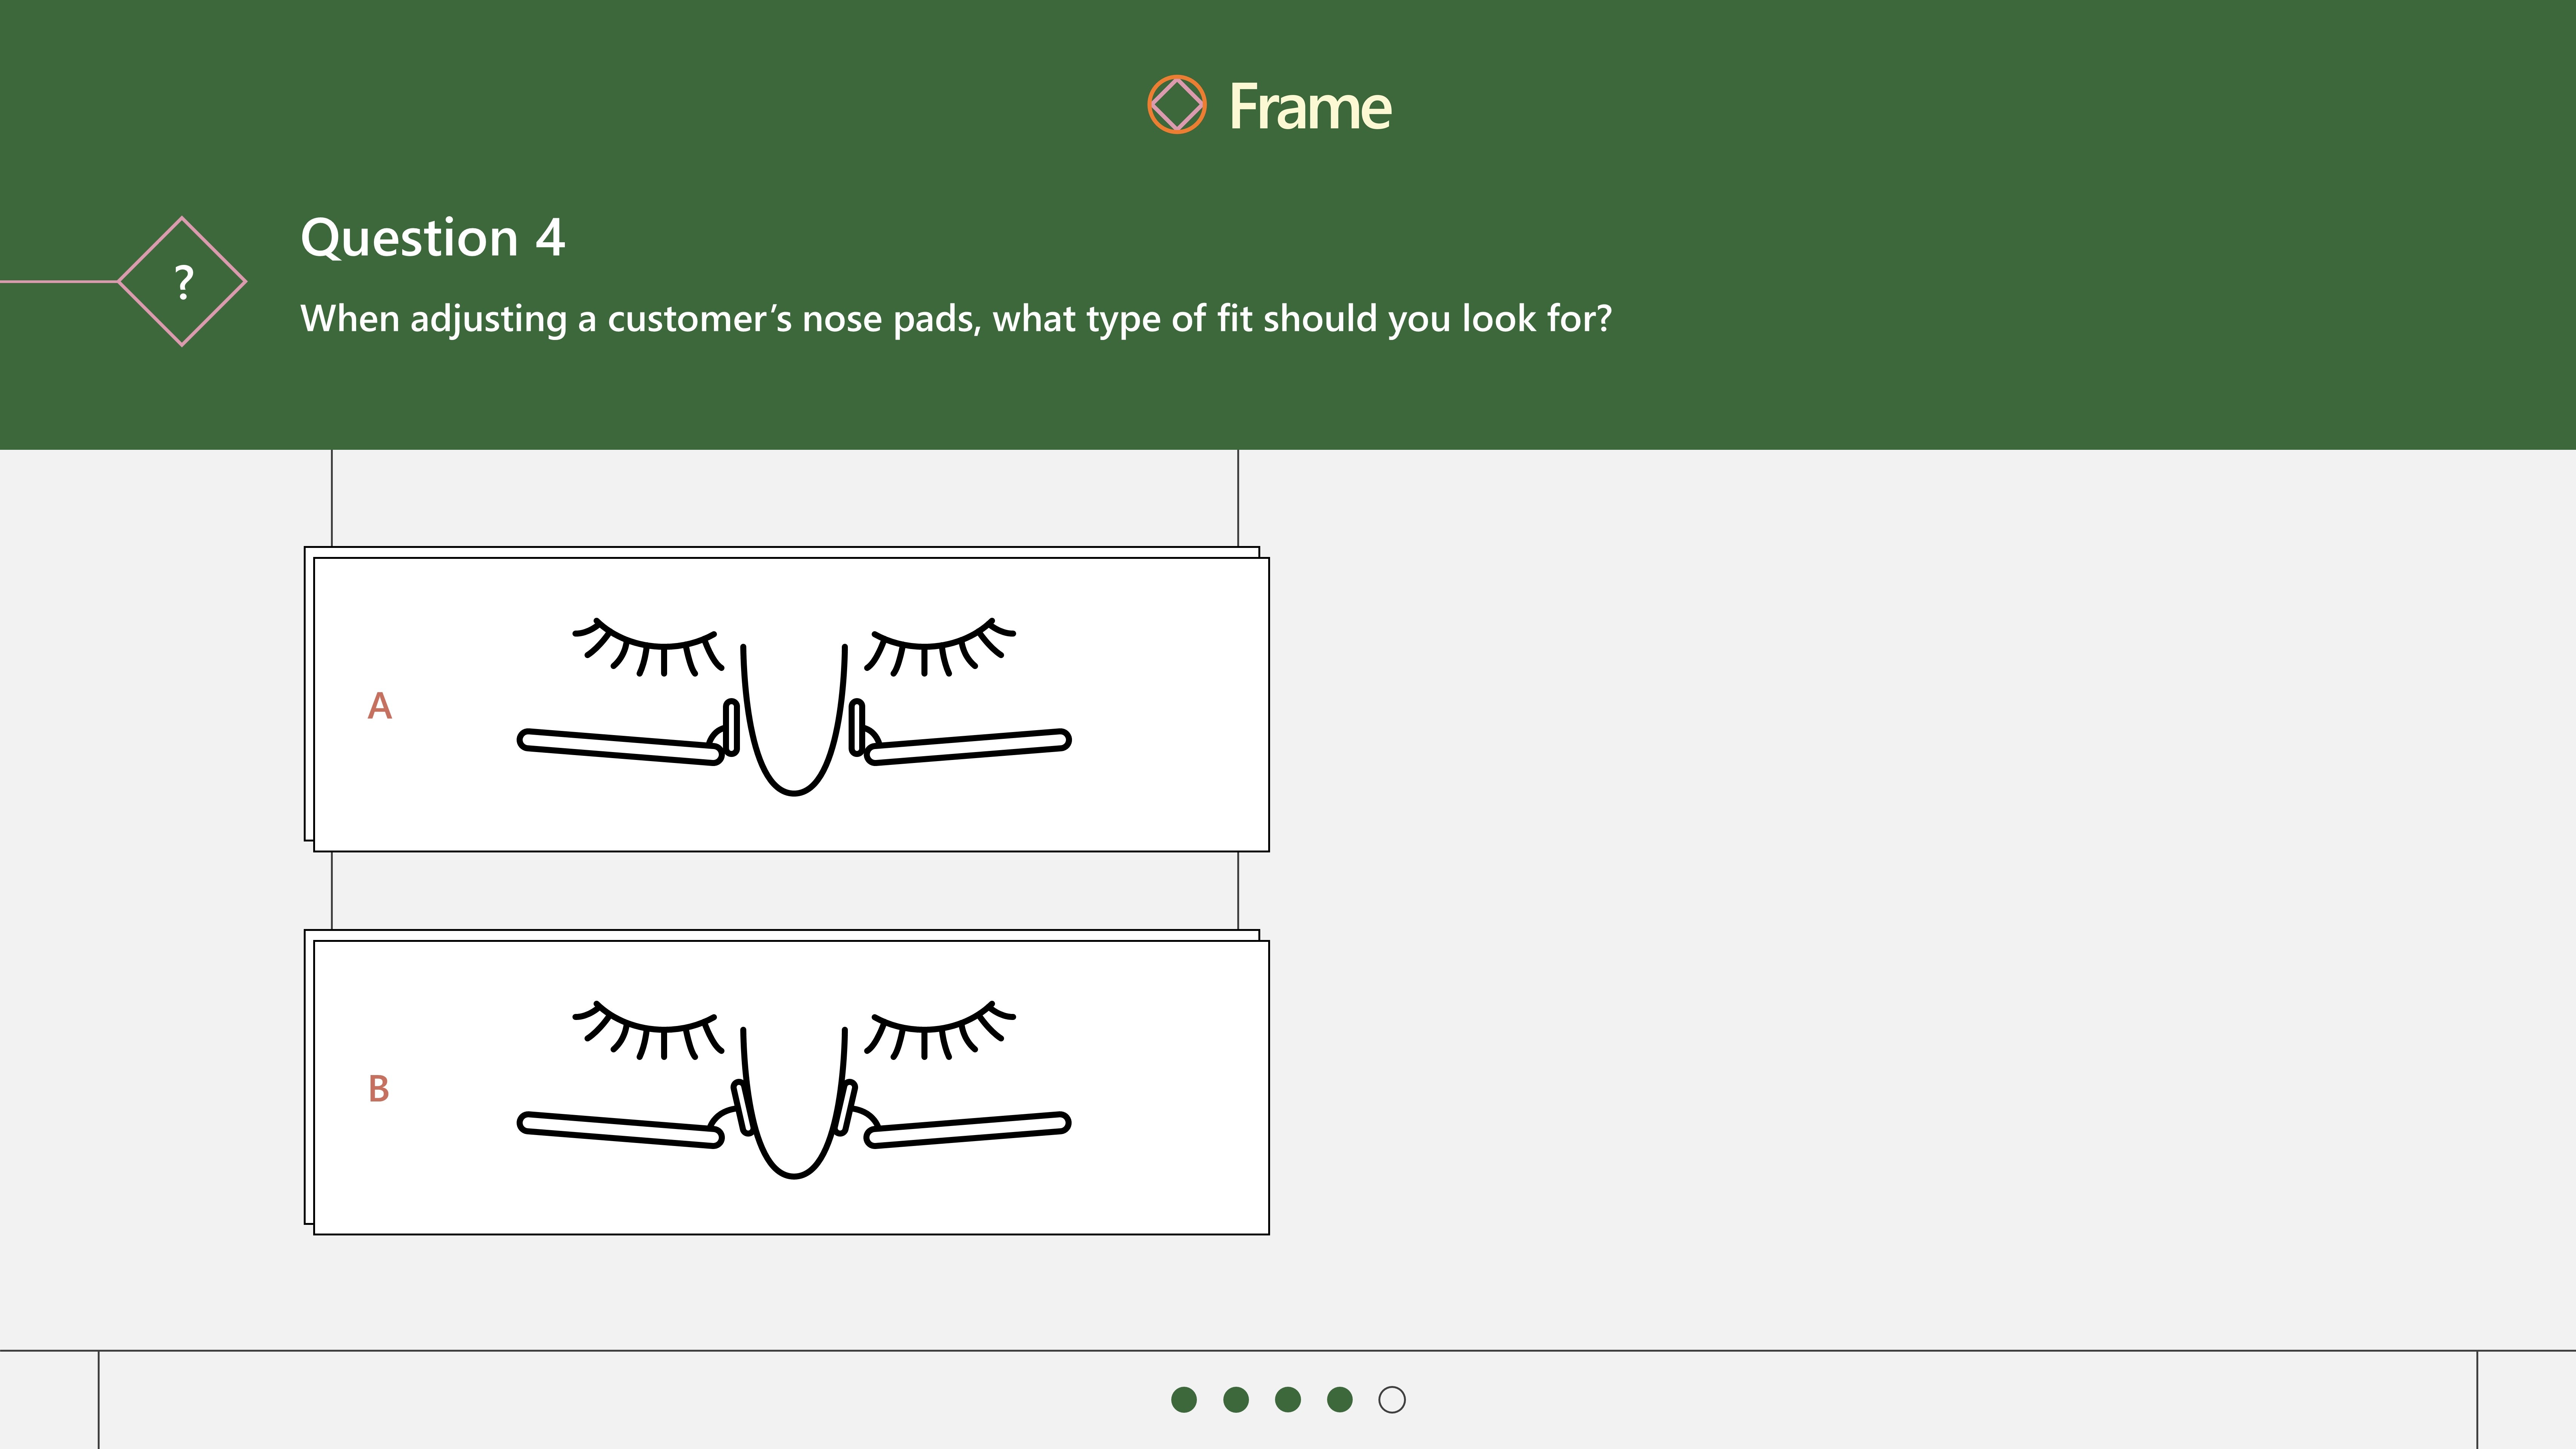
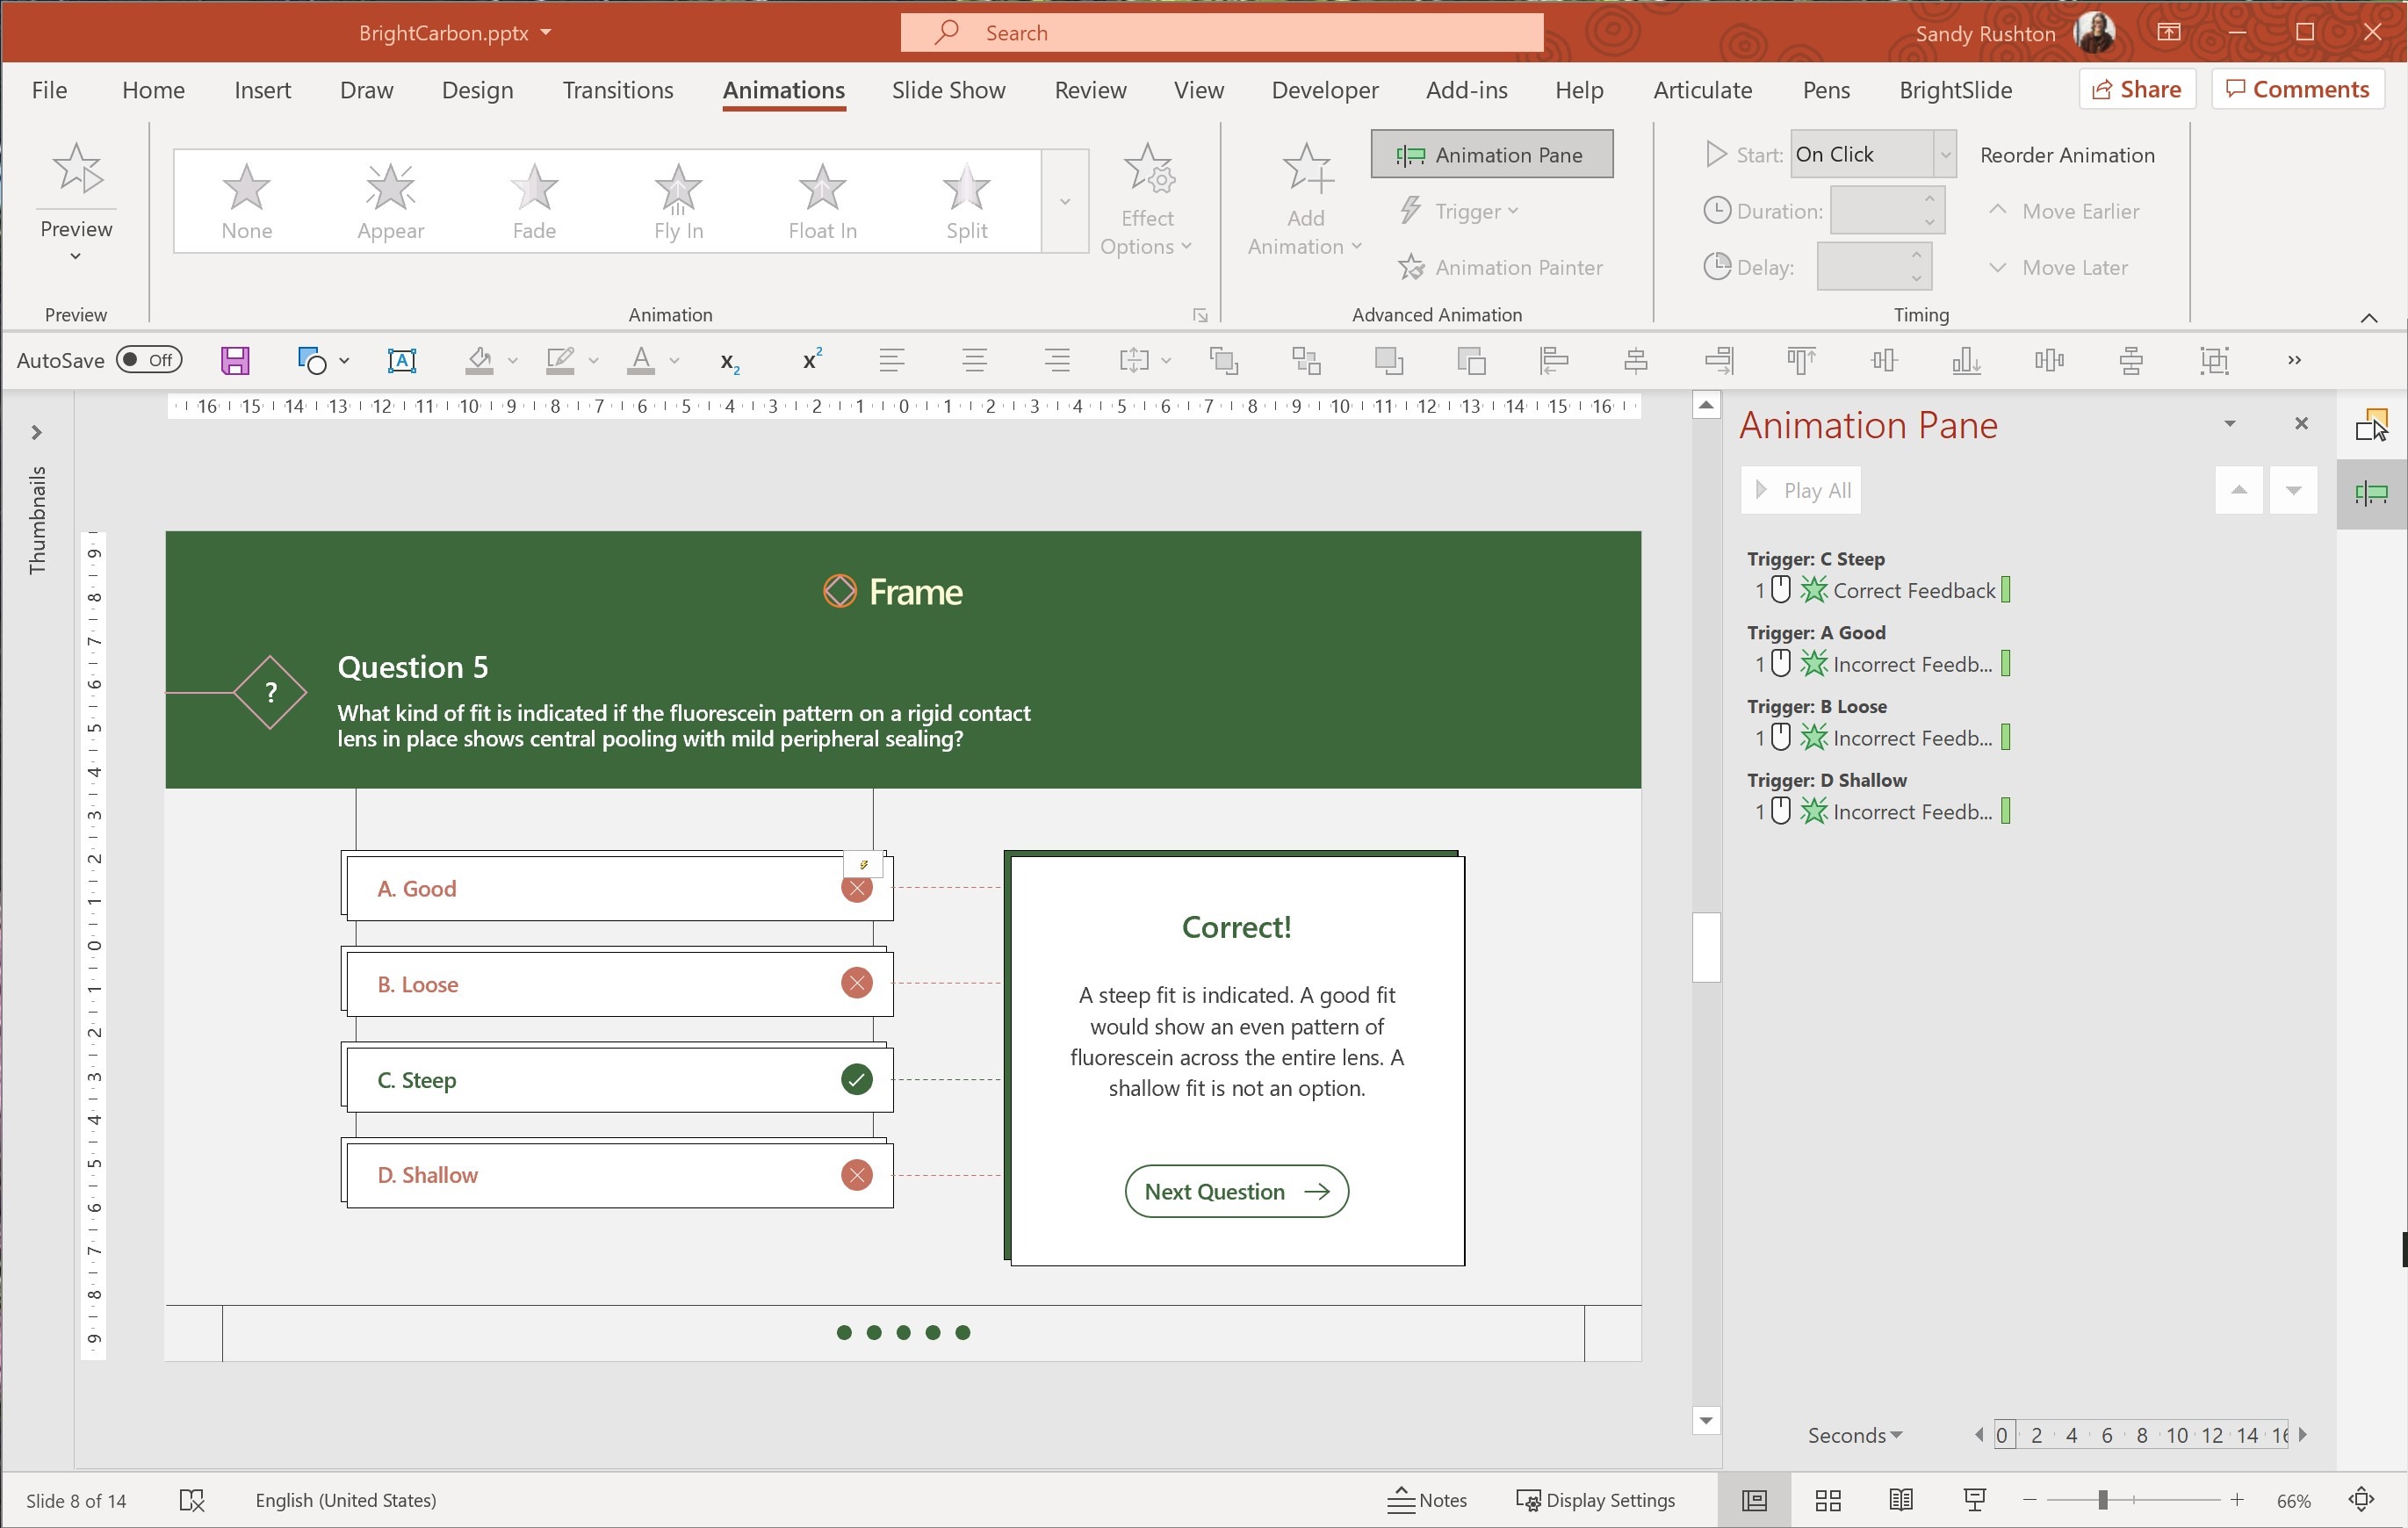
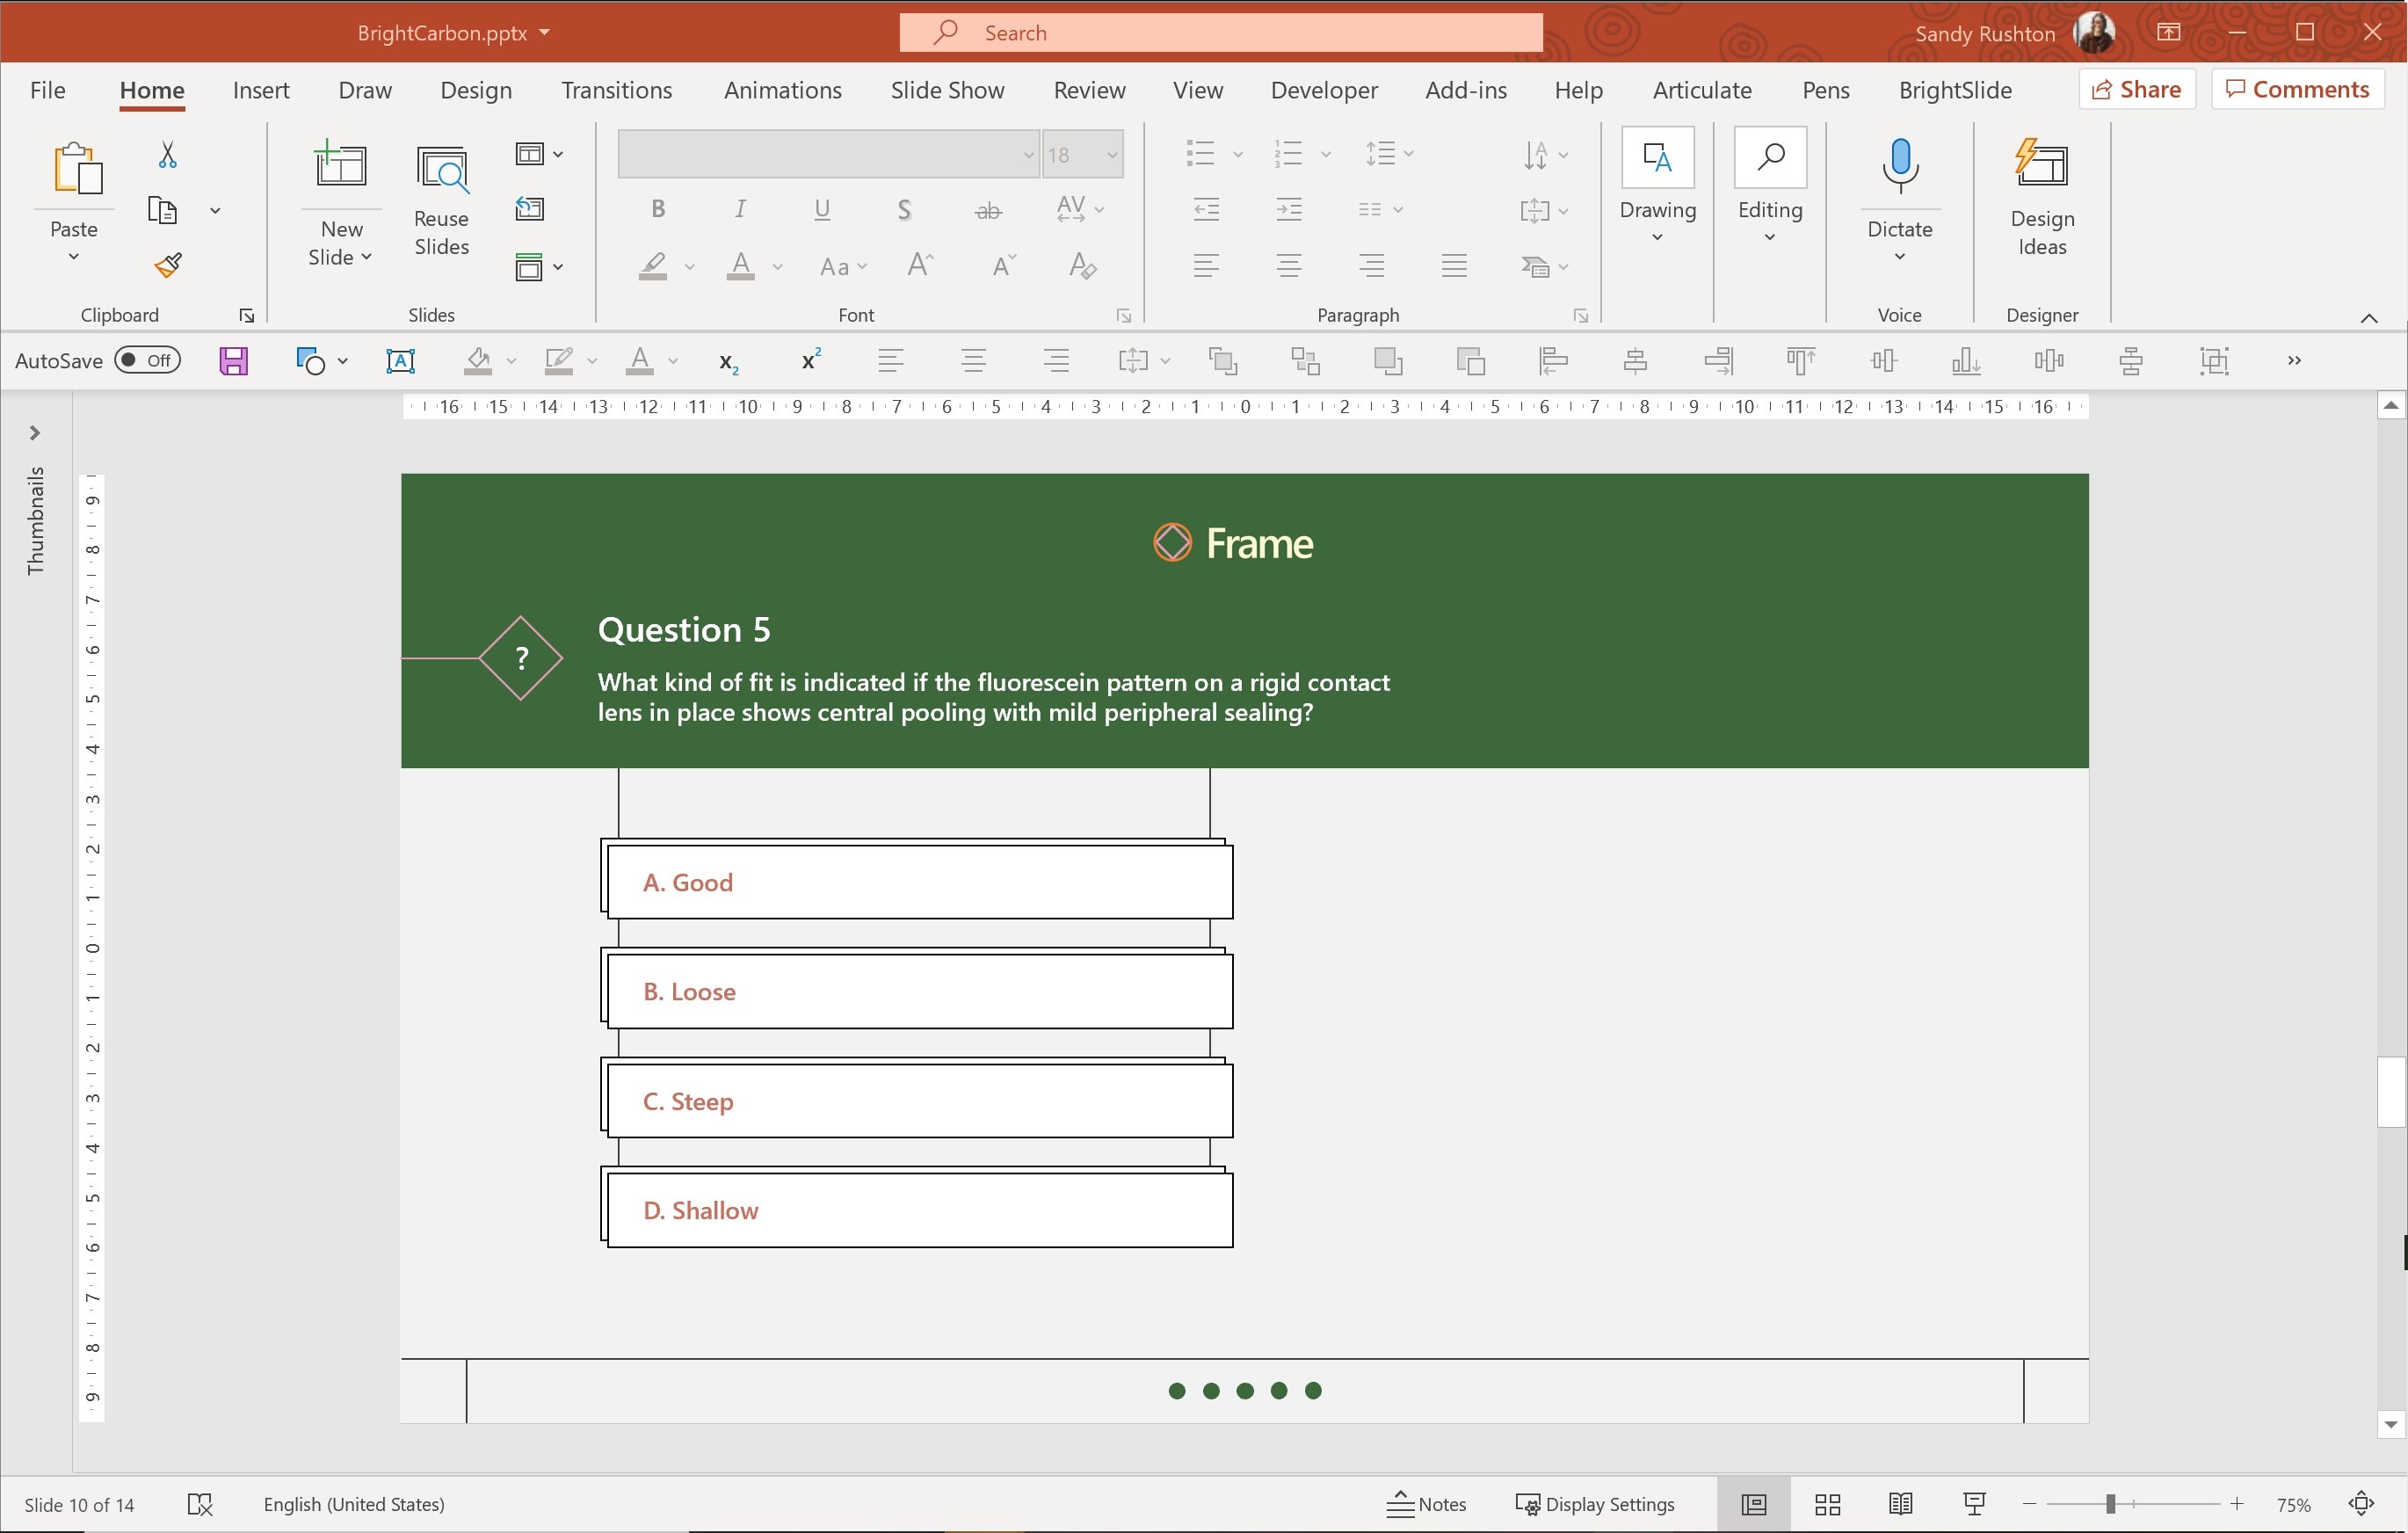
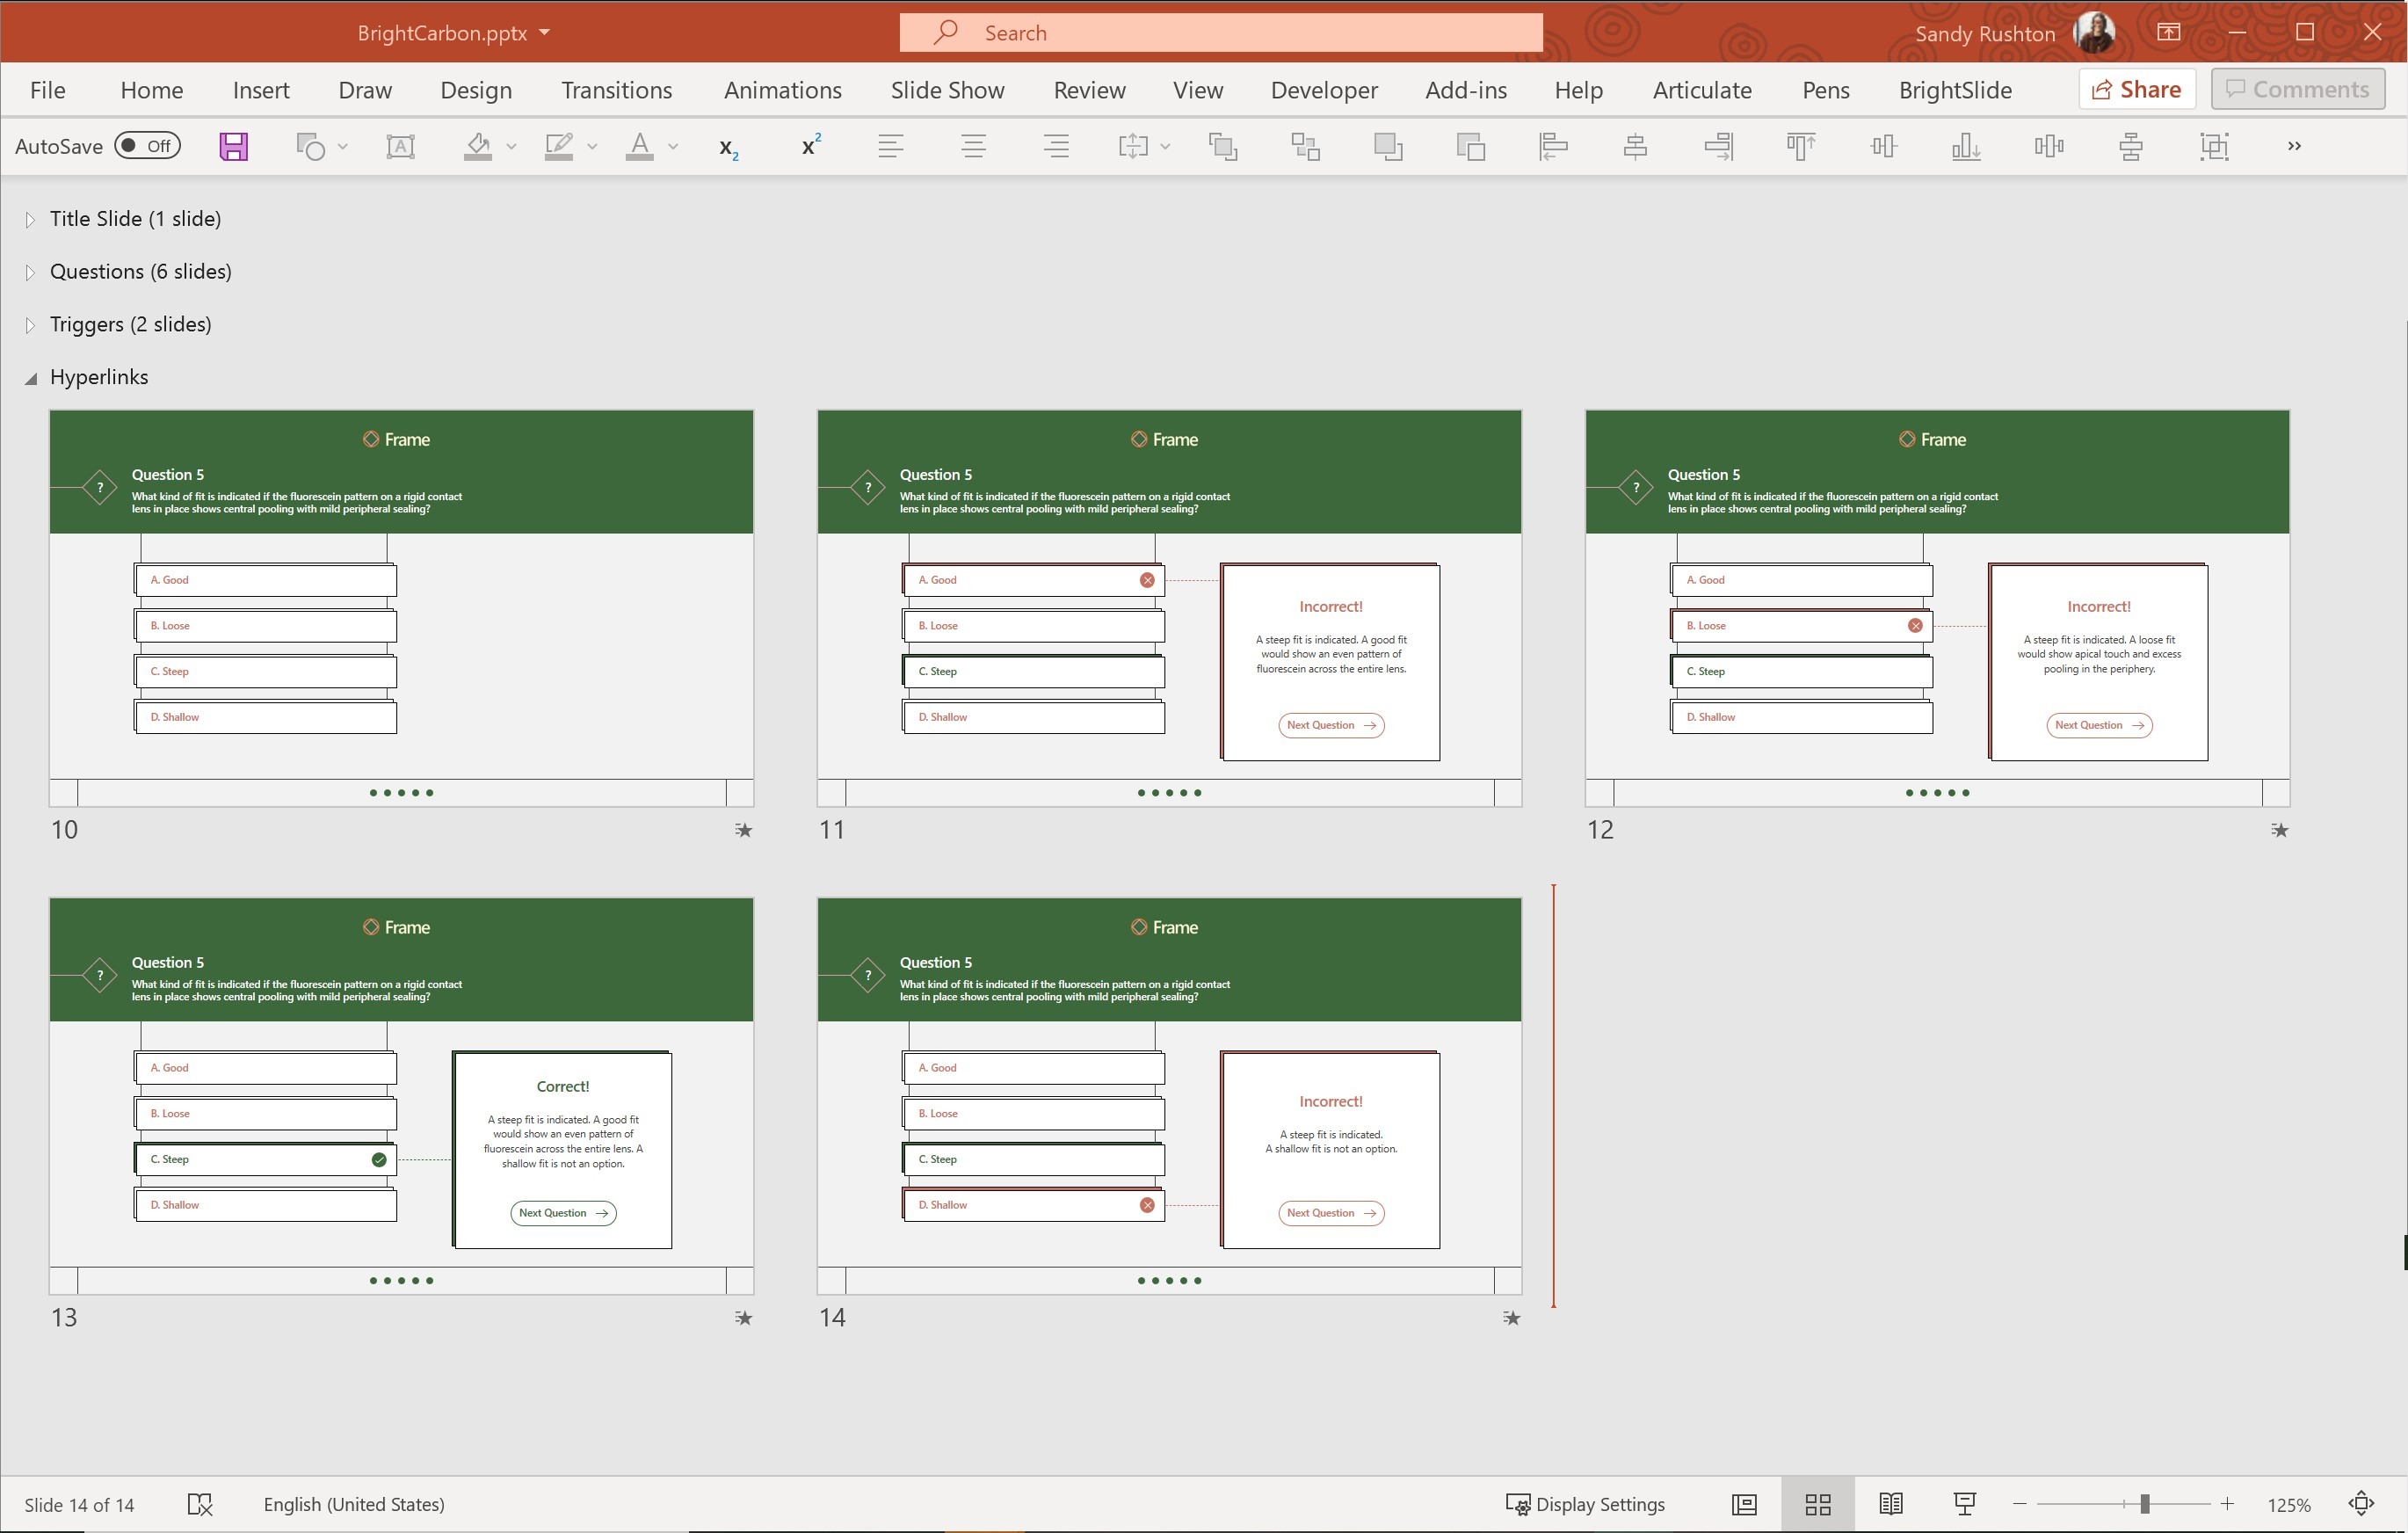
1. First off, lay out your slide. You need to include all your answers and feedback. Our incorrect feedback is just hiding behind the correct feedback on the slide below, but it is there – we promise! If your slides end up layered, like this, don’t worry – you can use the selection pane to easily access all of your feedback.
2. Rename the objects on your slide to make programming easier. Use the Selection Pane to do this. Double-click on the name of each object and rename it to something descriptive e.g. Correct Answer, Incorrect Answer 1, Correct Feedback Box, Incorrect Feedback Box etc.
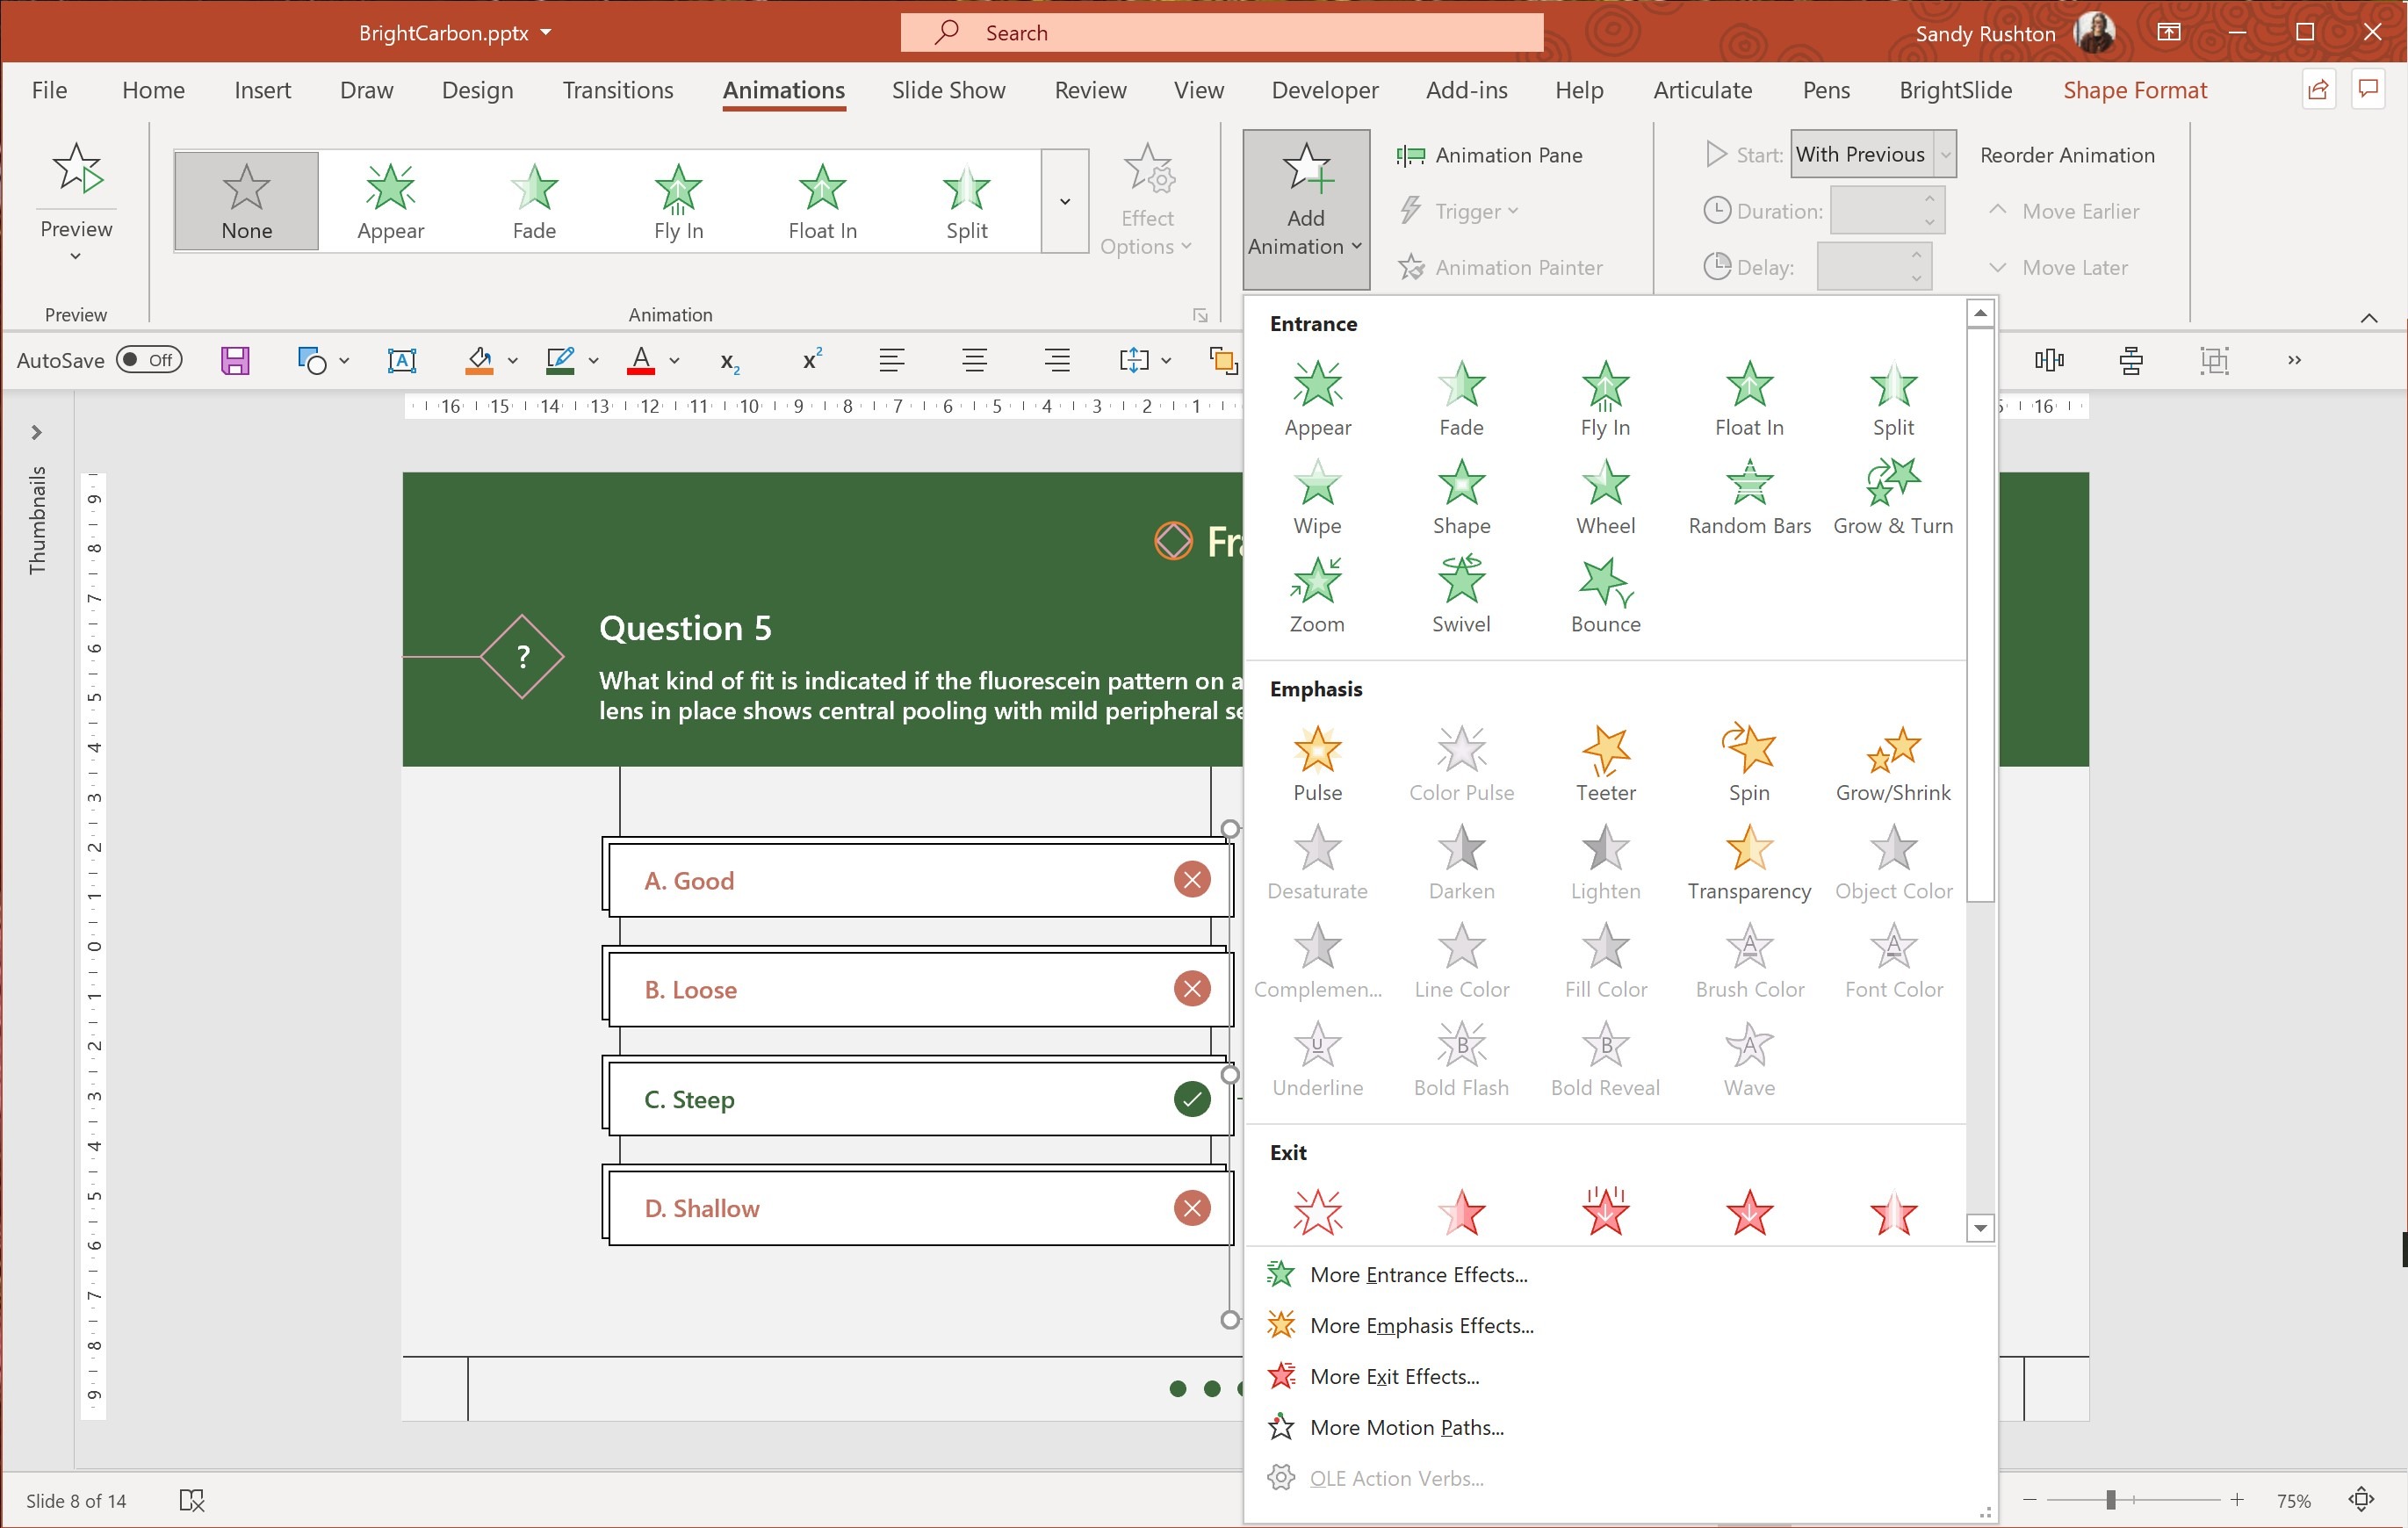
3. Add entrance animations to your correct feedback. You can do this by selecting the object(s), going to the Animations pane and adding one of the green animations from the options available. Or, if you have BrightSlide, you can add a more snazzy entrance animation using the My Animations button.
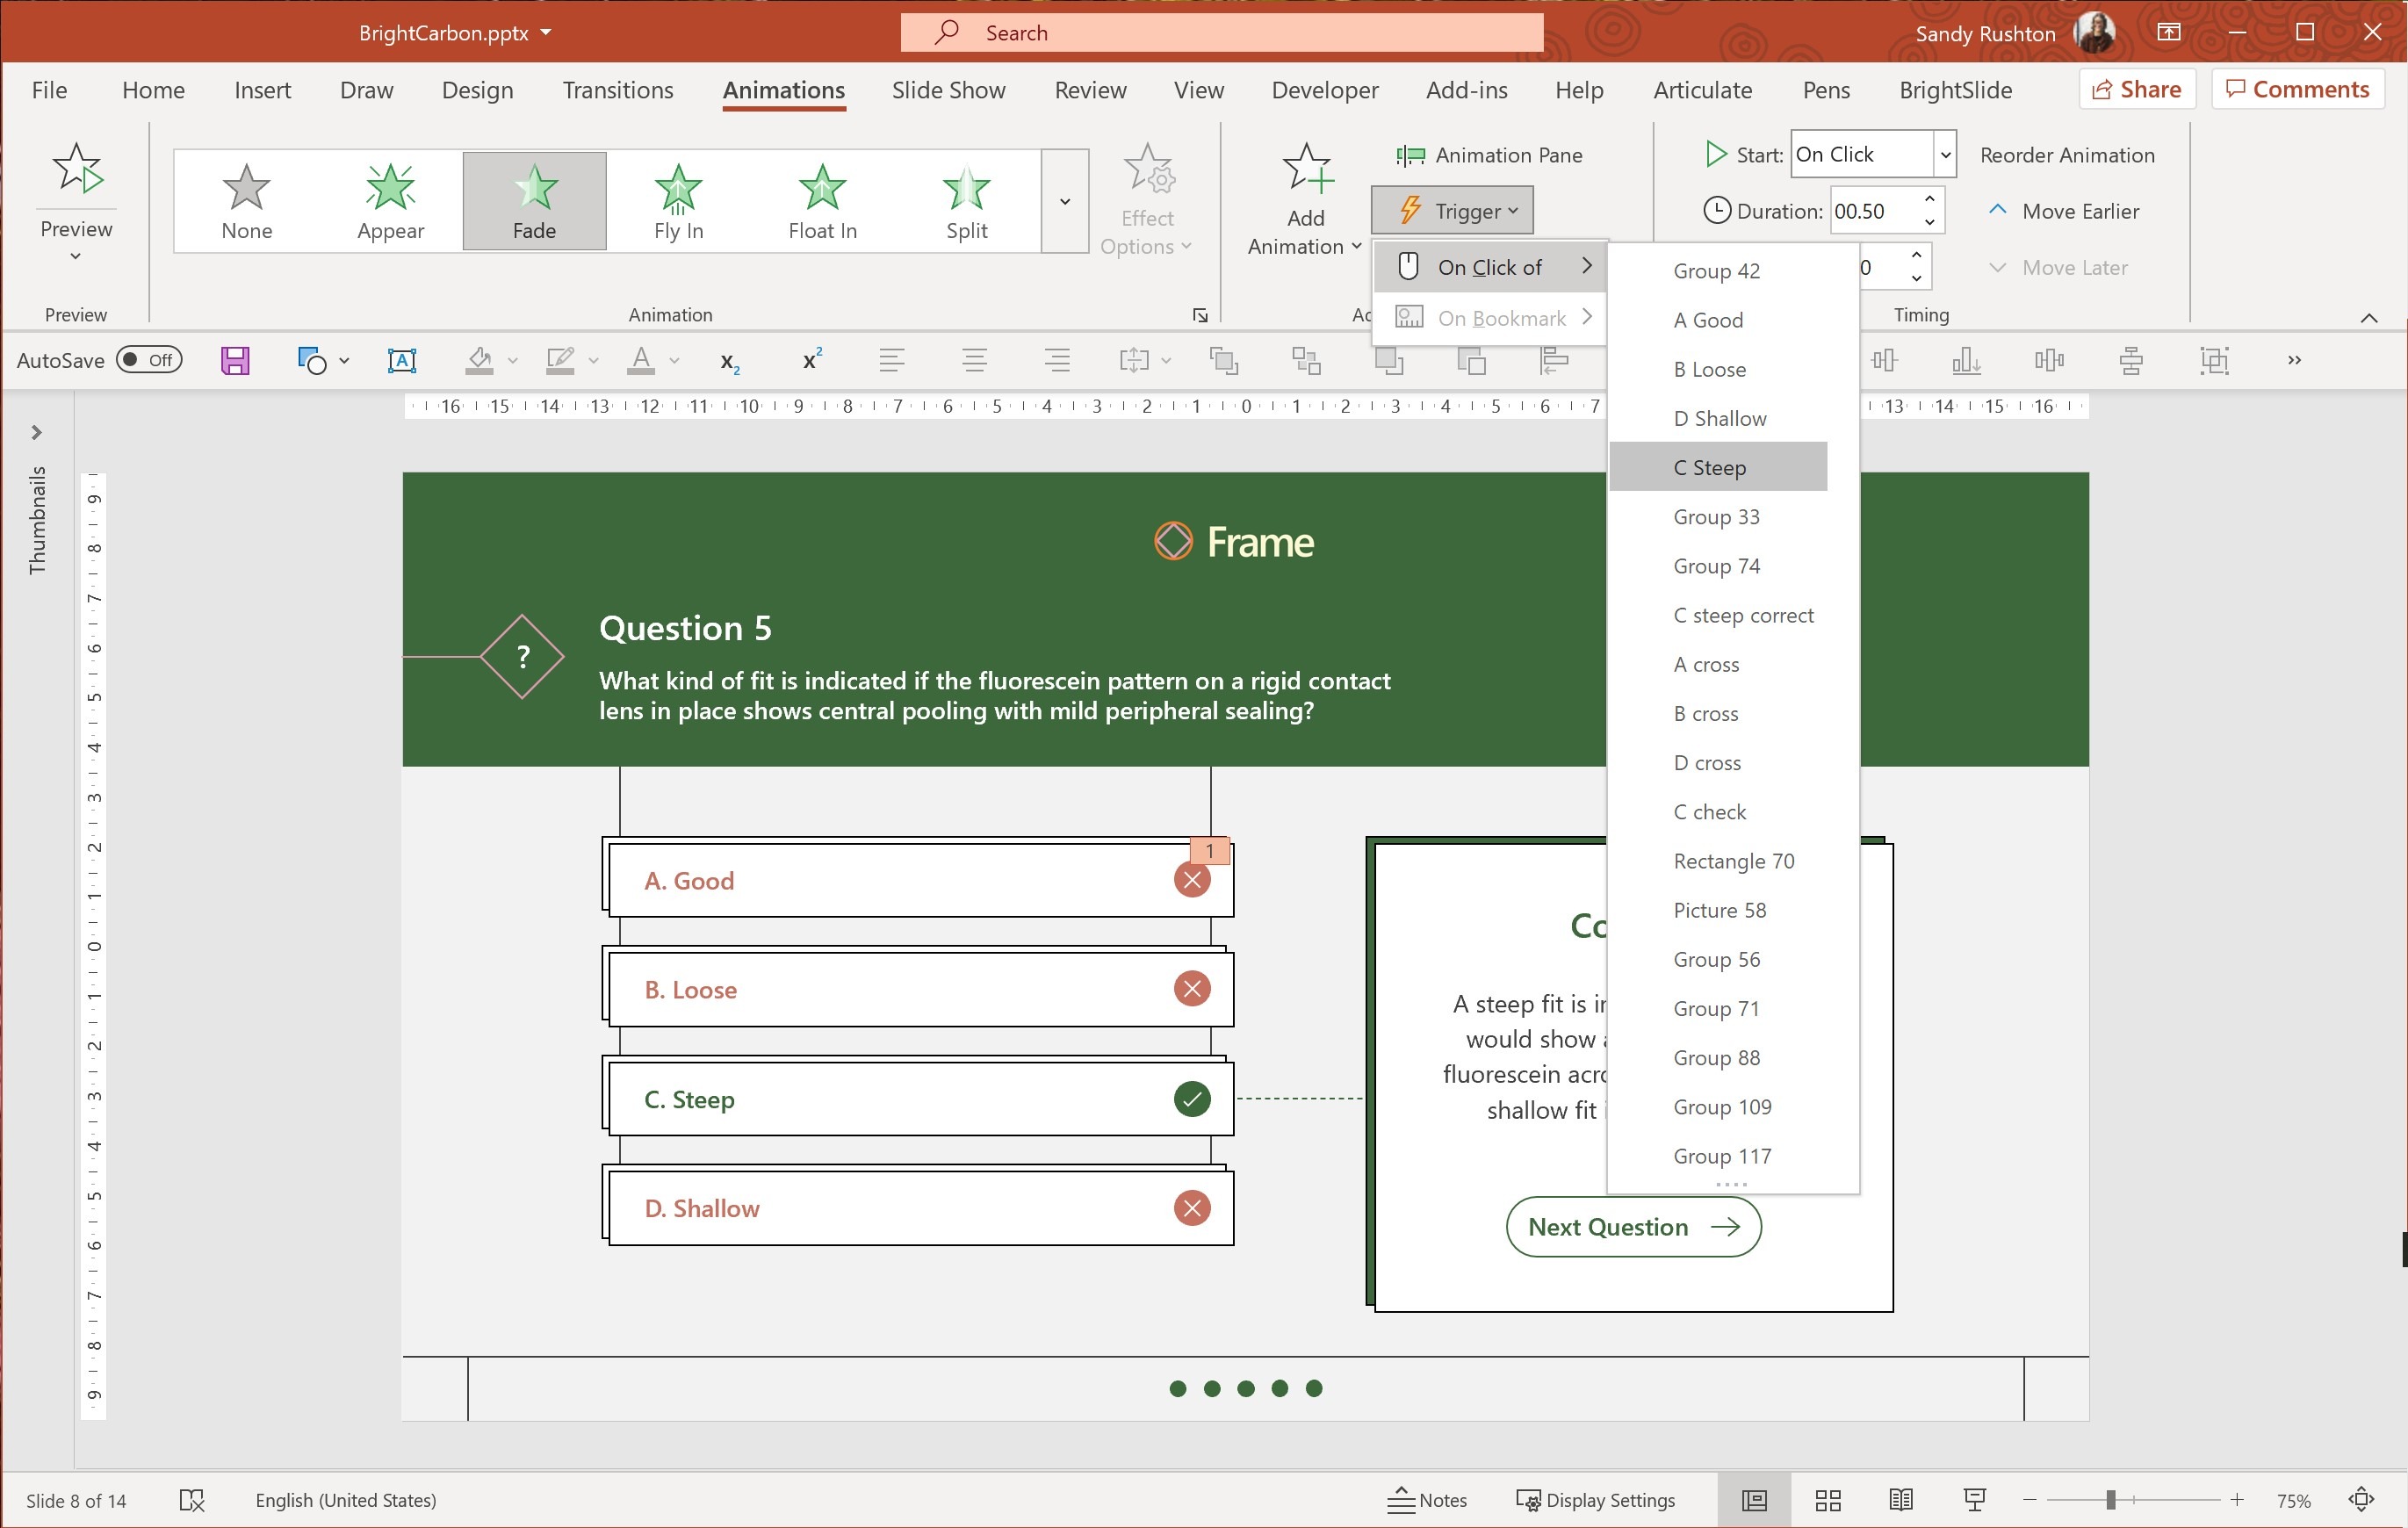
4. Now it’s time to make this animation interactive. With the correct feedback object(s) still selected, go to the Animations tab and press the Trigger > On Click Of > your correct answer.
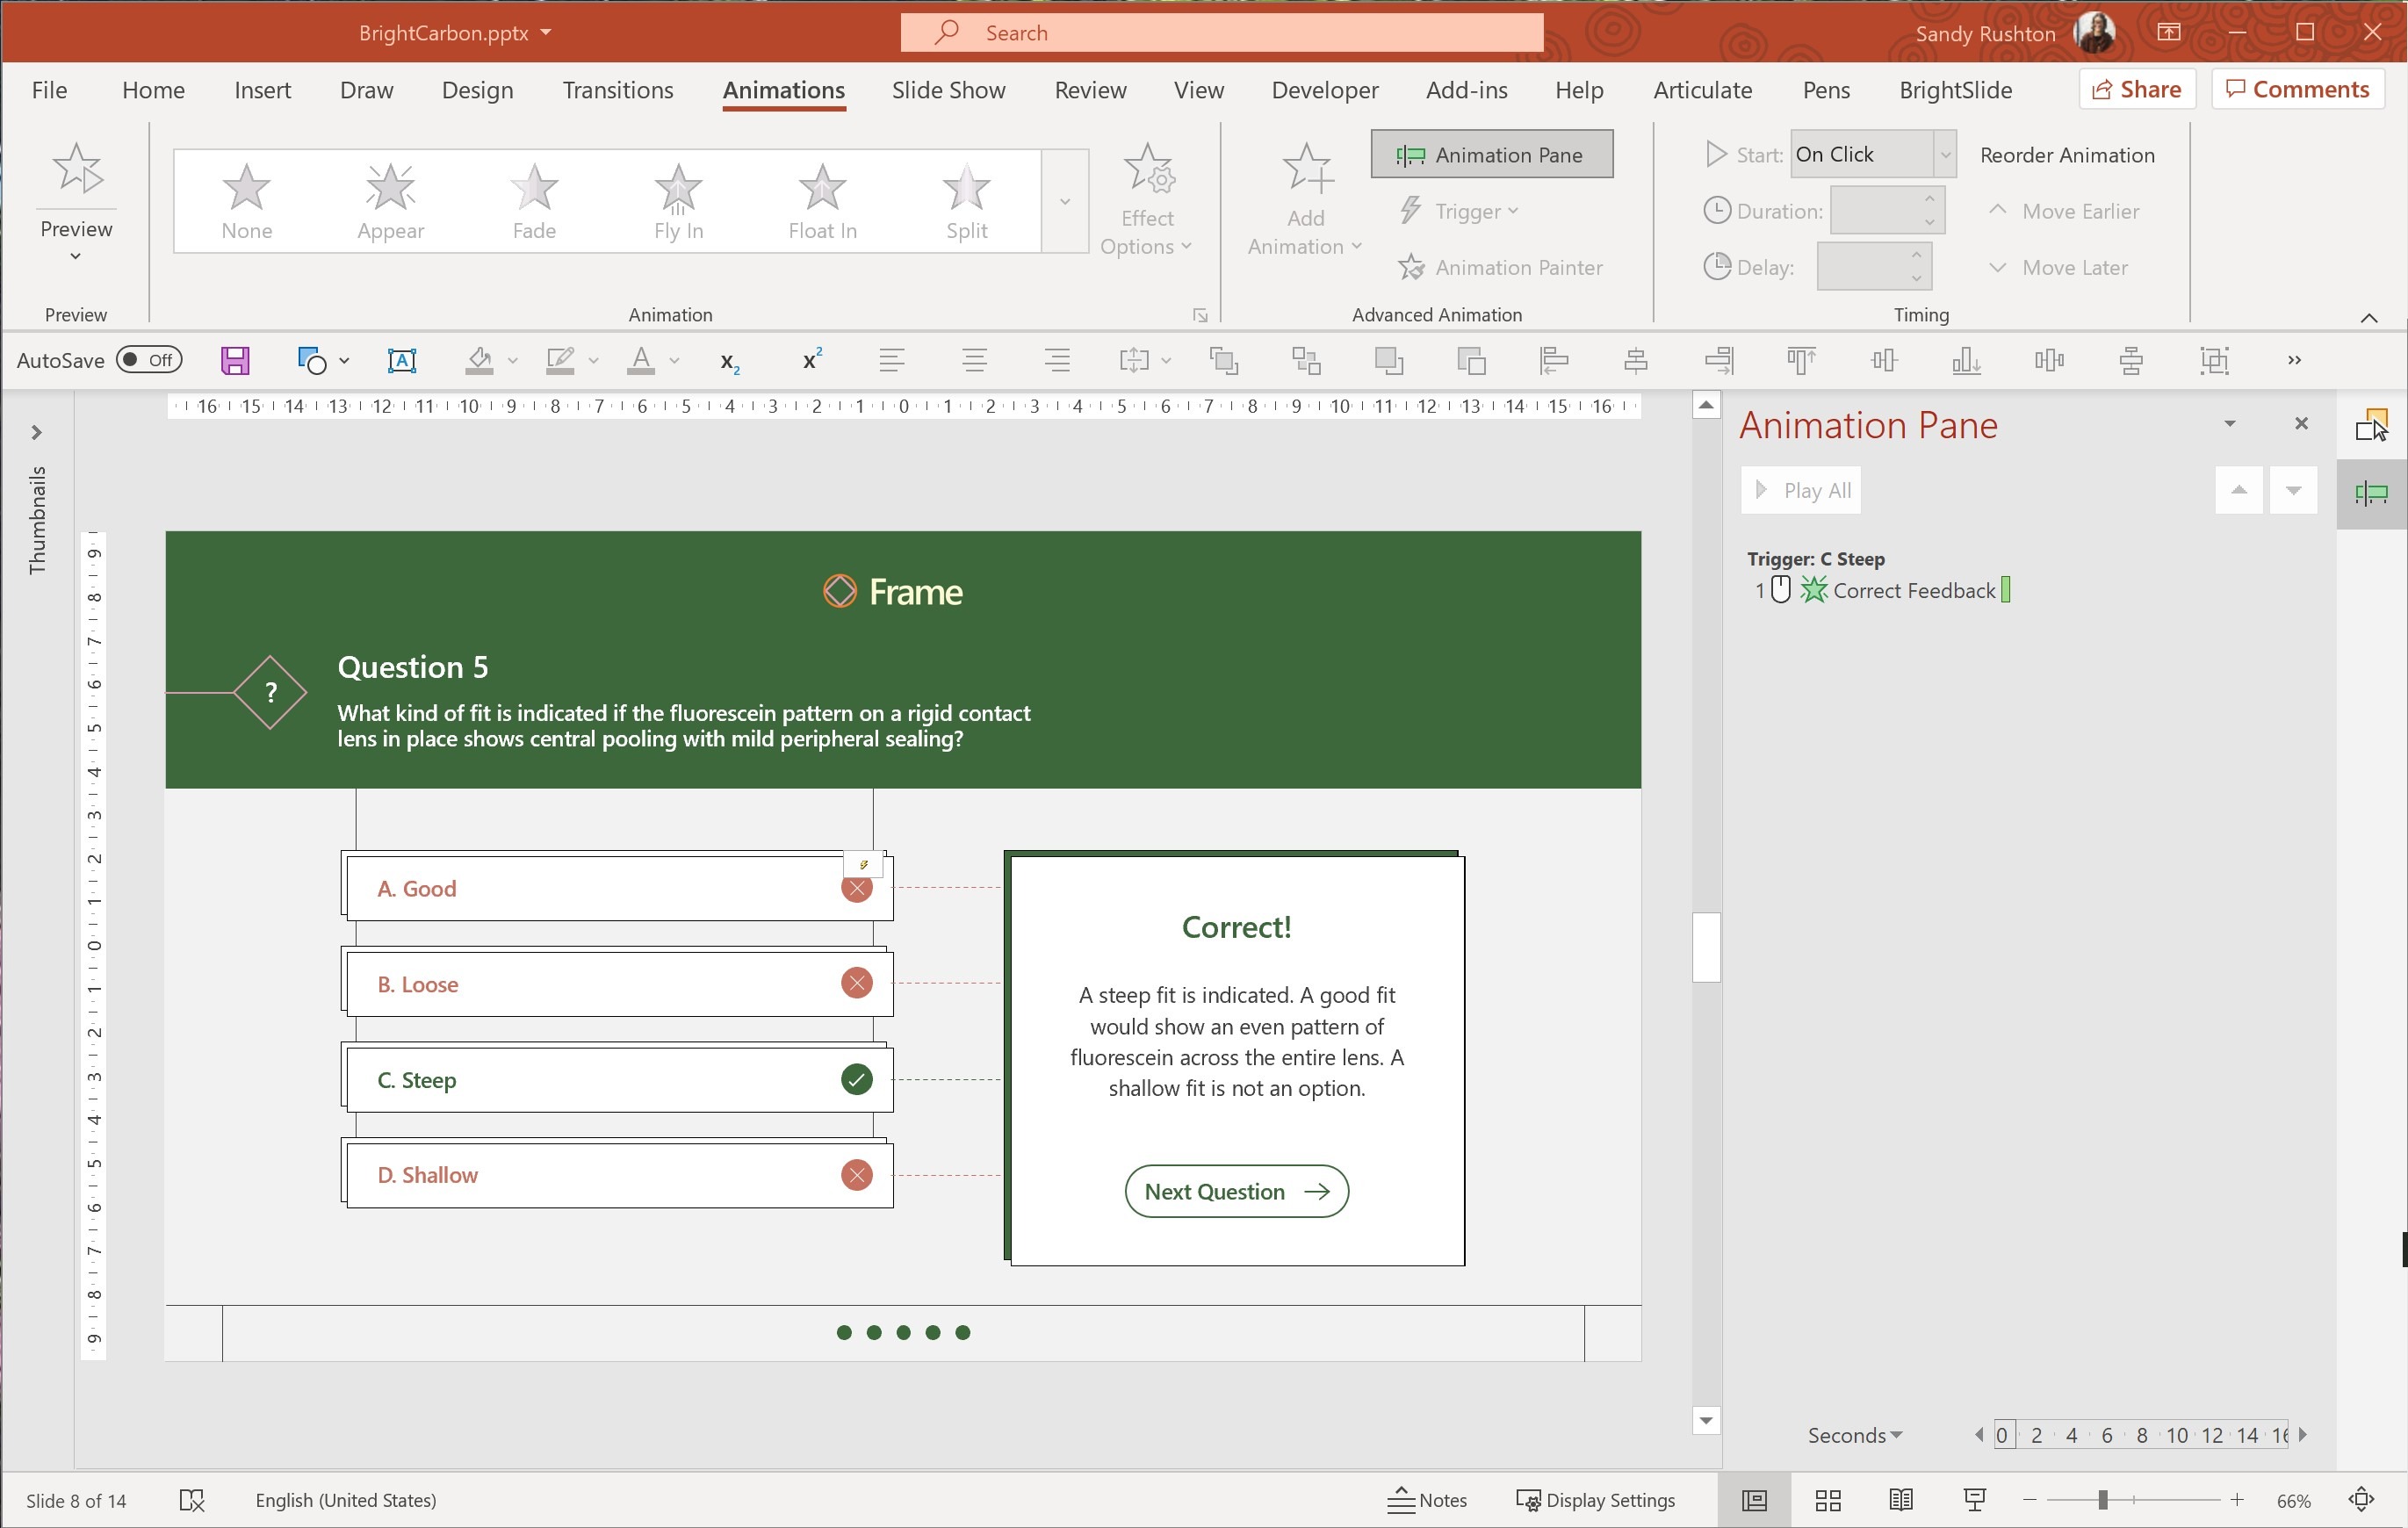
If you open the Animation Pane you can see that this trigger is active. Adjust the timings or effect options here if you want to.
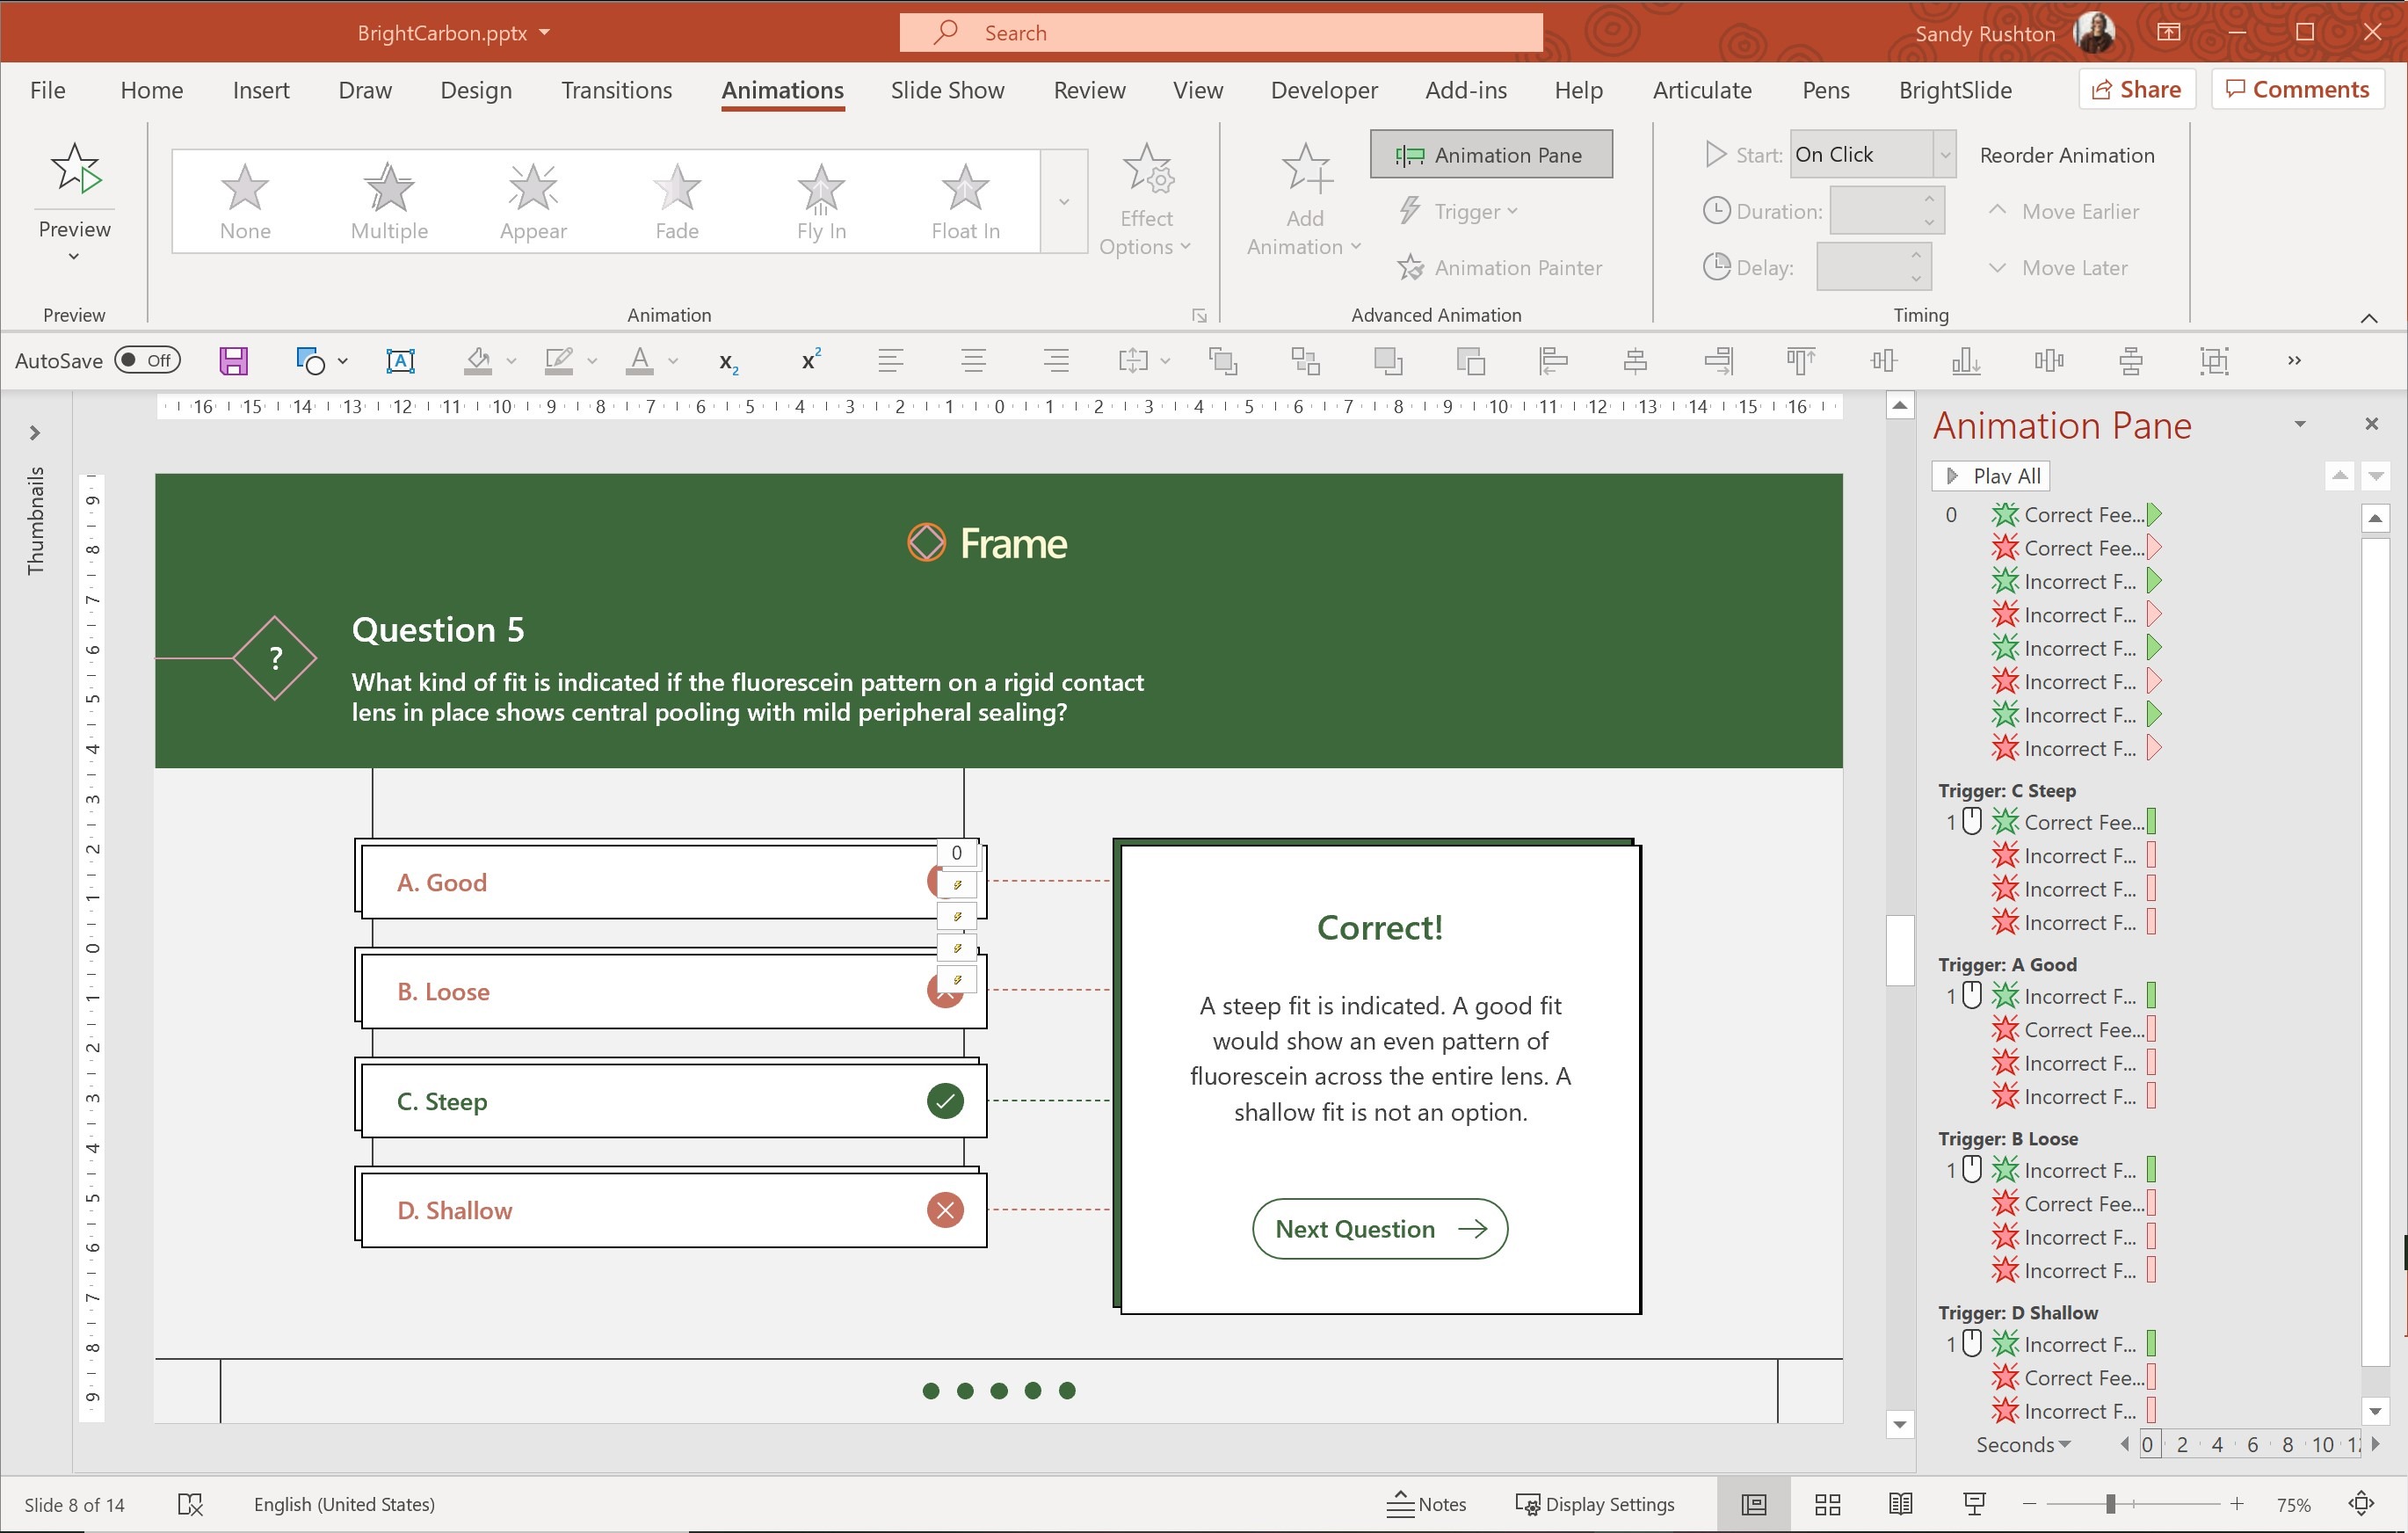
5. Now, repeat the same process for the incorrect feedback. You will need to add the animations first, then use the Trigger button on the Animation Pane to add interactivity. Use the Animation Painter button to save you time, and ensure the animations are consistent for all feedback options. Repeat this for each of the incorrect answers.
6. If you want learners to be able to change their answer, you can add an Exit animation to each of the feedback options. This way you won’t end up with both correct and incorrect feedback visible on your slide at once.
First select all your feedback, and go to the Animations tab, select the Add Animation button and add an Appear and a Disappear effect. Use the timing options to change these animations to Start > With Previous. This way all your objects will quickly appear and disappear at the start of your slide, which is important for the rest of this animation to work.
Next, select your correct feedback, use the Add Animation button to add a red exit effect of your choice. Use the timing options to change this animation to Start > With Previous. Then, select this animation on the Animation Pane and drag it to the trigger for one of your incorrect answers. Repeat this exit animation on the correct feedback, dragging it to each of your incorrect answer triggers on the Animation Pane. Repeat for each of your incorrect feedback options.
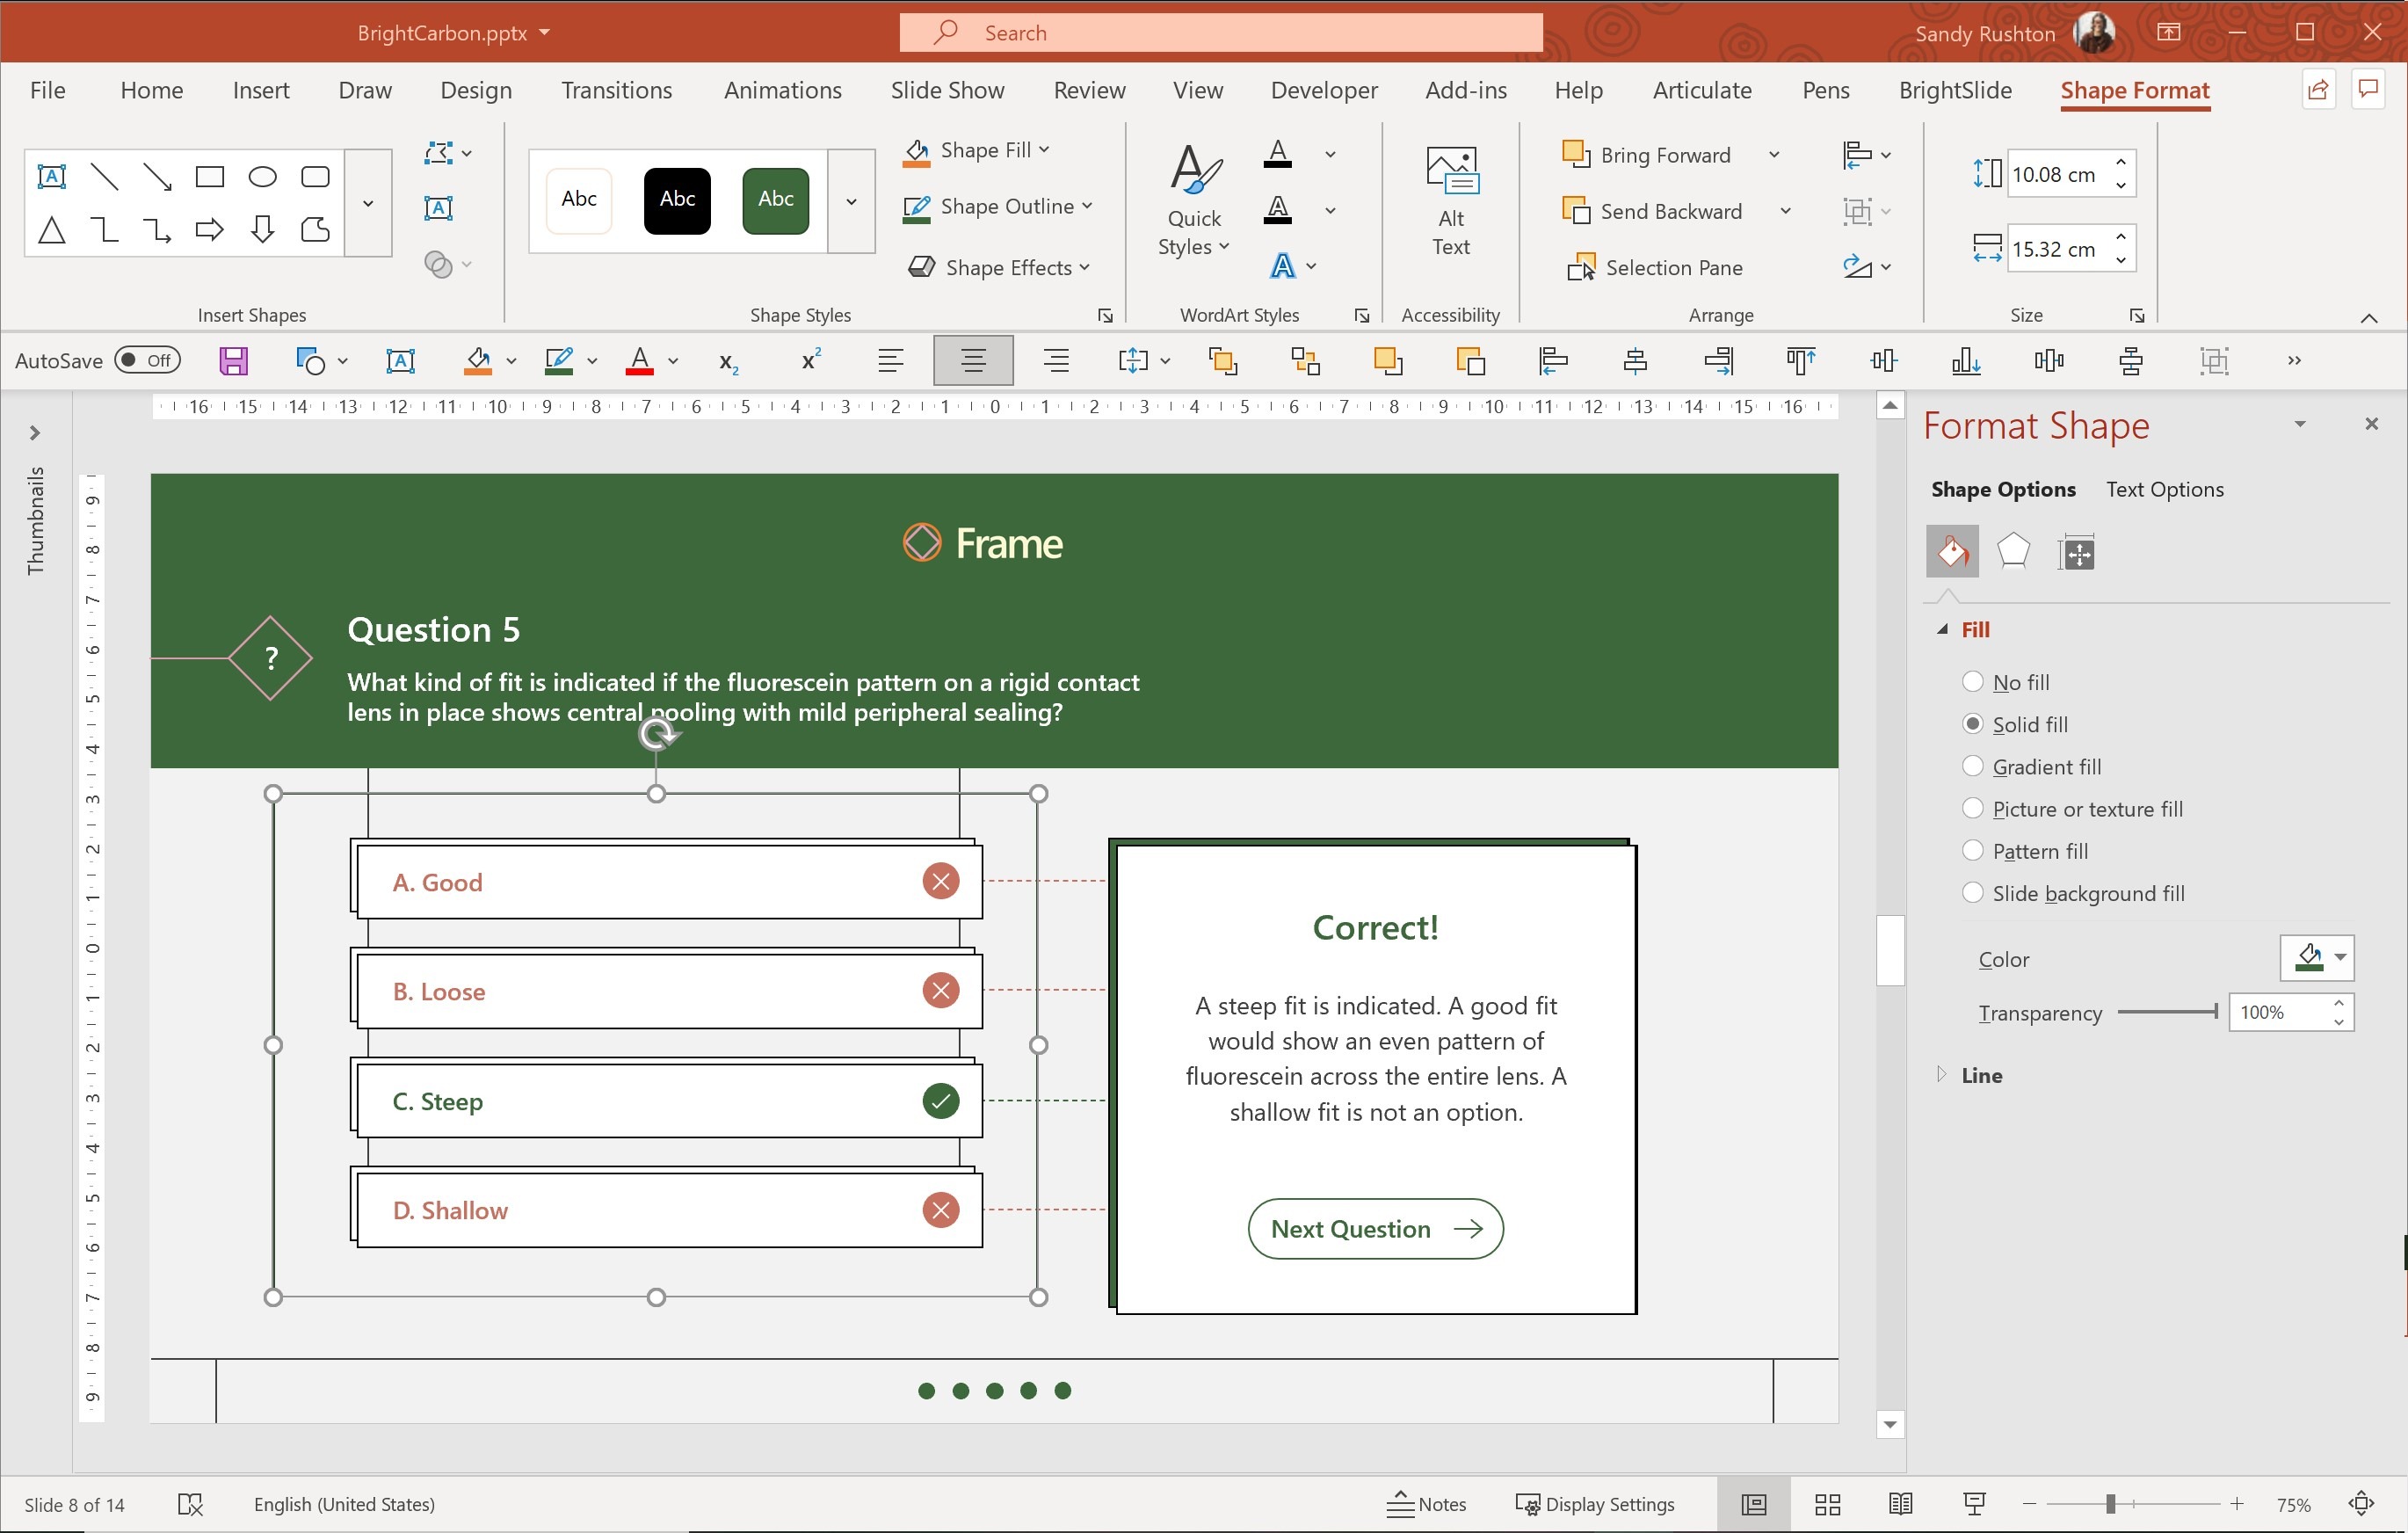
7. If you don’t want learners to be able to change their answer, you can add an invisible mask over the answers instead of the exit animations. Insert a shape, right-click and choose Format Shape. Then change the Fill to 100% transparency (not No Fill – this won’t work!).
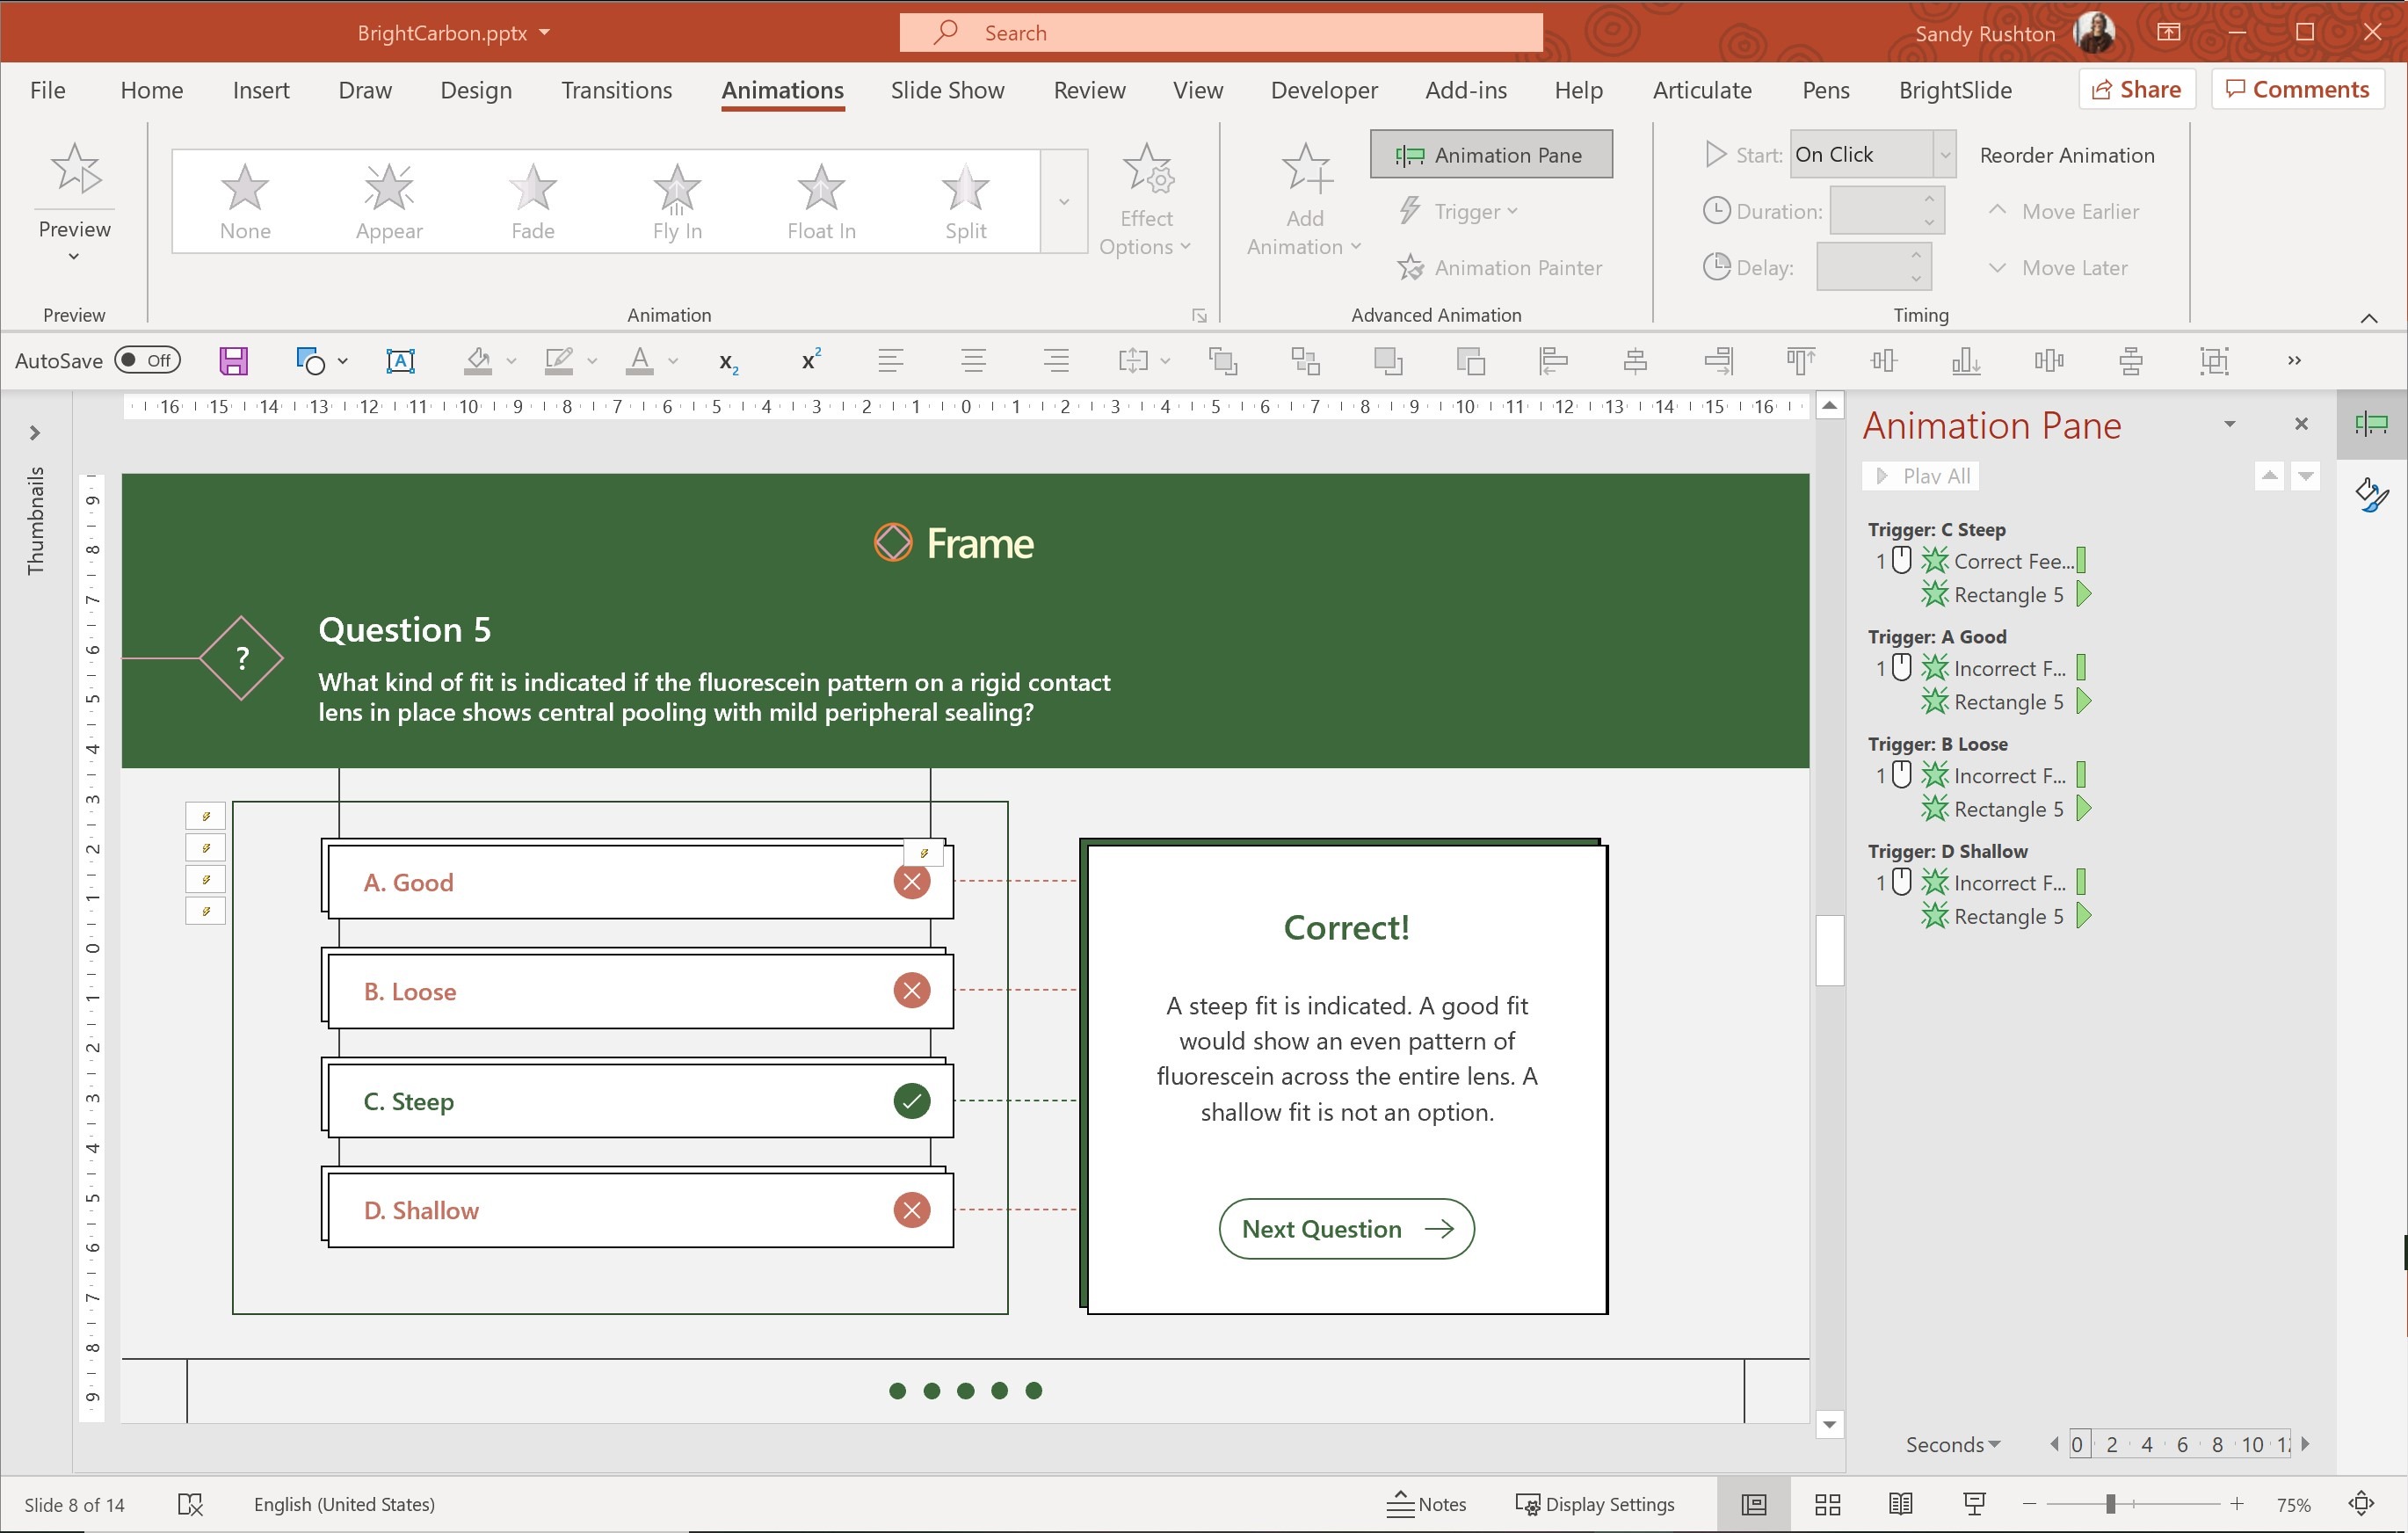
Go to the Animations tab and add an Appear entrance animation to the shape. Use the timing options to change the animation to Start > With Previous. Then select this animation on the Animation Pane and drag it to the trigger for one of your answers. Repeat for each of the triggers on your slide. Now, the mask will appear whenever an answer is clicked, preventing the learner from clicking another option.
Technique 2: Use hyperlinks
1. Start by creating your question slide: this should have all your answers but no feedback.
2. Duplicate this slide by right-clicking the thumbnail and selecting Duplicate slide or by just copy-pasting it. You will need two copies of your slide. On one of these copies, add your correct feedback, and on a separate slide add your incorrect feedback. You could even have multiple incorrect feedback slides if you’ll be providing different feedback for each incorrect answer.
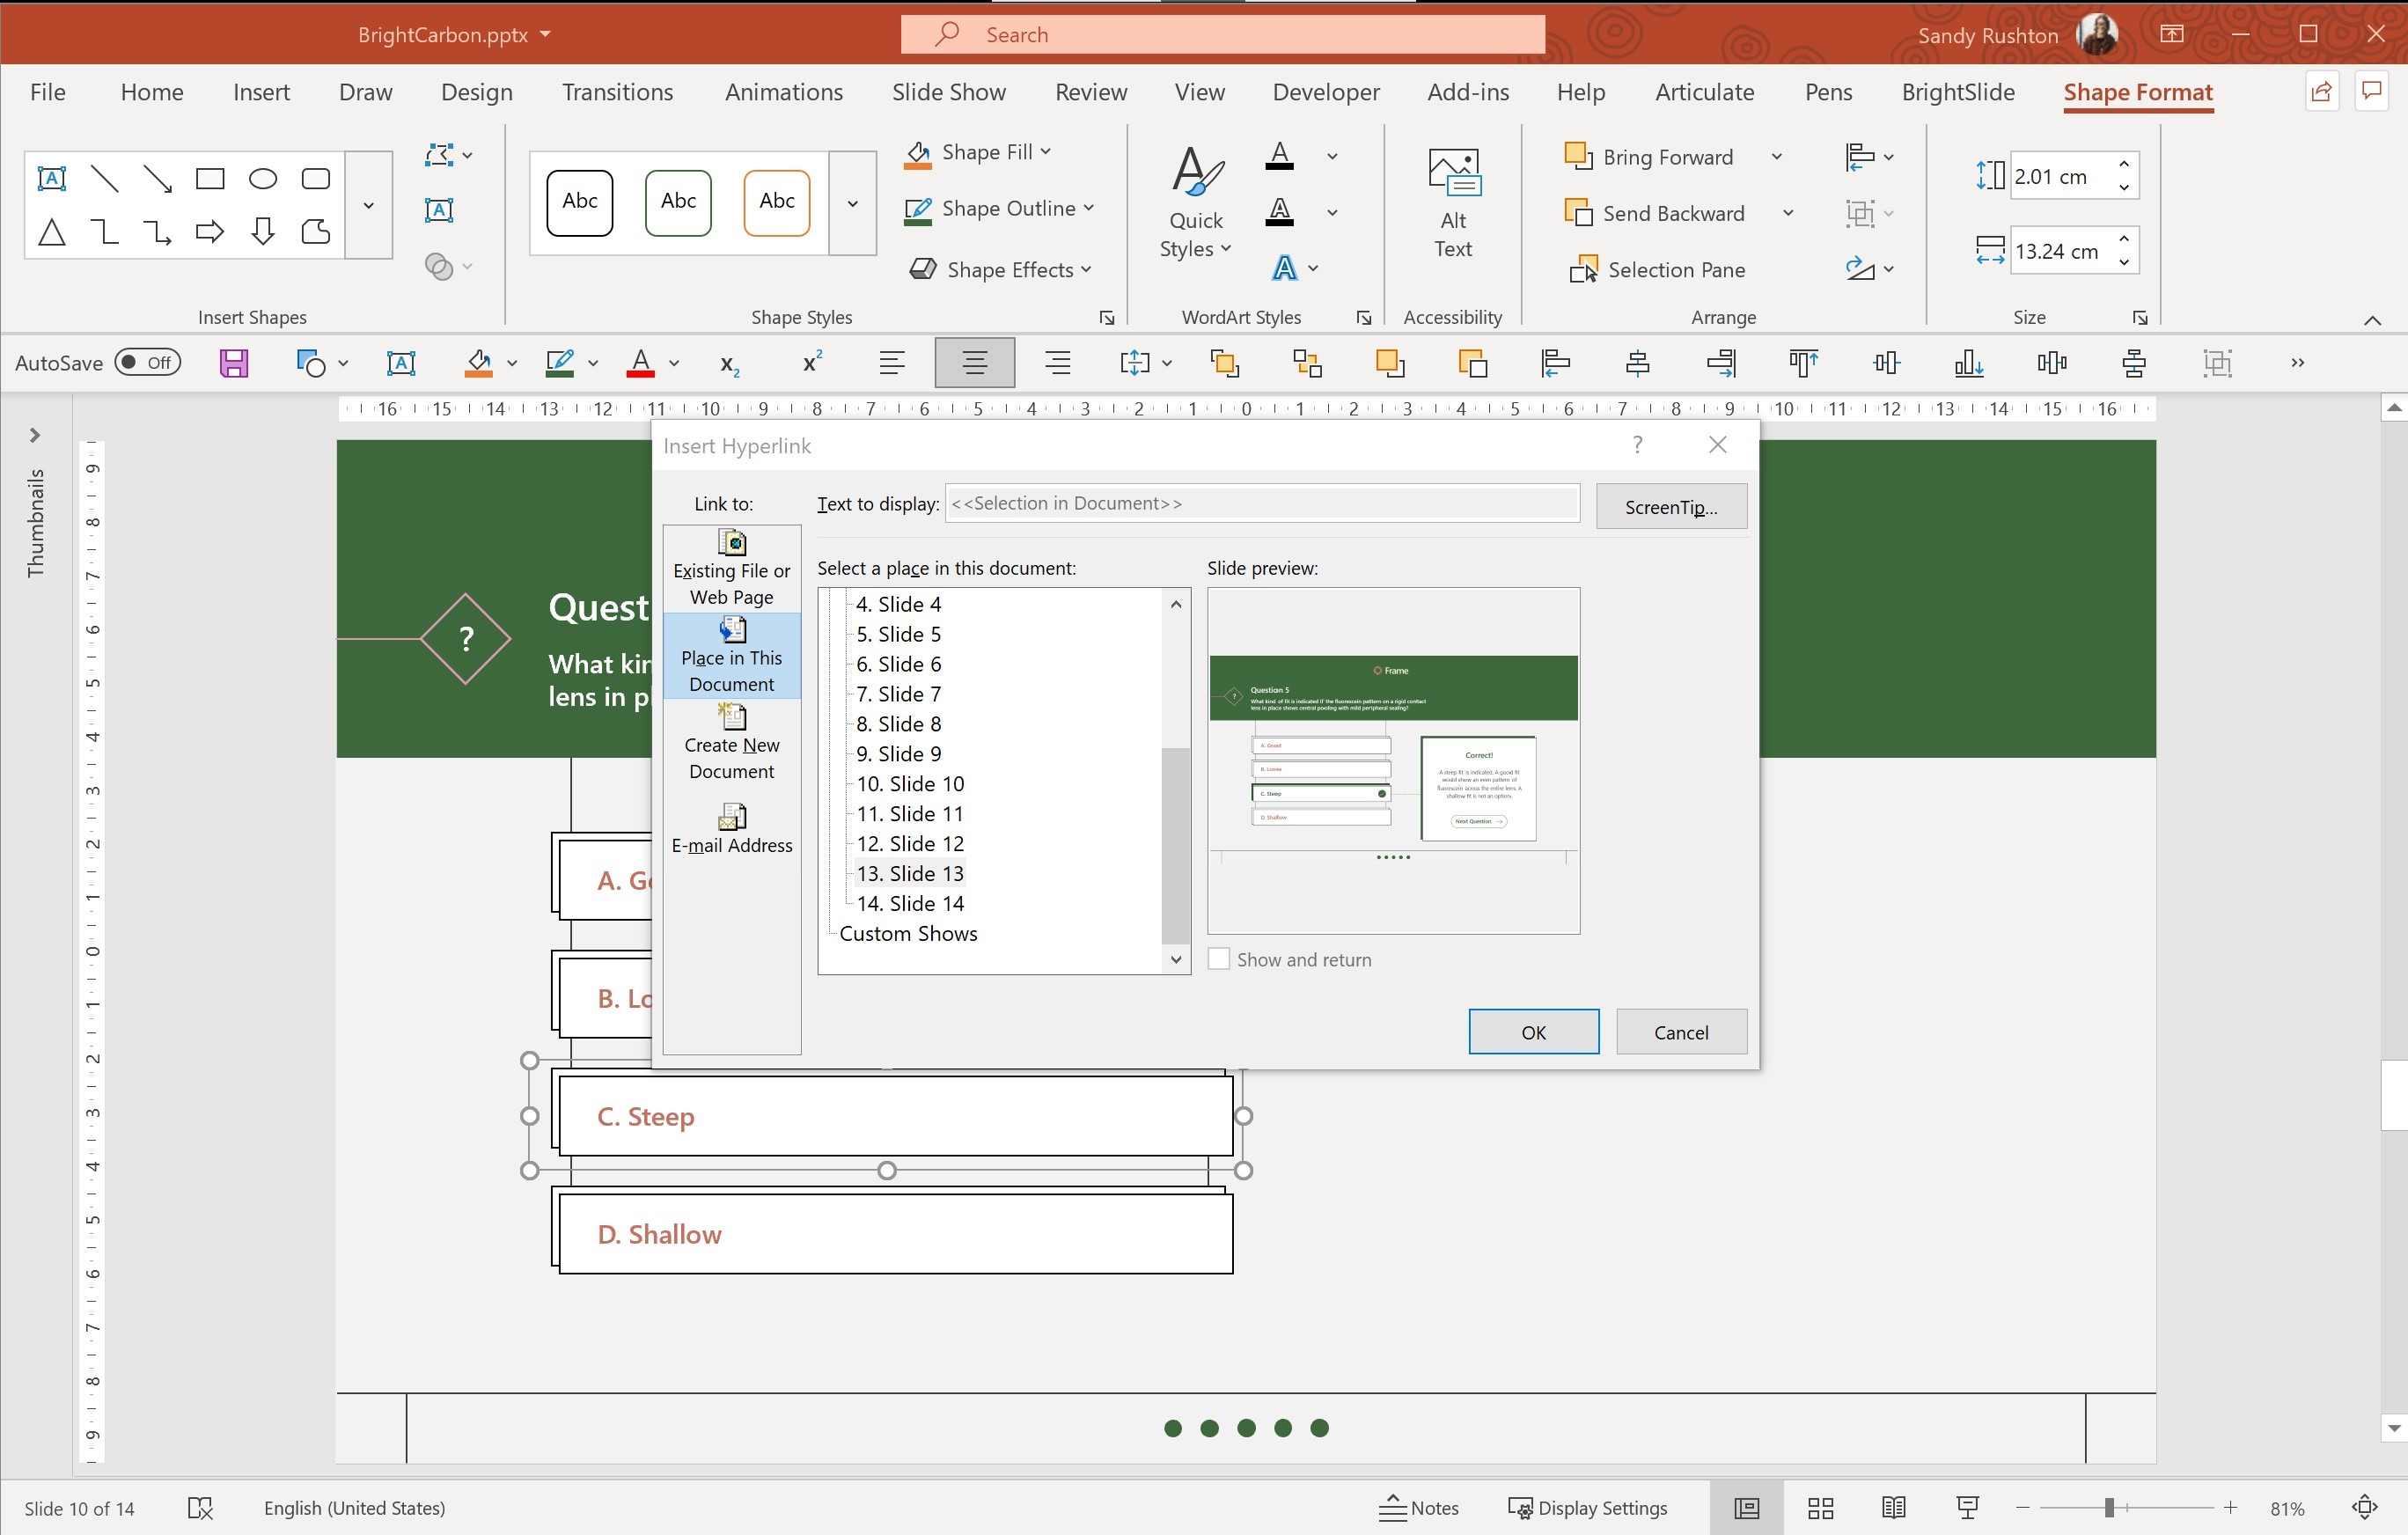
3. Now, go back to your question slide. Right click on the correct answer, and select Link. A pop-up will appear with different options. Select Place in this document and then select the correct feedback slide you just made from the list of Slide Titles. The pop-up will show you a preview of the slide which will help you find the slide you need. Select OK and your hyperlink will be live.
4. Repeat this process for each of the incorrect answers, linking each to the incorrect feedback slide, if incorrect feedback is the same for each. If there’s specific feedback for each incorrect answer,
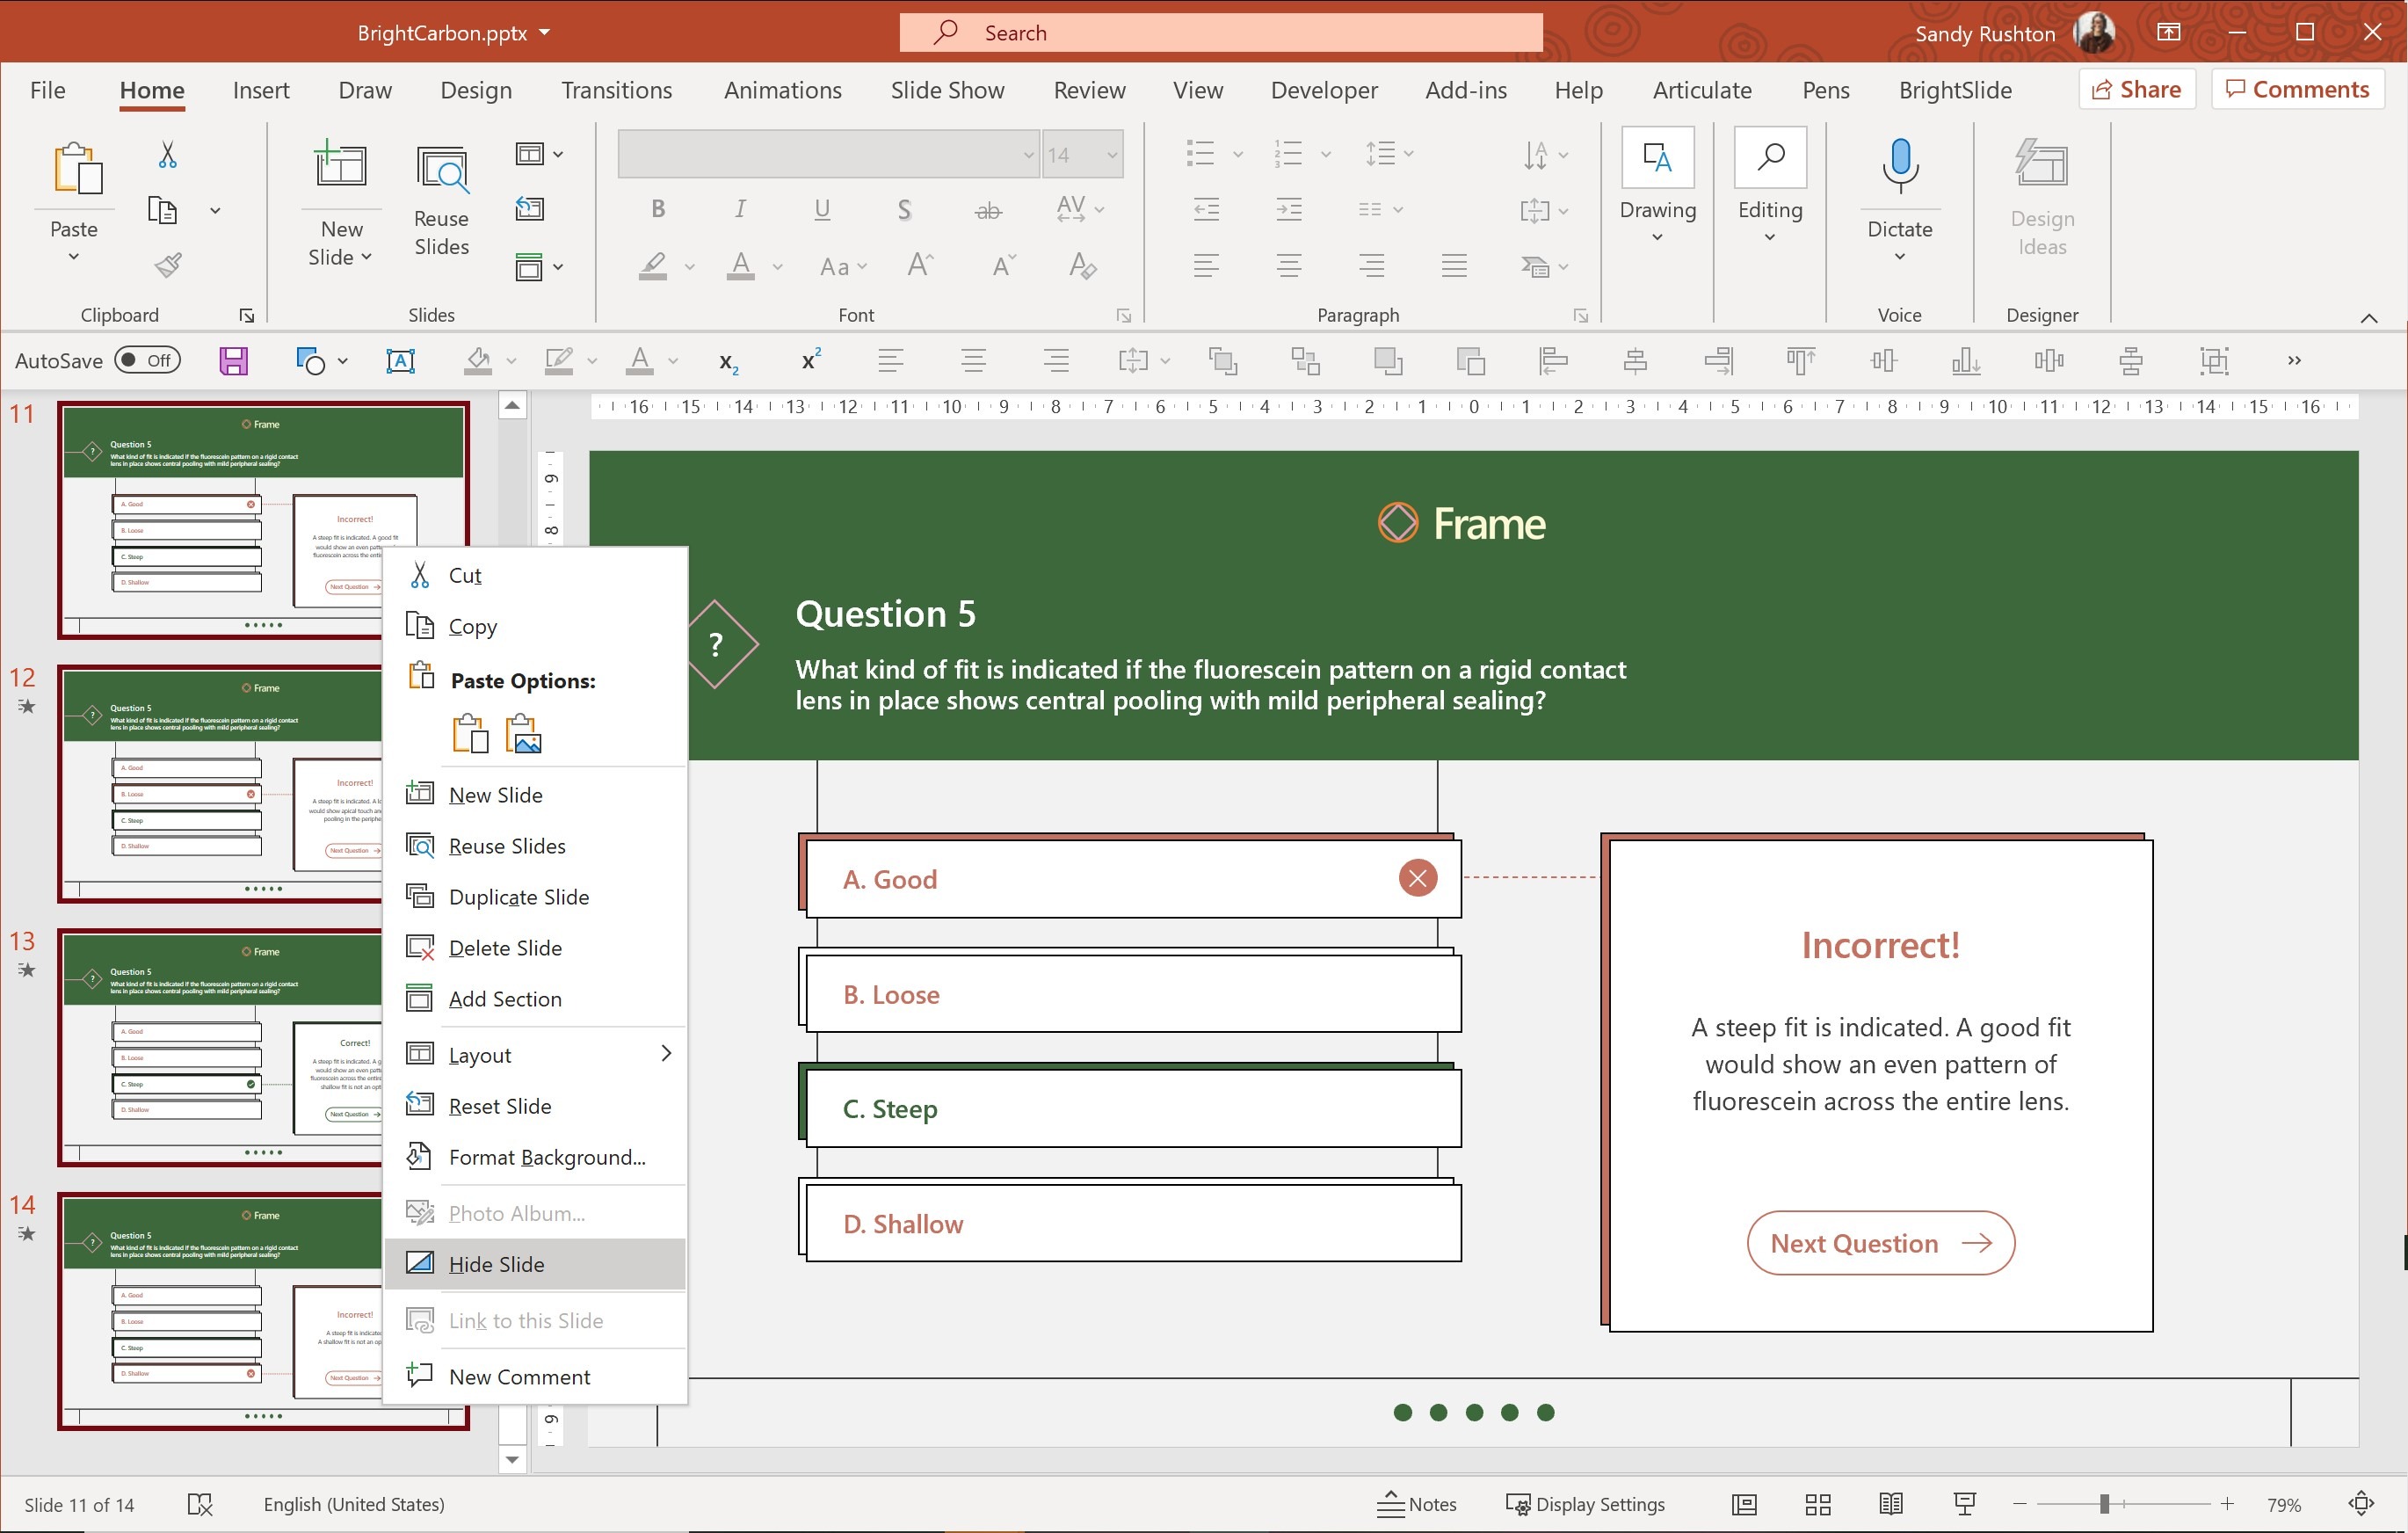
5. Finally, hide all the feedback slides. Select the thumbnails, right click and select Hide Slide. Your hyperlinks will still work even if the slides are hidden but doing this means that your learner can’t accidentally navigate to the feedback by clicking the slide or pressing the arrow keys when in Show Mode.
Delivering your interactive PowerPoint quiz to learners
Now that you’ve built your interactive PowerPoint quiz (and tested it to make sure it works!), the simplest way to deliver your it to learners is just to save it as a PowerPoint file. Go to the File > Save As and then choose a file format from the dropdown. The standard is .pptx, which will work, but there’s loads of other options as well.
One useful format to be aware of is PowerPoint Show – .ppsx. Saving in this format means that when your learner opens the file, it’ll automatically be in show mode with all the animations and triggers that you set up. Using this file type helps ensure your learners don’t miss out on any of the content you’ve programmed and saves them a bit of time as well. Be sure to double-check that the platform you are using to deliver the eLearning (an LMS, for example) supports .ppsx before using this file type.
However, if you need a different format then there are lots of PowerPoint plug-ins available, including Articulate Presenter and iSpring Converter, which let you export your slides as HTML5 and have SCORM compliant capabilities as well. By using one of these dedicated plug-ins, you can keep all the functionality and animations that you’ve created in PowerPoint but you get the added bonuses of being able to track completion in an LMS and uploading your HTML5 content into a wider variety of hosting platforms.
That’s it for this part of the series! We’ll be tackling more complex authentic assessments in the next two posts or you can revisit Part 1 of the series for the basics:
The final instalment of our four-part series on eLearning assessments takes us to Articulate Storyline, where we’re going to level up one final time by creating realistic scenario interactions!
Branching scenarios are a great way of providing authentic assessment in Articulate Rise. They offer learners a chance to put theory into practice, by facing realistic situations that they might encounter in real life and getting feedback on what they’ve done well or need to improve.
In this series we are taking you on a journey through the theory behind effective eLearning assessments and practical tips for building assessments it in three different authoring tools: Microsoft PowerPoint, Articulate Rise, and Articulate Storyline. In this post, we lay the instructional design foundations.
BrightCarbon are a great partner in our growth. They are great to work with, very consultative, and professional. I could not recommend working with them more highly.