Welcome back to our series on eLearning assessments! So far, we’ve looked at some essential eLearning assessment theory and walked through the steps you can take to create basic interactive quizzes in Microsoft PowerPoint. In this post, we’re pivoting away from quizzes and will be using Articulate Rise to build an authentic assessment using a branching scenario. And in the next part, we’ll be looking at some even more immersive assessments in Articulate Storyline. To go back and refresh, use these links:
Branching scenarios are a great way of providing authentic assessment. They offer learners a chance to put theory into practice, by facing realistic situations that they might encounter in real life and getting feedback on what they’ve done well or need to improve.
True branching scenarios – where different choices take a learner down different paths – offer an opportunity for learners to see the consequences of poor application of their skills, learning through experience and truly assessing their aptitude. “Fake branching” – where incorrect answers are met with corrective feedback, but the learner’s path stays the same – is easier to create and can still give a powerful experience and capture assessment information.
We’ll be looking at how to achieve true and fake branching in this post, and will cover:
What you will need: content, assets, and Rise blocks
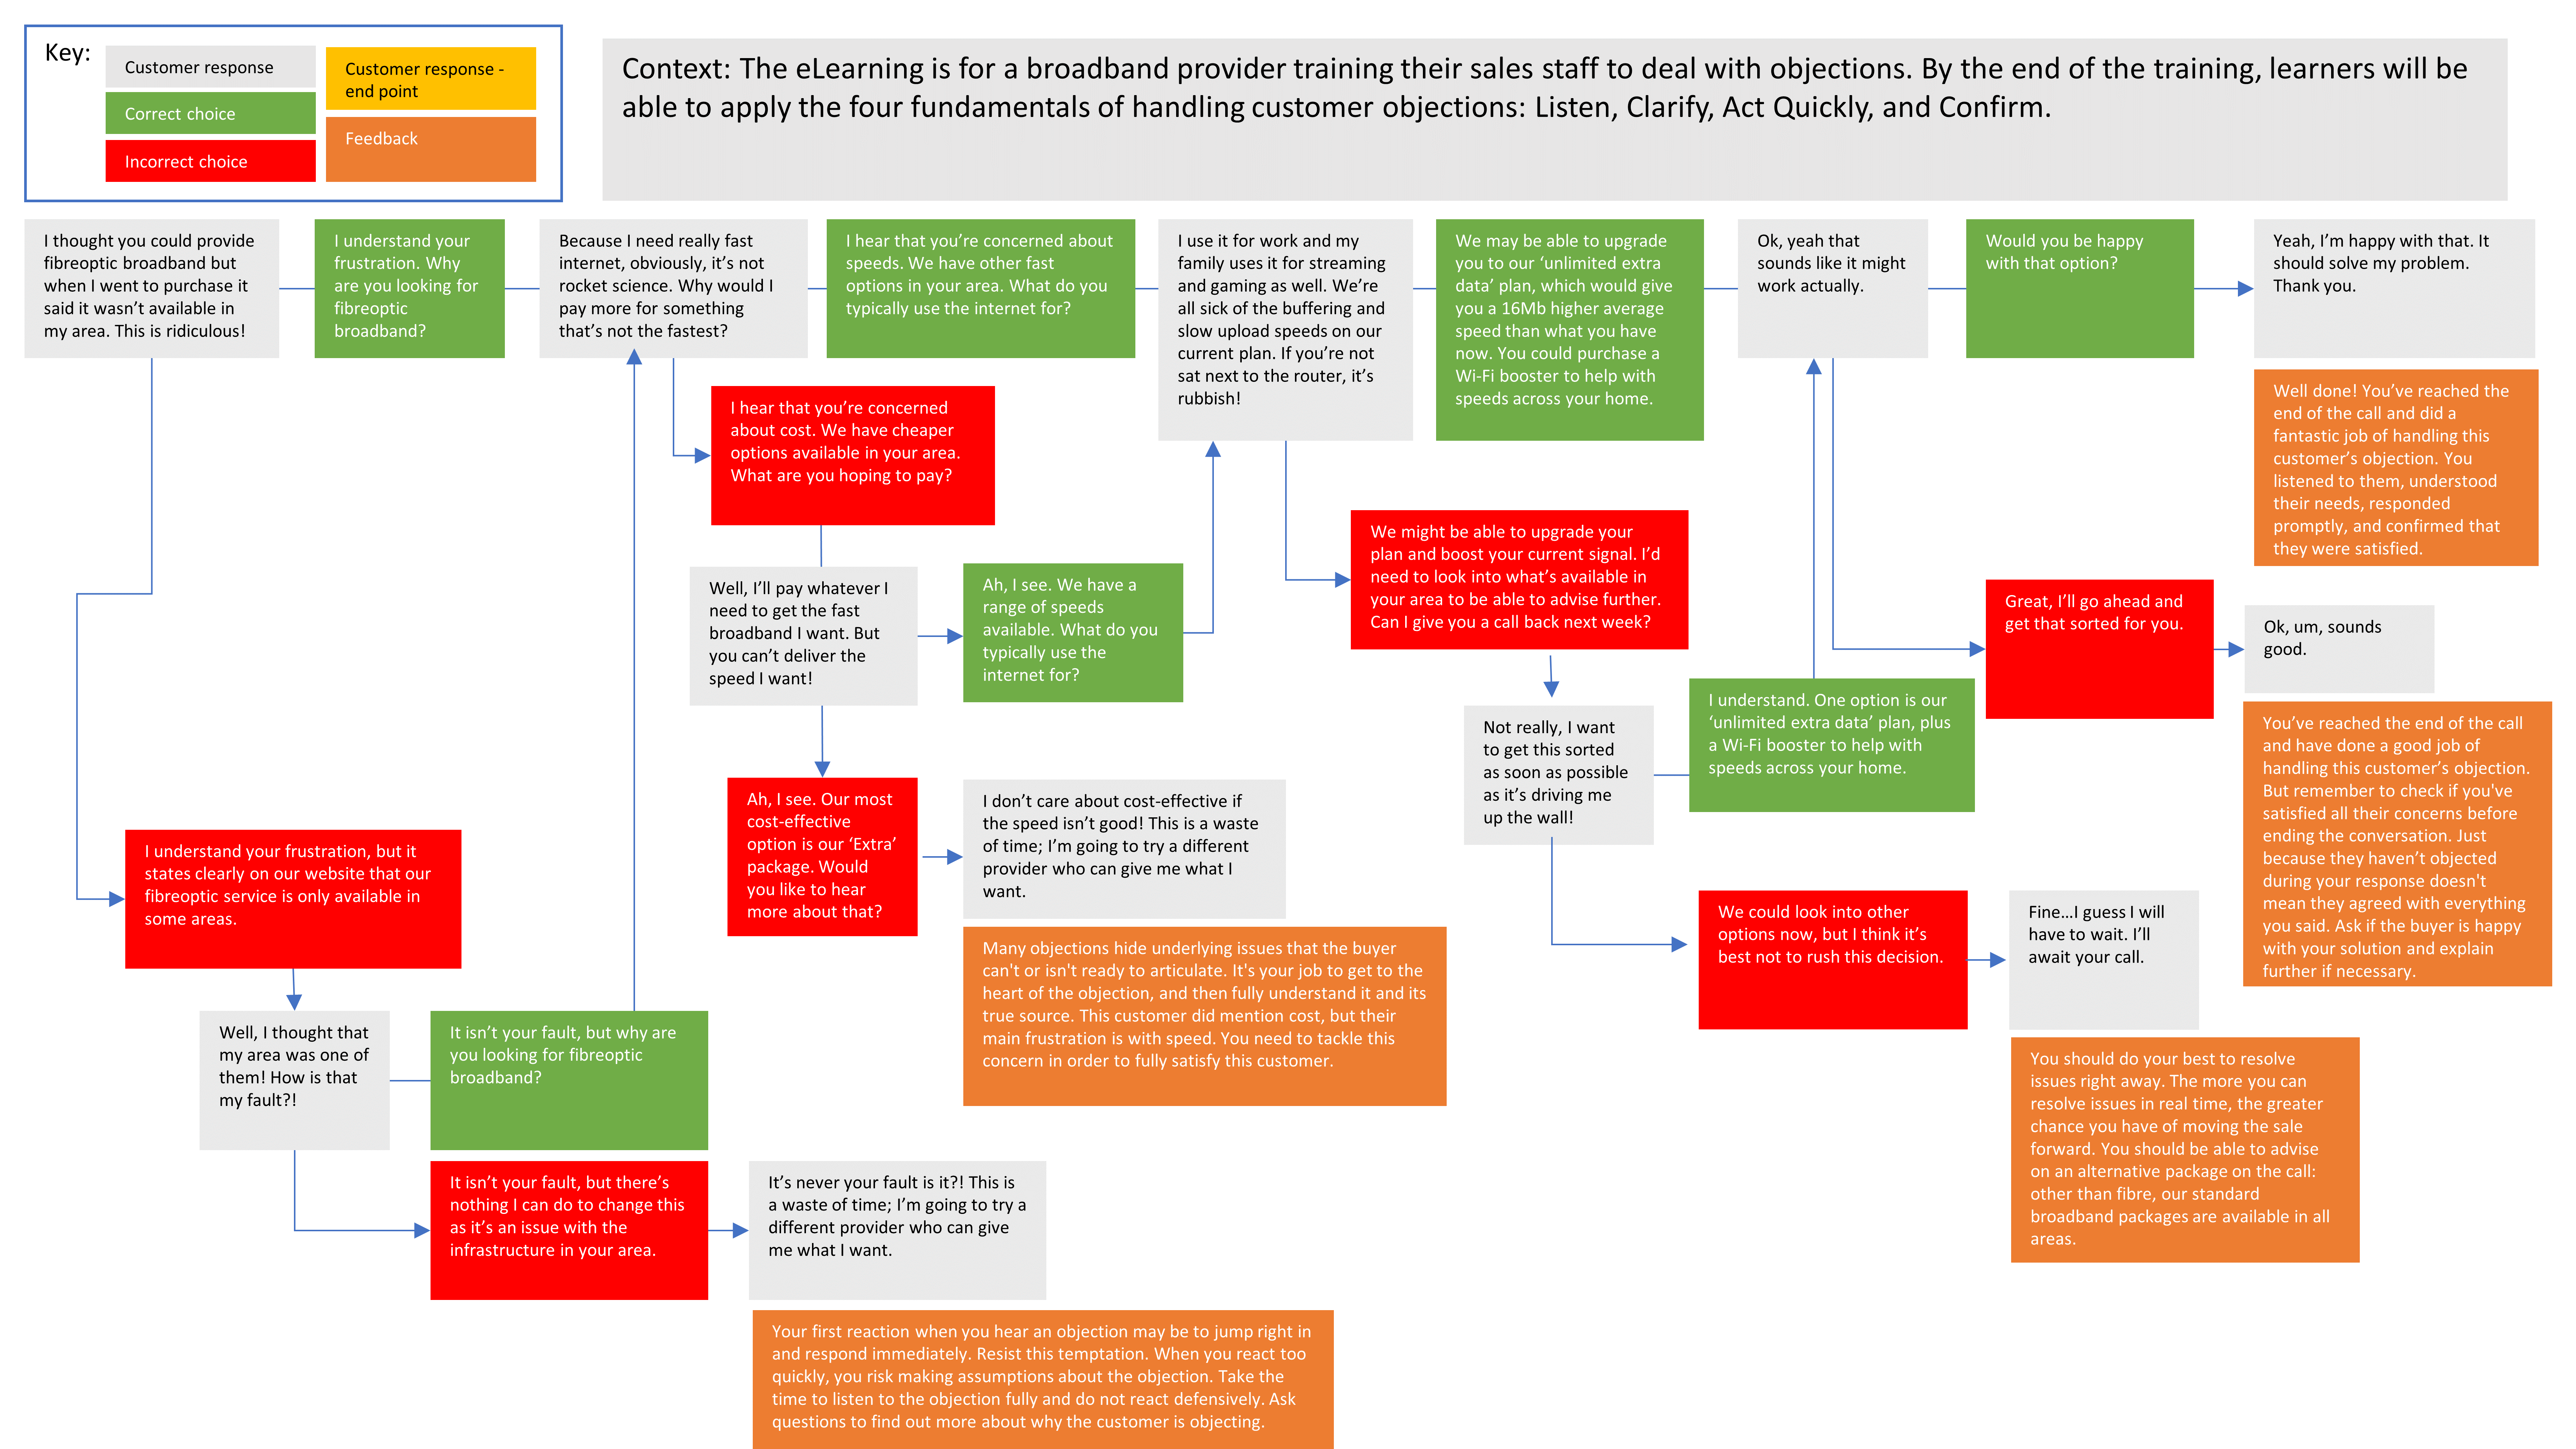
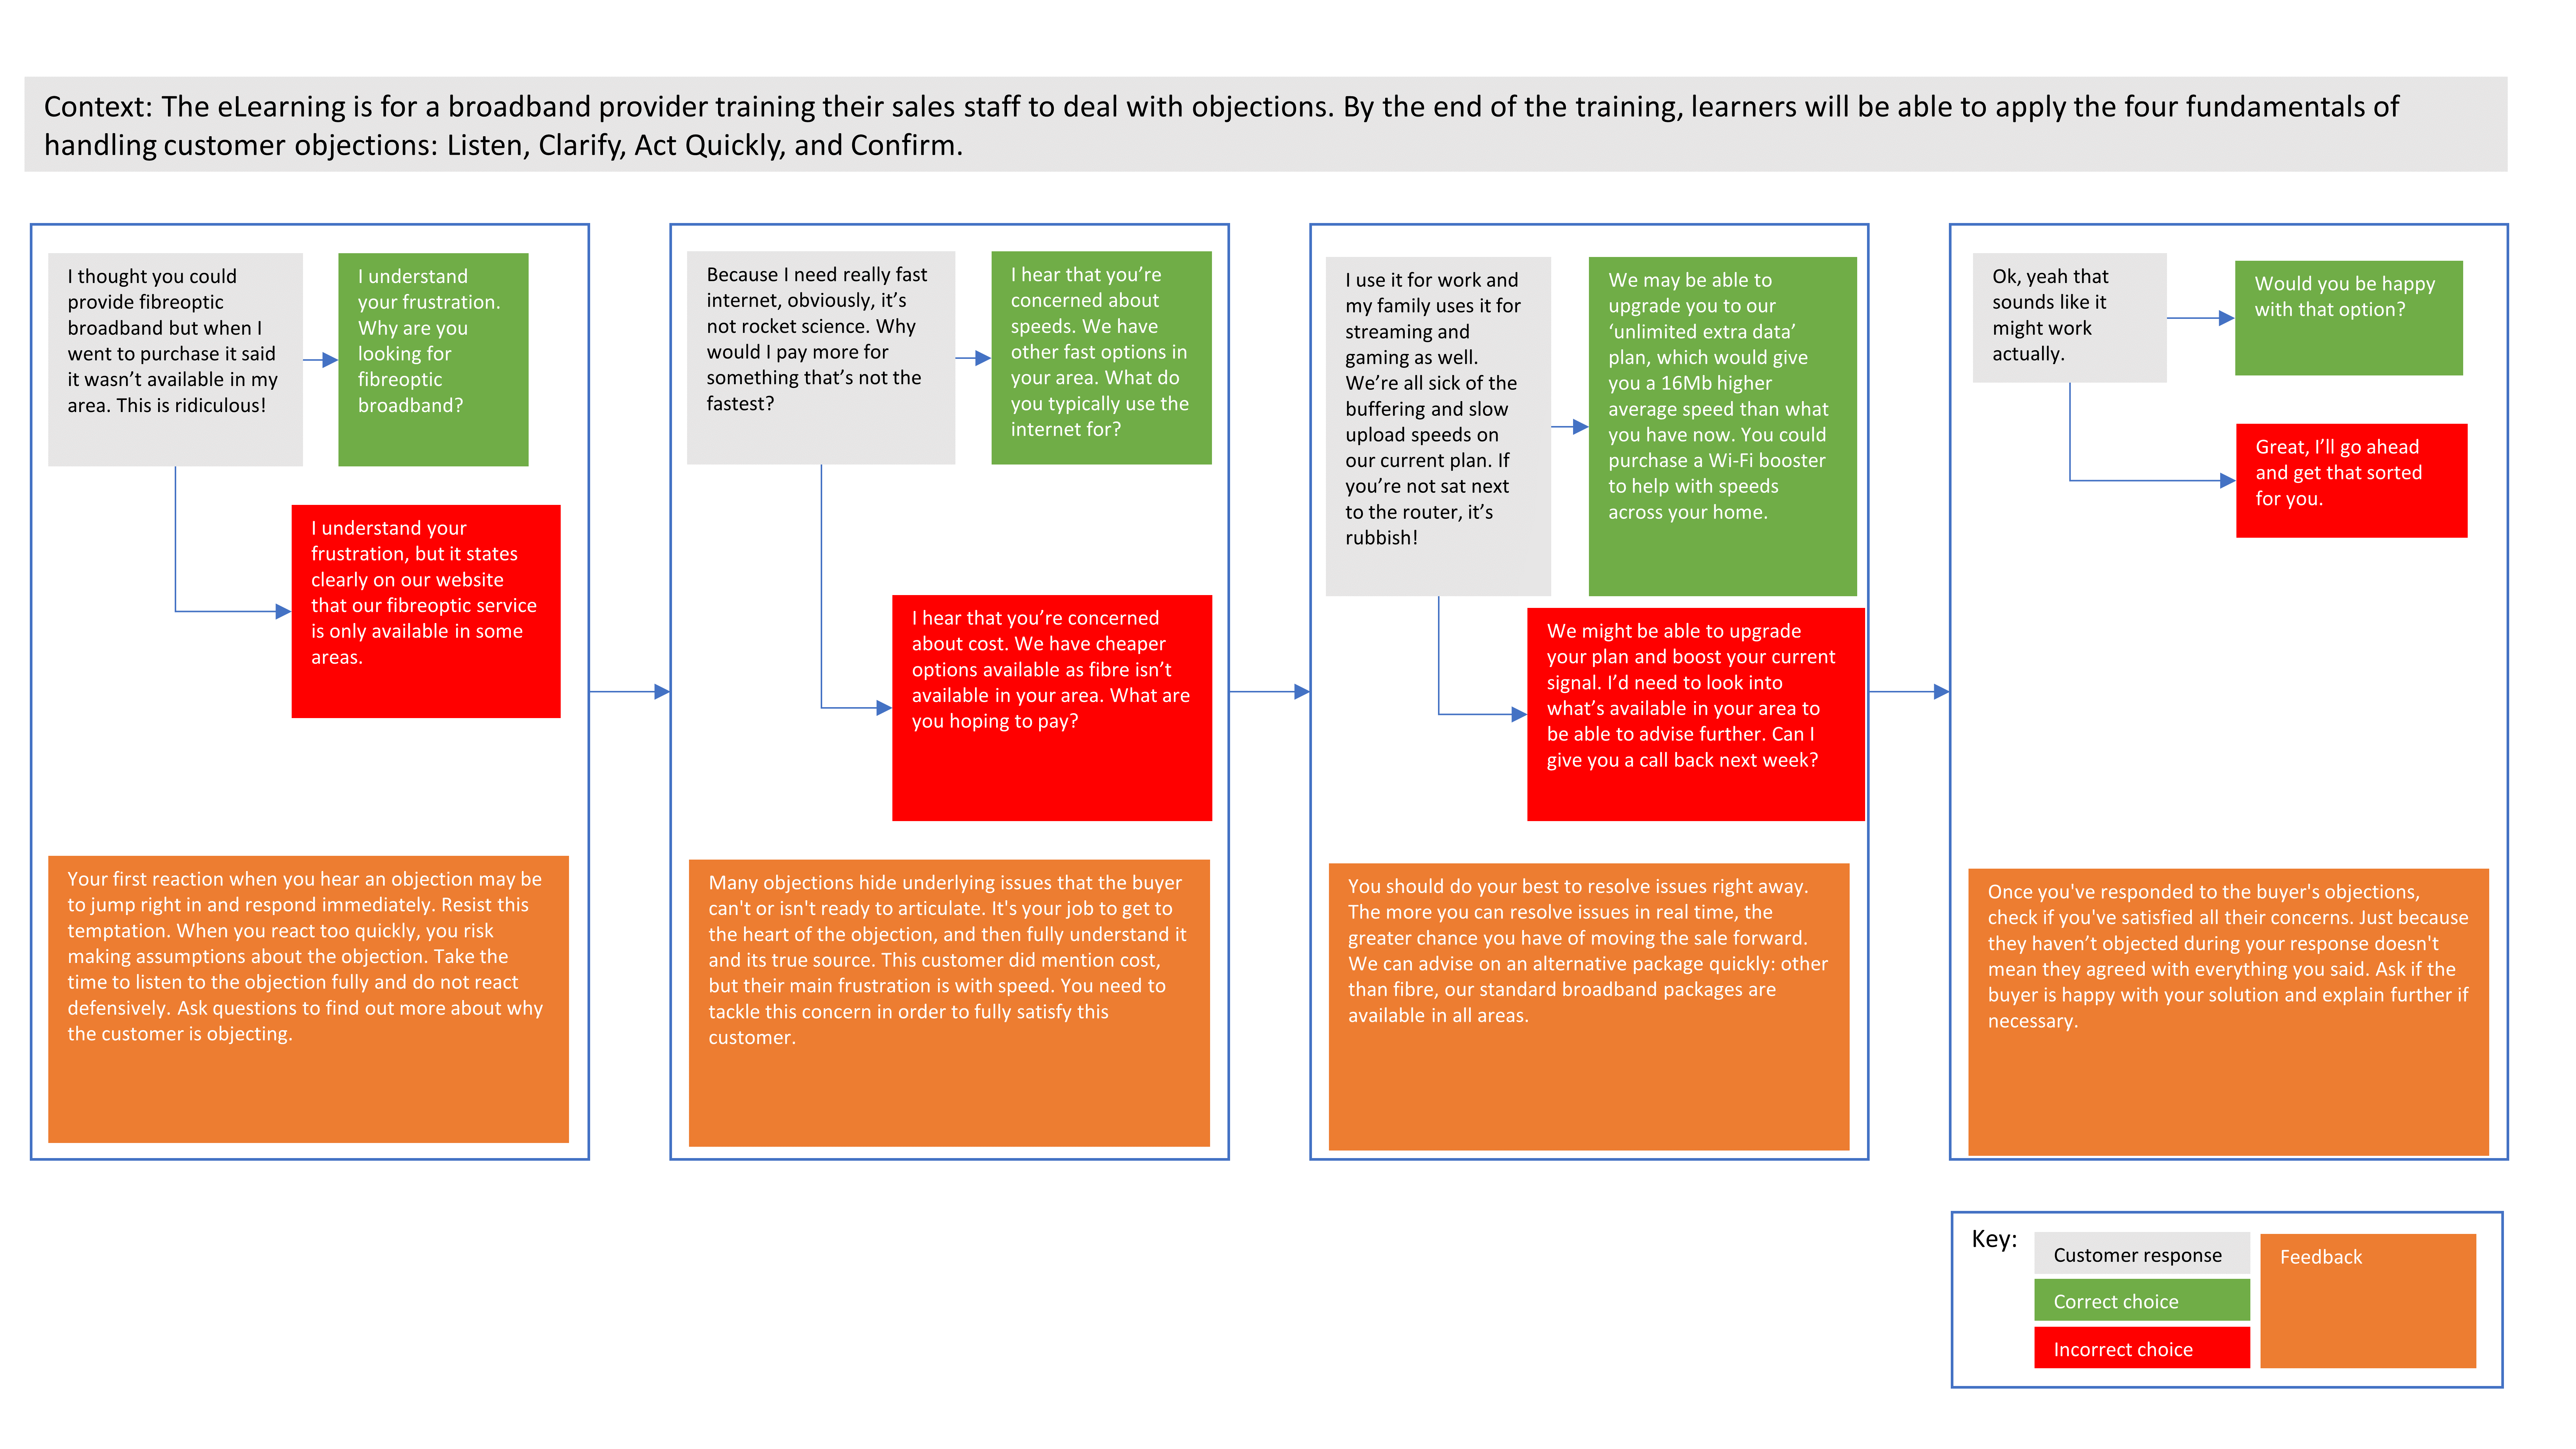
Before building an authentic assessment, you will need to develop your content. Writing a branching scenario like the one we’ll look at today takes a bit of practice. There’s lots of great guidance out there, like in Christy Tucker’s post on getting started with branching scenarios. You’ll need to storyboard your content and create a flowchart to help you plan out what you’ll need to build in Rise. Scenarios can quickly get complex, and you need to ensure that you ask the right questions, provide the right response options, and give the right feedback at each stage of the assessment. Here’s an example flowchart which we will use to create the authentic assessment in Rise in this post:
This flowchart details each decision that the learner will have to make, and where each decision will take them to. Your flowchart might be simpler than this or more complex: it depends on the skill you’re trying to assess!
To build an authentic assessment in Articulate Rise, you’ll also need assets. Images, videos, animations, and audio can all add to making a branching scenario realistic. Articulate 360 users can add assets to Rise using Content Library 360. If you don’t find what you need there, we have a guide to free design resources which might take your fancy. You can also create custom assets and import them to Rise directly using blocks.
Speaking of blocks, that’s the final thing you will need! Articulate Rise is made up of a number of pre-programed blocks for different types of content. To build your assessment, you’ll want to use a range of the many blocks that Rise has on offer. There are lots of different options for creating interactions in Rise, and you can use a variety of the blocks available to create a scenario that will test your learners’ skills and knowledge.
In this post we’ll just look at three different ways to build the same assessment, but it’s worth familiarising yourself with all the blocks Rise has so that you can customise all the interactions you create even further!
Option 1: Lesson with a scenario block
The simplest way of making a branching scenario in Rise is to use the pre-programmed scenario block. These scenarios involve your learner having a conversation with a character, so are great for any skills that involve communicating with others. The example course shown in the GIF below was built using scenario blocks: open and explore the example here.
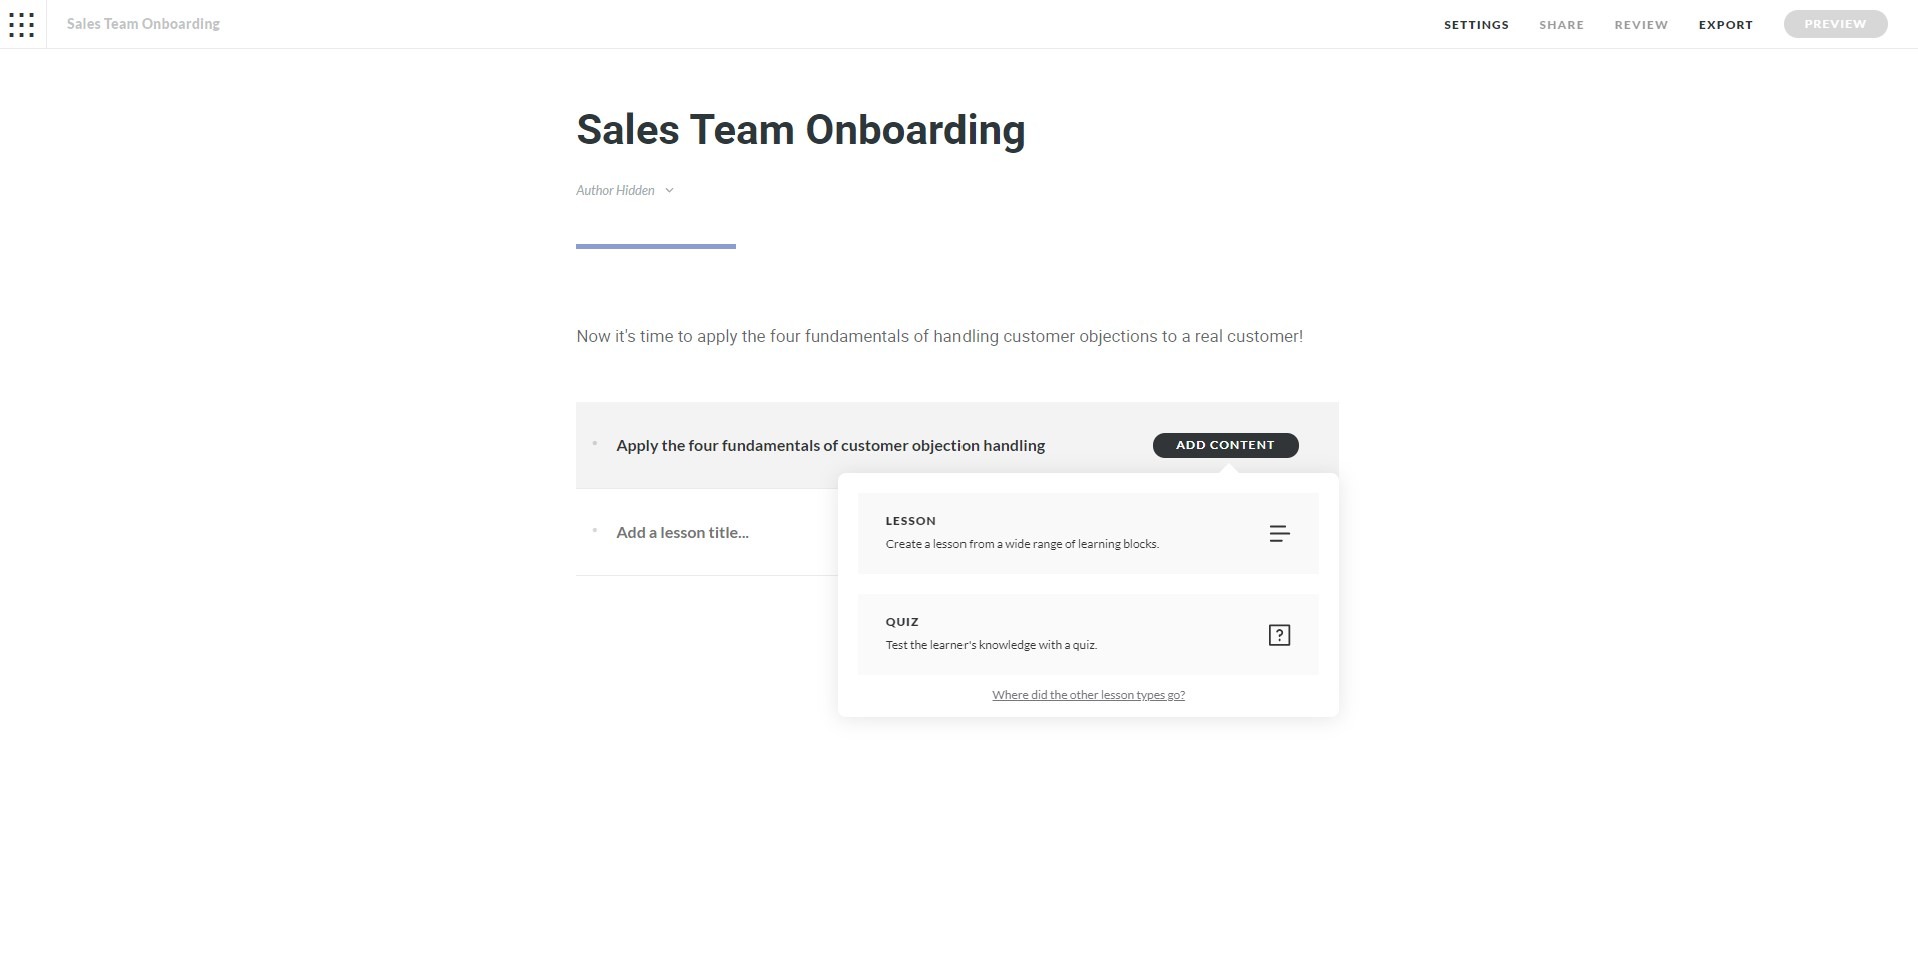
To create an assessment using the scenario block, first add a new lesson to your Rise course. Add a title, press Enter, then select Lesson from the options given.
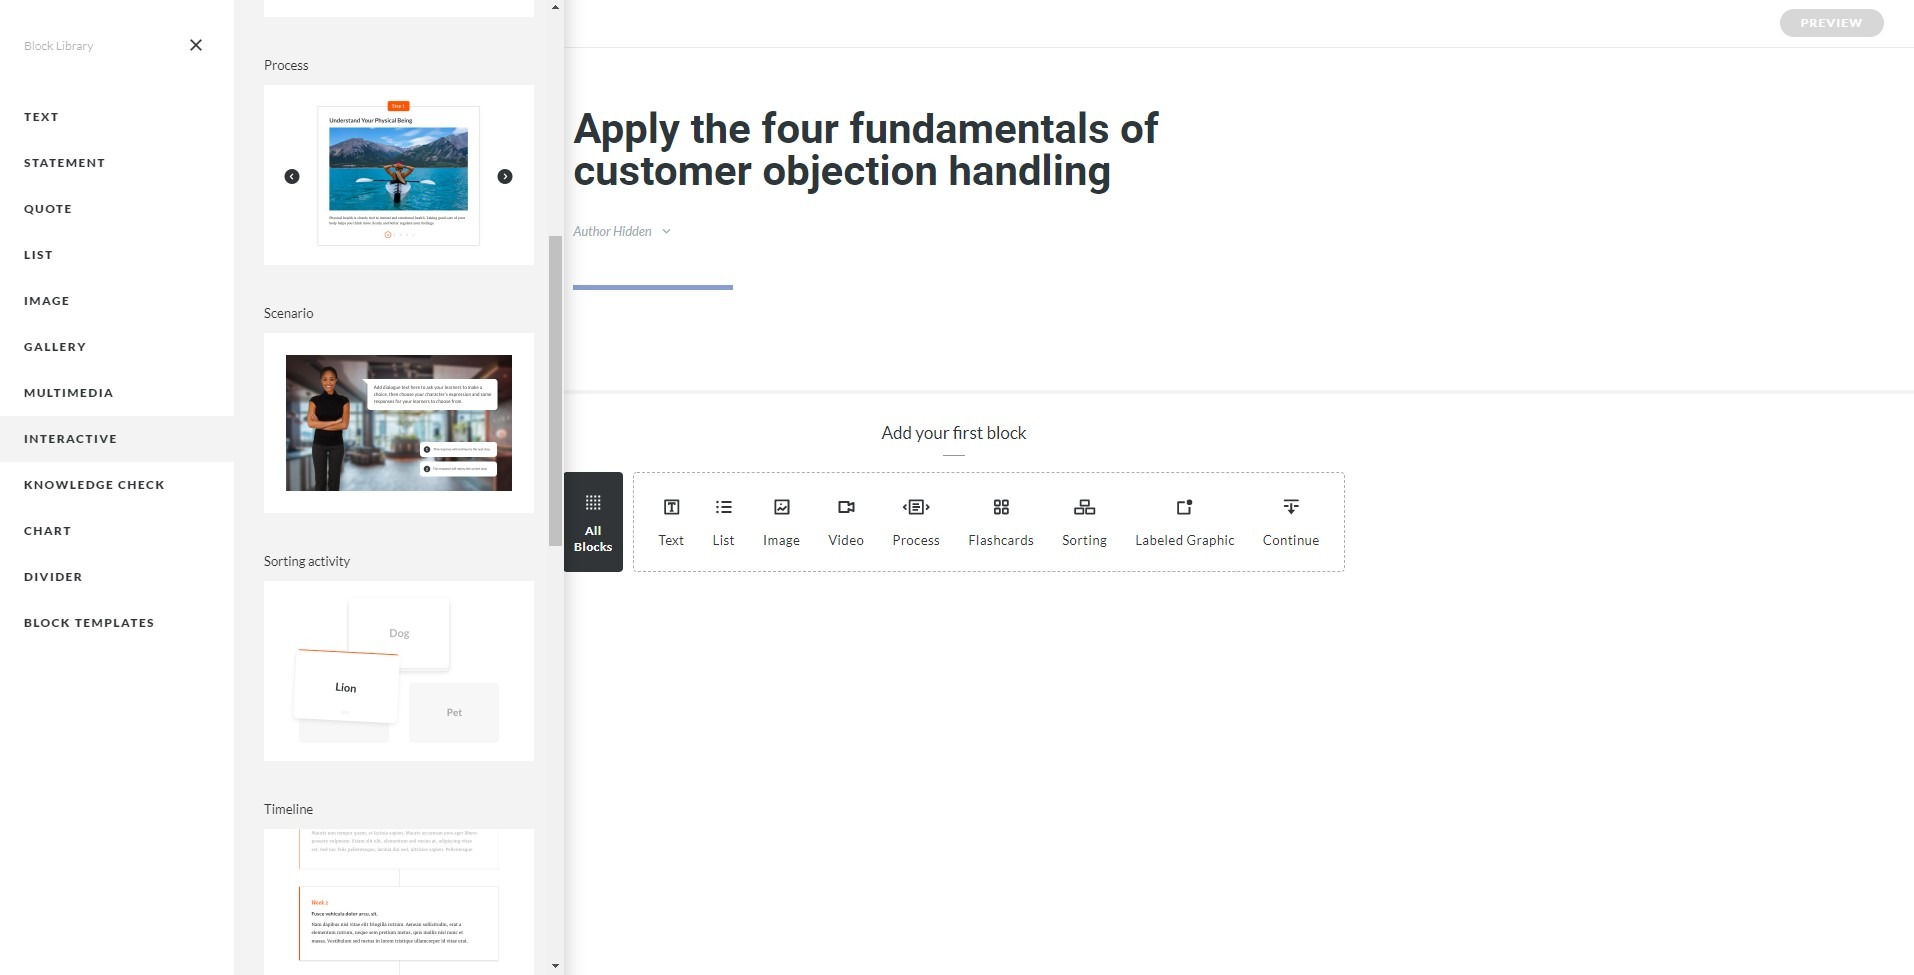
Select All Blocks, then Interactive, then Scenario. Select Edit from the block options to add your content.
First, you get the option to choose a background and character for the scene. Choose something that’s realistic for your learner and the situation in which they will have to use their skills in real life.
You can upload a custom image for your background – though it will be blurred automatically in Rise. Your character has to come from a set menu of options, but if you’re yearning for more customisation, there is a way of adding your own custom character after publishing your Rise course. Matt Basuk has outlined this in a video tutorial.
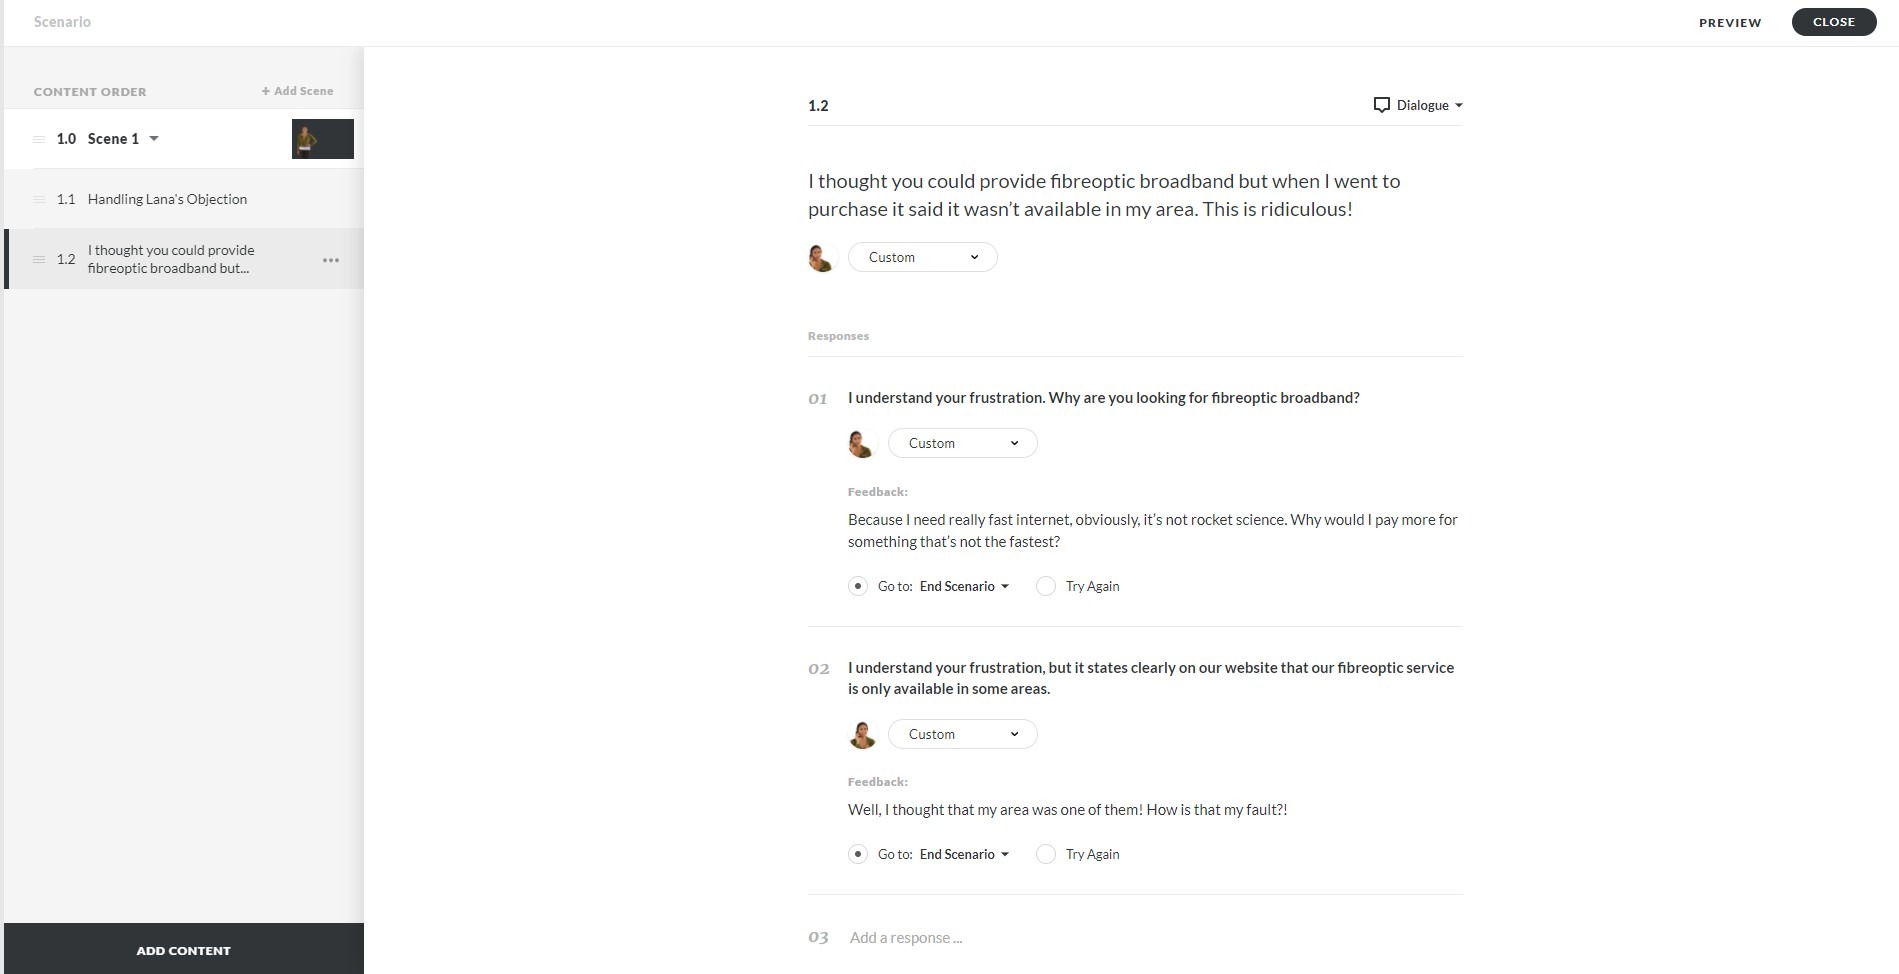
Then, it’s time to add each decision point from your flowchart as a piece of content. Choose Dialogue to add something your character says, or Text to add non-speech events, like feedback or further context.
Dialogue that your character says can be up to 200 characters long, and each response your learner will choose can be up to 150 characters long. This is less than a standard tweet, so you need to keep your copy short and snappy if you plan to use this block.
Intrinsic feedback is expressed by the pose you choose for the character: pick from a huge array of moods by scrolling to the bottom of the list and selecting More. You can filter all these poses by emotion and style.
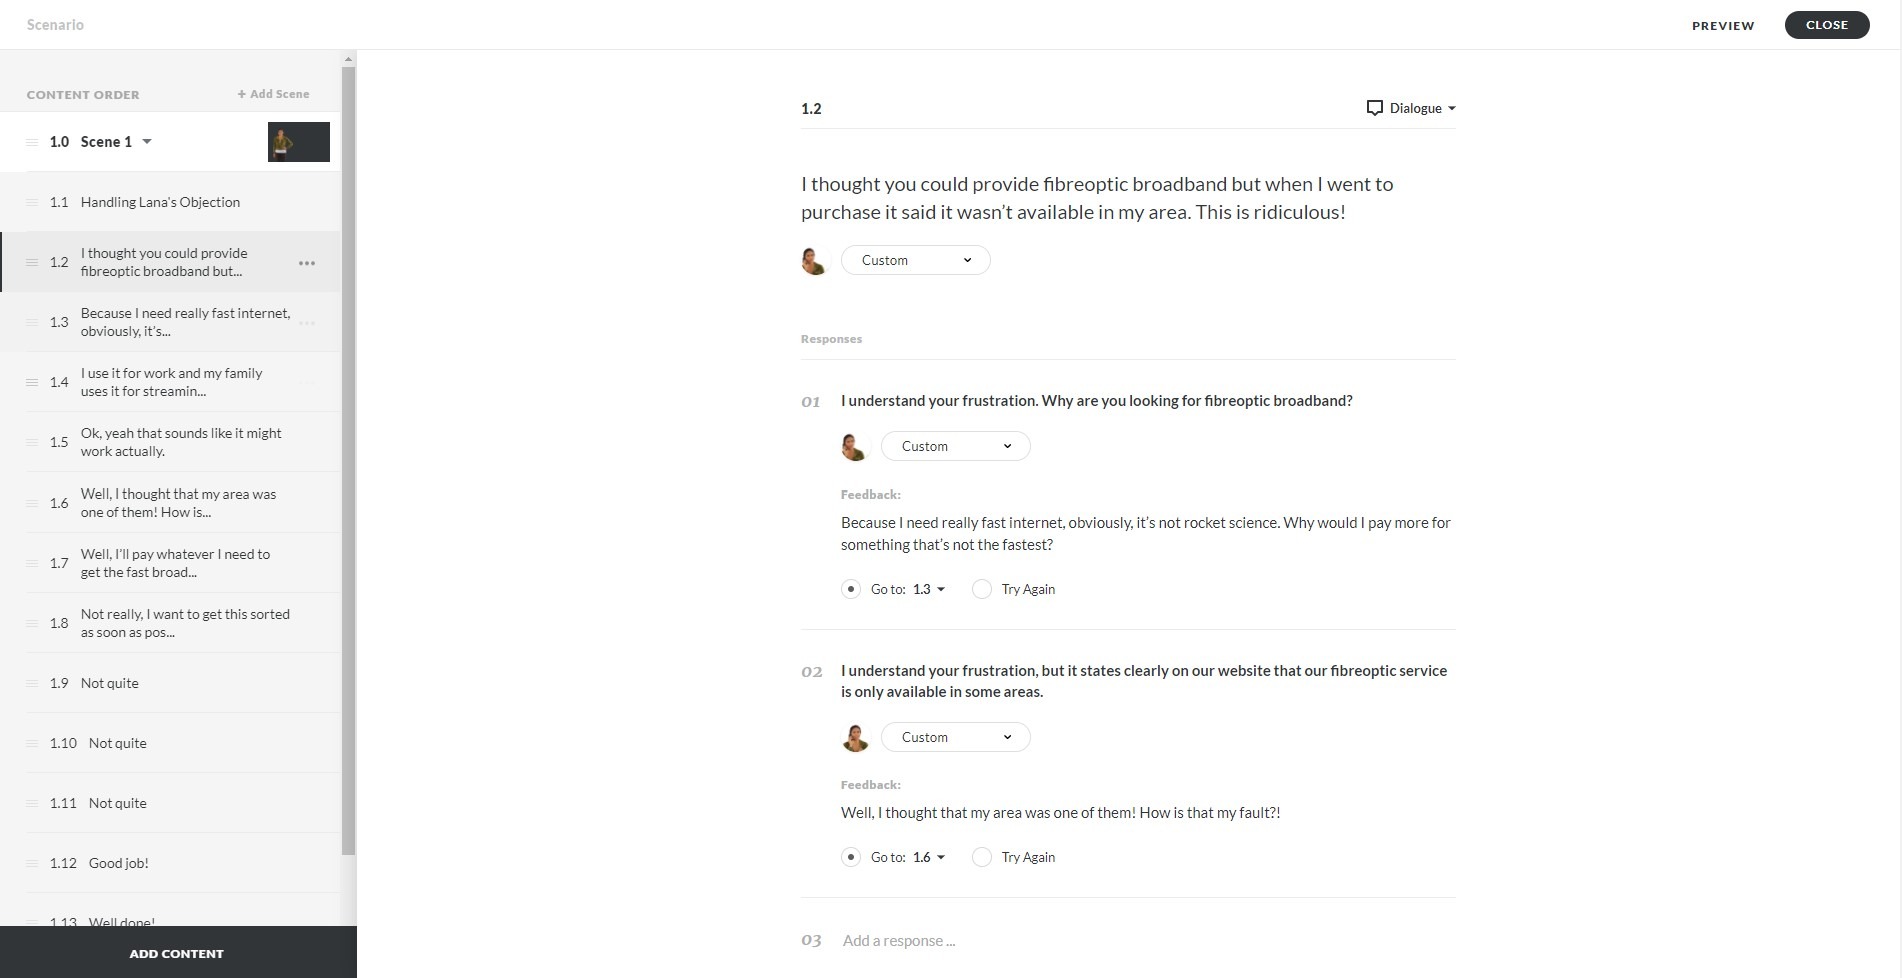
Repeat this process for every decision-point in your scenario. Once you have all possible decision-points from your flowchart as content, go back and program the branching. For each response, pick where the learner will go next from the Go to: dropdown.
Delete, add, or rearrange any and all of these pieces of content, including the Scenario Title to fully customise your authentic assessment in Rise. You can add multiple scenes, which means you can change characters and/or background images throughout an assessment. Preview to see what your content looks like and check your work as you go: it’s that easy!
Option 2: Lessons with animations and button sets
If you want a bit more customisation in your branching scenarios, or if you need more words than the 200-character limits imposed by the scenario block, you can use Rise’s button stack feature to make something truly bespoke. Buttons in Rise can link to different lessons in a course. By building each decision of your scenario as a different lesson, and linking them with button stacks, you can build a really dynamic authentic assessment in Rise!
The example course shown in the GIF below was built using the button set method: open and explore the example here.
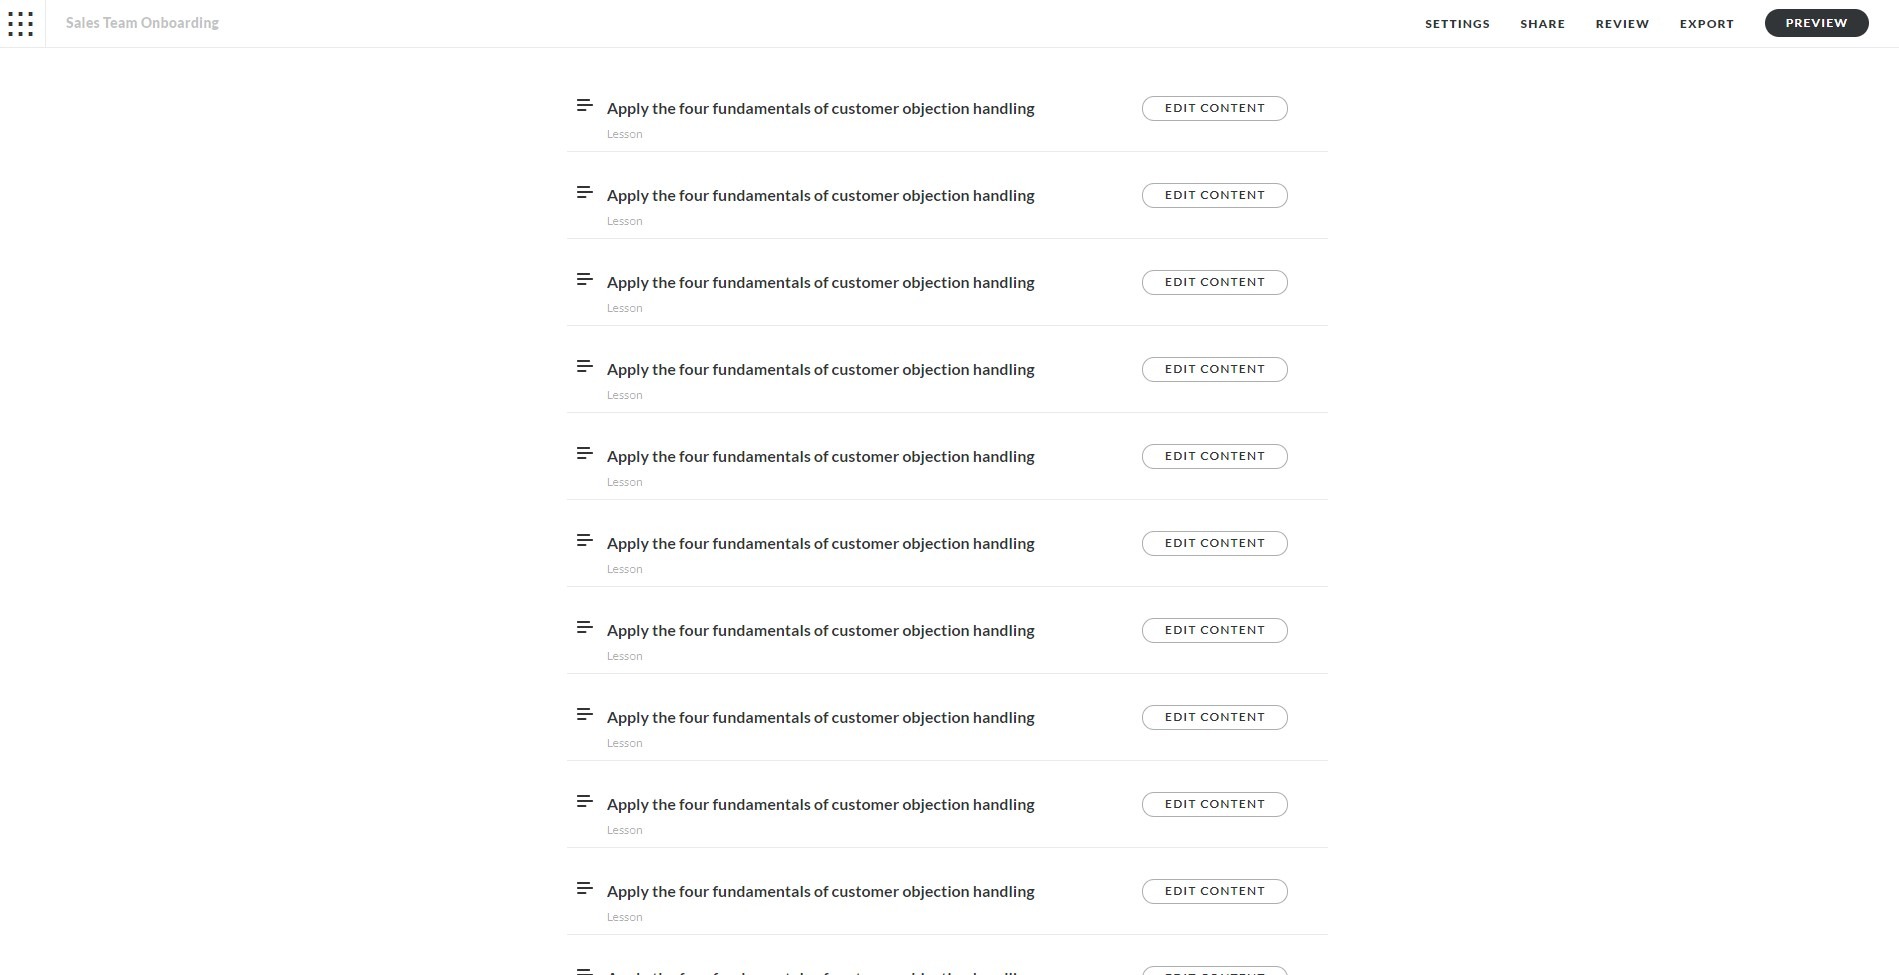
To build your lessons, simply add a title, press Enter, then select Lesson from the options given. We’d recommend adding all the lessons you will need – that is, every decision point on your flowchart – before you start, so you can program buttons as you go.
Add the title of the scenario as the title of your lesson and add a Text block of your choice to add any information that introduces it. Then add the content your learner has to react to. This could be text, text and image, video, audio, or something else! We’ll be using animations in this example.
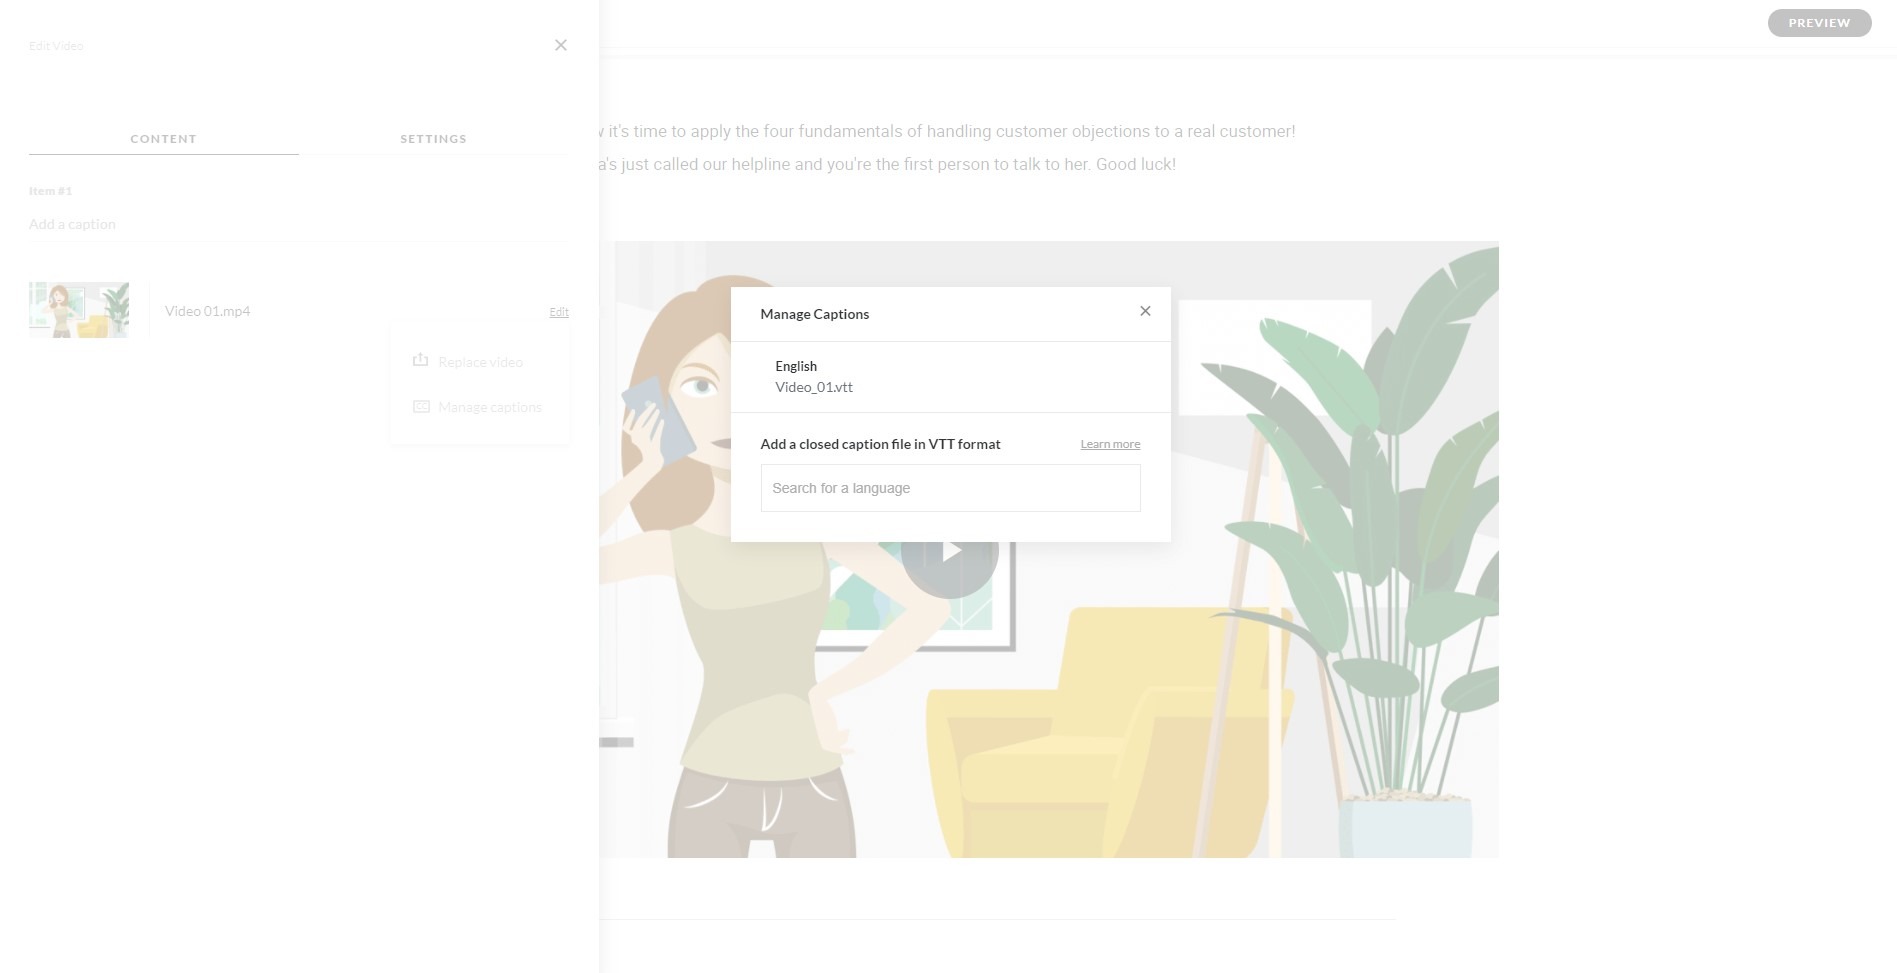
To add the animation, add a Video block, going to the Edit options, and selecting Replace video. Here you can also Manage captions: add closed captions and/or subtitles by uploading VTT files. Be sure to do this to keep your course accessible to any learners who cannot access audio content.
We made these animations in PowerPoint, using just the native animation features available in our favourite authoring tool! You can find out much more about animating in PowerPoint elsewhere on our blog, including in this post on taking your animations to the next level!
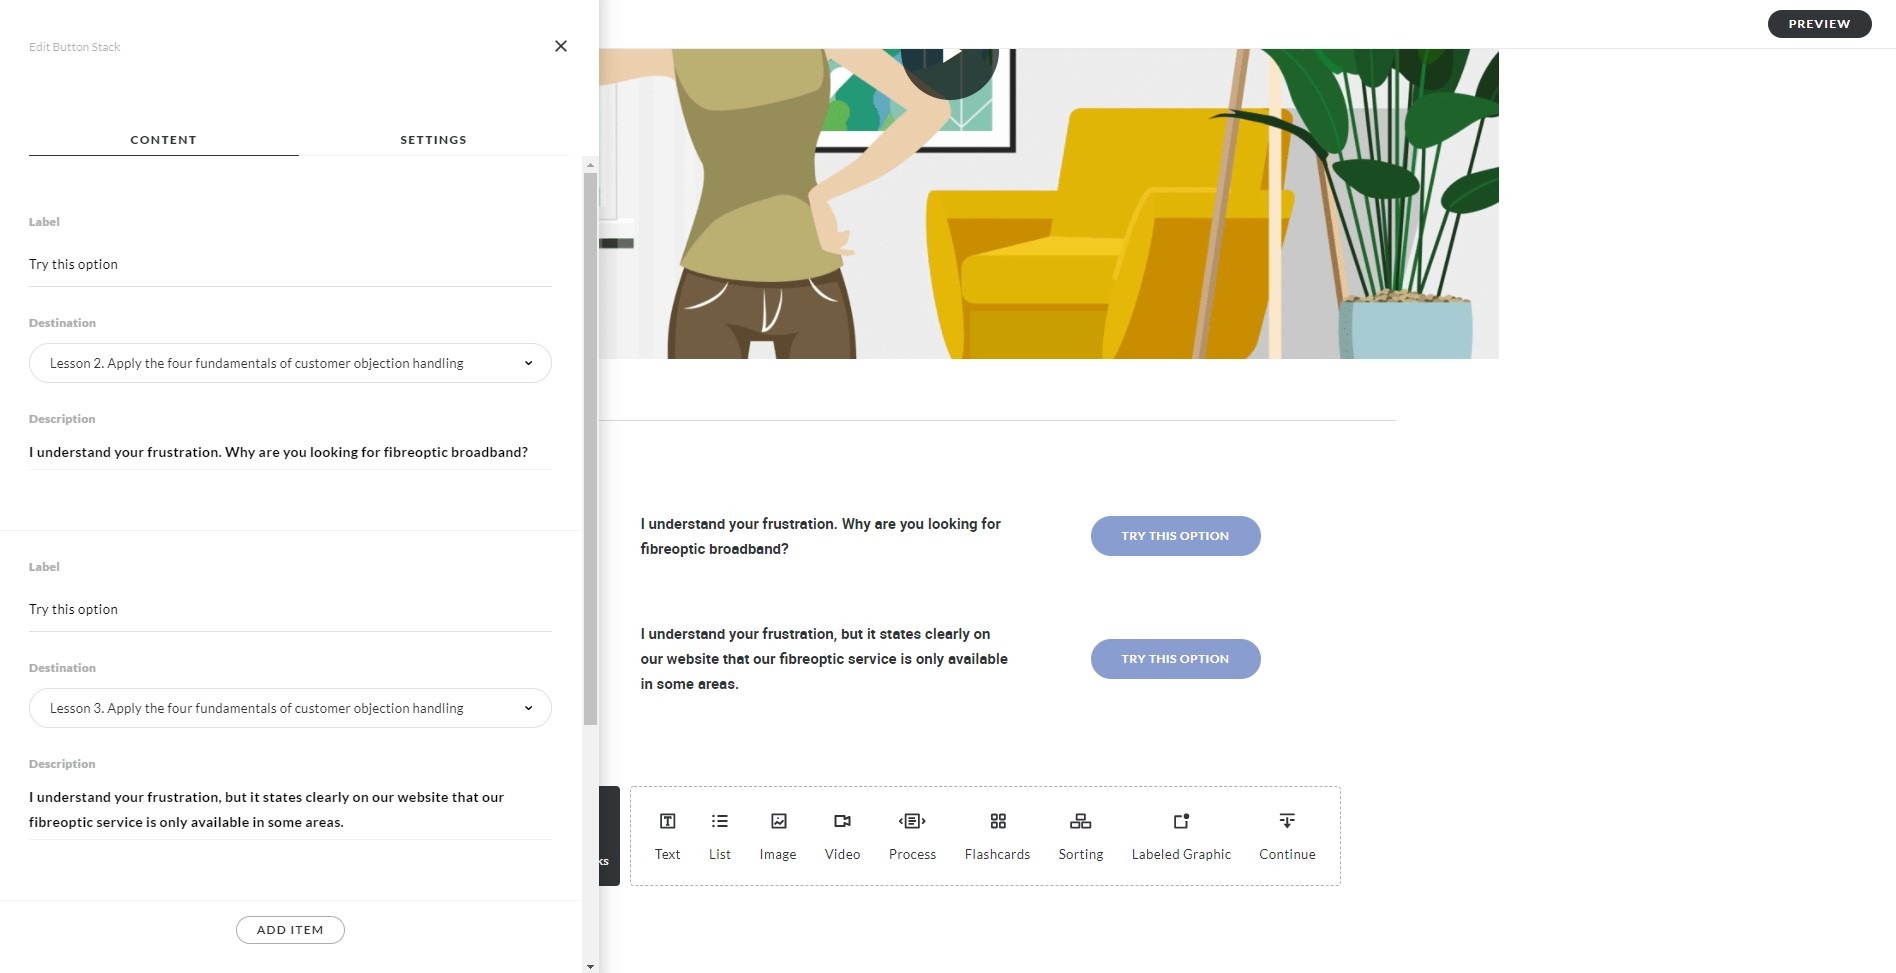
Now that your content is in place, it’s time to add your branching option. Go to the Block library, then Interactive, then Button stack. A button stack includes three buttons by default, but you can delete any buttons you don’t need or add as many buttons as you like! For each button, explain the choice the learner could make on the left. Then, go to the Edit options and choose the Destination for each button from the dropdown. This will be outlined in your flowchart.
Simply repeat this for each decision point to build your authentic assessment!
A couple things to note on this approach:
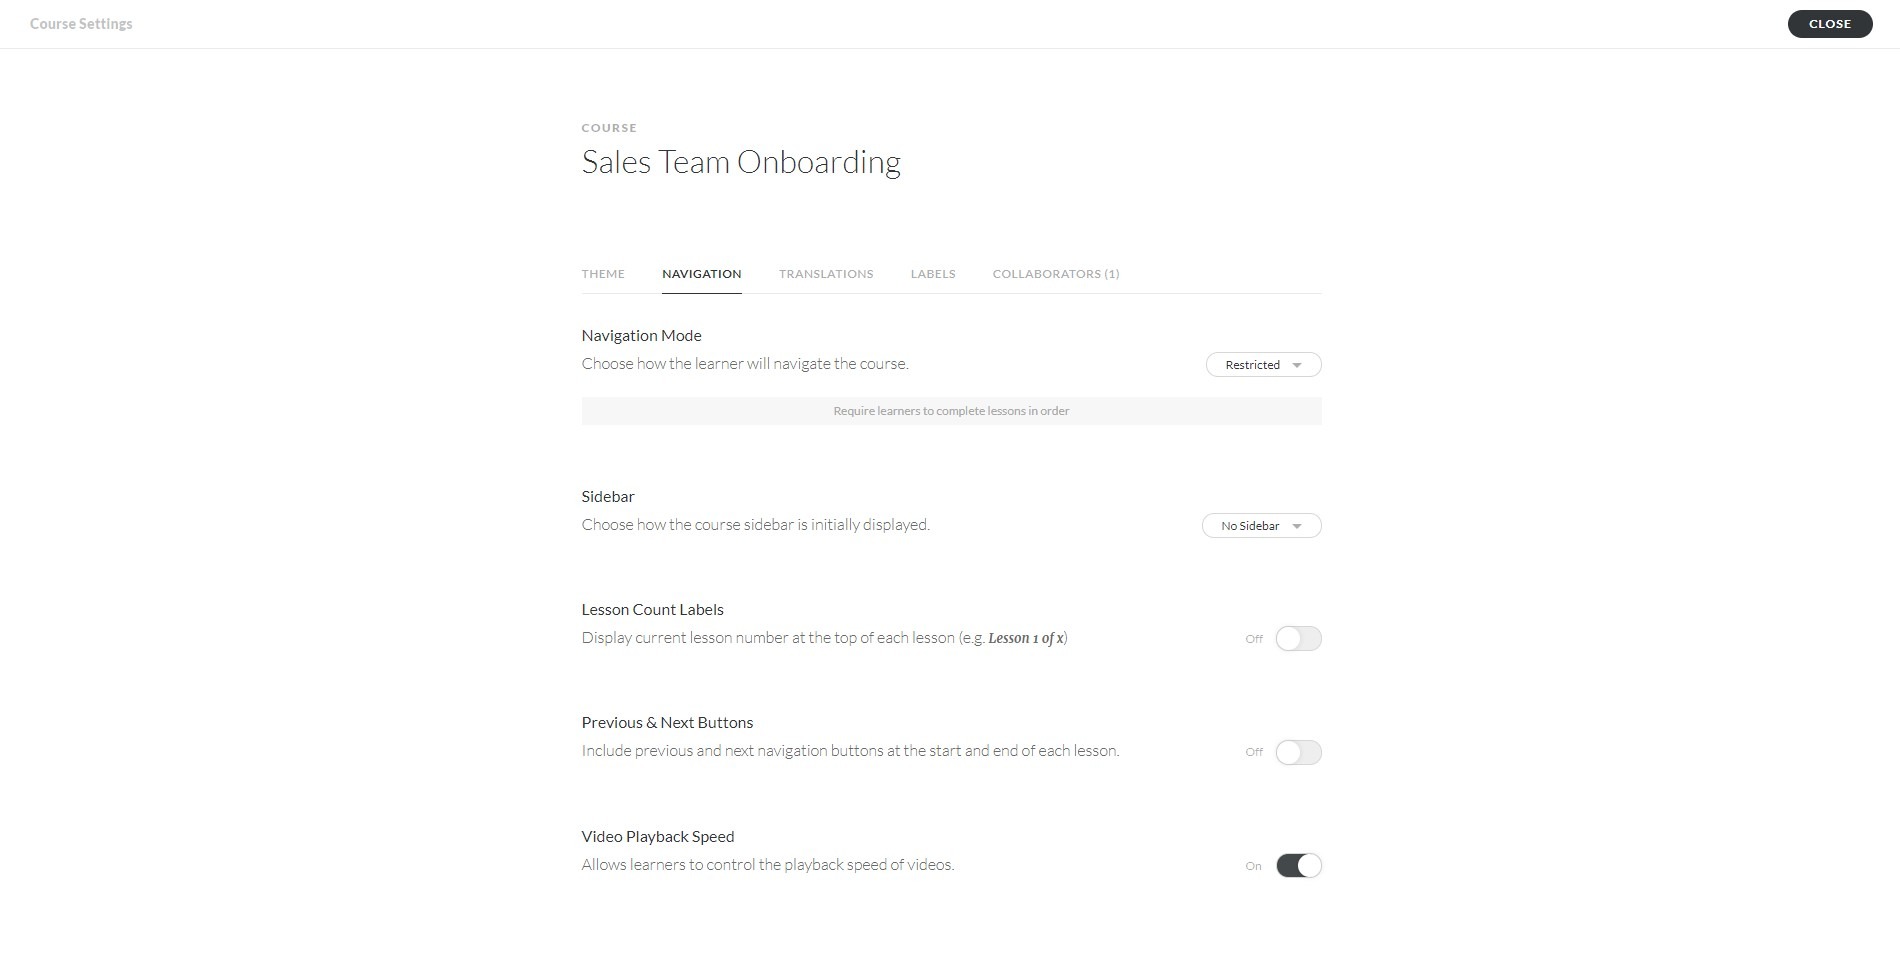
For the lesson and button stack approach to work, you need to restrict learner navigation to only the buttons in your course. Go to your Course Settings and select Restricted navigation, turn off the sidebar (No Sidebar), plus turn off the lesson count labels and previous and next buttons.
Keep in mind that if you are tracking completion by the percentage of course viewed, a true branching scenario built in this way will mean that a learner will not view all course content. Depending on the choices they make, they may skip entire sections of the course. Consider this when setting your completion criteria.
Option 3: Quiz with images
If you need to score an authentic assessment (Not sure if you do? More on that in Part 1), a quiz is the way to go. Rise’s quizzes lend themselves to fake branching, rather than true branching, as it isn’t currently possible to programme branching between questions in a quiz interaction.
To create fake branching, we’ll use this flowchart:
As you can see, there’s just one path on this flowchart. At each decision-point, the learner gets corrective feedback. This can be the same for each decision, different for correct and incorrect decisions, or different for each possible decision. Whatever you choose, make sure that feedback for incorrect decisions, or decisions that aren’t best practice, explains what the learner should have done and the consequences of making this incorrect decision in real life.
A fake branching scenario like this is quick and easy to build as a Rise quiz! The example course shown in the GIF below was built using the quiz method: open and explore the example here.
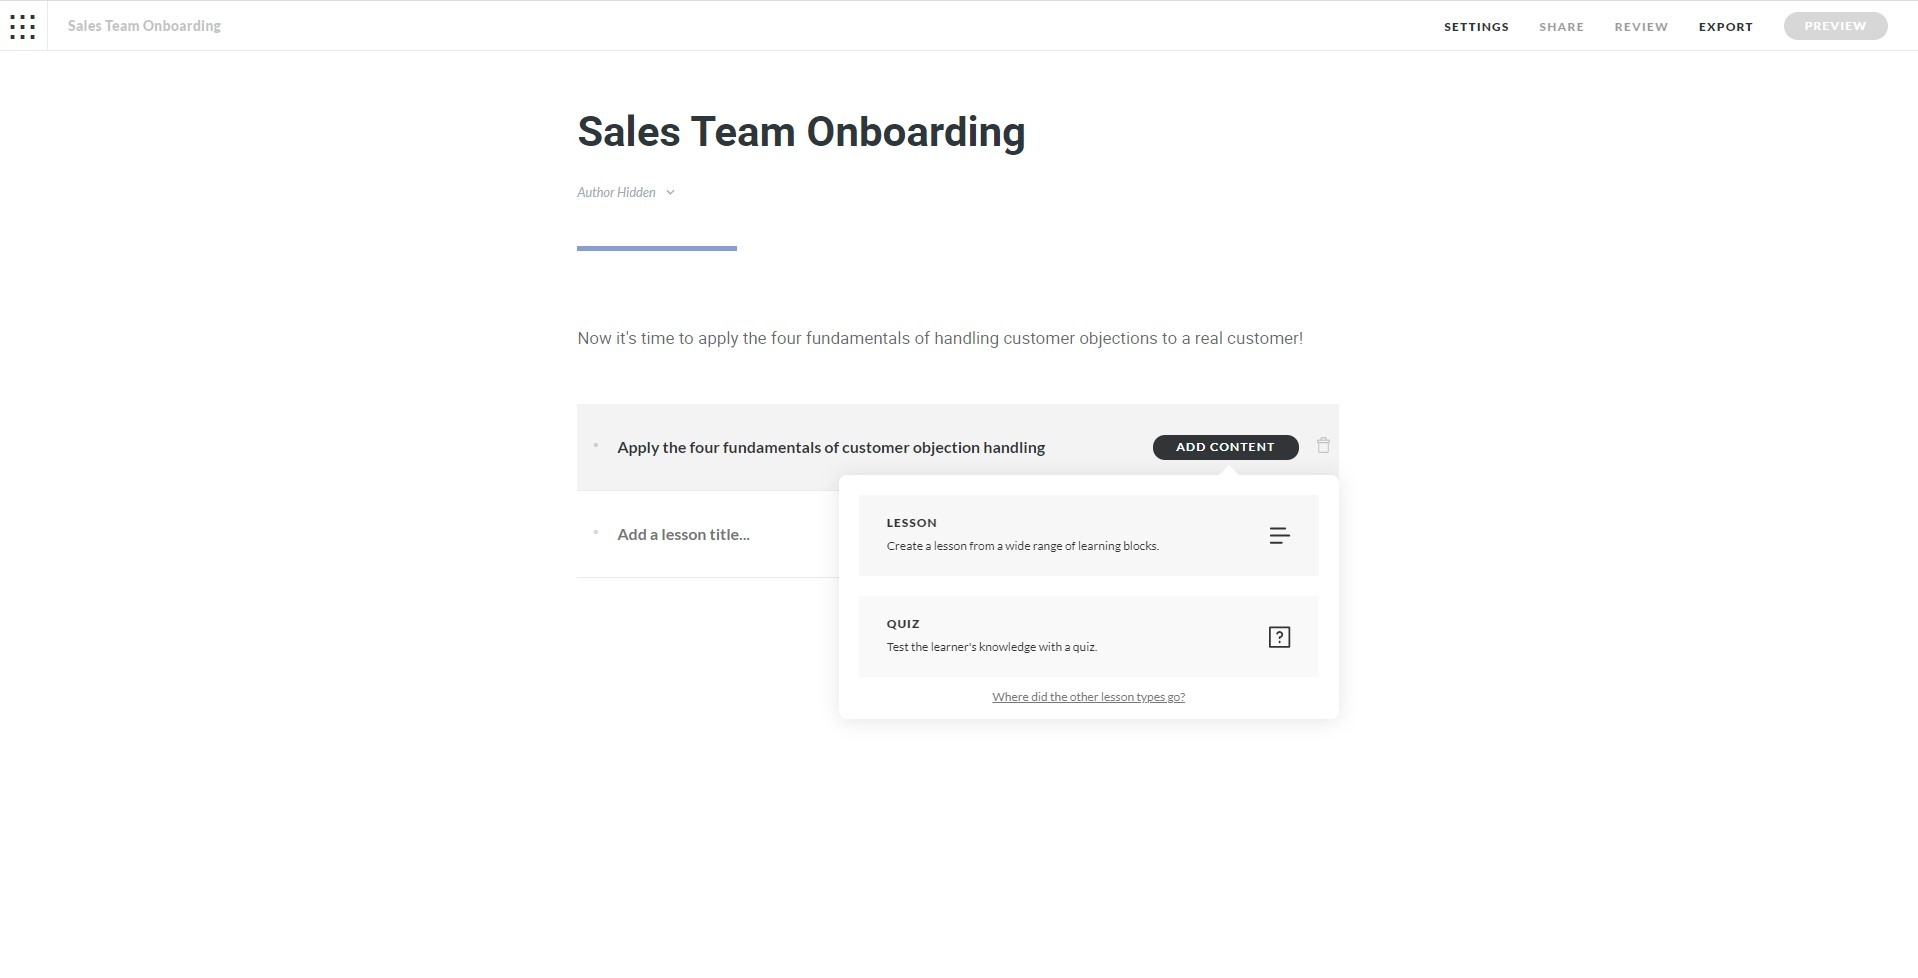
To create your authentic assessment, first add a new lesson to your Rise course. Add a title, press Enter, then select Quiz from the options given.
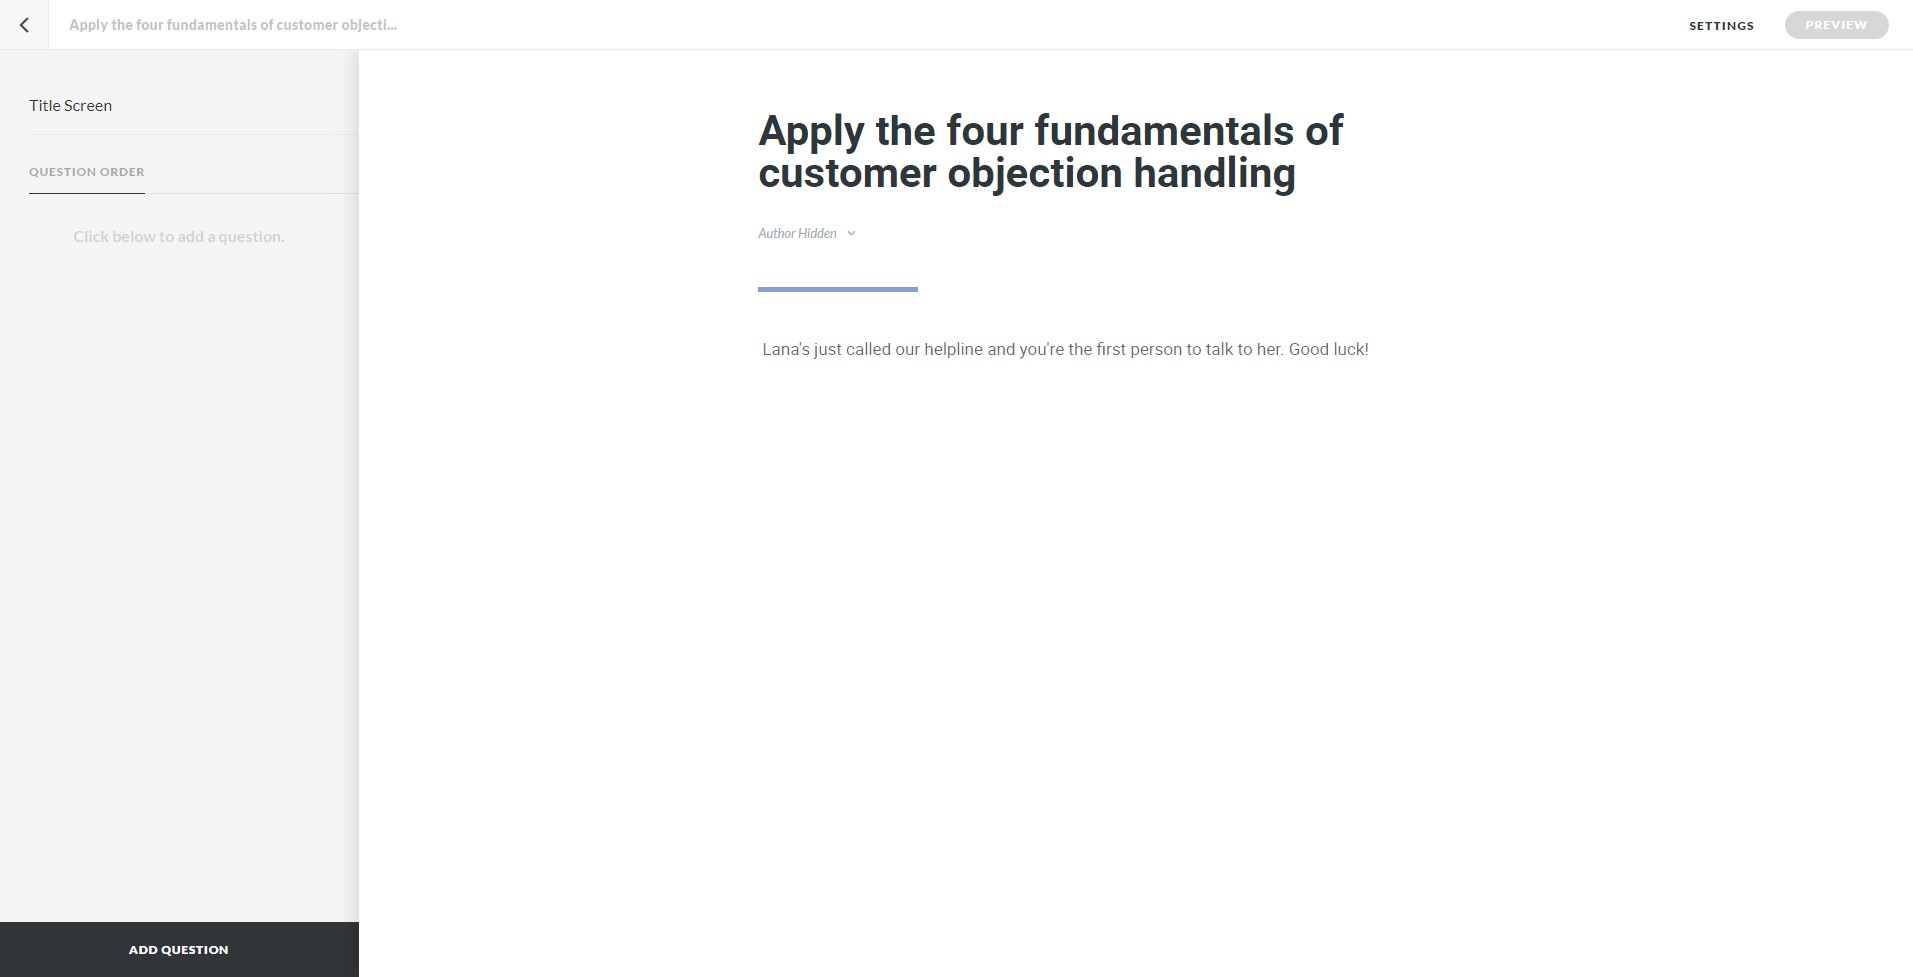
On the Title Screen, add the title of the scenario and any information that introduces it.
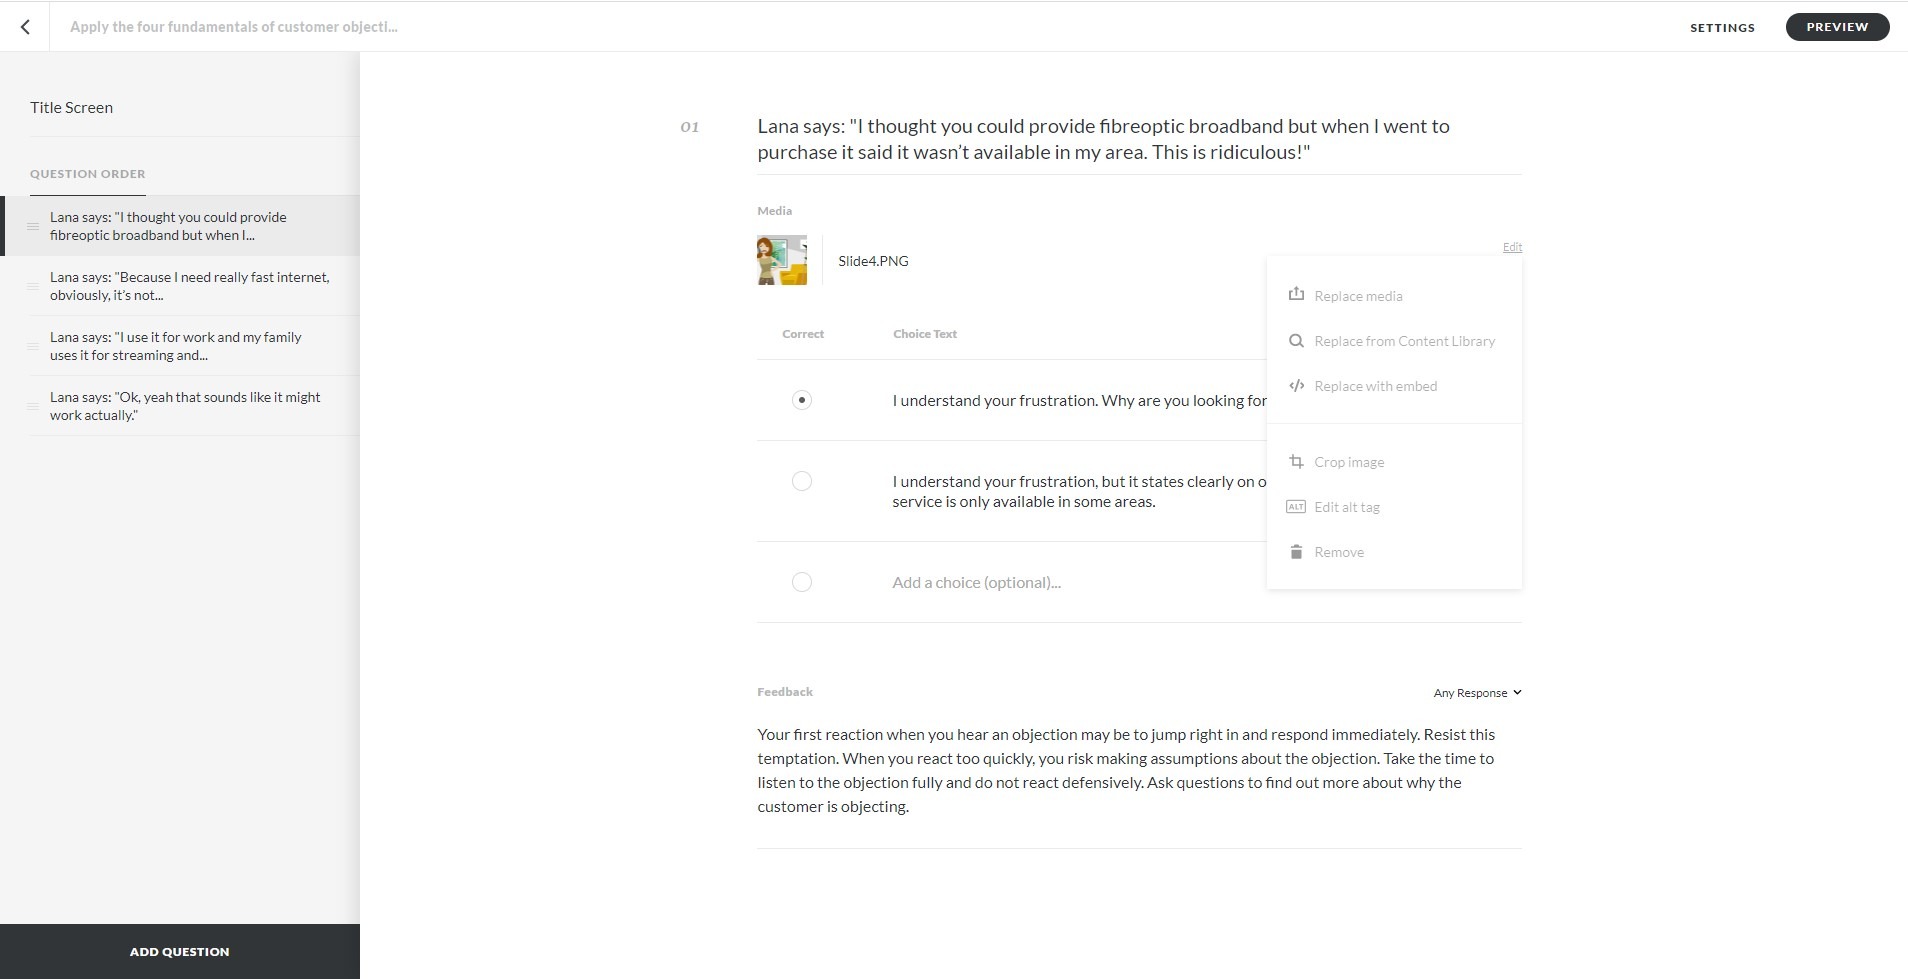
Each question should be a decision the learner has to make and each answer should provide them with a different choice. Multiple choice is the question type we’ll use here, though you could multiple response if there is more than one thing that a learner would need to do at a particular decision point.
Add your question title (the decision the learner has to make) at the top, and all possible choices in the Choice Text column. Use the camera icon to add an image, video, or audio. This could provide the content for a learner to make a decision about (i.e. what they would see/hear in the real world) or just add an element of realism (e.g. a cartoon of a character they are talking to in the scenario). Don’t add decorative images, as these may be distracting or confusing.
Use the buttons on the left to indicate which option is correct – this will be important for scoring. Then, choose Any Response, Correct/Incorrect, or By Choice from the Feedback menu at the bottom of the page. Add your feedback for each choice in the feedback box/column.
Simply repeat this for each decision your learner has to make, and your quiz is all set up!
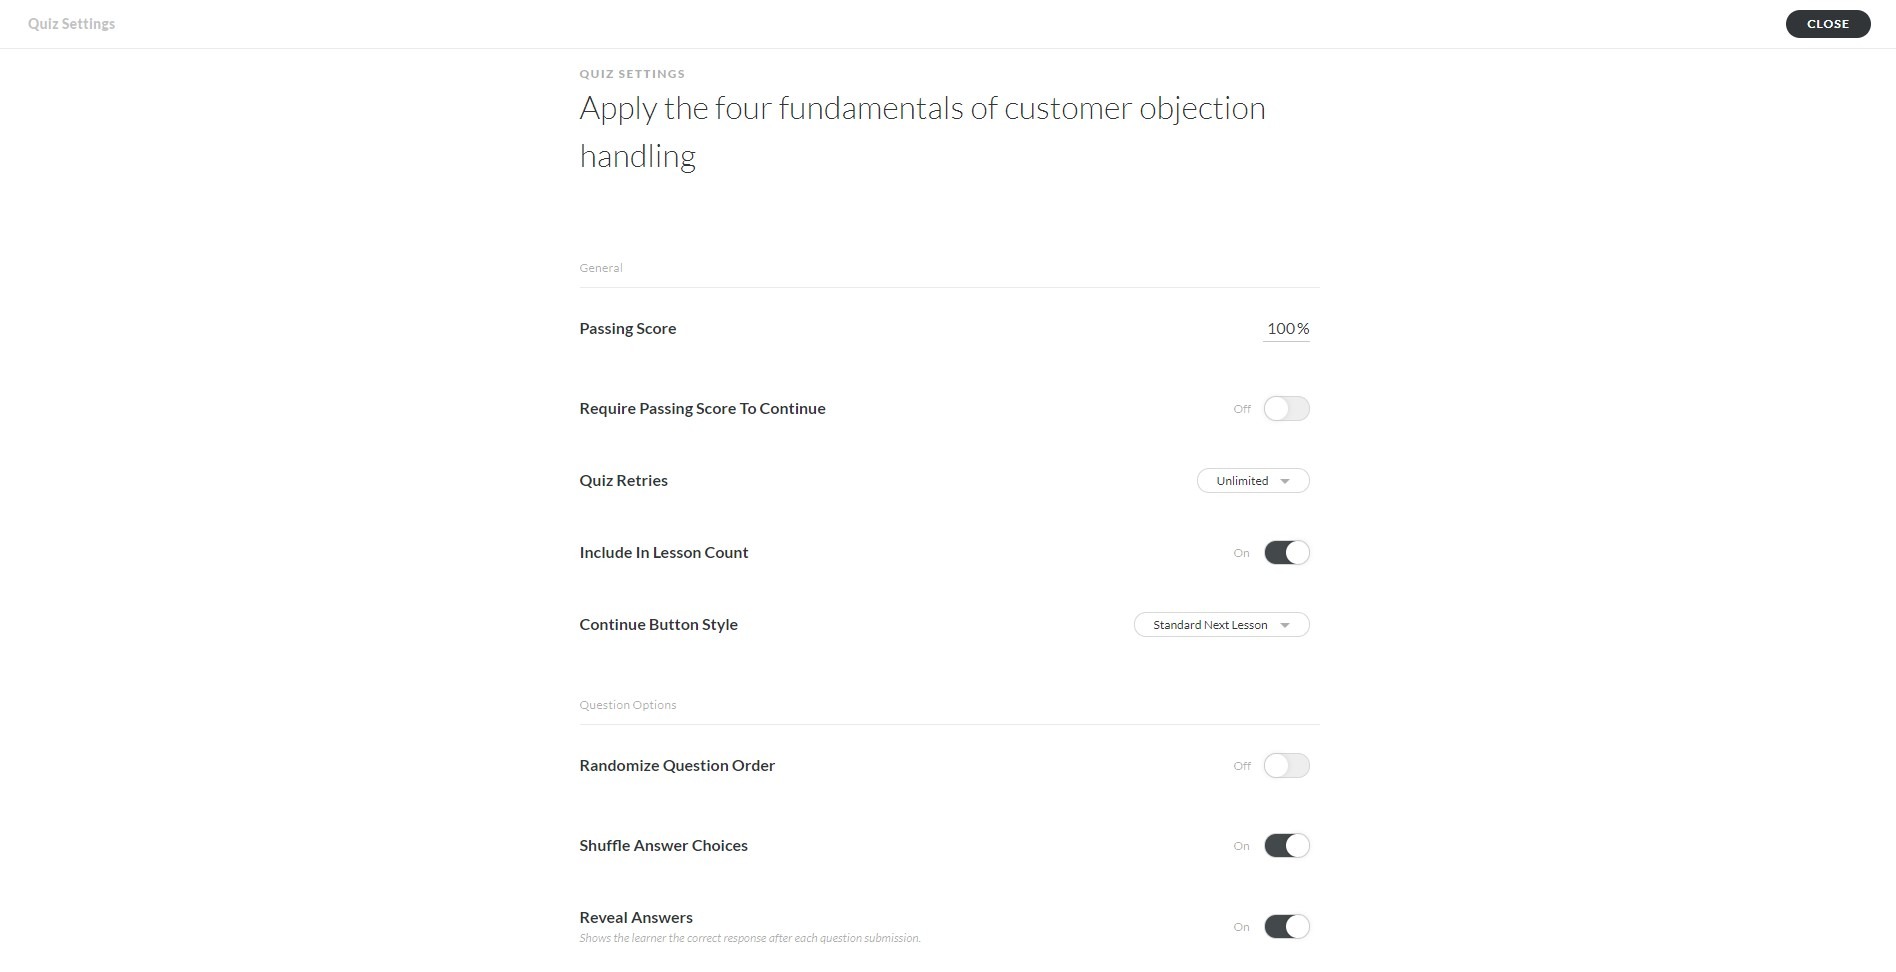
Before you finish, select the Settings button to make some final adjustments. The only important thing that you must do is keep the Randomize Question Order option turned off. Turning this on means the decisions in your scenario will be jumbled up and it won’t make any sense!
All other options are up to you to decide; scoring, progression, number of retries etc. should have be considered when planning your learners’ experience up front. If not, take the time now to think about what options make sense for the kind of experience you want learners to have with your assessment.
That’s it for this part of the series! In our final post, we’re looking at even more bespoke interactivity when we build out authentic assessments in Articulate Storyline. Revisit the earlier parts of the series if you want a recap:
The final instalment of our four-part series on eLearning assessments takes us to Articulate Storyline, where we’re going to level up one final time by creating realistic scenario interactions!
Interactive PowerPoint quizzes are a great way of levelling up your eLearning content. Whether used for formative or summative assessment, interactive quizzes help learners to have a more engaging experience, identify areas where they need more help, and retain more of what they learned in the course of their training. In this post we cover all the practicalities of creating interactive assessments in PowerPoint.
In this series we are taking you on a journey through the theory behind effective eLearning assessments and practical tips for building assessments it in three different authoring tools: Microsoft PowerPoint, Articulate Rise, and Articulate Storyline. In this post, we lay the instructional design foundations.