PowerPoint morph is a magic little transition that’s been around for a while now. As the world gradually discovers just how useful it really is, it’s turning out to be the gift that keeps giving. We’ve compiled a trilogy of how-to tricks so that you can up your morph ante.
Before we get going, if you take a look at this and you start breaking out in a morph sweat, then you might want to take a look at this article first: it explains the basics of morph and how it works.
In this tutorial find out how to use morph to create a cut-away effect that can be used in everything from blueprints and sketches, to interior and exterior photographs.
PowerPoint Morph Tutorial #2: Lens reveal
So after completing the first of your morph quests in our PowerPoint morph tutorial series, (revisit that adventure here if you want to), it’s time to continue our journey with this nifty little trick – the lens reveal:
Use cases
This is a morph trick that would give Specsavers a run for their money – a twist on the traditional “click to reveal” slide. It’s useful for those moments when you want to give the audience a blurry indication of what’s to come, without risking any spoilers.
Step-by-step tutorial
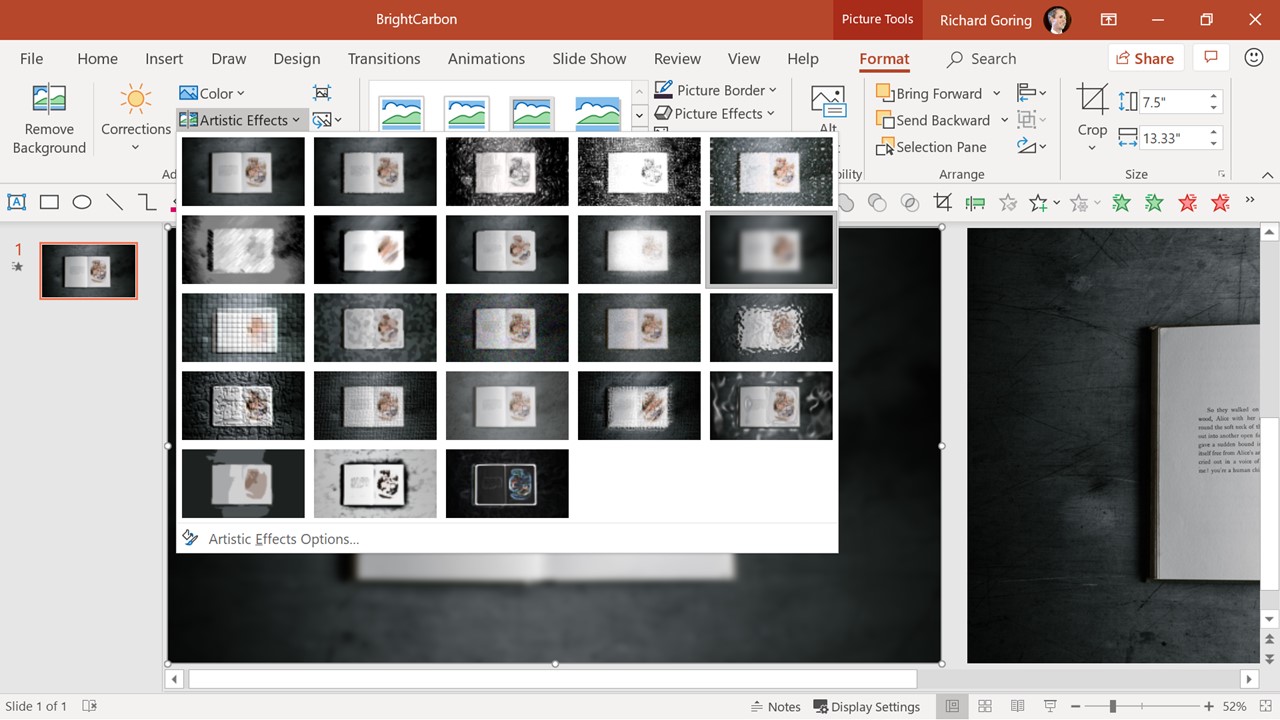
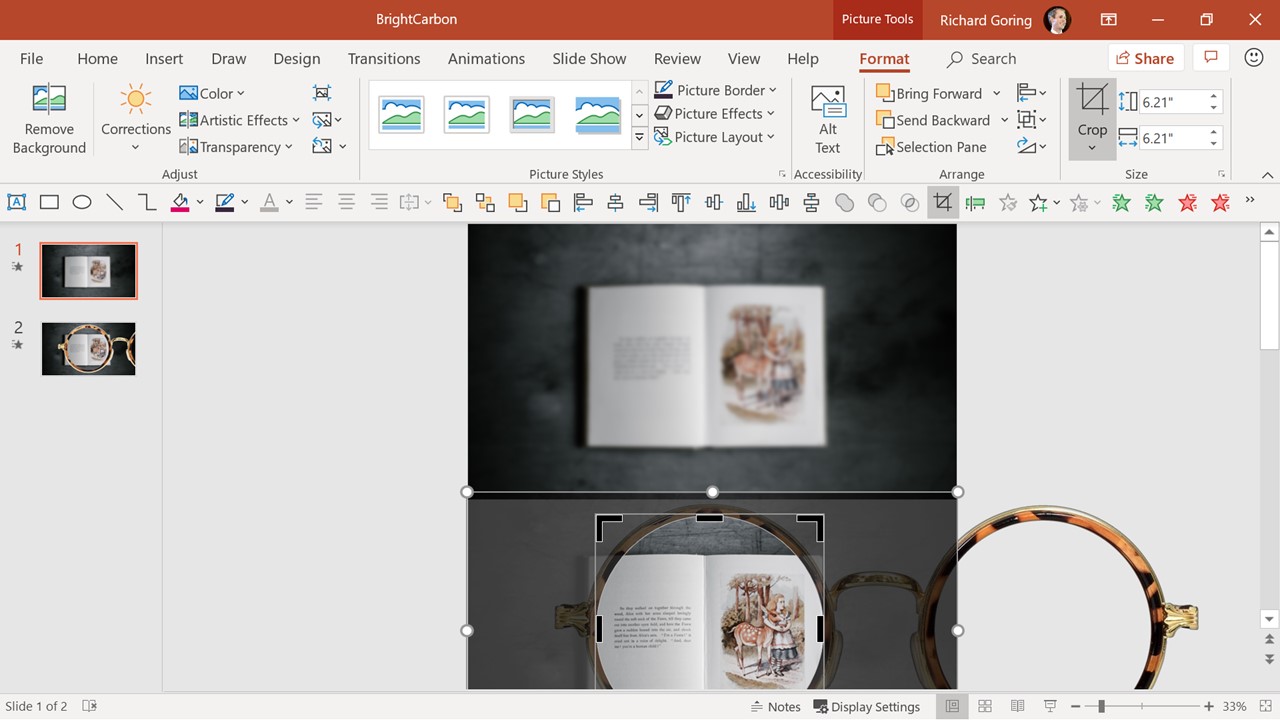
Insert any image that you want to reveal part of, either by dragging it onto the slide or choosing Insert > Picture. Make sure it’s a decent resolution, as you’ll be magnifying it and don’t want it too pixelated. Ideally a minimum of 1000 pixels as the smallest dimension.
Position the image on the slide. This example is full screen, but it doesn’t need to be. In this case, as the revealing lens will be coming from outside of the slide, it’s best to have at least one edge of your image on the edge of the slide, otherwise, you will have to use an overlay to mask the lens coming onto the blurred image. Make sure that it’s the final position, as changing it later will be a pain.
Copy the image with Ctrl + C, paste it with Ctrl + V, and move the copied image out of the way for a moment.
Select the original image and blur or recolour it with Picture Tools Format > Artistic Effects > Blur or Picture Tools Format > Colour (or both), to give you the background image that you will reveal part of.
Now select the new pasted image and line it up on top of the blurred background image using the alignment tools Home > Arrange > Align.
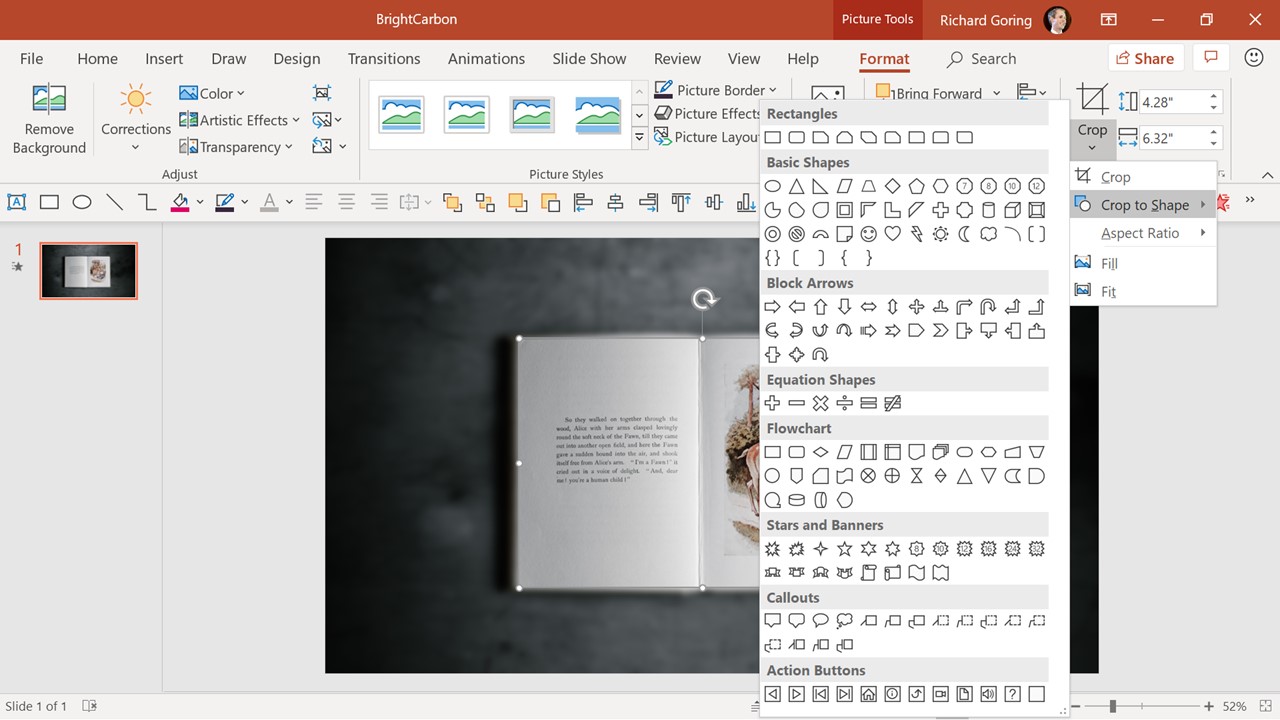
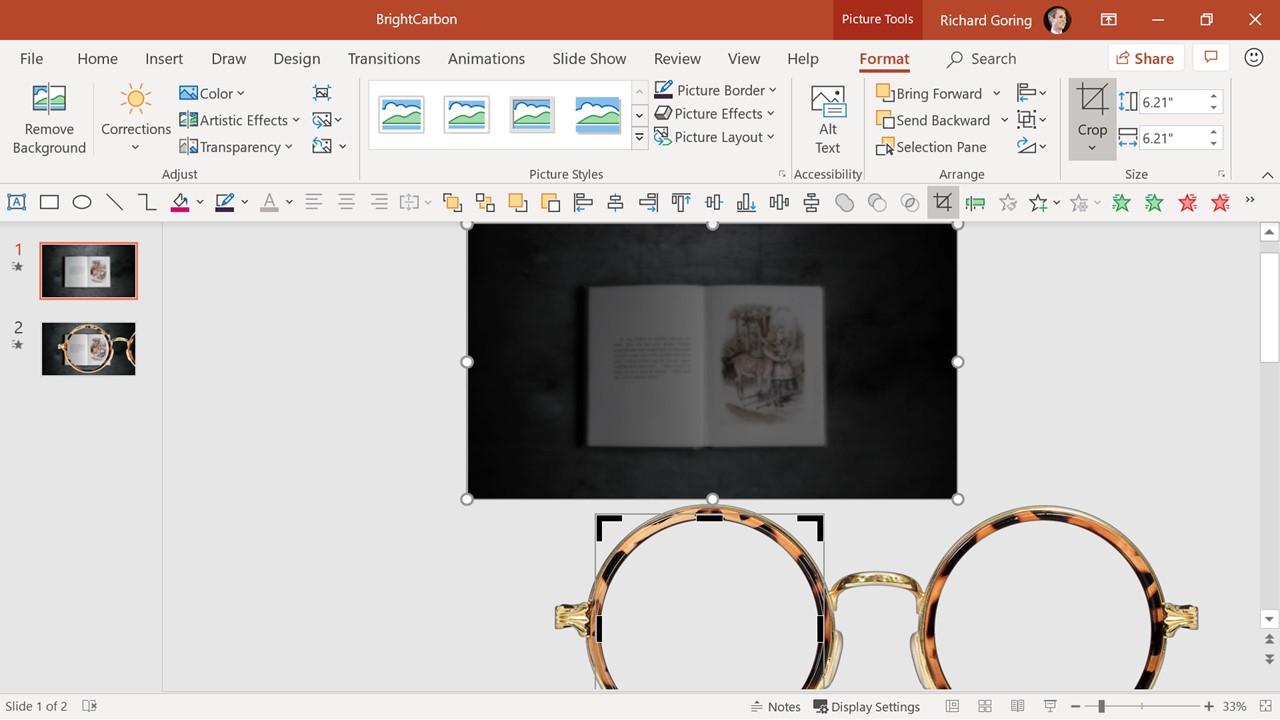
At this point you need to decide what your lens is going to look like. You could just choose a simple shape like a circle or square, or you may want to use an object to house the lens, like a pair of glasses. a) If you pick a simple shape, then select just the pasted image and crop it down to the area you want to reveal with Picture Tools Format > Crop. You may wish to create a non-square/rectangle shape for your highlight, in which case, change the crop shape with Picture Tools Format > Crop > Crop to Shape. You can also ensure a precise shape by choosing a 1:1 aspect ratio with Picture Tools Format > Crop > Aspect Ratio (for example, 1:1).
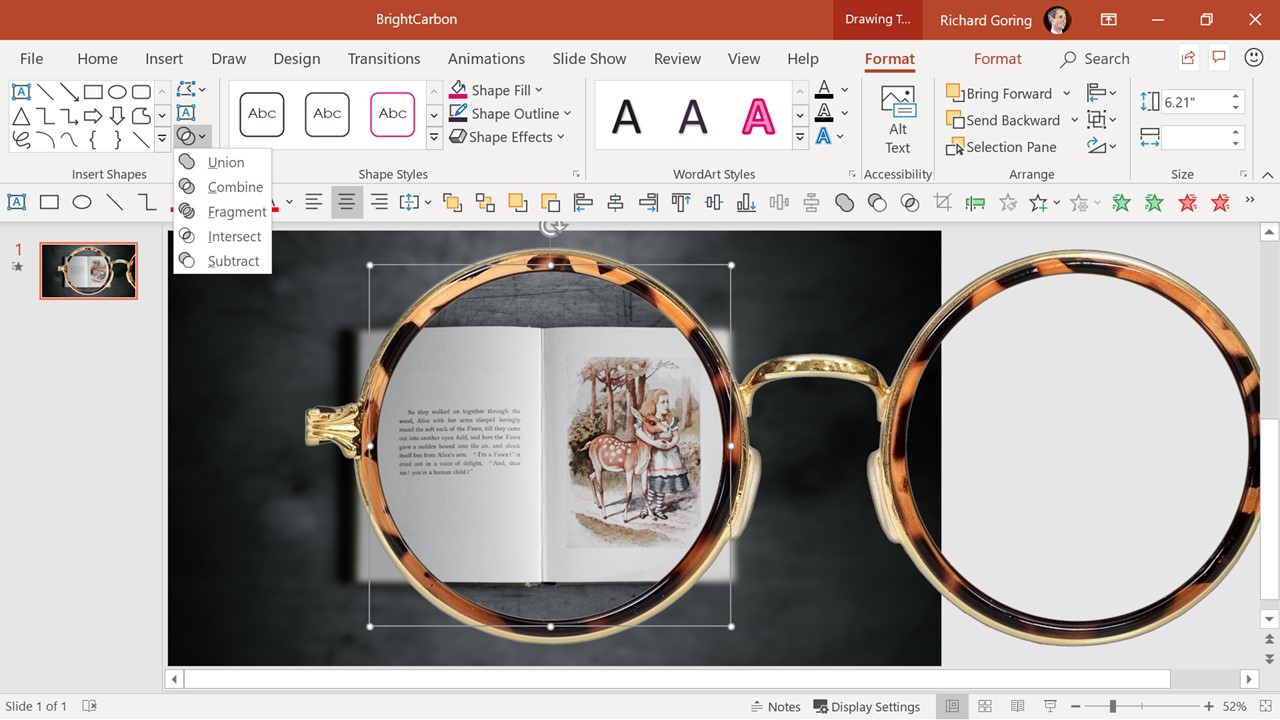
b) If you want an object to house the lens, then you’ll need to create a shape that fits within that object. It could be a simple standard shape like a circle, in which case, follow the steps above. If you want something else, you’ll have to create a custom shape, either by using the Freeform shape tool with Insert > Shapes > Lines > Freeform: Shape (second from the right in Lines), or create something custom using standard shapes and manipulating them with Drawing Tools Format > Merge Shapes. Once you have a shape that you’re happy with, select the copied image and then the new shape (using the Shift key to select both), and use the Intersect tool in Drawing Tools Format > Merge Shapes to crop the image to that specific frame. Then, place your object over the newly cropped image.
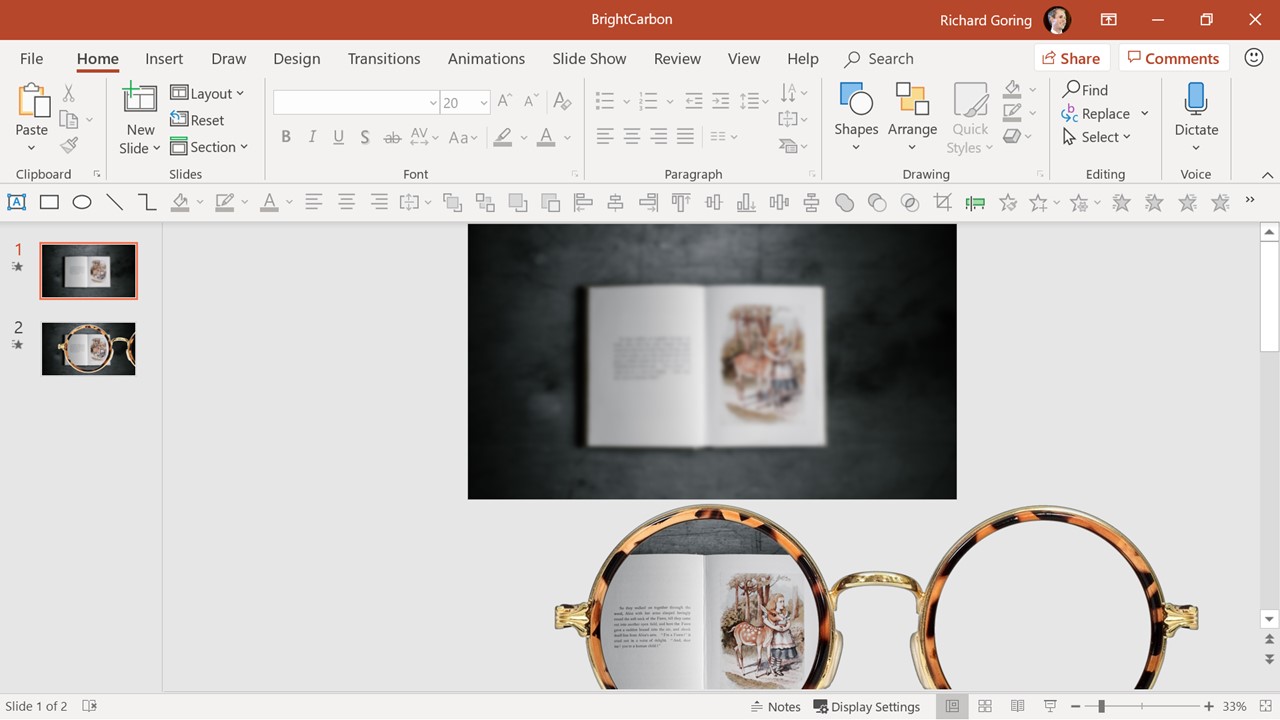
You should now have a blurred/coloured image in the background, with a highlighted portion. Duplicate the slide, by selecting it in the thumbnails on the left and using Ctrl + D.
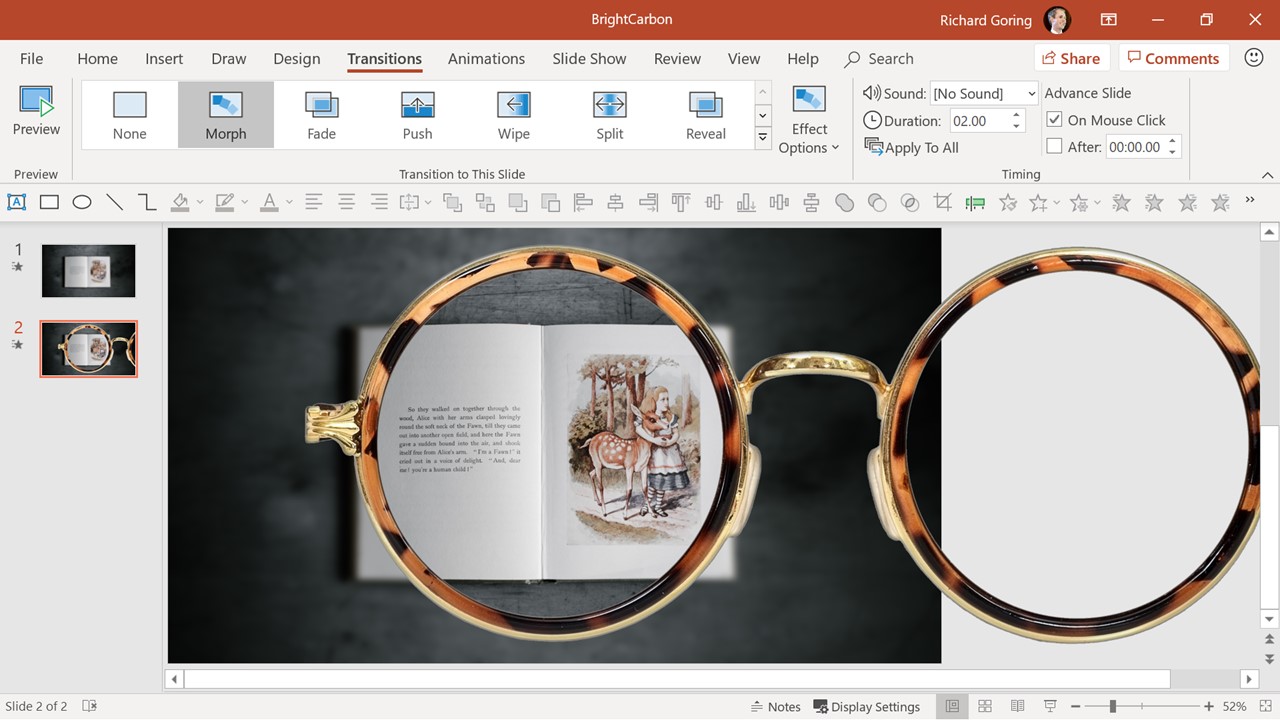
On the first slide move the cropped reveal image off the edge of the slide, so that when you use the Morph transition to go from the first to the second slide, the reveal lens moves into the image from the edge of the screen.
Select the cropped reveal image and choose the crop function with Picture Tools Format > Crop to see the lens reveal part of the image in colour and the full original image greyed out. Move the image and line it up with the background image on the slide, so that one sits on top of the other. Note that in doing this, you’ll no longer see anything inside your lens, as the image has been out of it. Don’t worry, this is supposed to happen!
If you add a Morph transition to the second slide with Transitions > Morph, then when you go into Slide Show mode, PowerPoint will recognise that the image is the same on both slides, just positioned and cropped differently. When you move from the first to the second slide, it will then reveal the parts of the blurred image between the first and second lens positions as it moves across the slide.
It’s a great way to focus attention on what’s important, and of course, don’t think you need to stop at just this. You could create a whole series of slides where you pan around revealing different parts of the same blurred image.
You can also change the size of the crop area, to show smaller and larger amounts (but be careful to change the size using the black crop grab handles, not the white shape grab handles).
Don’t get carried away with it, but used sensibly, you can help your audience focus on what’s important on the slide and minimise distractions.
And there you have it! Another sure-fire way to wow your audience using morph.
Logo slides are a regular fixture of presentations, but they're often ugly and messy and tend not to do too much to build the credibility they're supposed to. Follow along to learn how to make a logo slide look neat and tidy, and if you want a stretch task, get inspired by some competitor-trouncing alternatives
When it feels like the call is to make more and do it faster, design smart and build a presentation toolkit packed with effective layout slides. We show you how to start off by building five of your own.
This article is dedicated to the bit hitting combination of PowerPoint and PDFs, and three particular use cases that will have these two giants working together in perfect harmony: how to convert PowerPoint to PDF on Windows and macOS, how to convert PDF to PowerPoint, and how to insert a PDF into PowerPoint.
BrightCarbon provided us with a fantastic service ... and left us with a presentation that secured us a £4 million contract. BrightCarbon is our first choice for presentations in the future.


Morph #2 is wonderful. But where do you get the glasses?? That’s what I was hoping to find out.
thank you, BrightCarbon!
Hi Susan,
Thanks for your comment! Here’s the link to the image of the glasses https://www.shutterstock.com/image-photo/glasses-isolated-on-white-background-design-1075226684. You can download the image, and then remove the background in PPT using the ‘Set Transparent Color’ setting in the Picture Format > Colour dropdown.