Masking and animation. Name a more iconic combination… I’ll wait. Static stencils are all well and good (and they can be very good), but adding even the simplest animations will manoeuvre your presentation into top gear, which is no bad thing when you’re up in front of an audience wanting to make a great impression.
In case you didn’t know, you’re actually reading the third article in a series of three about masking in PowerPoint. Haven’t caught up yet? No worries. Click below to level up your masking abilities:
Masking effects in PowerPoint: Stencils and animation
Masking effects in PowerPoint: Stencils and animation
We like to harp on about animations and their ability to transform your presentation, but that really is the case. You may already be a stencils master having read our previous post on the topic, in which case, now it’s time to use PowerPoint animations to make your slides even more powerful.
1. Mask reveal
The best way to keep your audience engaged with your presentation is to feed them information bit-by-bit. By plonking everything on a slide, you’re effectively giving them a simplified word document, and they’re likely to tune you out while they read the slide content. Not ideal. Animation is the alternative.
This is especially helpful when you’re thinking about data visualisation. Graphs and charts are so often plonked onto the slide, but animation can be a clever way to reveal information in a way that supports the story the speaker is telling.
For example, you could have each of these bars come in one by one, like this:
Or in groups, like this:
Both of these animations use a cheeky mask, and it’s super easy to make your own. Here’s how to…
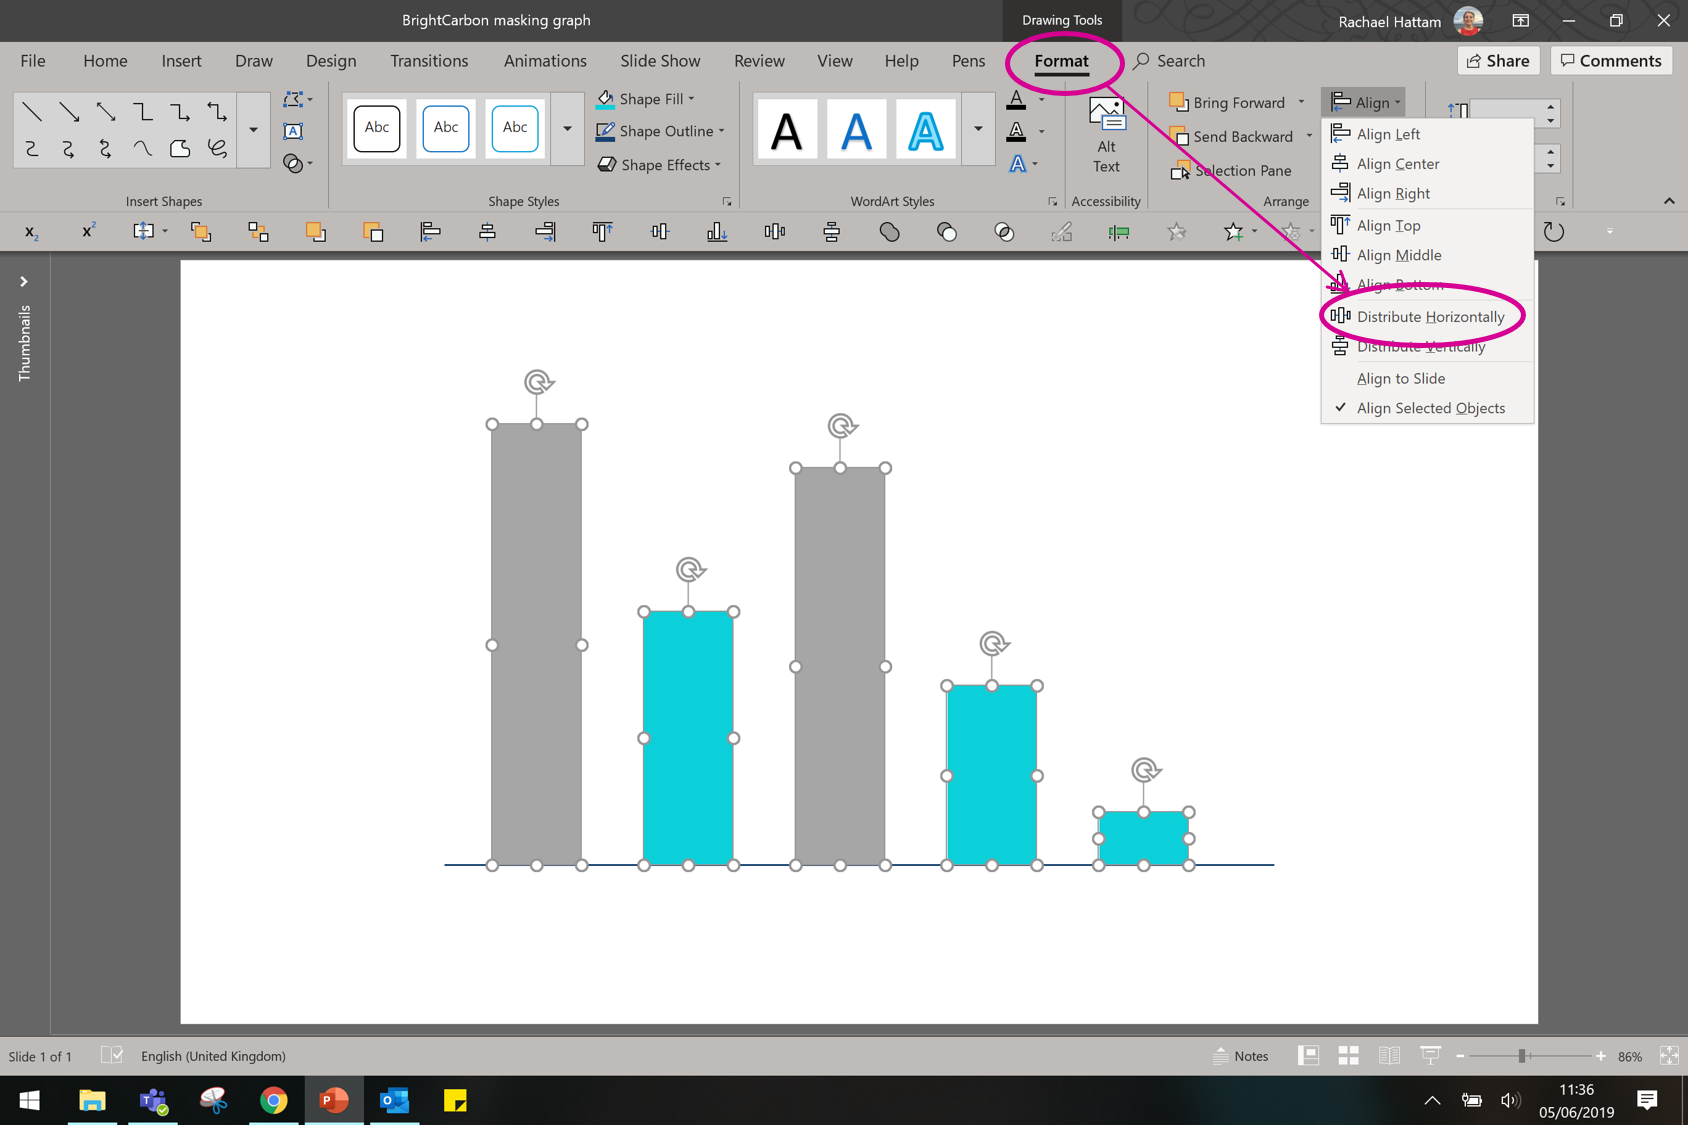
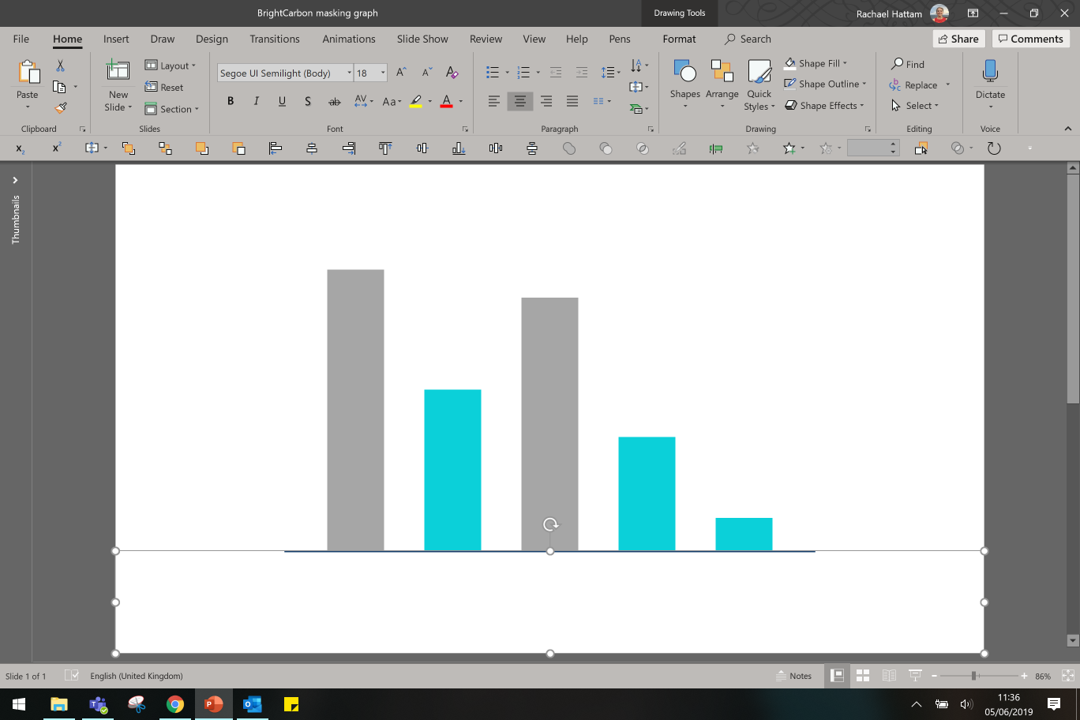
Create your graph using lines and shapes in PowerPoint. Use the alignment tools to make sure everything is nicely distributed and all lined up.
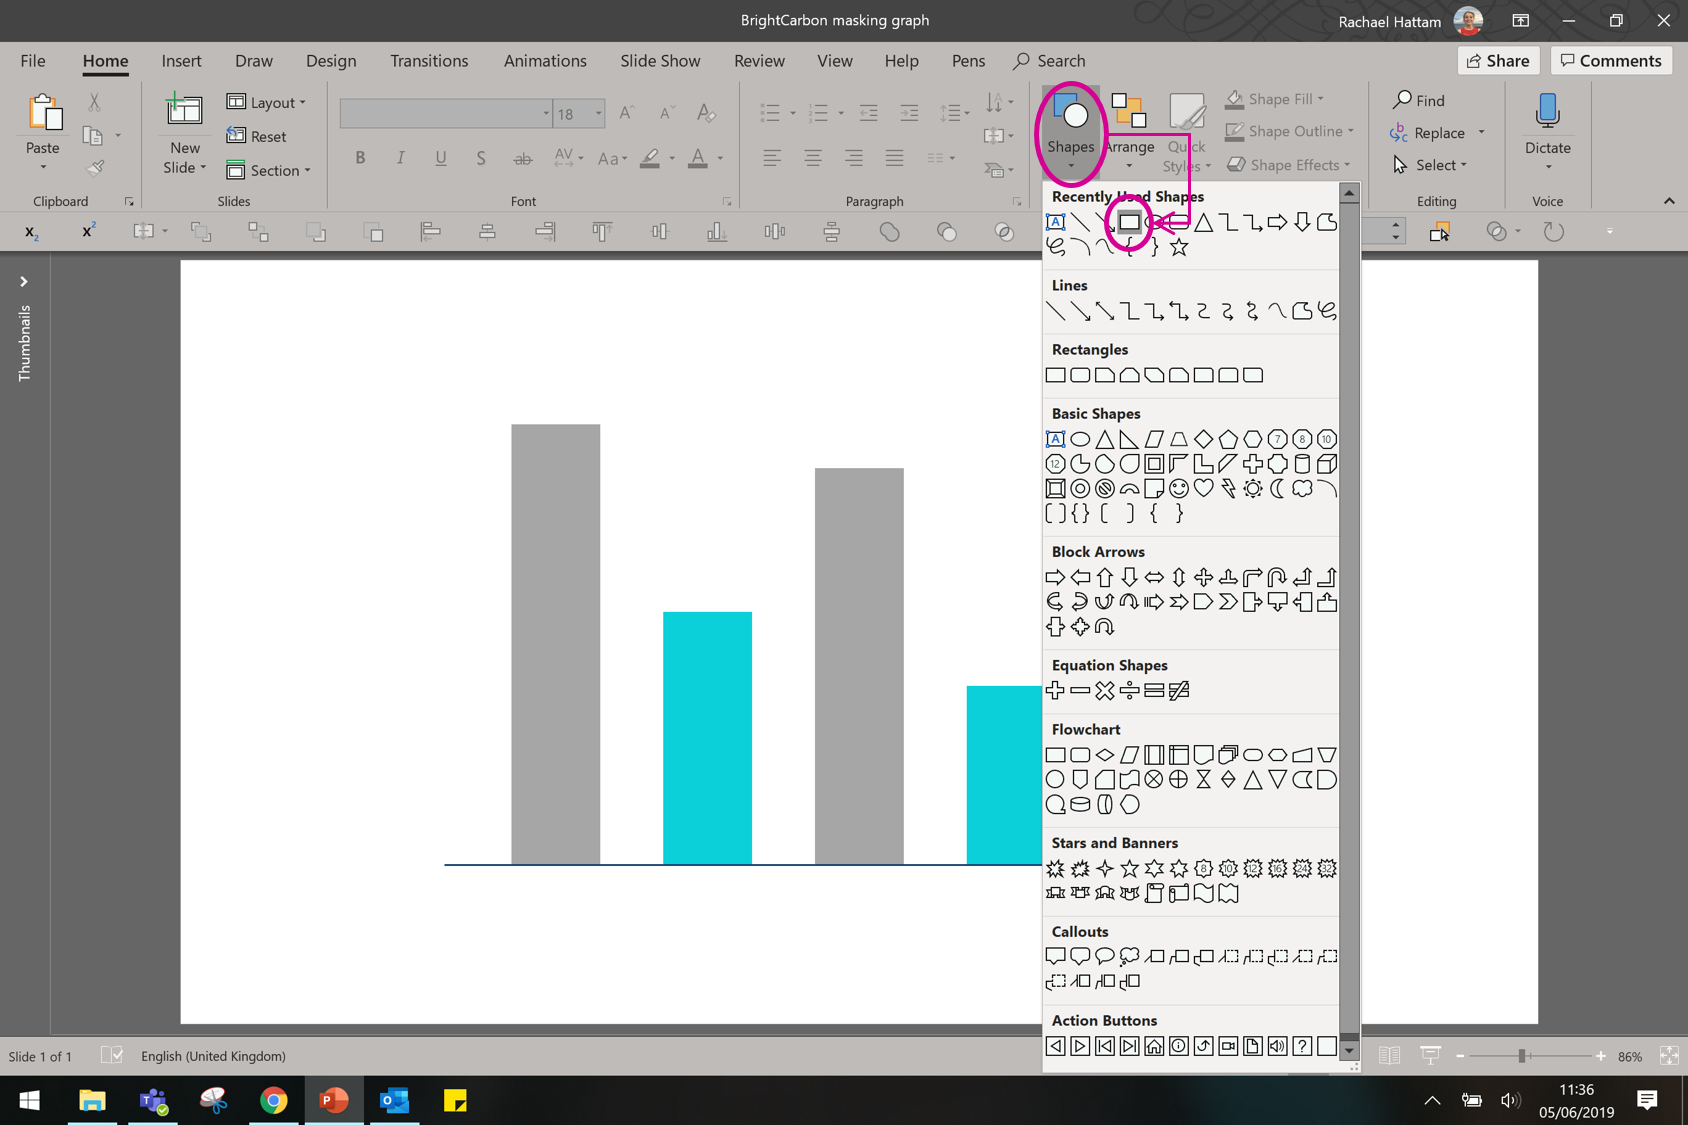
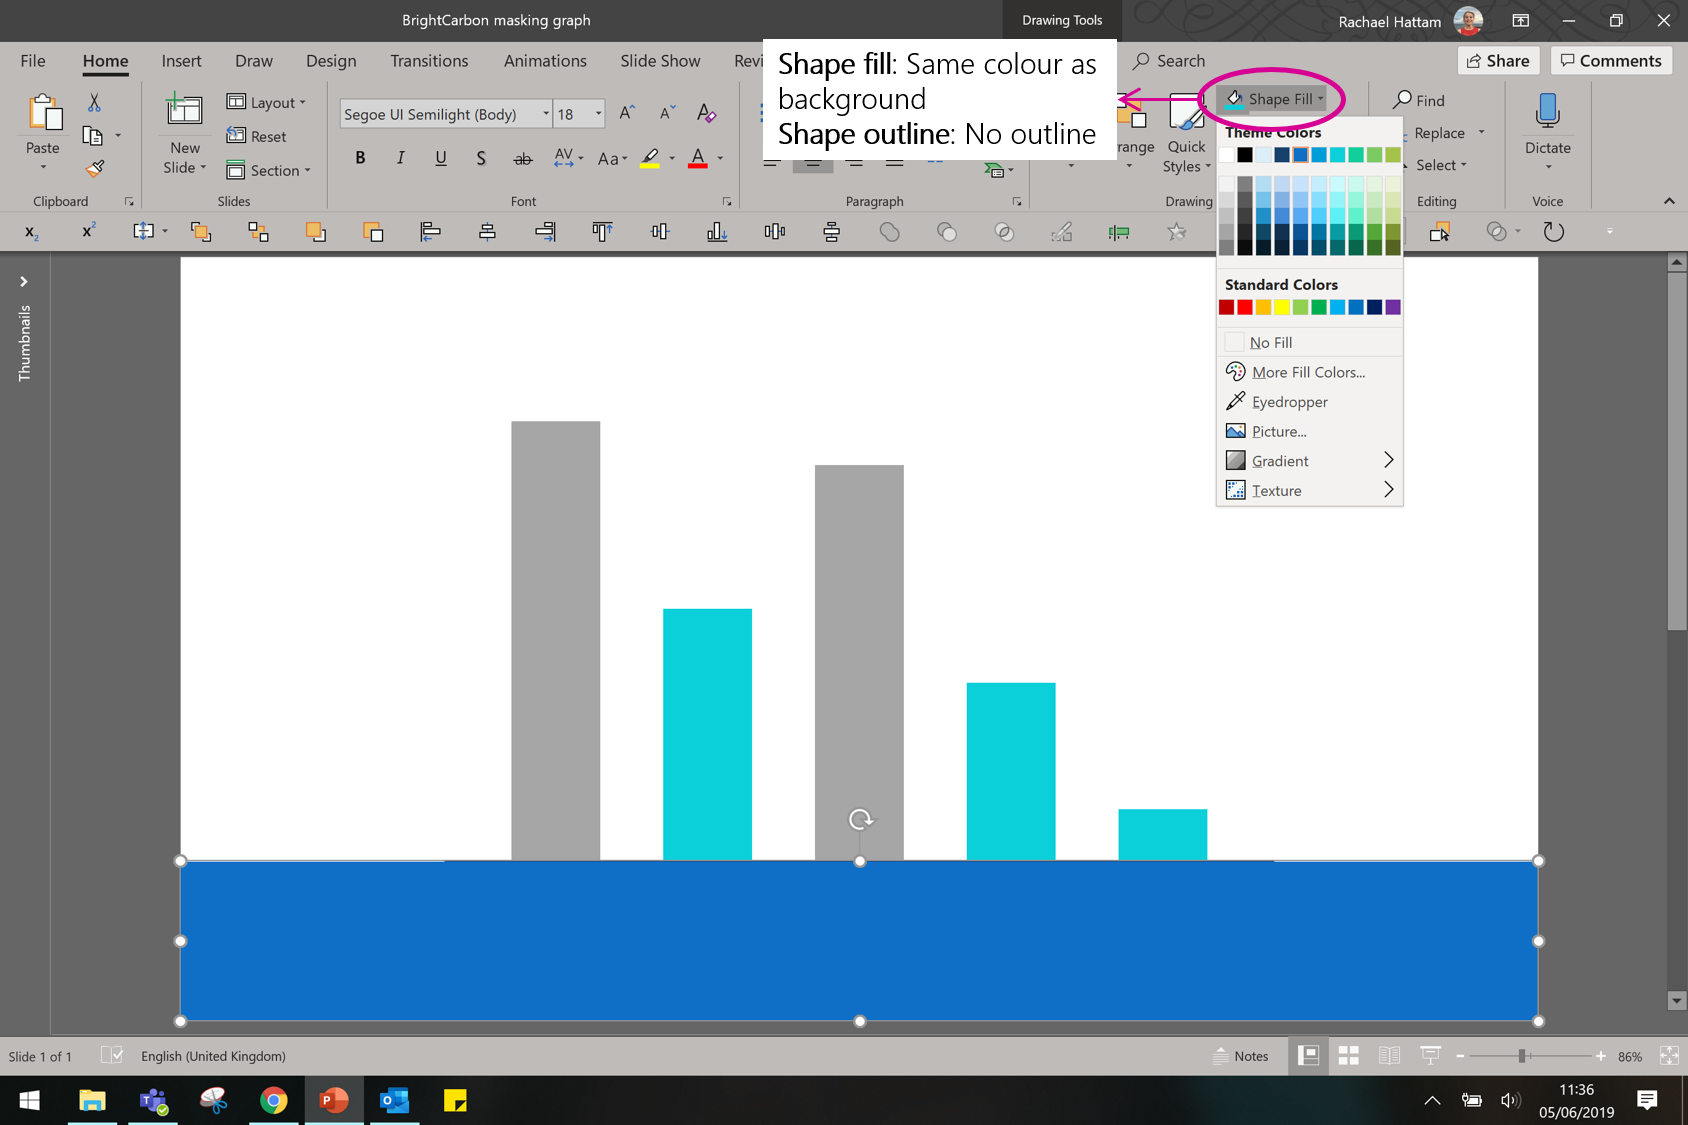
Now, draw a shape underneath your graph, and colour it the same as your slide background so that it’s invisible.
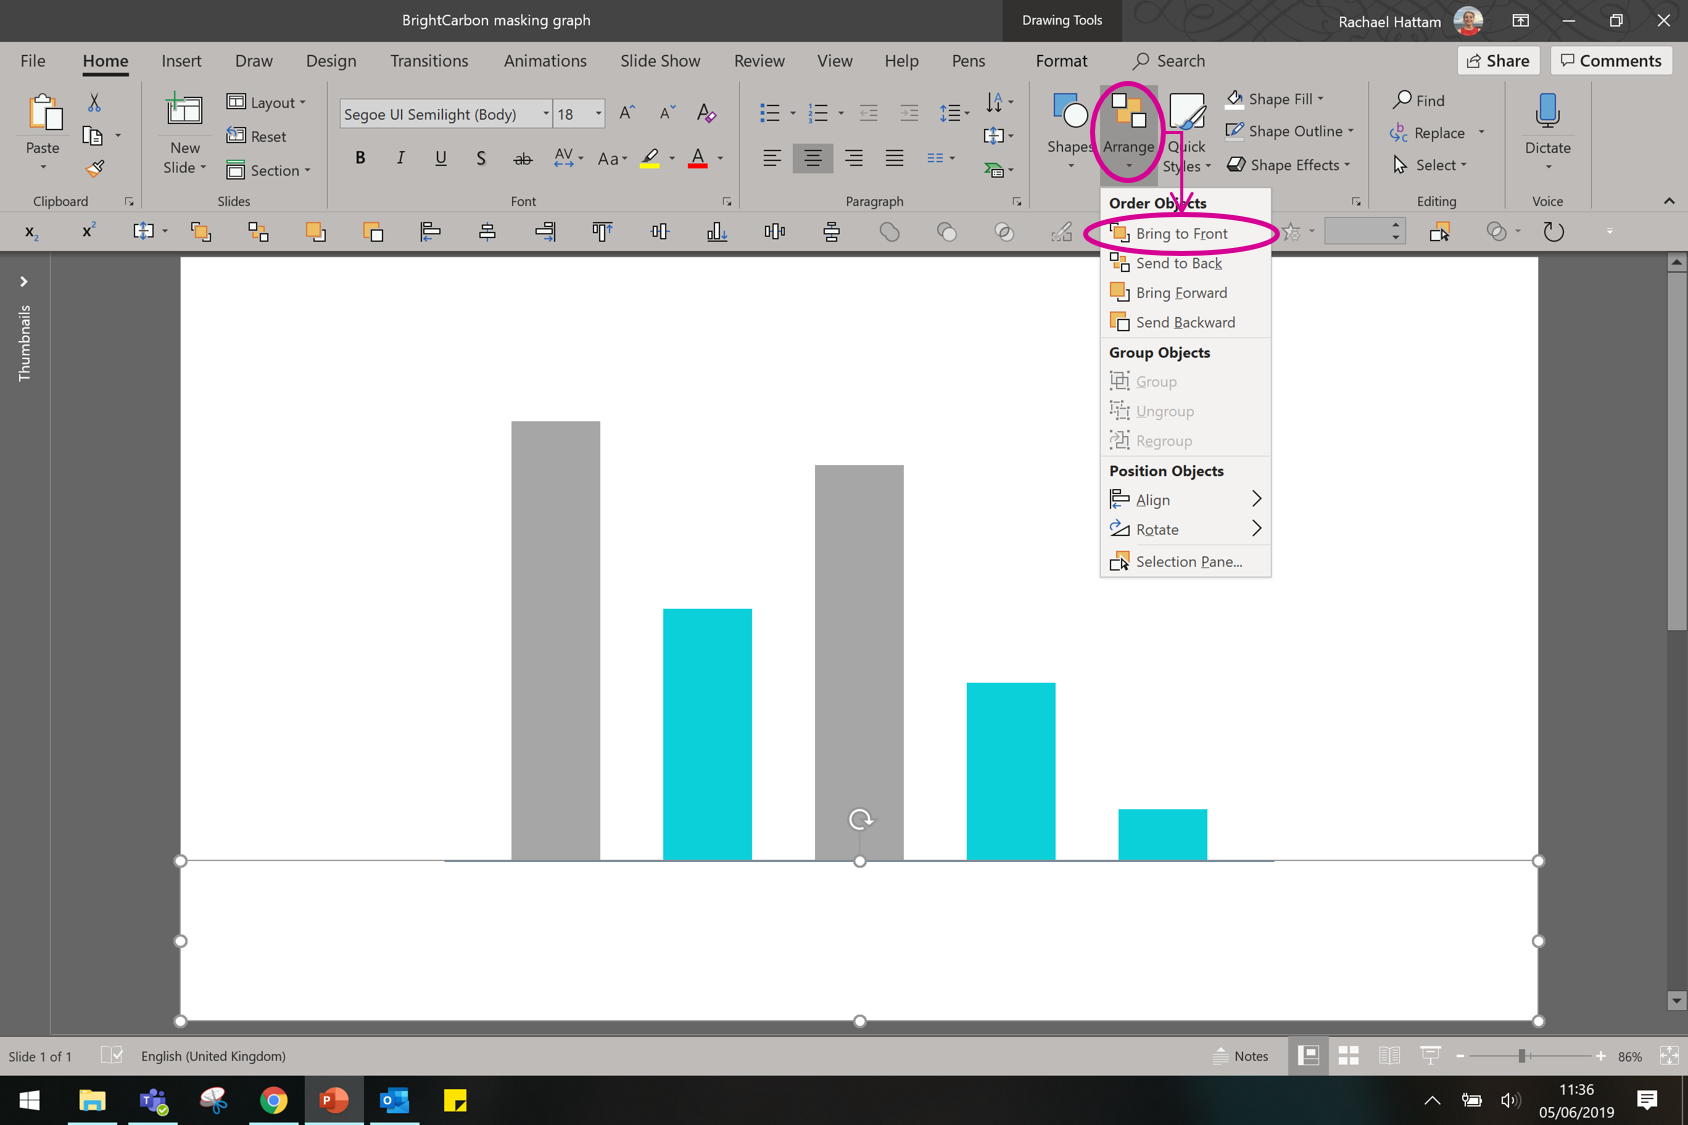
Send the shape to the front.
Your slide should look exactly the same, but now you have the mask sitting underneath your graph, like so.
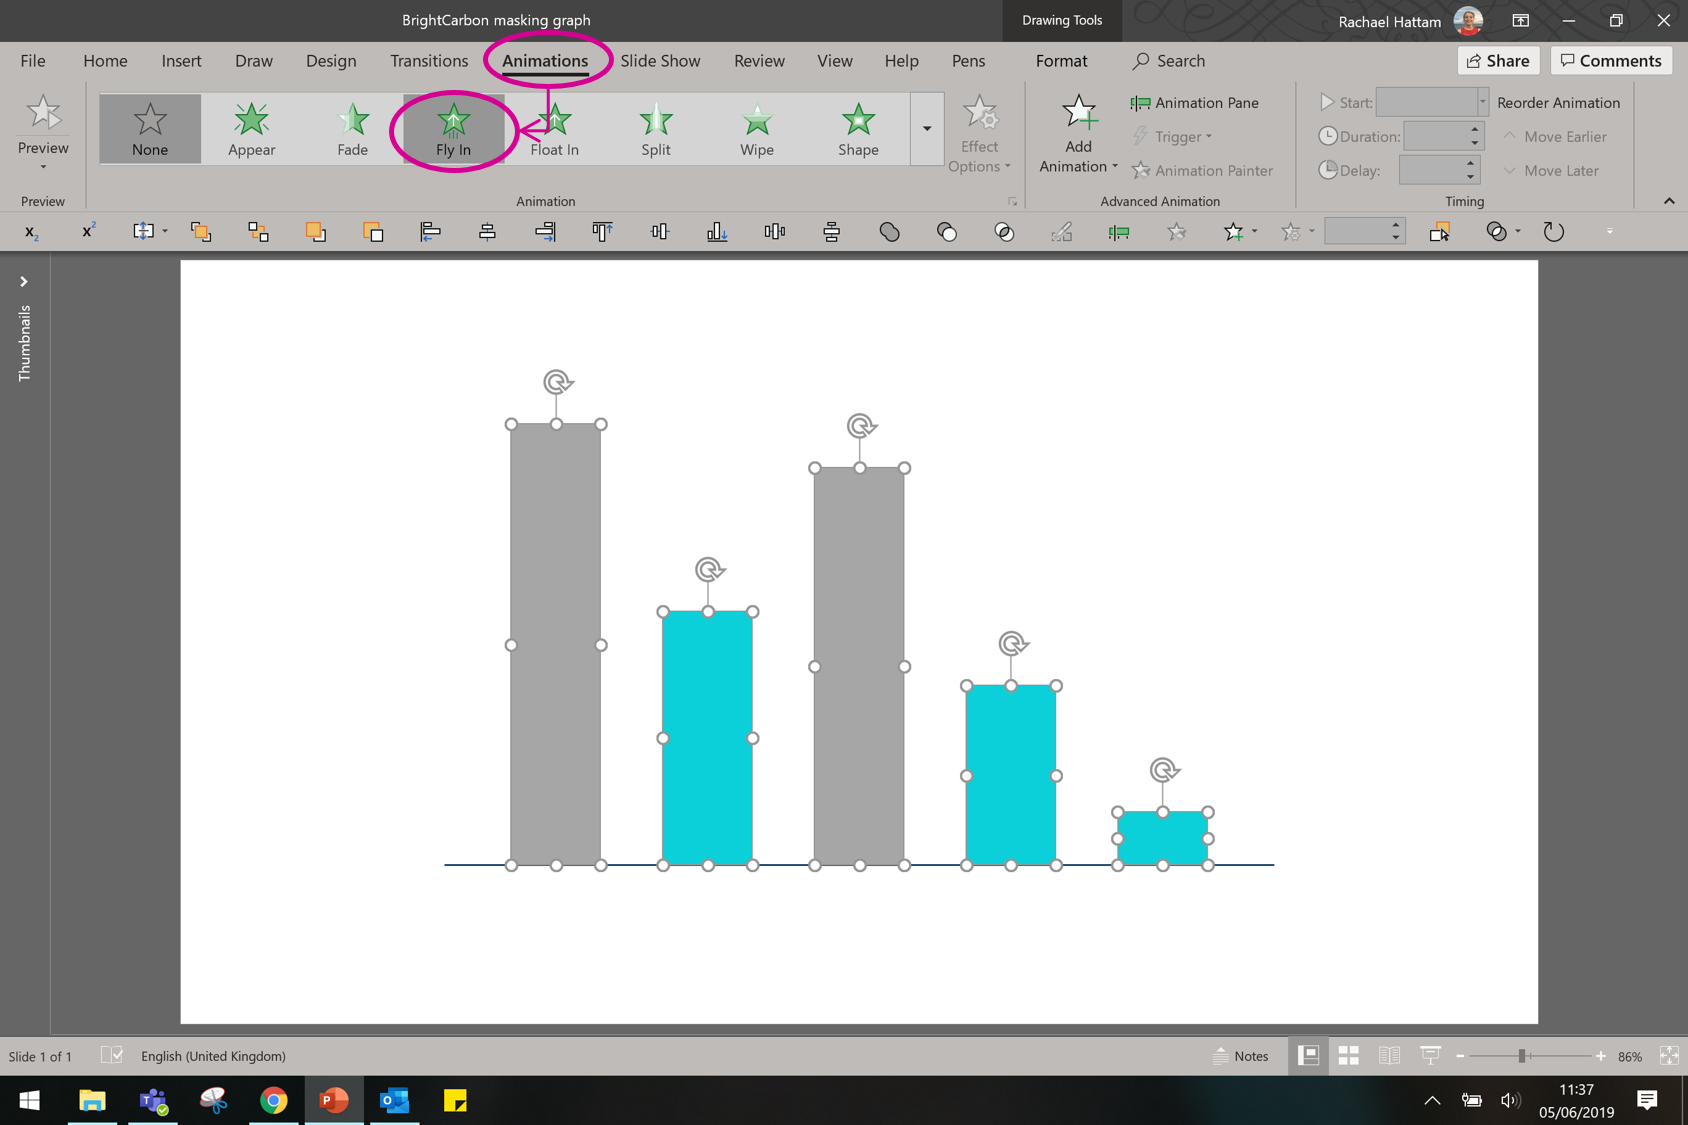
Now for some animation! Open up the Animations tab, select the bars in your graph and choose “Fly in”.
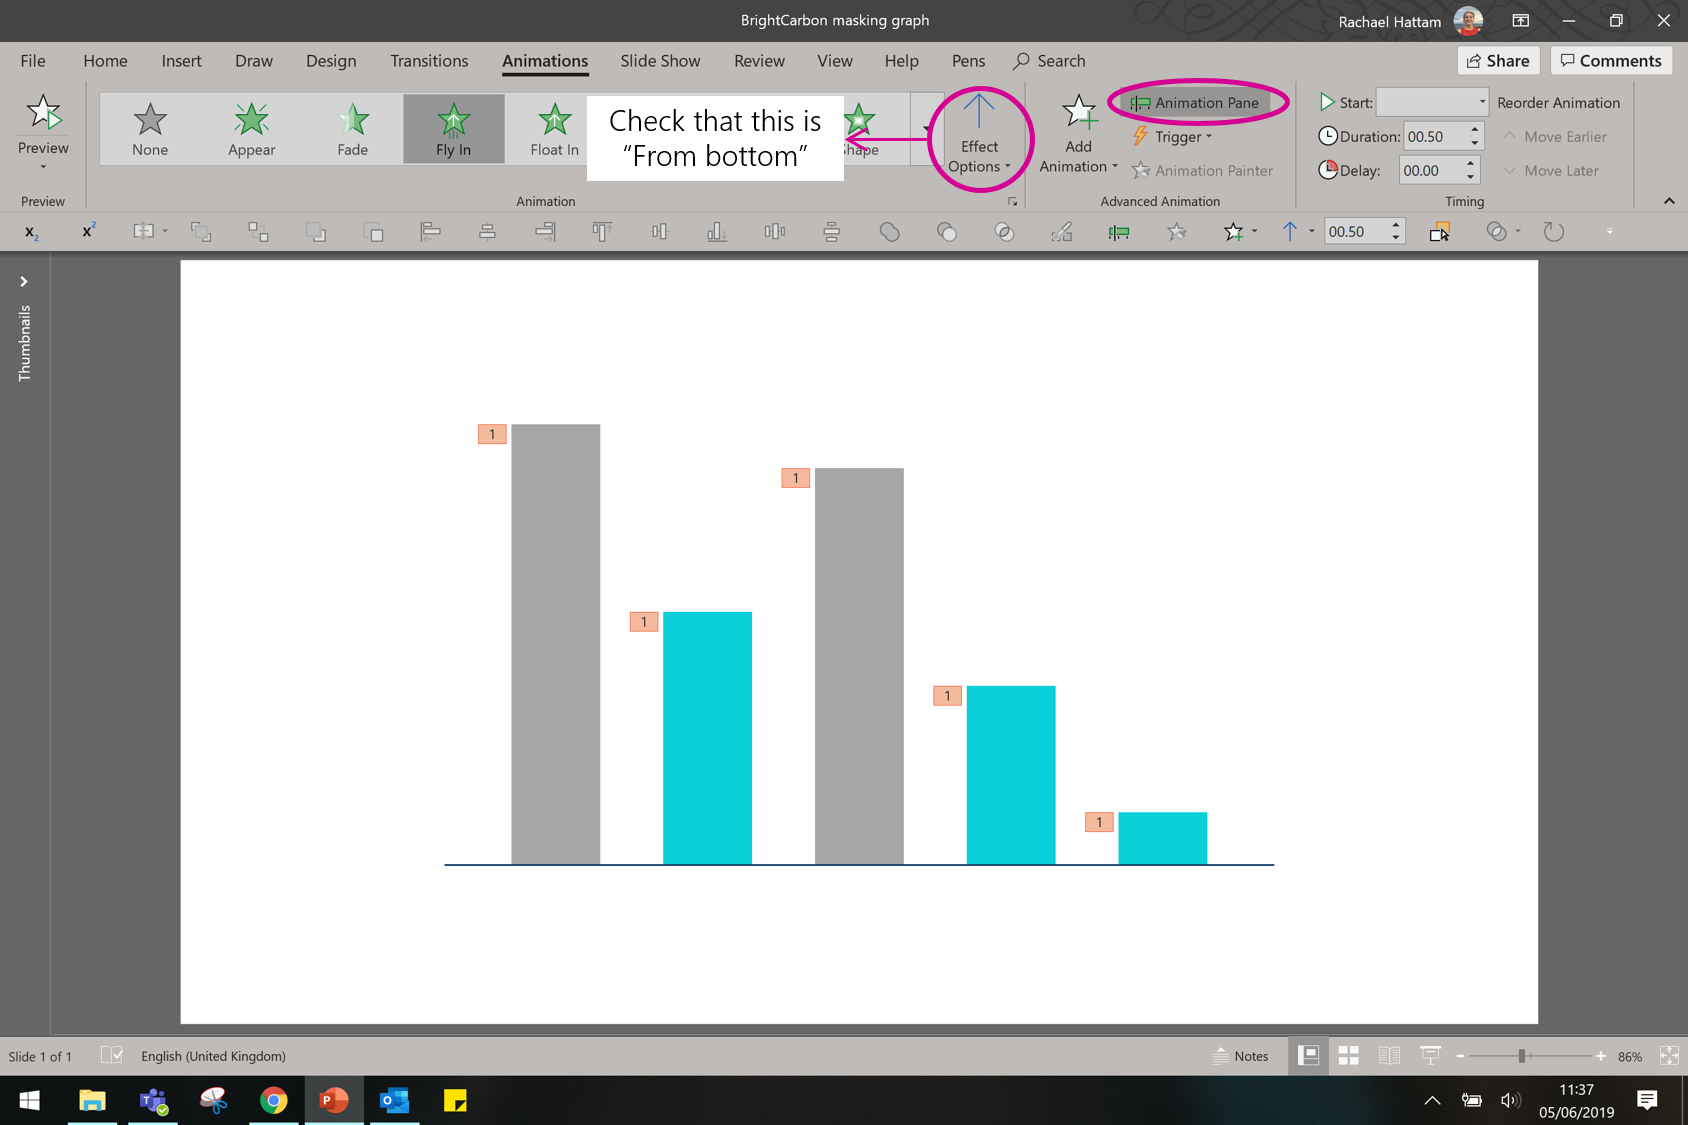
Make sure that in the “Effect Options” tab, you have selected “From bottom” (this should be the default). Open up the Animation Pane.
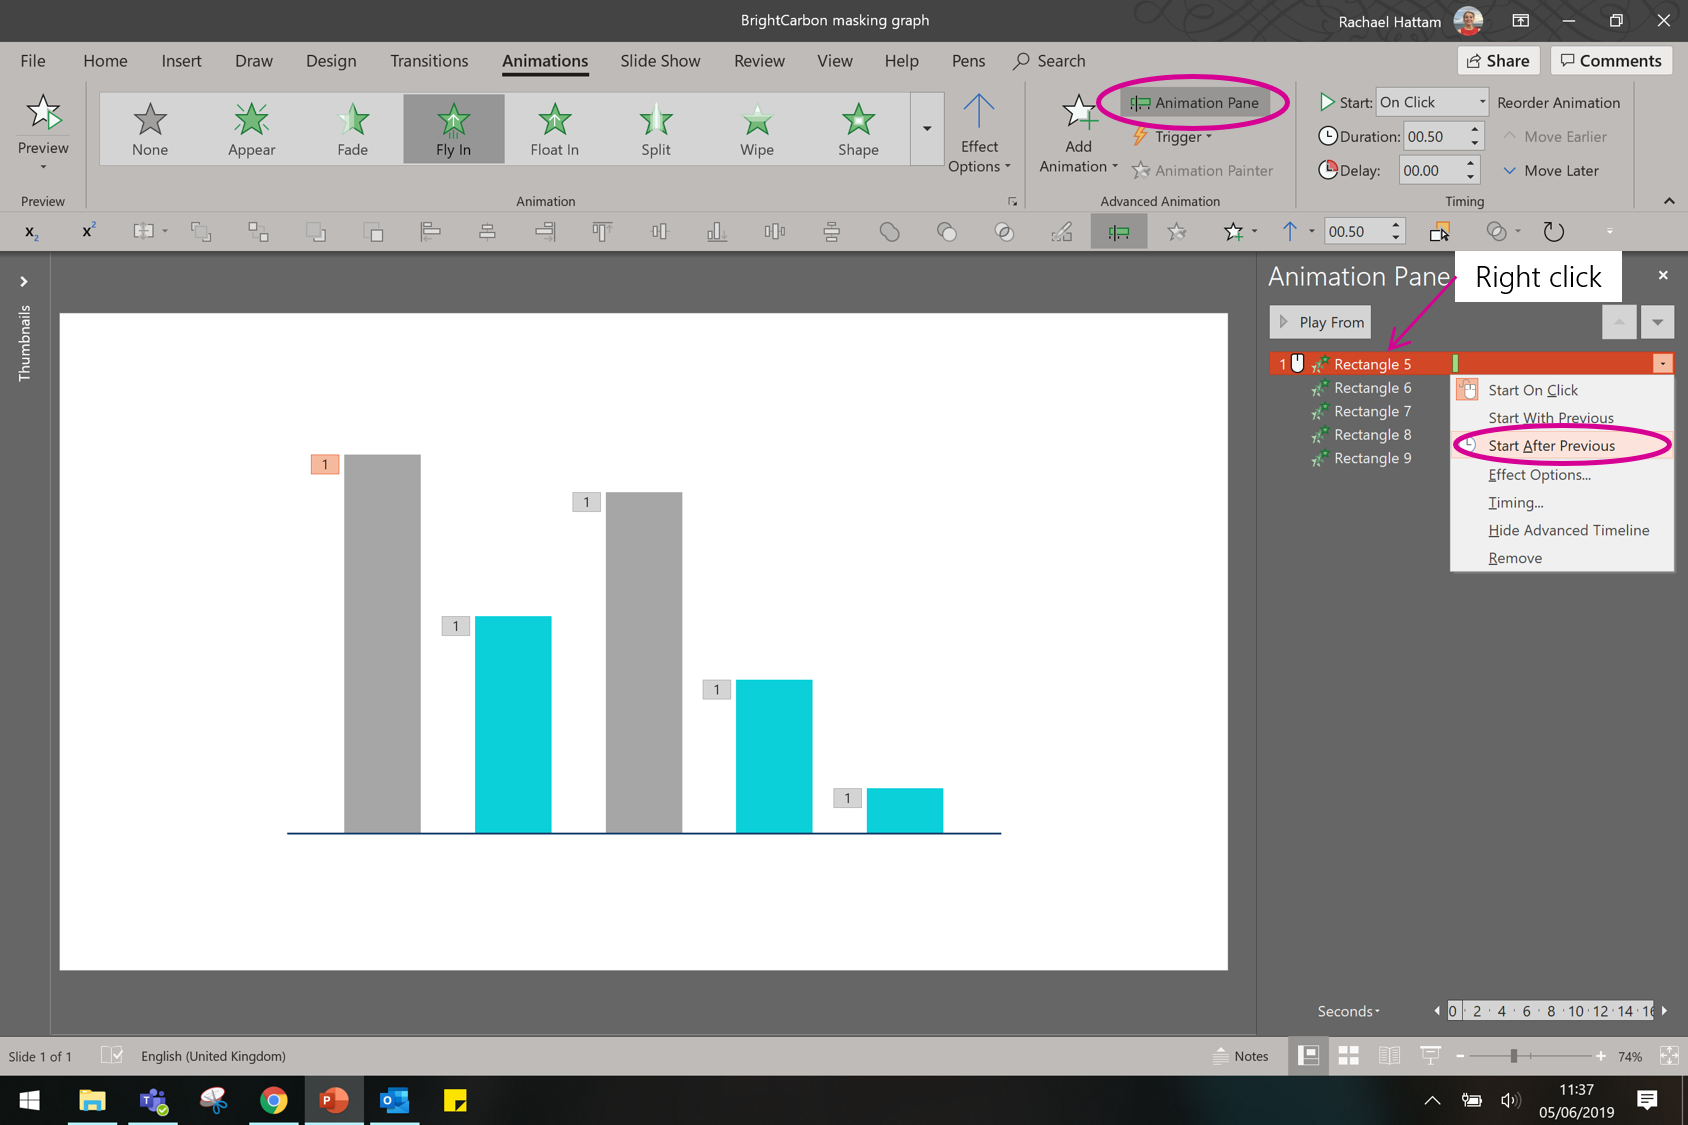
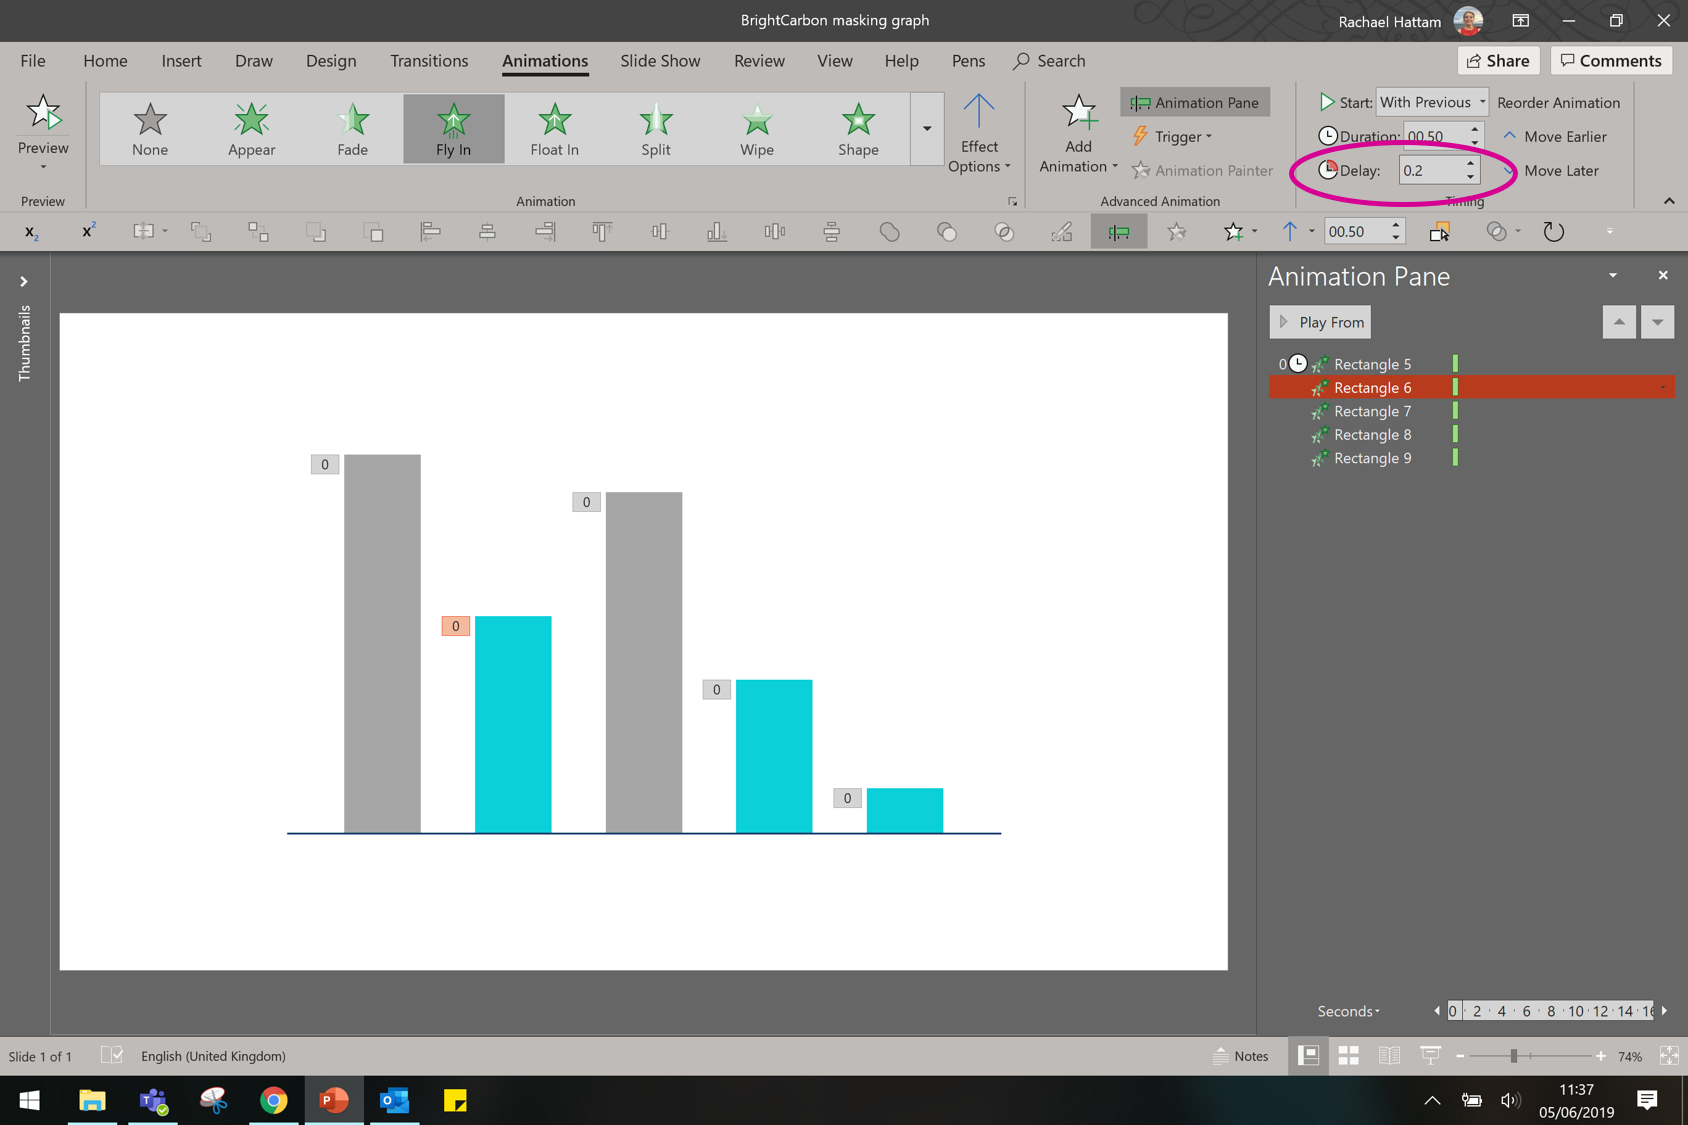
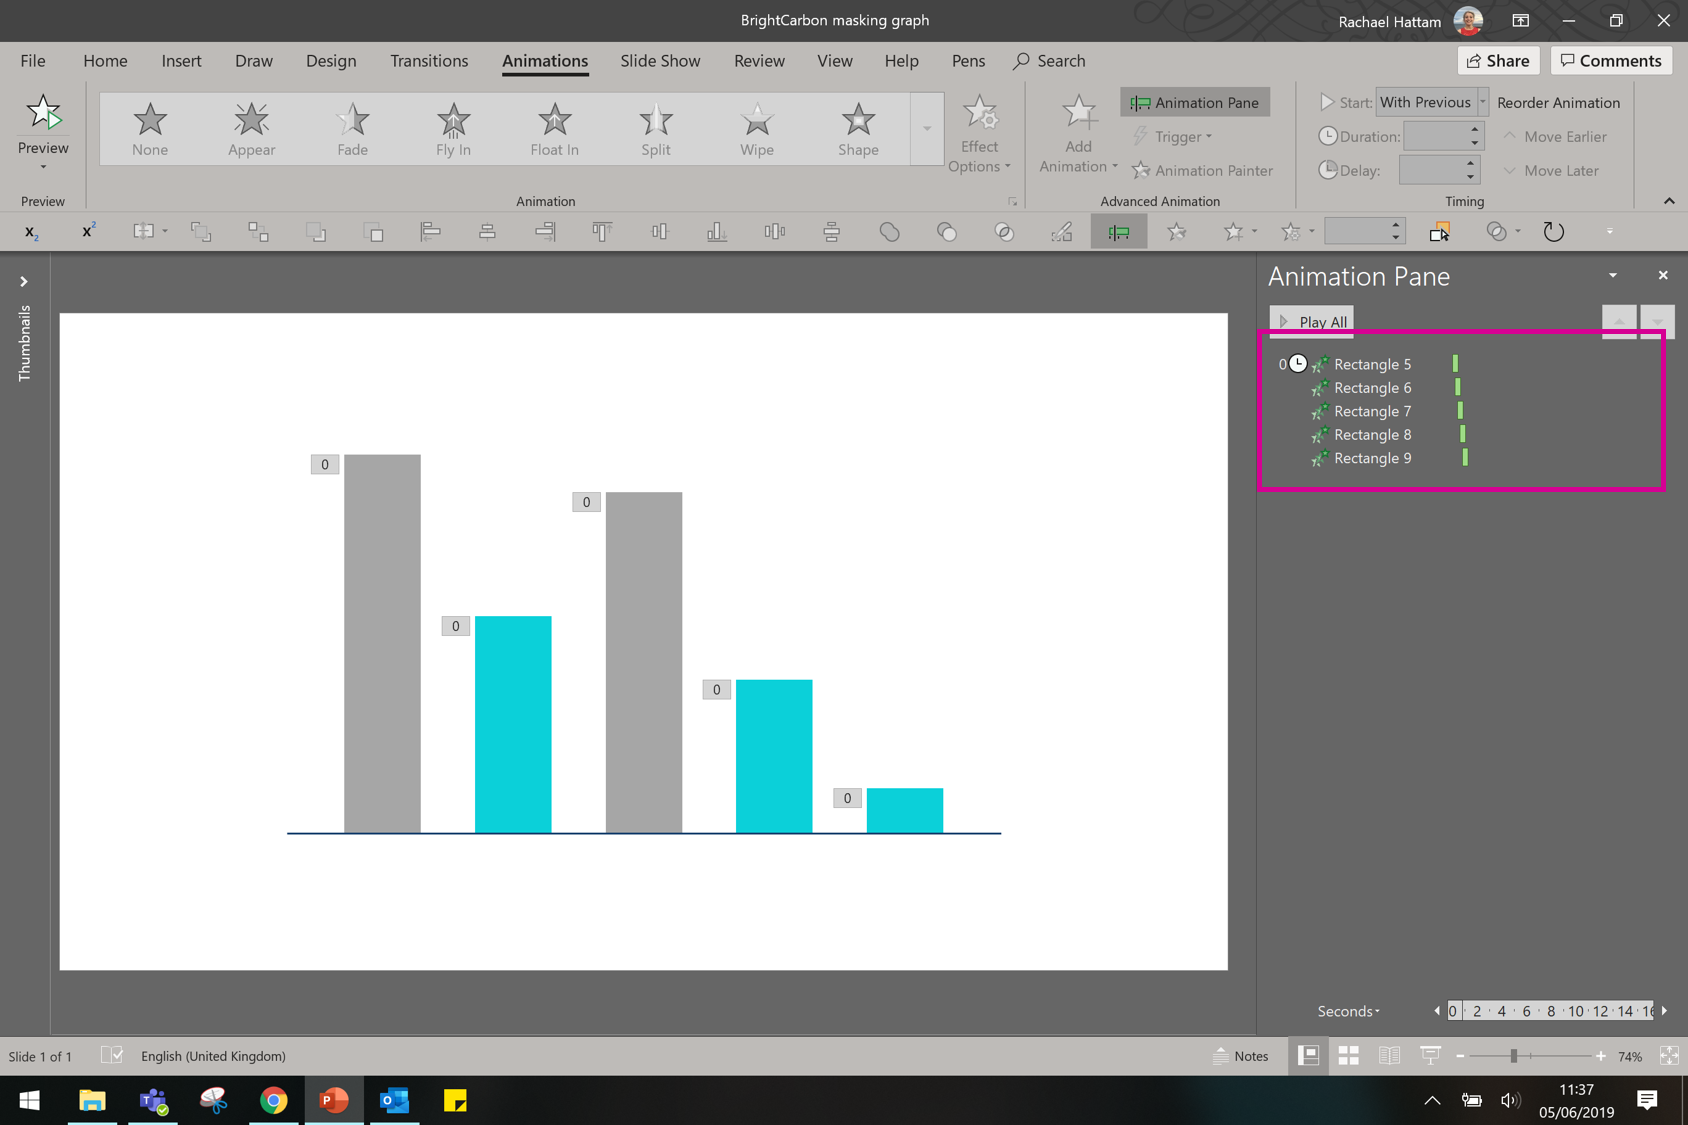
You can control how the bars in the graph animate using the Animation Pane. Right click the shapes to choose whether they come in on a click, or automatically. I want all of my bars to come in as soon as the slide starts, and I want them to animate in one after the other, so I’ve chosen “Start After Previous” for the first shape, then “Start With Previous” for the others.
You can then change the delay settings for each bar, so that they come onto the slide in a sequence. I have a 0.2 second delay between each shape, so they fly in left to right, one after the other.
And that’s you done! A neat little way to animate your bar charts onto the slide!
2. Cutout text in motion
In our “Creating stencils” post, I showed you how to cut out text from a PowerPoint shape. Want to take things a step further? Add a motion path.
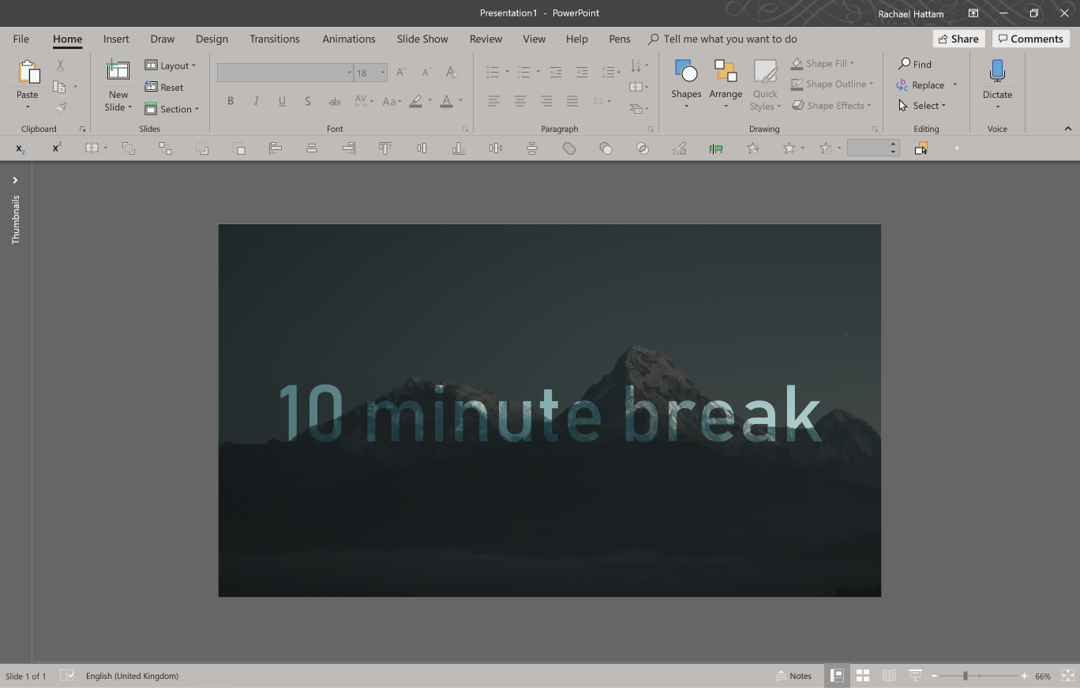
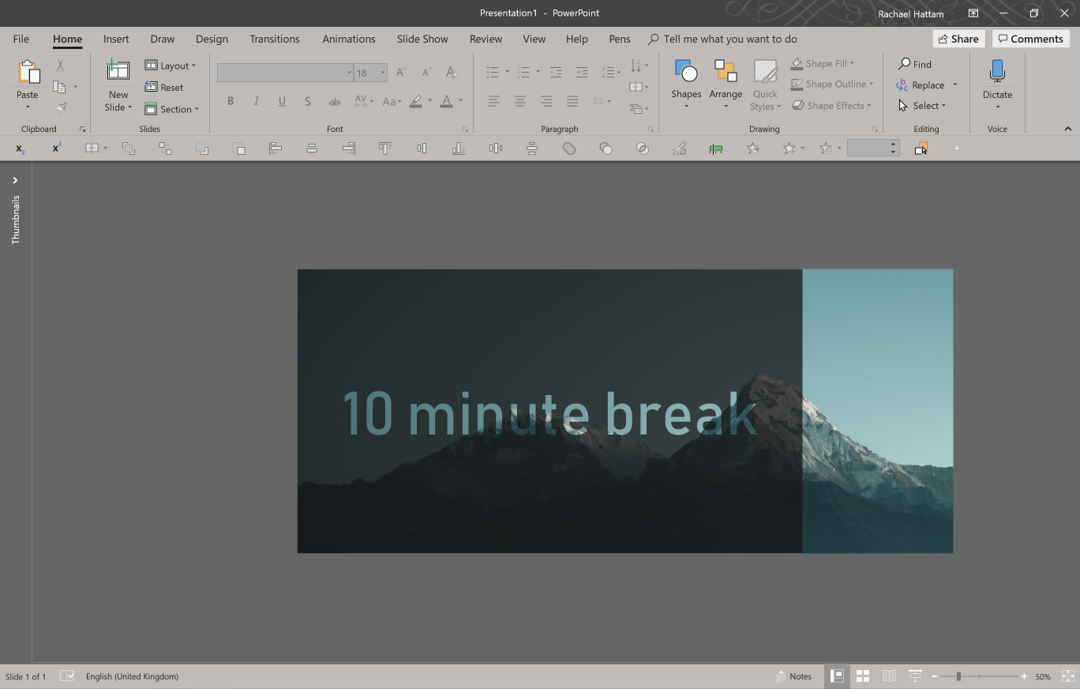
Follow the instructions from idea number 3 in the Creating stencils post, so you should have something that looks like this.
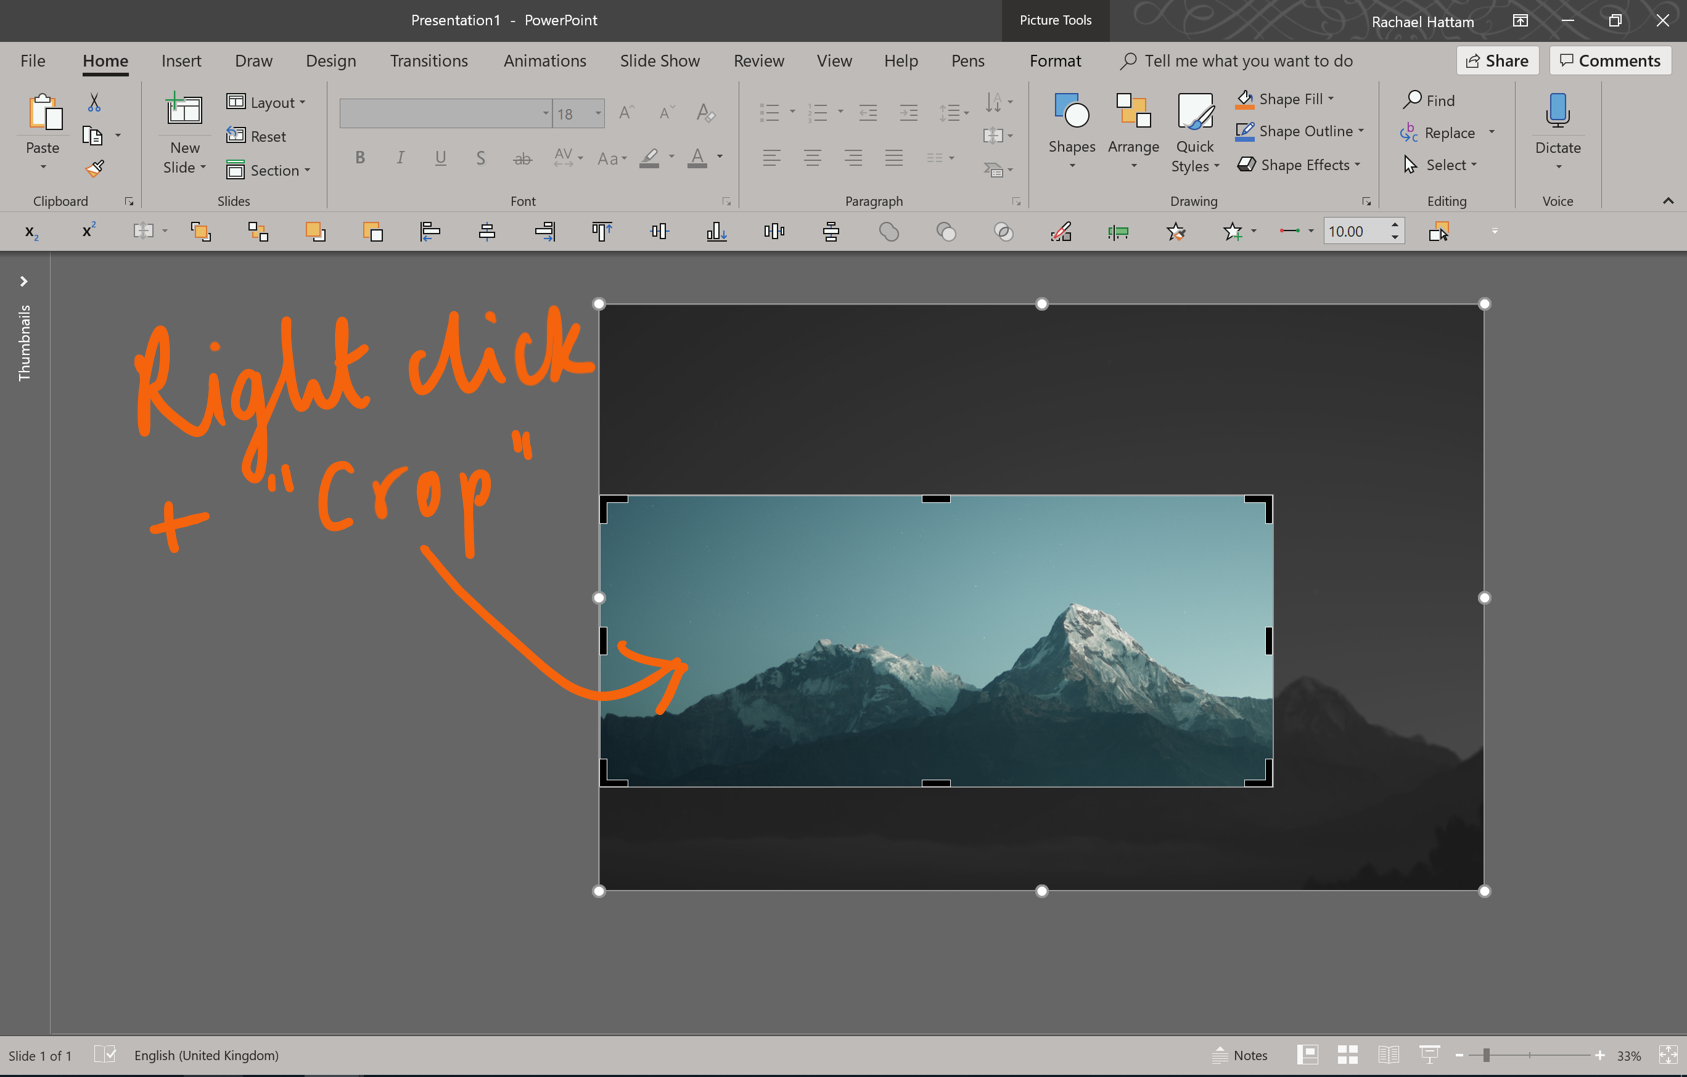
Using the crop function, enlarge your image so that excess is sitting off the side of the slide.
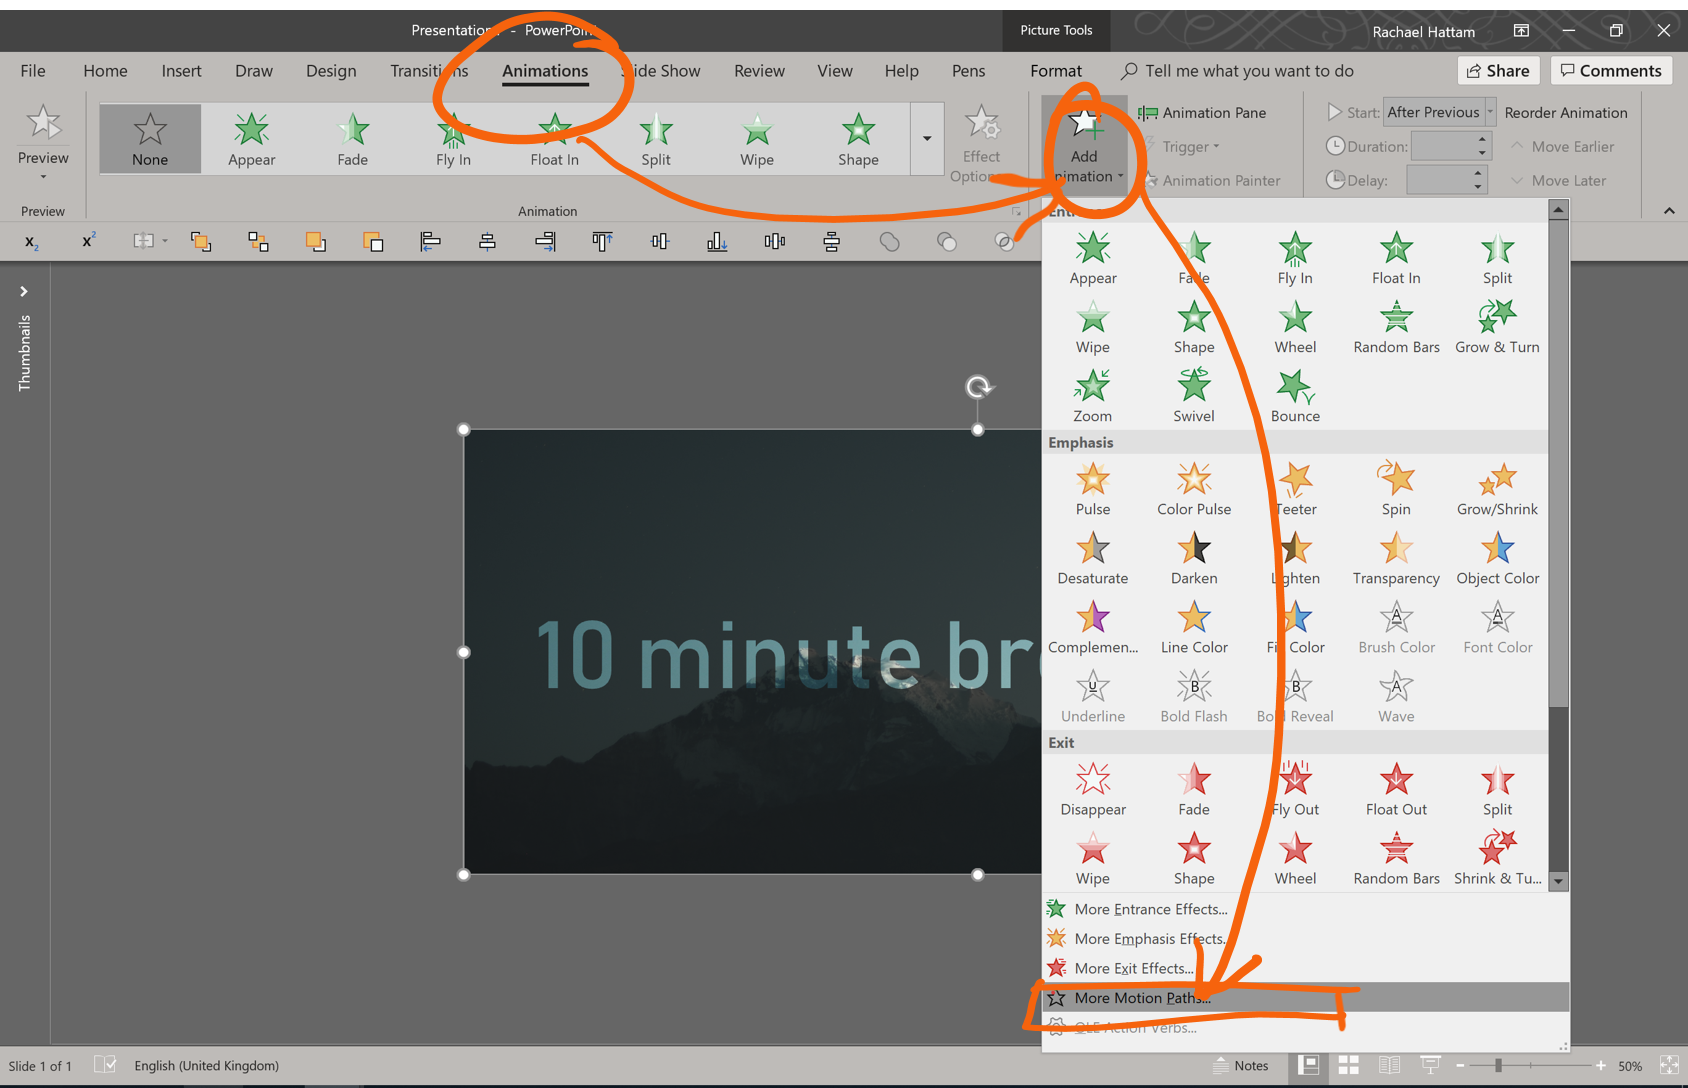
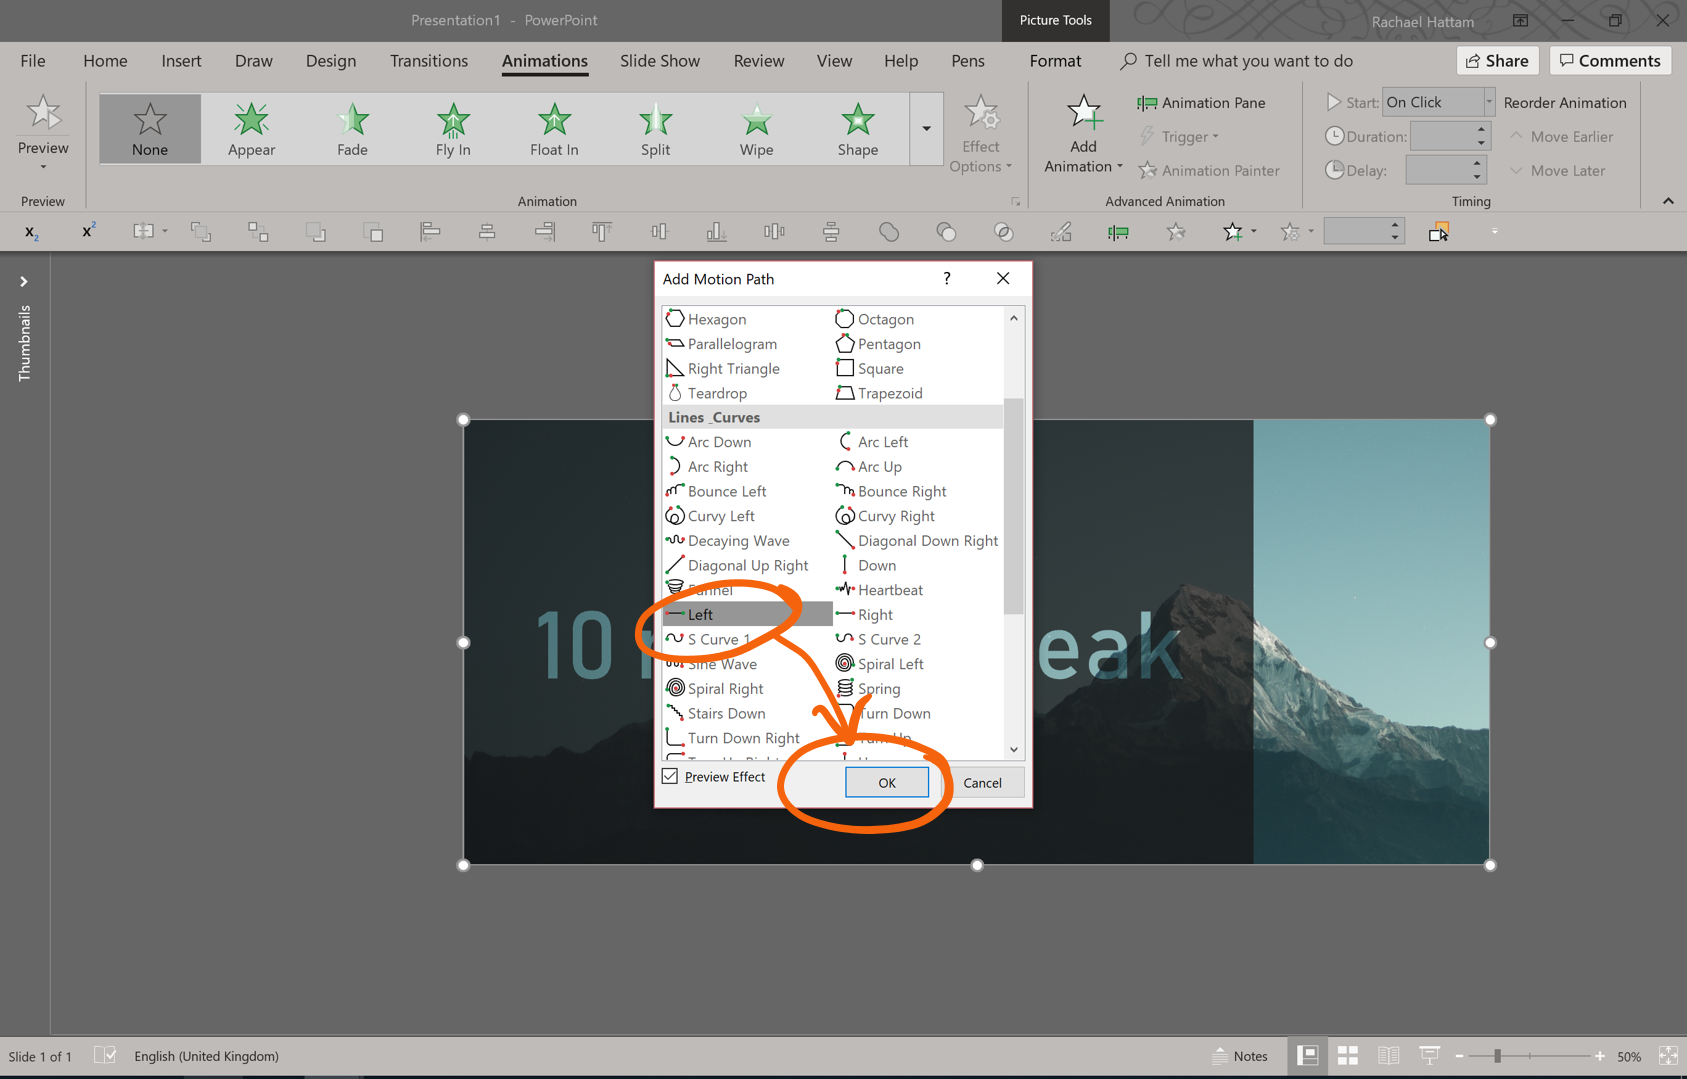
Then, add a motion path to the background image.
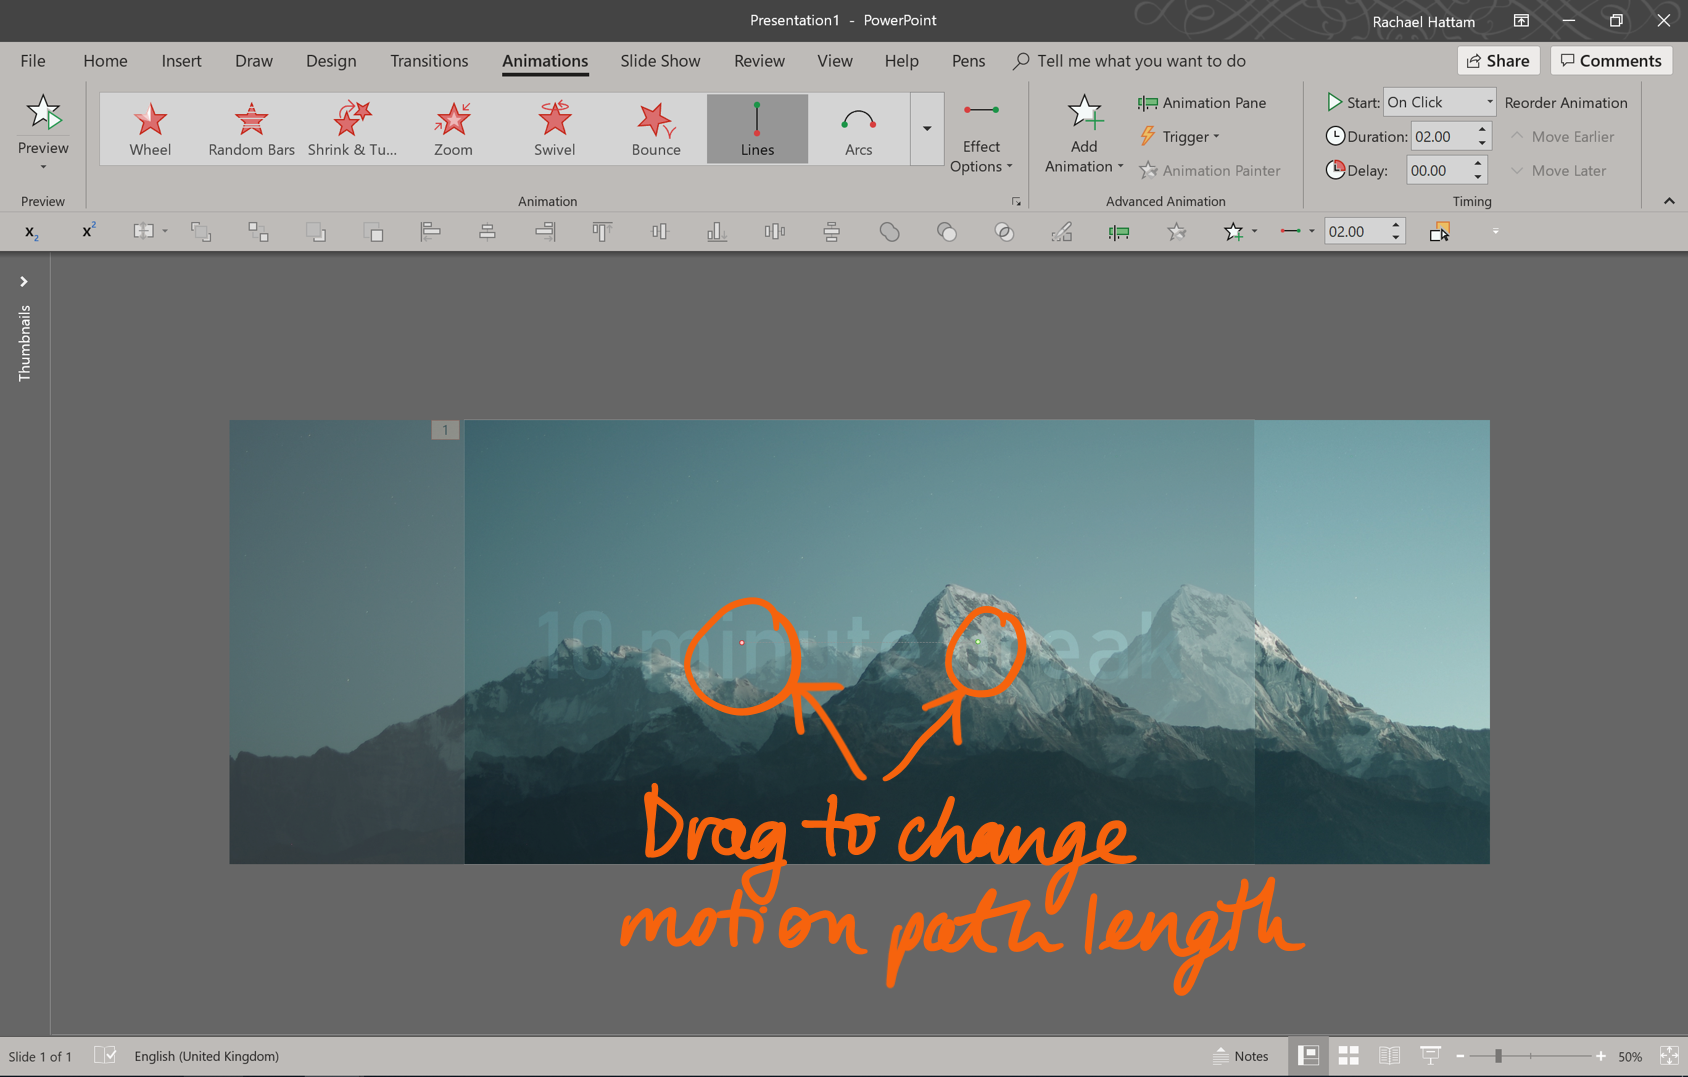
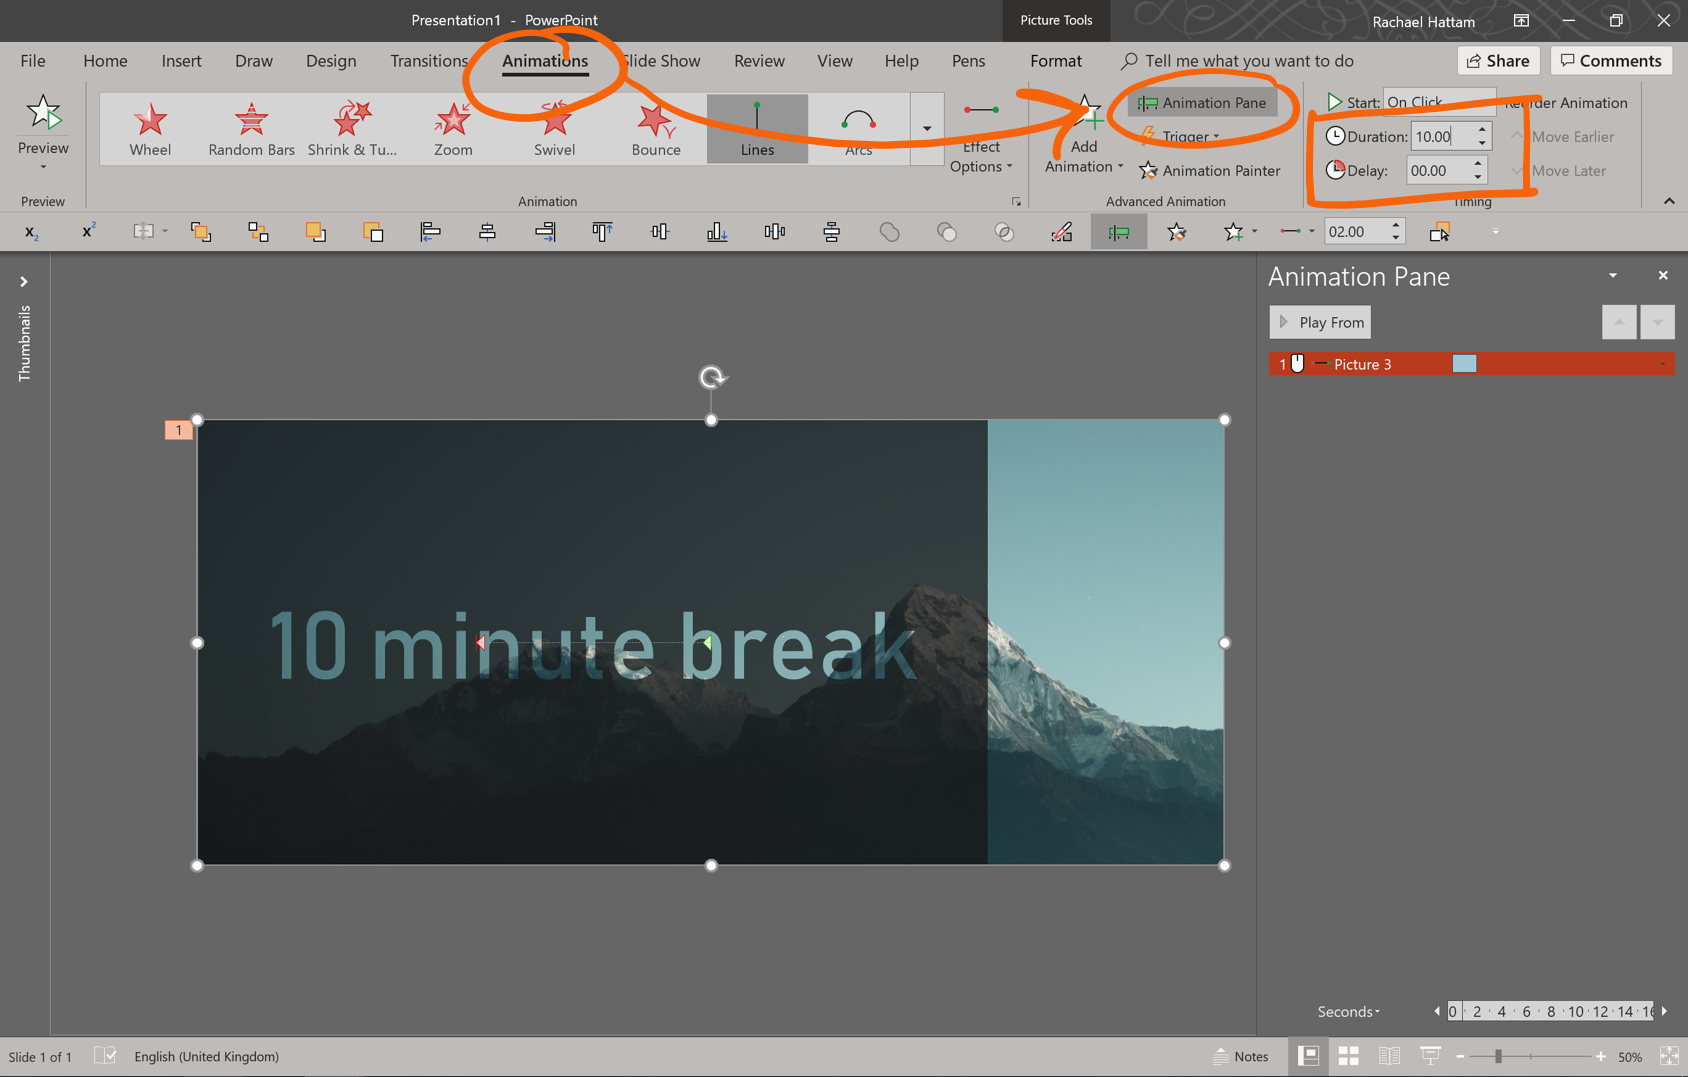
You can modify the length of the motion path by dragging the red and green dots, and you can also change the duration of the animation using the animation pane.
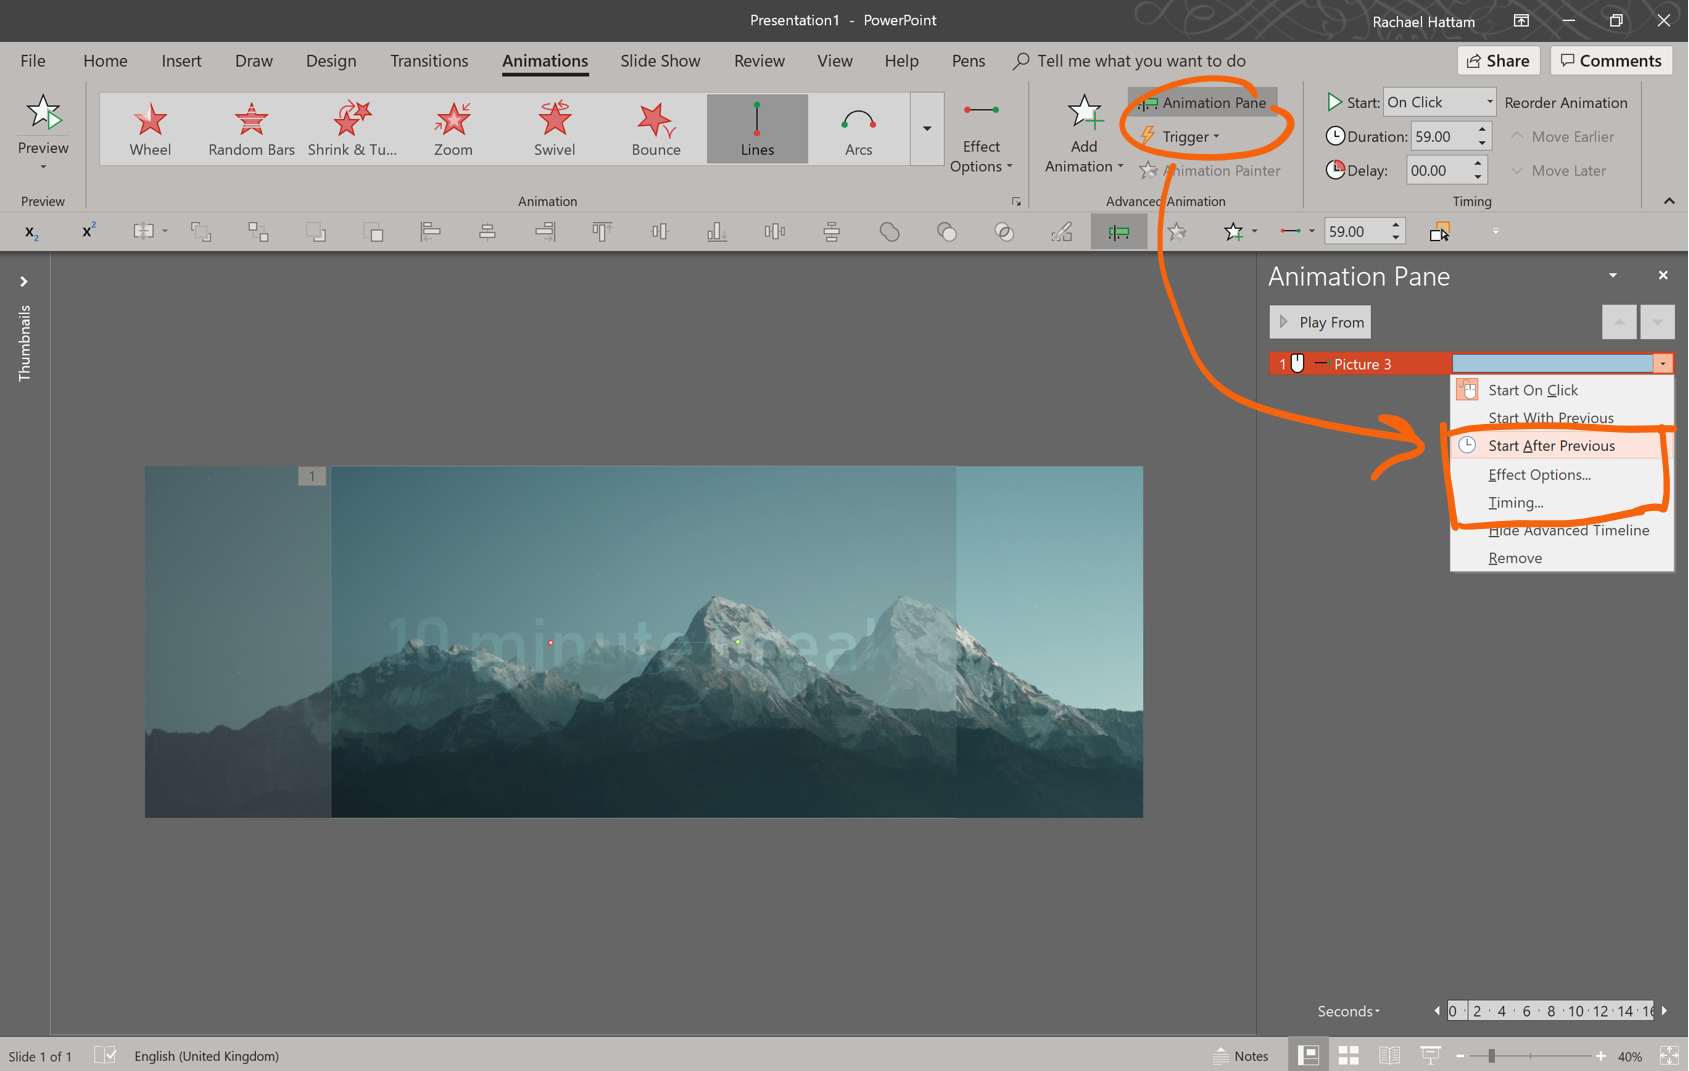
To set the animation so that it moves continuously until your next click, right click it in the animation tab to bring up a dialog box that looks like this:
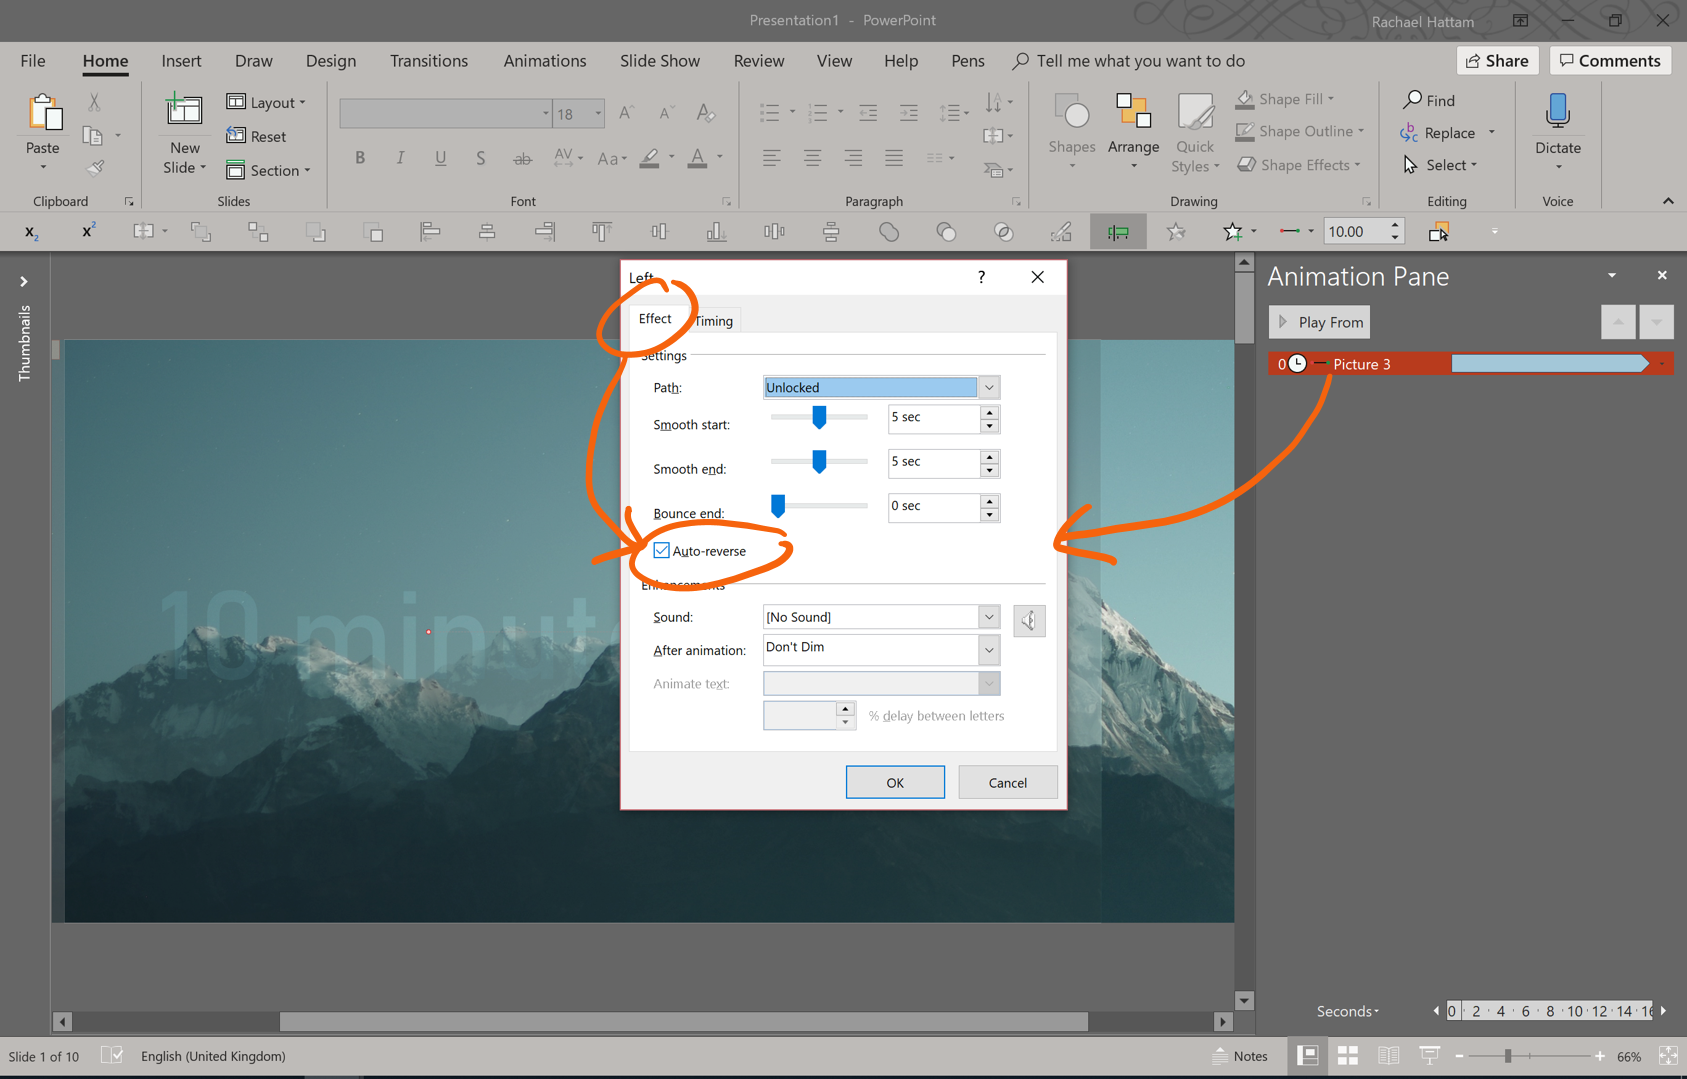
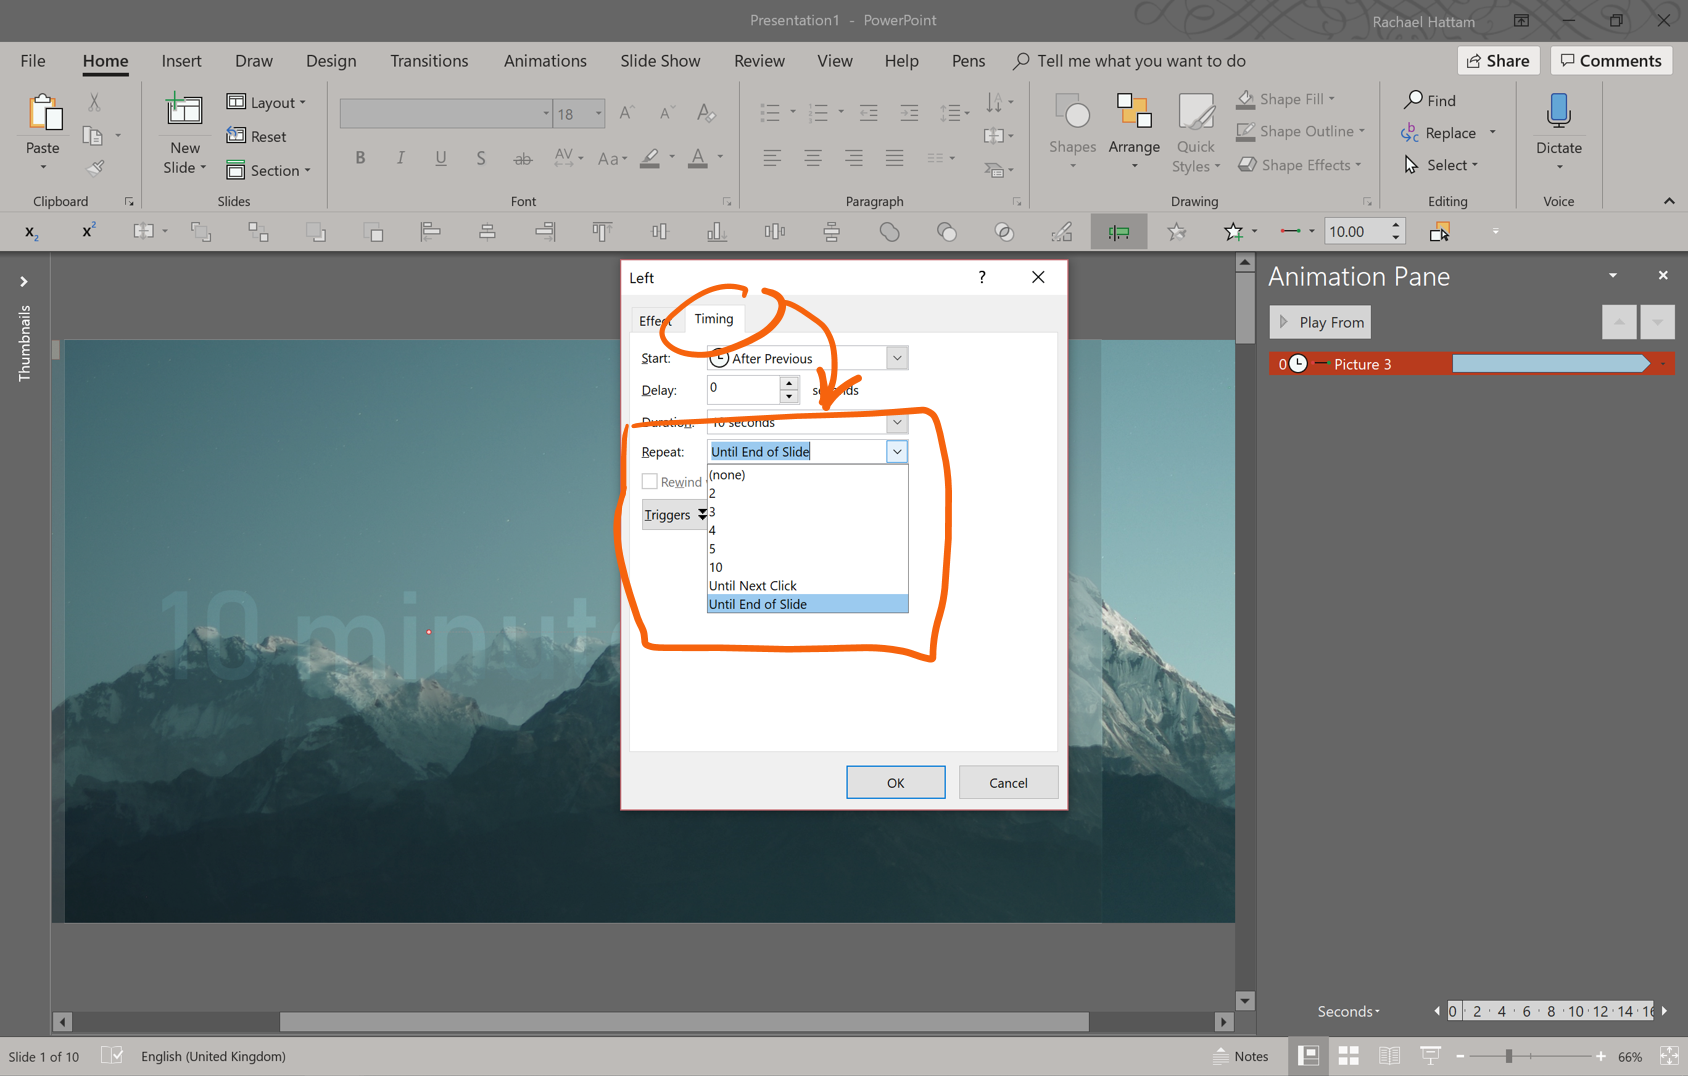
Click “Auto-reverse”, which makes the motion path animate in backwards, then select the Timing tab and choose an option from the “Repeat” drop down menu.
Easy-peasy! Take a look below!
Perhaps you have another cool way to use a stencils and animations combo? We’d love to geek out about it with you! You can tweet us or send us an email – whatever you fancy.
Logo slides are a regular fixture of presentations, but they're often ugly and messy and tend not to do too much to build the credibility they're supposed to. Follow along to learn how to make a logo slide look neat and tidy, and if you want a stretch task, get inspired by some competitor-trouncing alternatives
When it feels like the call is to make more and do it faster, design smart and build a presentation toolkit packed with effective layout slides. We show you how to start off by building five of your own.
This article is dedicated to the bit hitting combination of PowerPoint and PDFs, and three particular use cases that will have these two giants working together in perfect harmony: how to convert PowerPoint to PDF on Windows and macOS, how to convert PDF to PowerPoint, and how to insert a PDF into PowerPoint.
I wanted to make sure I send you both a HUGE thank you for making this story come to life and creating amazing graphics to help. We really appreciate BrightCarbon for stepping up our presentation game massively!


These blog posts are great! Thanks for the advice!