
As a designer that works in the field of presentation, I am constantly on the lookout for inspiration and new ways of thinking to further advance my presentation skills. Inspiration is all around, one of my favourite forms of ‘presentation’ are movies; specifically the title credits of a movie.
Blog 

8th Nov 2021
Sensational slide transitions in PowerPoint: Epic title slide transition
- Written by: David Talavera
- Categories: PowerPoint design, PowerPoint animation
- Comments: 2
Underwhelmed by the built-in slide transitions in PowerPoint? Or just completely baffled? PowerPoint has almost 50 transitions to choose from. A few of them are tasteful, like the classic Fade or a personal favourite—Push. But many of them are rather strange; the famous Origami folds your slide into a paper crane which turns out to be living and flies off screen, revealing the next slide and distracting your audience for the next few minutes as they ponder your poor transition choices instead of your stellar content.
In our last article on slide transitions in PowerPoint we may have mentioned (once or twice) that the options native to PowerPoint leave something to be desired. Our last post showed you how to use PowerPoint shapes to create dynamic, professional slide transitions that don’t look PowerPoint-y. This post shows you how to use the versatile Boolean tools to create a title slide transition with impact.
And, even better, this transition trick doesn’t rely on Morph, so it’s accessible whether you use Office 365 or not. Let’s get started!
How to create a title slide transition with impact in PowerPoint
- Start by inserting your title text onto the slide. Use a chunky sans serif font. Some good options are Franklin Gothic, Impact, Bebas or Din – but you can use whatever font looks the coolest! Place your text bang in the centre of the slide for maximum impact. To do this click the text box, head to the Shape Format tab, then click Align > Align Centre and Align Middle.
Top tip: This effect works best with short titles, the fewer words the better.
- Next, create a background by inserting a rectangle behind your text. It doesn’t matter what colour it is at the moment. Make sure the rectangle fills the entire slide. If you have our free PowerPoint add-in BrightSlide installed simply insert the shape and click Match size – the rectangle will resize to match the slide. Then push the rectangle behind the text – right click and select Send to back.
- You can now use the text to punch a hole in the rectangle. Select the shape, then your text (this order is important), and navigate to the Boolean tools in the Shape Format tab. Select Subtract (Shape Format > Merge Shapes > Subtract).
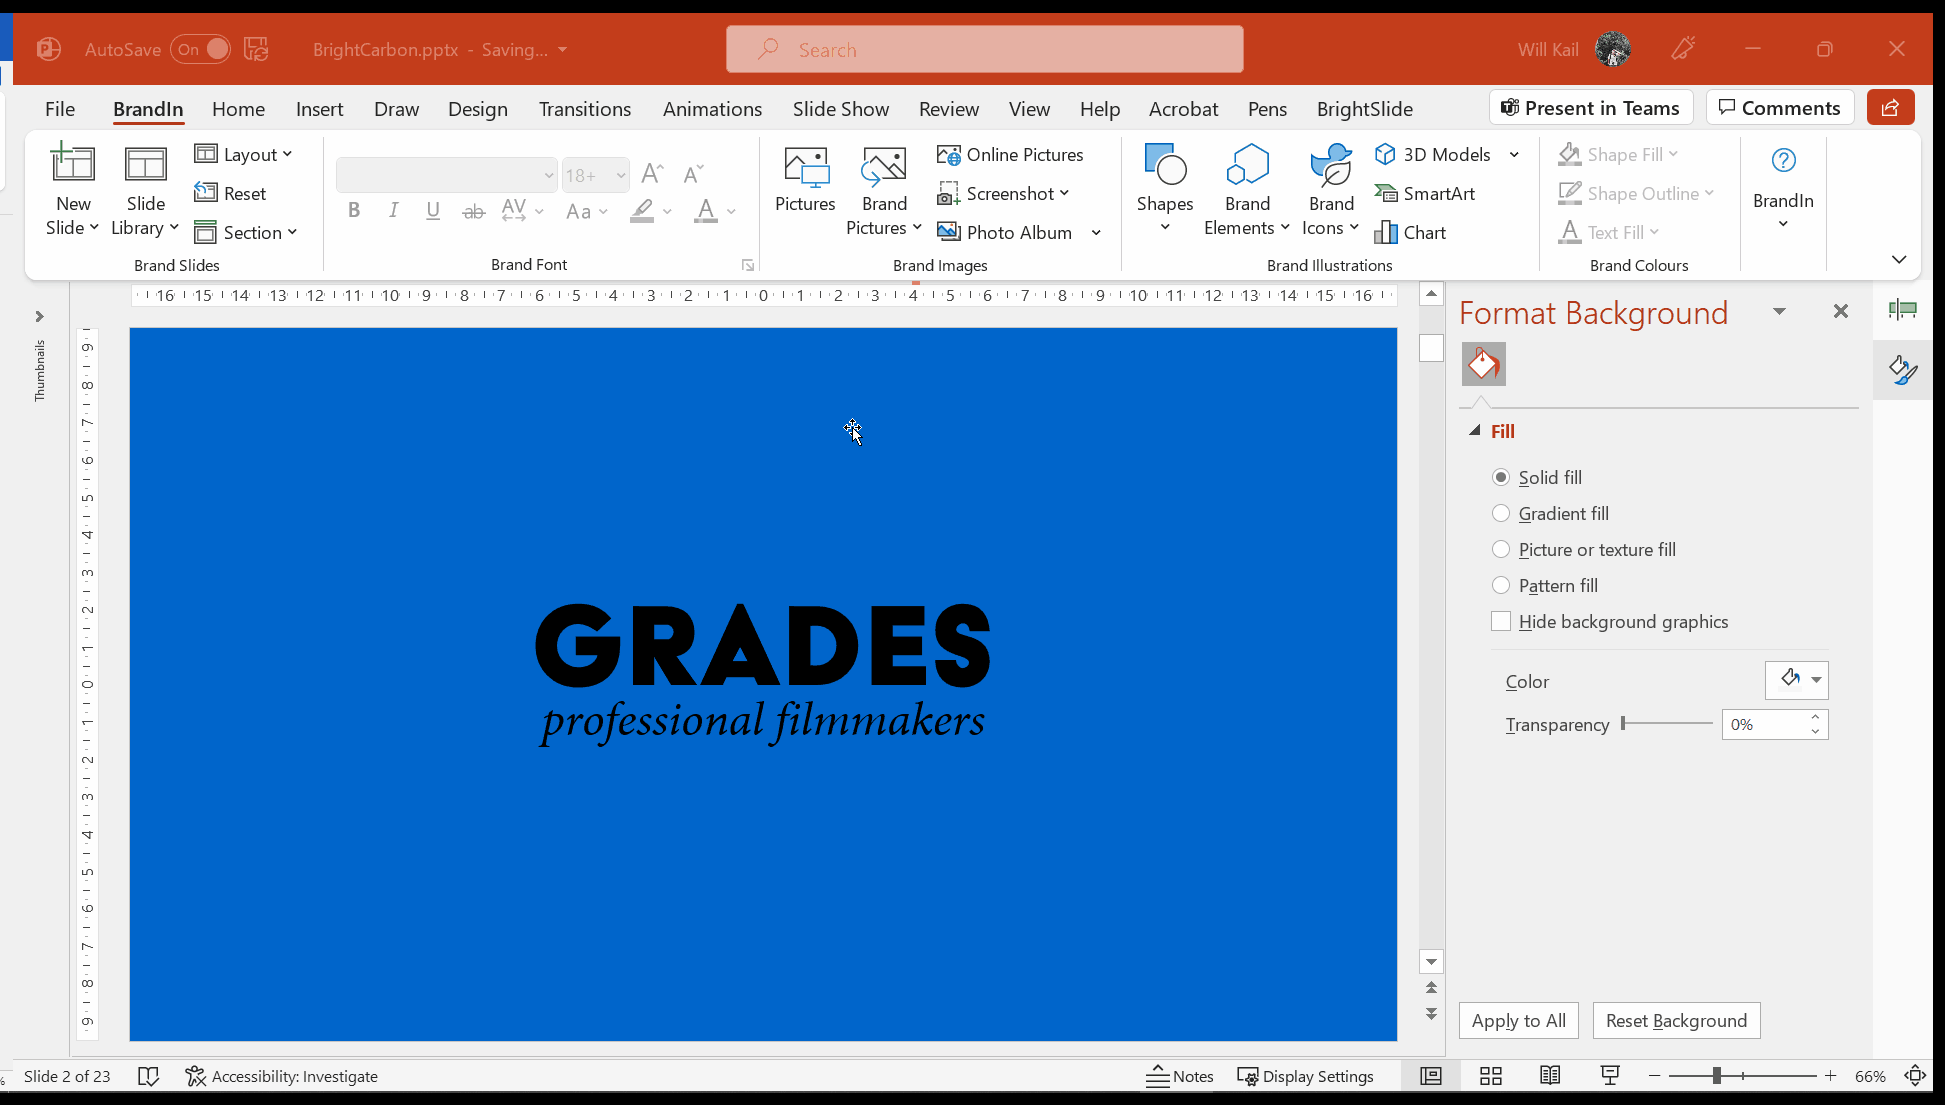
This step won’t work if your text box has any fill colour, so make sure it’s set to No fill.
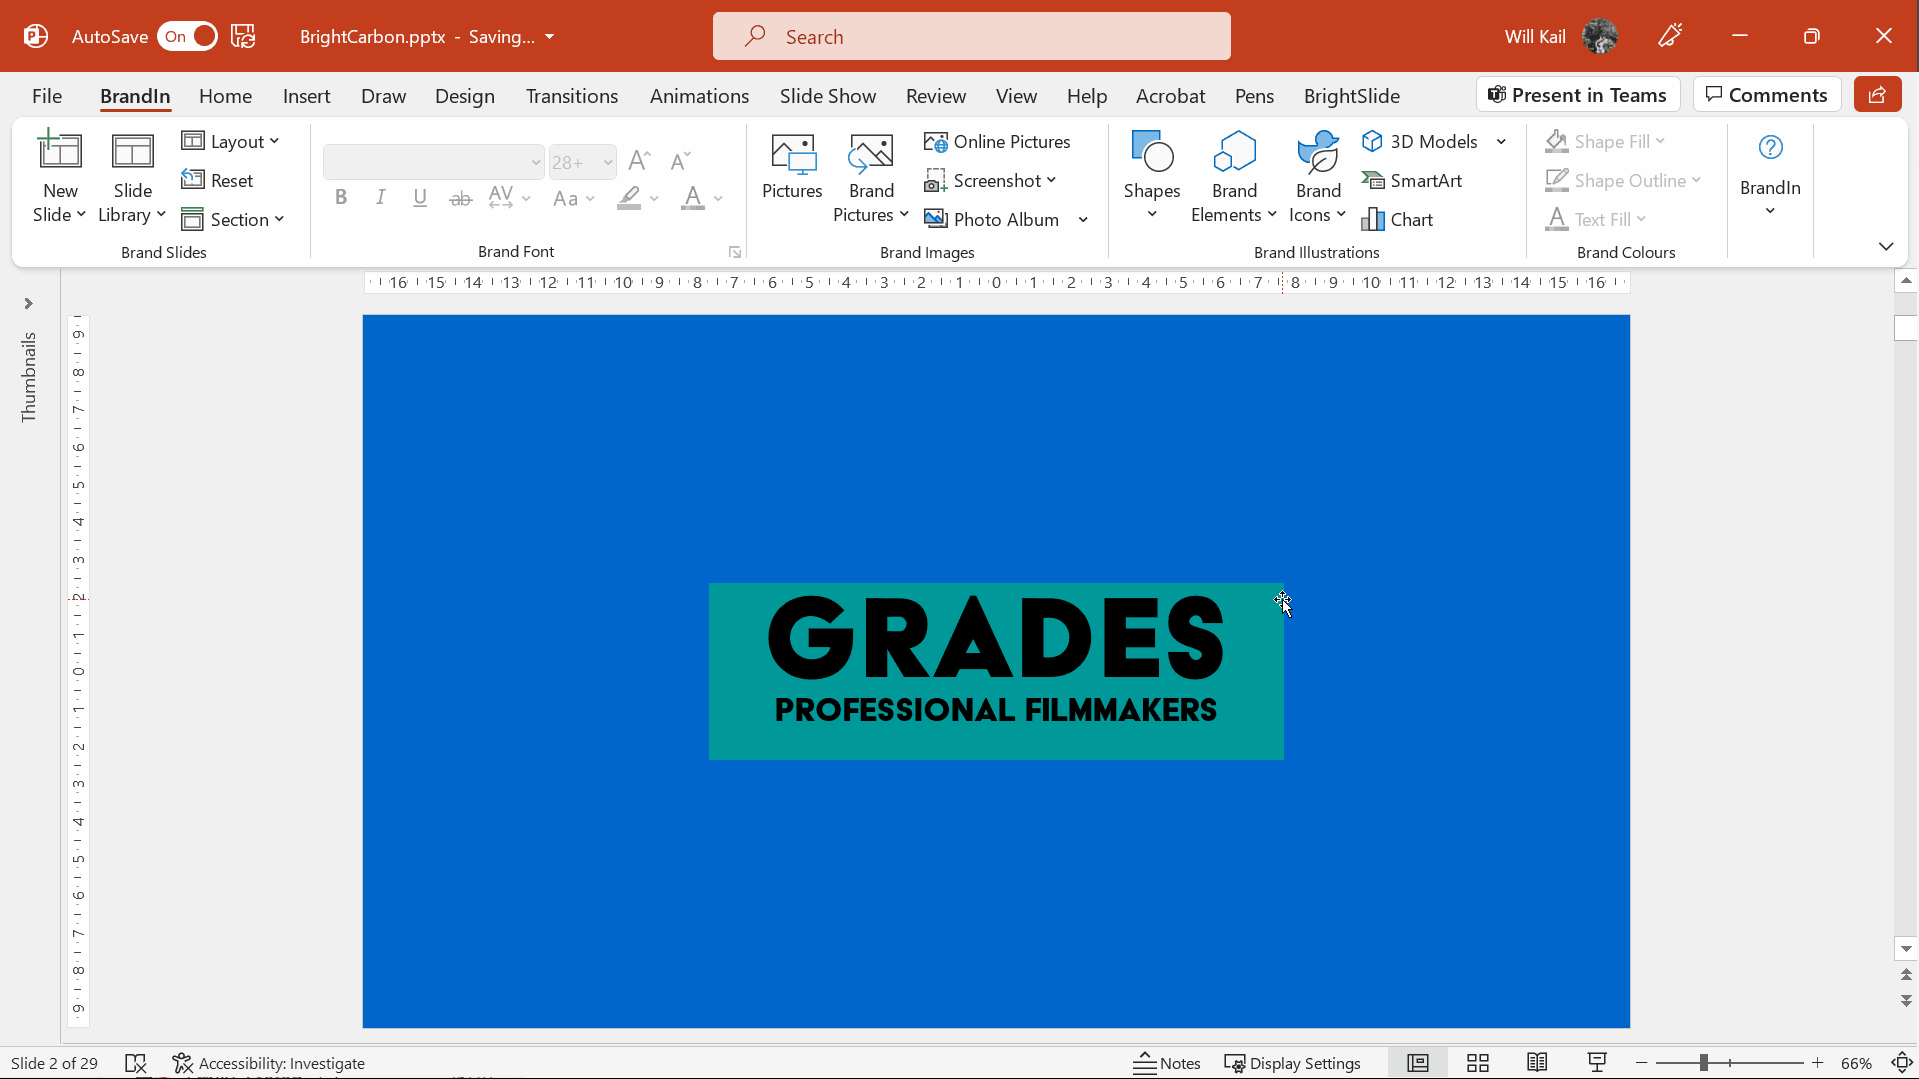
- Congratulations! You’ve created a mask. Now, change the fill colour of this mask – any dark colour will work well.
- It’s time to have some fun. Drop in a cool image, graphic, or video behind the mask. Use something on-brand or something bold from a free image depository like Unsplash. Not sure where to source royalty free images? Luckily, we’ve got a blog post on the topic here. When you’ve found your image, send it to the back of the side (right click > Send to back). It should look something like this:
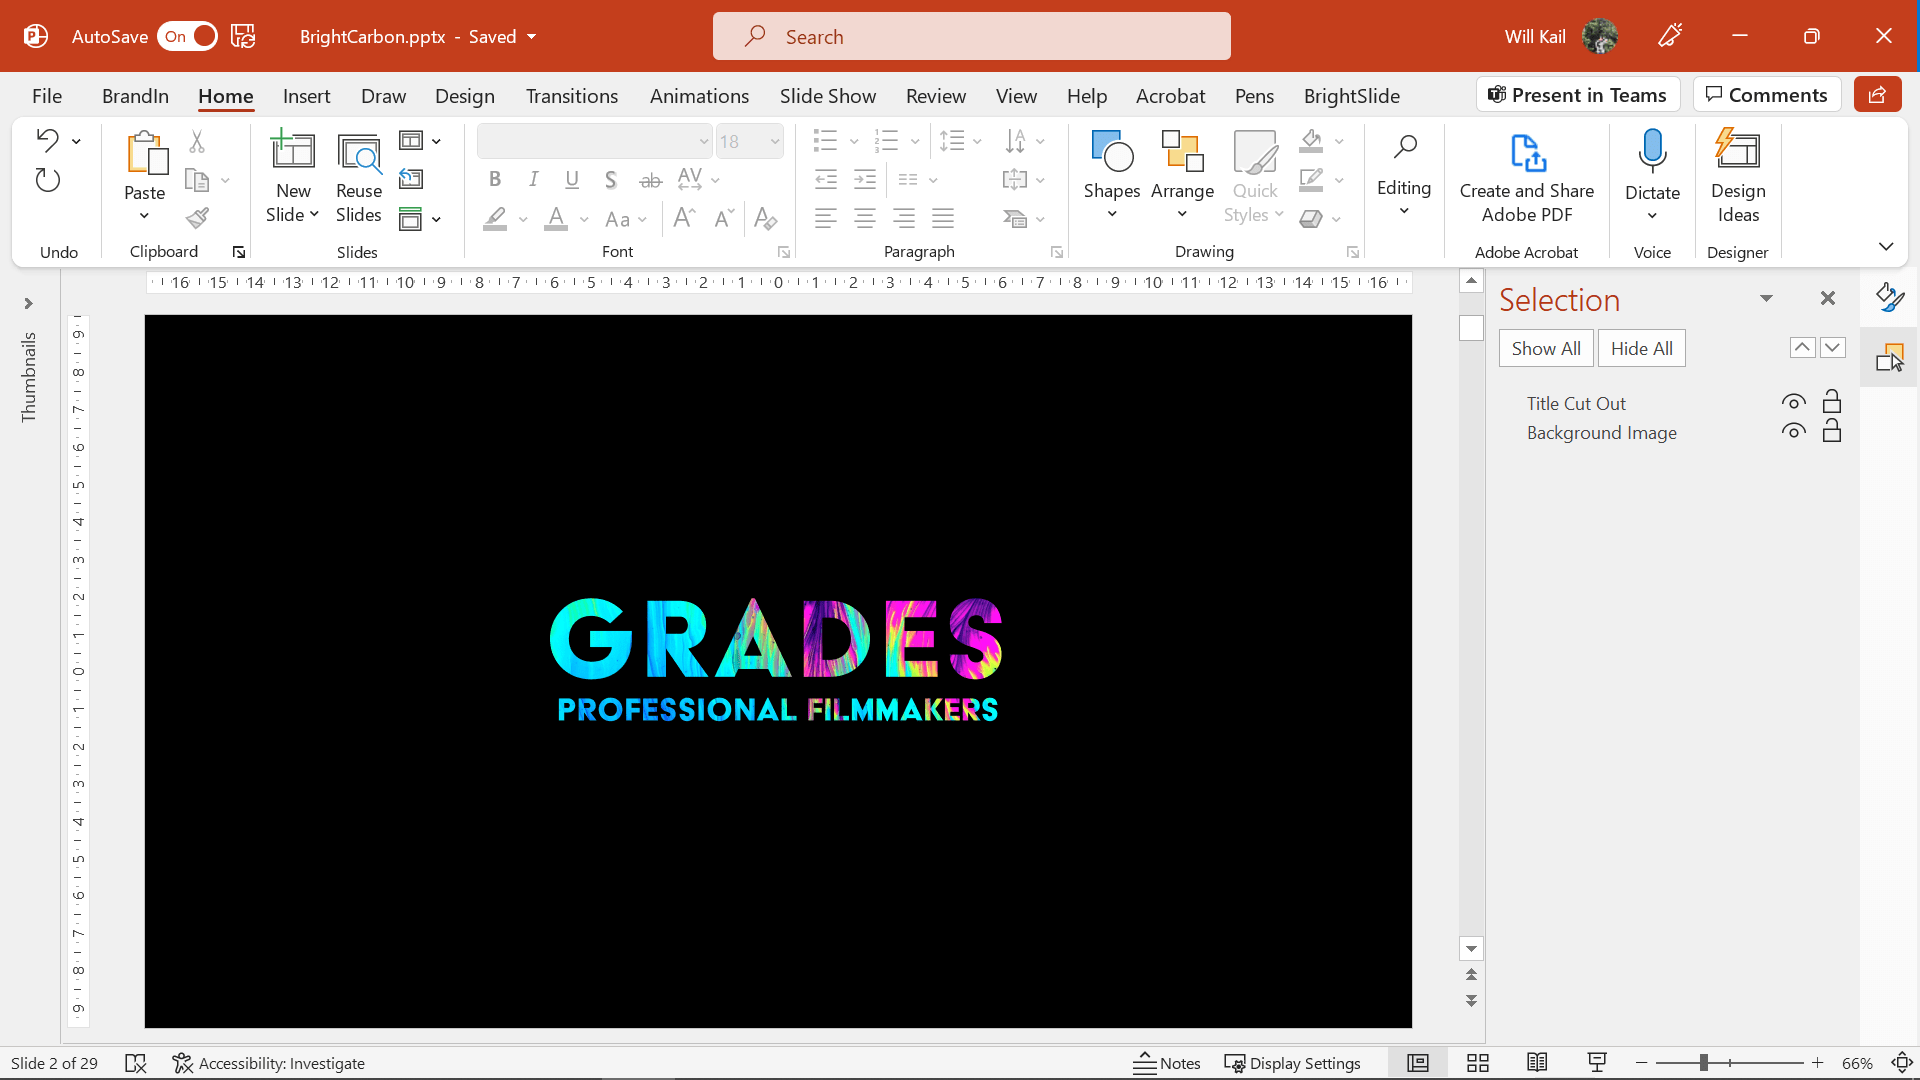
- This is where the magic starts! You’re ready to add some animation to make things pop. Here are a couple of options:
A) Place the mask above your slide and use a motion path animation to move it into view. Go to the Animations tab and, under Add Animation, select Motion Path. You can edit the effect by opening the Animation Pane, right clicking the animation, and selecting Effect Options to make sure your text ends up front and centre.
Here’s an example of what you can achieve with a couple of motion paths!

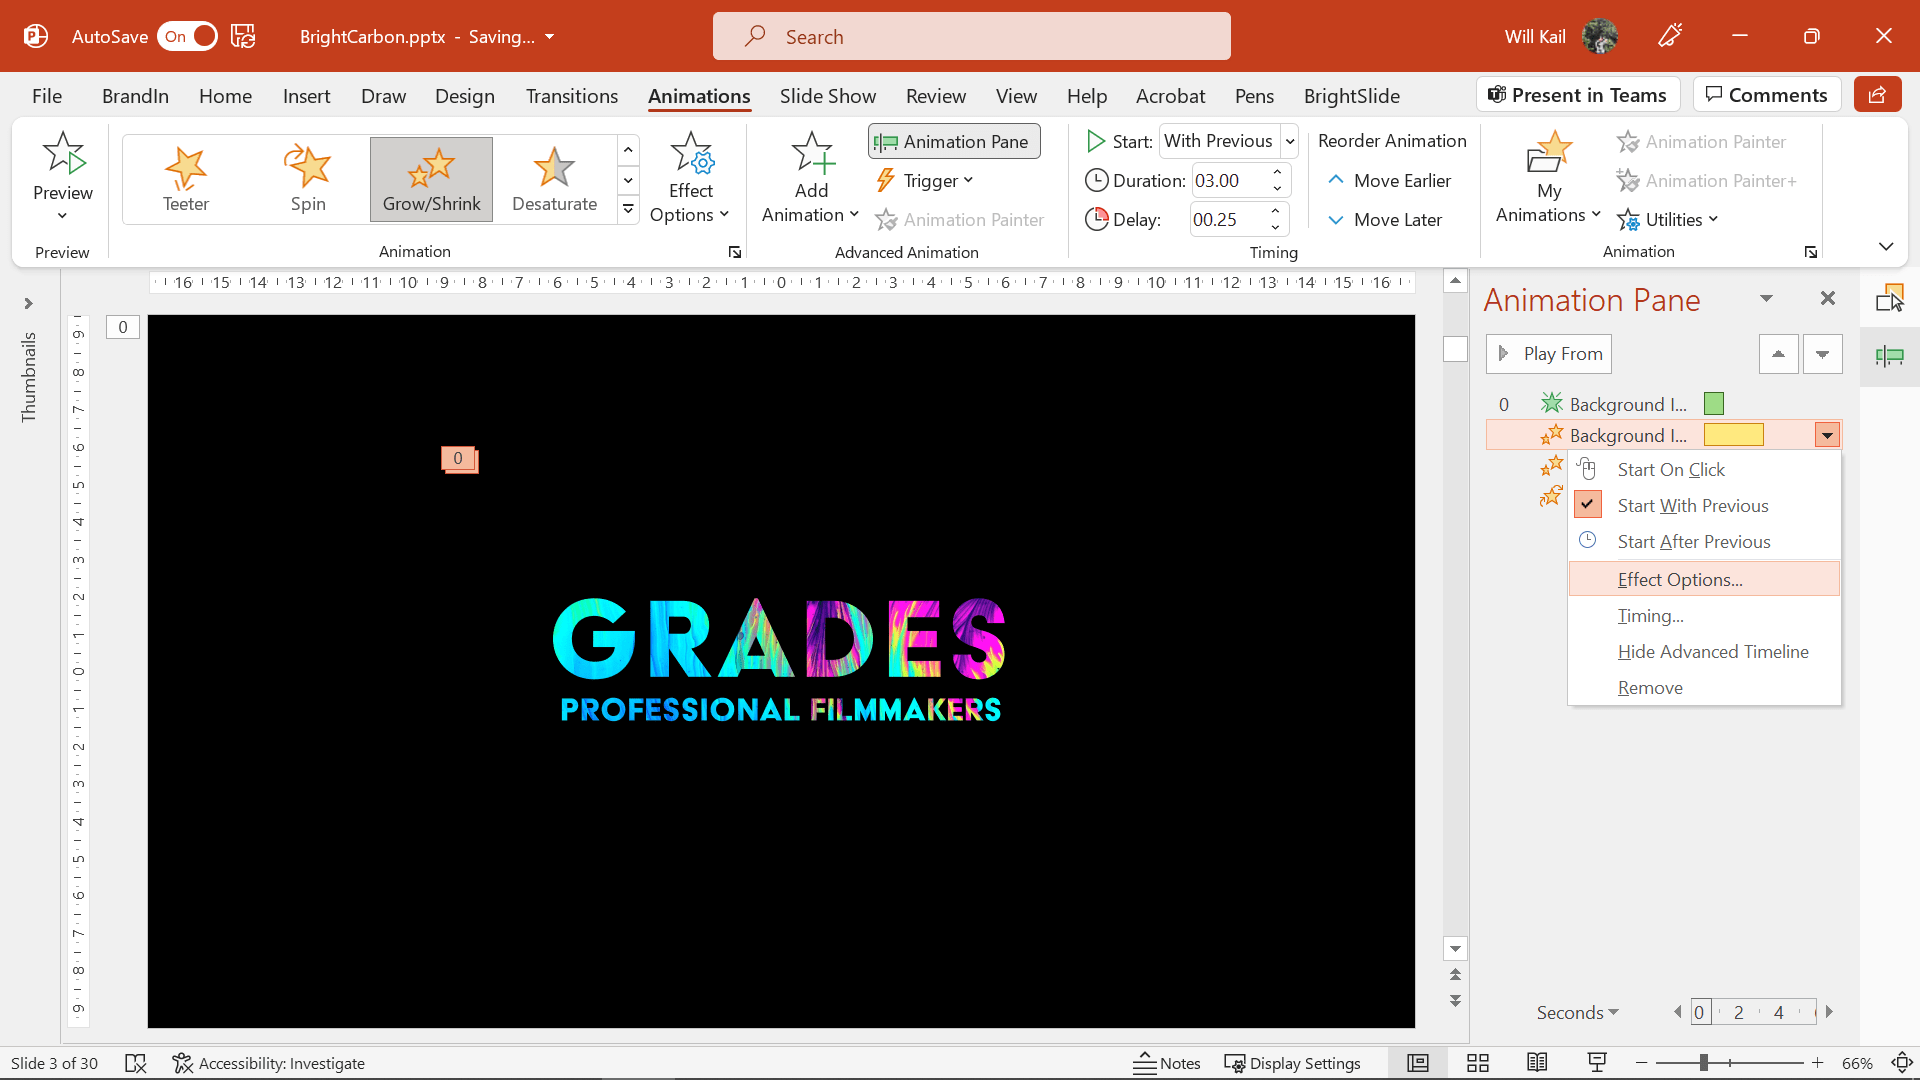
B) Alternatively, add a subtle Grow/shrink animation to both the title and the background image so they move dynamically as the slide animates. To do this, select the objects, navigate to the Animations tab and pick Grow/shrink. Open the Animation pane, right click on the Grow/shrink animation you’ve just added and select Effect Options.
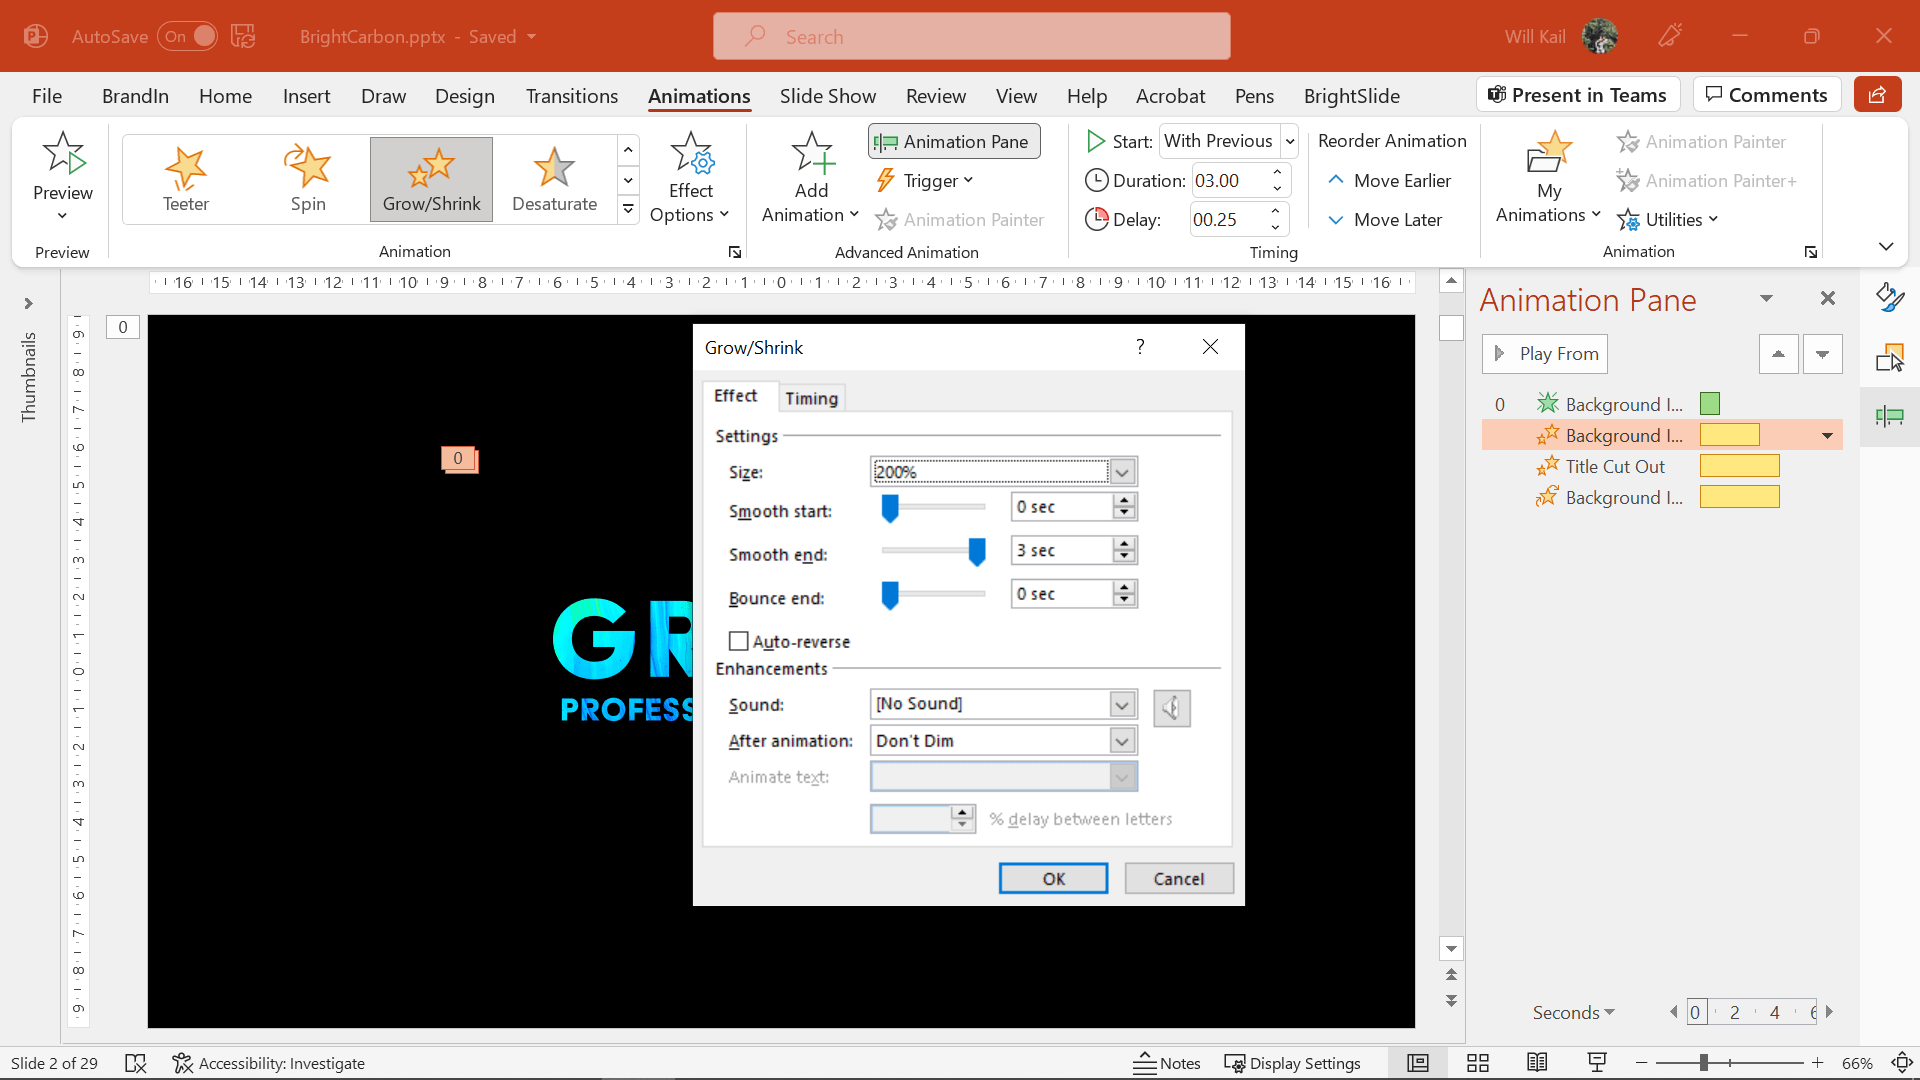
Then increase the animation duration to something like 3 seconds and add Smooth End to the full animation length.
This means that, as the animation plays, it will slow down. Repeat these animation steps with both the title mask and background image, making sure there’s a slight offset between the two (so they don’t start at the same time). If you’re feeling creative, you can add further animations such as a Fade or a Spin for extra flourishes.
Boom! You’re done, one title slide transition in PowerPoint is in the bag!

Once you’ve mastered this trick you can get even more creative. Depending on what impact you want to create, this title slide transition effect can be subtle or in-your-face – the power is in your hands!
If you want to learn more about PowerPoint slide transitions check out our guide to looking sleek with smooth PowerPoint native transitions or our expert insight into the magic of morph.
Leave a commentRelated articles

05th Feb 2026
PowerPoint template tips for design agencies
A PowerPoint template is the only brand element you put in the hands of the whole organisation – regardless of computer literacy, or design skill: it has to be robust enough so that it can’t be broken, but strong enough to carry your brand voice into every meeting, or leave-behind, or proposal it gets used for. Read on for a list of the essential elements every PowerPoint template needs to have.

- PowerPoint design
- Comments: 1
Designing content to be accessible doesn't have to mean you compromise on vibrant design, or your brand guidelines. In this article you'll learn more about colour contrast and how you can preserve colour vibrancy without having to sidestep WCAG accessibility guidelines.

Leave a Reply
Join the BrightCarbon mailing list for monthly invites and resources
Tell me more!All of the content I've seen so far has been valuable and definitely worthwhile. The resources are awesome, and you're really crushing it with useful content.
Theresa Schuck Thorp Olympic Steel

Brilliant! Thank you so much for putting out such great content!
Not sure what I am doing wrong, but everytime I click Merge Shape to Subtract, I end up with a white box (yes the textbox is set to no fill too, and ordering is shape first, then text). What am I doing wrong?