If that isn’t click bait, I don’t know what is. But it’s true. Well actually it’s not – our experiment showed you can save well over 50% of time in slide creation (we cut slide creation time by two-thirds) but sometimes it pays to hedge your bets. So, even being conservative, there are some big time gains to be had, and it all comes down to your PowerPoint workflow.
How to use this article
If you create PowerPoint content every day, you’ll want to top up your coffee and have a read through everything – it’s going to be important to figure out where you’re losing time, and how you can speed things up.
If you supervise teams of content creators then you probably just want to dig into the experiment, the results, and what happens next – there are going to big some big wins for you if you can speed up your team at scale.
It’s simple. We’re going to make a slide comparing two different workflows. The first replicates average user behaviour (based on what we see in our training sessions), the second uses our three simple workflow hacks.
This is the slide we’re going to make. It’s not a boring bullet point slide (the world has enough of those already), it’s the kind of slide you might have seen somewhere and screenshotted for inspiration. As you can see we’ve got some rich imagery, there’s some interesting texture and layering going on, and space for our key messages.
The result
If you like gentle videos of someone clicking around in PowerPoint whilst making sarcastic comments, I’d recommend watching the two videos below in full. If you like headlines, here’s the key takeaway: with the average workflow, it took 10 minutes to make the slide. Now that isn’t a crazy investment, but when you consider with the updated workflow it took just under 3-and-a-half minutes, that’s a considerable time saving.
Like I said in the opening, we saved two-thirds on creation time from the two approaches, and while you might not get there first time of trying, even saving 25-50% of your slide creation time really adds up over the course of a deck, a week of decks, and months of decks.
Slide creation simulating an average user workflow
Before we dig in, how are we defining an ‘average user workflow’? Well, we’re assuming the user is not a complete novice. They know the basic functionality, and roughly where it all sits. They might have been to a few of our free masterclasses. By trial and error they’ve probably found some of the cooler things PowerPoint can do as well. They’re using PowerPoint ‘out of the box’ – so no modifications, no PowerPoint-specific shortcuts, no add-ins. They probably also lack confidence – maybe trying something, deciding it doesn’t work, and then trying something else – we see that a lot.
Slide creation using a boosted workflow
The biggest difference is that this user three tools in their toolbox: an optimised workspace, some key shortcuts, and a very powerful add-in. Watch below to see the difference that makes.
Three ways to save time in PowerPoint
So how do you go about building these practices into your PowerPoint creation? Here are three things you can start doing today.
Avoid sub-menus
If you watched the videos, you’ll have seen that there’s a whole bunch of time dedicated to clicking around in menus. PowerPoint has a wealth of functionality, and it needs to compartmentalise everything in menus and sub-menus, and sub-sub-menus. But that means lots of clicks to first of all find the right menu, and then clicks to execute the right function.
The single-best way to cut out all of that click-chatter is to bring your core functions out of your sub-menus and down onto your workspace.
In the second video you can see a banner of tools right above my working area – that’s my Quick Access Toolbar. It’s populated with the functions I use all the time. Arrange tools, alignment tools, formatting tools – it’s done in one click instead of four or five.
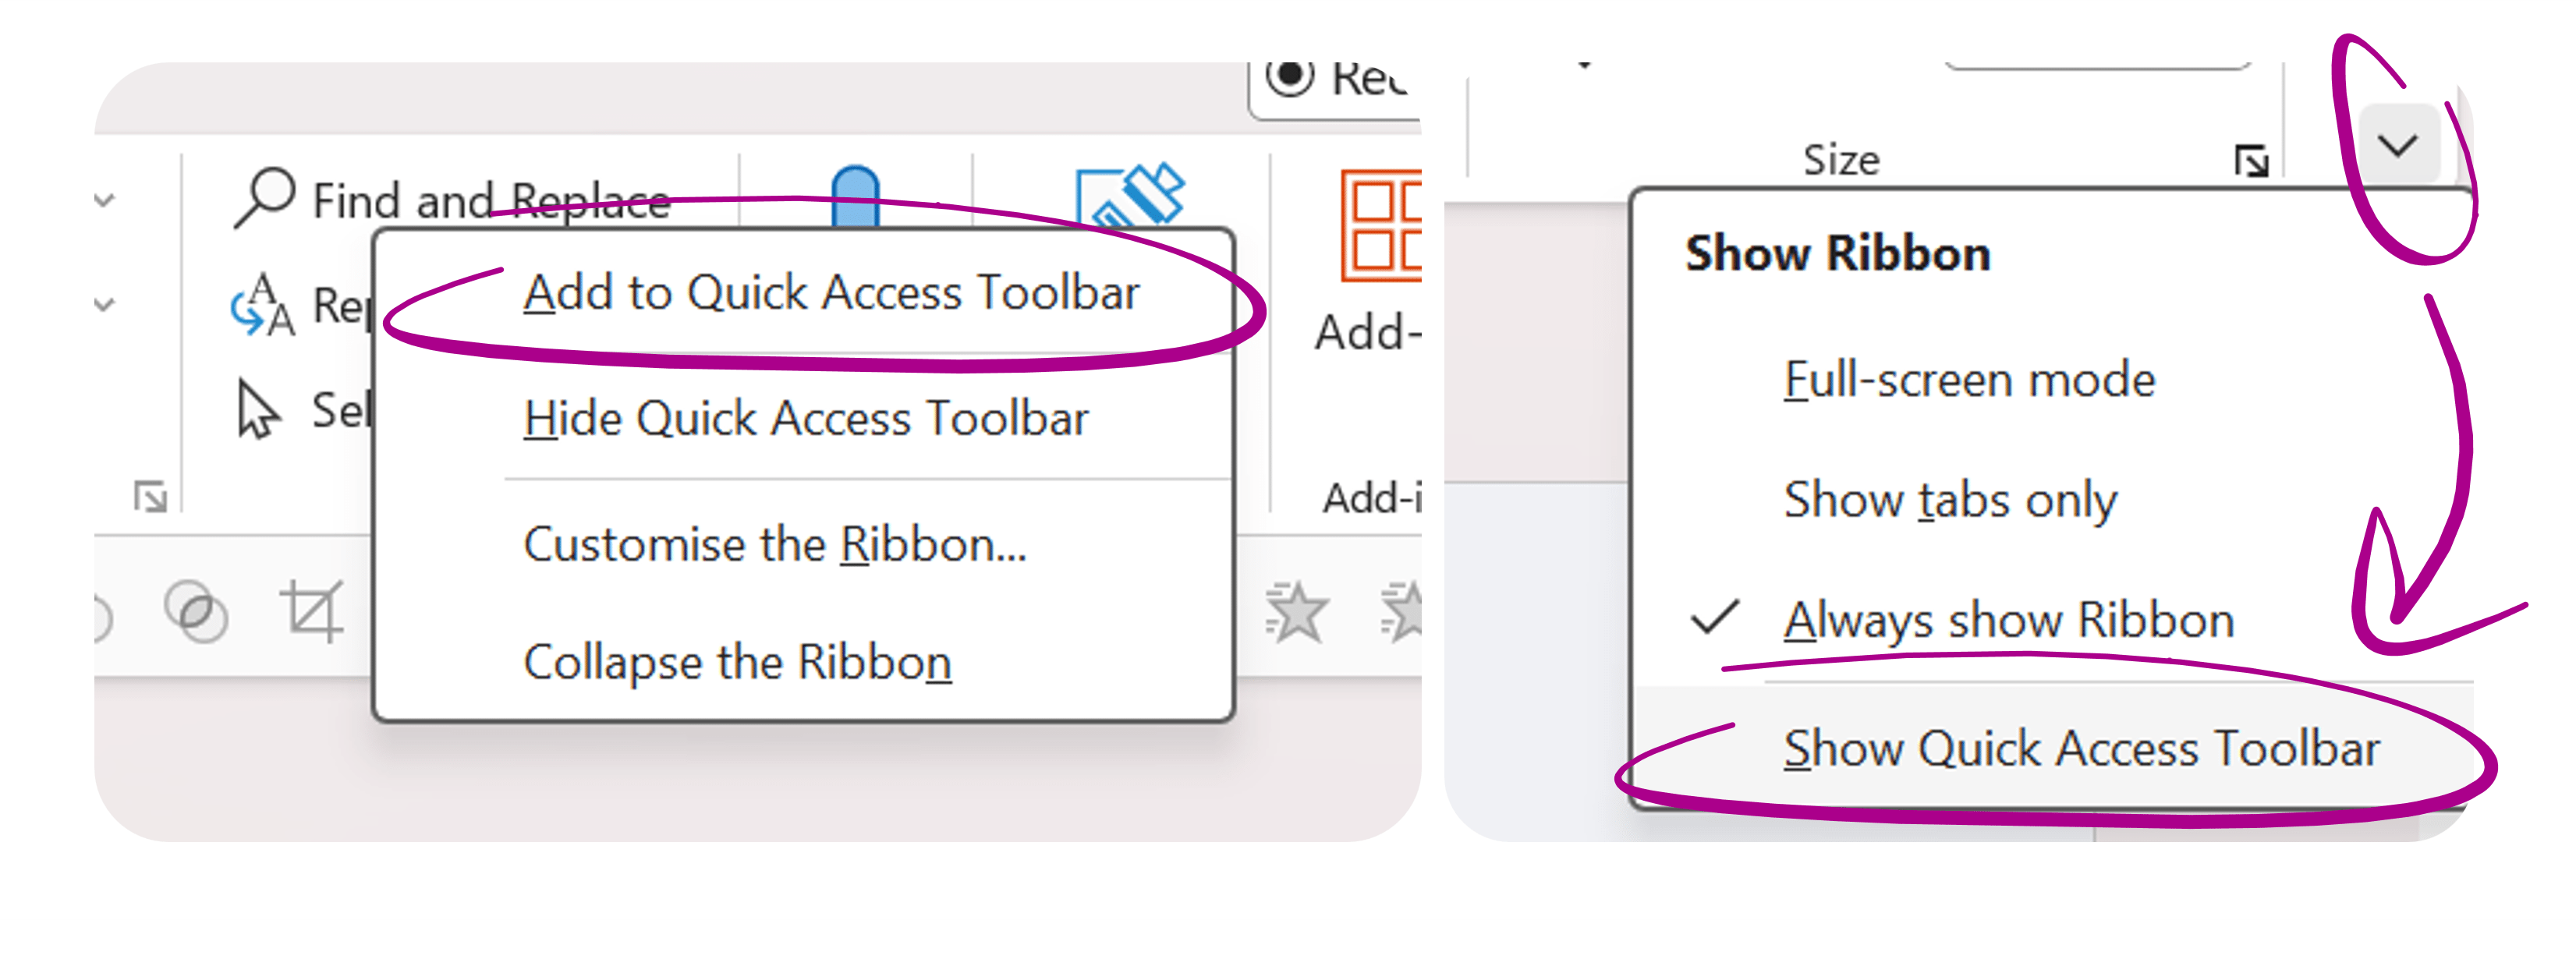
The Quick Access Toolbar is really easy to program. Clicking the down arrow on the far-right of your PowerPoint window will give you the option to display the toolbar. Right clicking any function will give you the option to add it to your Quick Access Toolbar.
We have a full tutorial for enabling your Quick Access Toolbar, plus you can download a version that we’ve populated with all of our most-used features.
There are so many keyboard shortcuts in PowerPoint, and they really do just that – they shortcut your creation process significantly. Before I give you the top 5 I think you need to learn, just a quick note on set up. Where possible, you should be using a mouse instead of a trackpad when you’re creating anything in PowerPoint. A mouse gives you a much greater degree of precision than a trackpad alone, and it also frees up one of your hands to use your keyboard for all of that magic shortcutting power.
1. Shift – Keep things in proportion
Hold down Shift when you’re drawing a shape and it will be a perfect 1:1 ratio. Hold shown Shift when you move an object and it will move along a perfect horizontal, vertical or 45 degree line.
2. Ctrl – Select multiple objects
Hold down Ctrl when and click on multiple objects – you’ll be able to select several at once. In the first video you may have noticed I achieved the same thing by clicking and dragging over the slide – or the lasso – this is a great option, but may give you less precision when you need it.
3. Ctrl + D – Duplicate
This combo allows you to duplicate any object. If you’re looking to duplicate multiple objects, use Ctrl + D to duplicate your first object, move it into position, then hit Ctrl + D again, and your next object will duplicate with the same relative spacing, allowing you to create lots of objects perfectly spaced and aligned with just a few keyboard taps.
4. Ctrl + Shift + C / V – Copy/paste formatting
Readers, this one is my favourite. This simple combo allows you to pick up the formatting of an object – think text size, colour, any effects applied – and drop them onto another object. Hours saved.
5. Ctrl + G / Ctrl + Shift + G – Group/ungroup
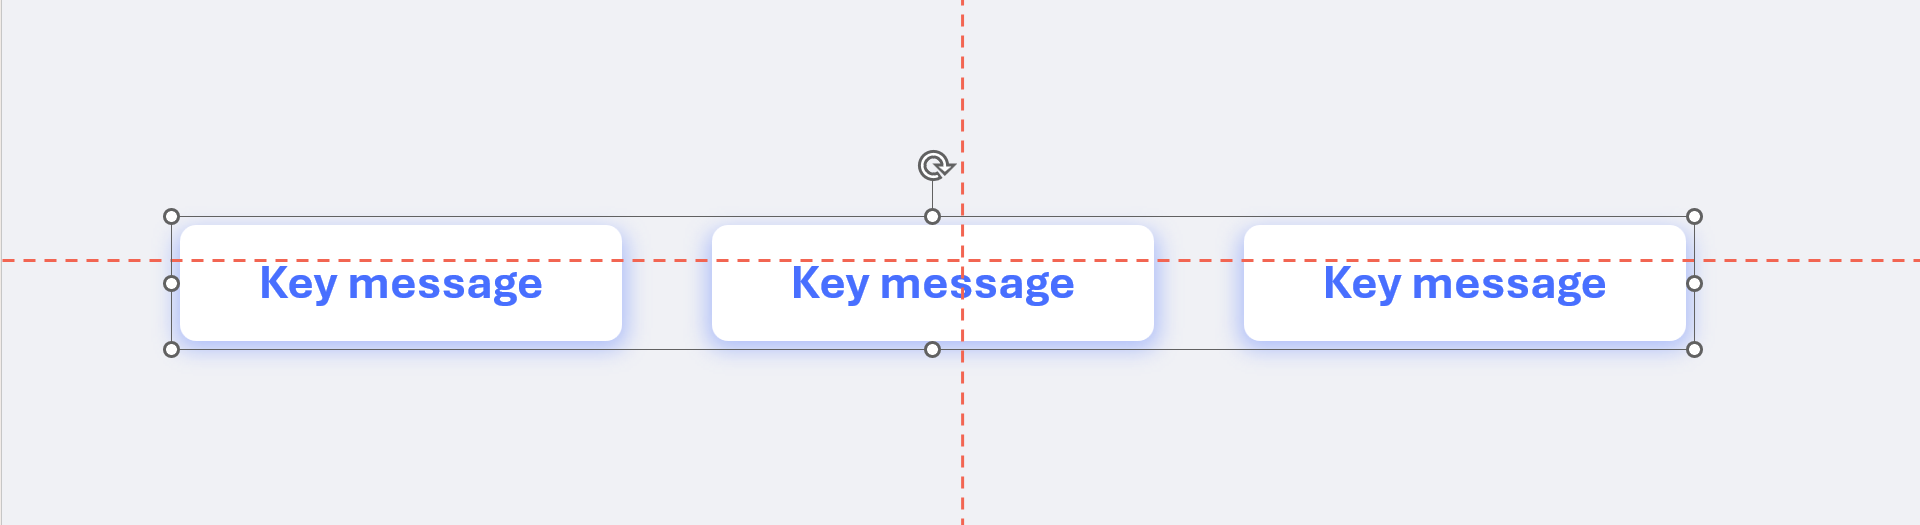
This is another of my go-tos for quick arrangement on a slide. Create your objects and align them to each other.
But even though they look right, they might not be perfectly aligned in the middle of the slide itself. This is especially common if – like me – you’ve started by creating a series of shapes that go from right to left. It’s not always intuitive to start in the middle.
Highlight all your objects (that are perfectly aligned with each other), and use the Ctrl + G shortcut to group them. Then use your alignment tools to make sure the group is aligned in the right place on your slide. Hit Ctrl + Shift + G to ungroup them and you have a neat and tidy slide that won’t distract your audiences with amateurish placement.
For a full (and free) downloadable list of all the major PowerPoint shortcuts, take a look at the links below:
Lastly, there are some things that PowerPoint simply cannot do. Amazing though it is, Ctrl + Shift + C/V won’t let you copy the precise amount of rounding on a rounded rectangle from shape-to-shape. You don’t have the option to select types of objects (so you can’t select all the pin drops on a slide, or all the green squares in amongst a sea of green squares and red triangles). Changing the paragraph and text spacing in PowerPoint is likely harder that navigating a shuttle to Mars (probably, this is currently just a hypothesis).
This is why BrightSlide exists. BrightSlide is an add-in for PowerPoint that enables you to access the power-user functionality directly in PowerPoint. And it’s free. Like actually free. For Windows and Mac.
In the video I used a fraction of what BrightSlide can do to match the size of my image to the slide in a single click, but you can read more about what BrightSlide can do in these articles.
Now you’ve opened the door to greater productivity in PowerPoint you can start to speed up your workflow. Get used to these go-to hacks and let muscle memory ramp up your creation times.
There are two more things you can try as well, if you want to completely hack PowerPoint productivity for your organisation.
Train your team
We run Advanced PowerPoint training for all organisations and these are just a few of the tricks we teach when it comes to productivity. Imagine if your whole team could learn how to create not just any content faster, but effective and beautiful content faster.
Deploy your best slides to your whole organisation
Okay, so you may have figured out some game-changing productivity hacks for PowerPoint, but what about the rest of your team? If PowerPoint training isn’t on the menu for you, there is potentially a lot of time you’re losing in making duplicates of key slides like the one in our example, or even just locating where it was saved so it can be shared more widely.
Check out the video below. This is slide creation in seconds.
Okay, what’s going on here? This is BrandIn – it’s an another add-in for PowerPoint (free for up-to 4 users) and it allows you to serve up your pre-approved content in app. So that’s your templates, slide libraries – including beautiful key messages slides – images, icons, text – the lot – accessible in a couple of clicks right in PowerPoint.
This is a great way to empower your key content creators to do what they do best, and then share their great work with the rest of your organisation without things going off-brand, or becoming a little too homemade.
So this whole article may have taken you 20 minutes to work through, but come back at the end of the week and drop a comment with how much time it has saved you.
When it feels like the call is to make more and do it faster, design smart and build a presentation toolkit packed with effective layout slides. We show you how to start off by building five of your own.
If you use PowerPoint a lot, chances are you’ll have seen your fair share of glitches and malfunctions. And nothing is so frustrating as losing work or precious time to PowerPoint crashes! So, after doing some of my own extensive research, here are the most common reasons why PowerPoint crashes and what you can do about it.
If you need footnotes, or if you’re a prolific user of mathematical formulae, you’re going to need to know how to make your text superscript and subscript in PowerPoint. Here are three ways to do it, with some bonus productivity tips to keep you working efficiently!