If you’ve ever wondered how to zoom in on your computer screen, look no further. This article will show just how simple it is to magnify or zoom into any content that you have on your PC, whether it is a program, app, or presentation. Once you know how to zoom in on your screen in Windows, you can improve your presentations, training sessions and online webinars by highlighting important content.
Magnifying or zooming in on your computer is simple to activate at any time using your mouse and you can zoom into the entire screen, or just magnify a section of it, moving around to change your view. You can also change the magnification level to make things even larger. This technique is useful for showing people data sets with small text sizes, complex screenshots, or a live program. We recommend doing it in presentations and training because it helps your audience to see things more clearly, and helps you to focus their attention on the important elements of the screen.
So, how do you zoom in on your screen?
Depending on the version of Windows you’re using, some of these options will work better than others.
Use the in-built functions on your computer to zoom in on your screen
Since Windows 7, Microsoft has had a great quality magnifier tool built in (earlier versions were less useful), but it can be a bit of a pain to access. Once you’re set up, though, you should be good to go. Here’s a quick run-down of how to get things working on your PC.
Zoom in on your whole screen using the Magnifier in Windows
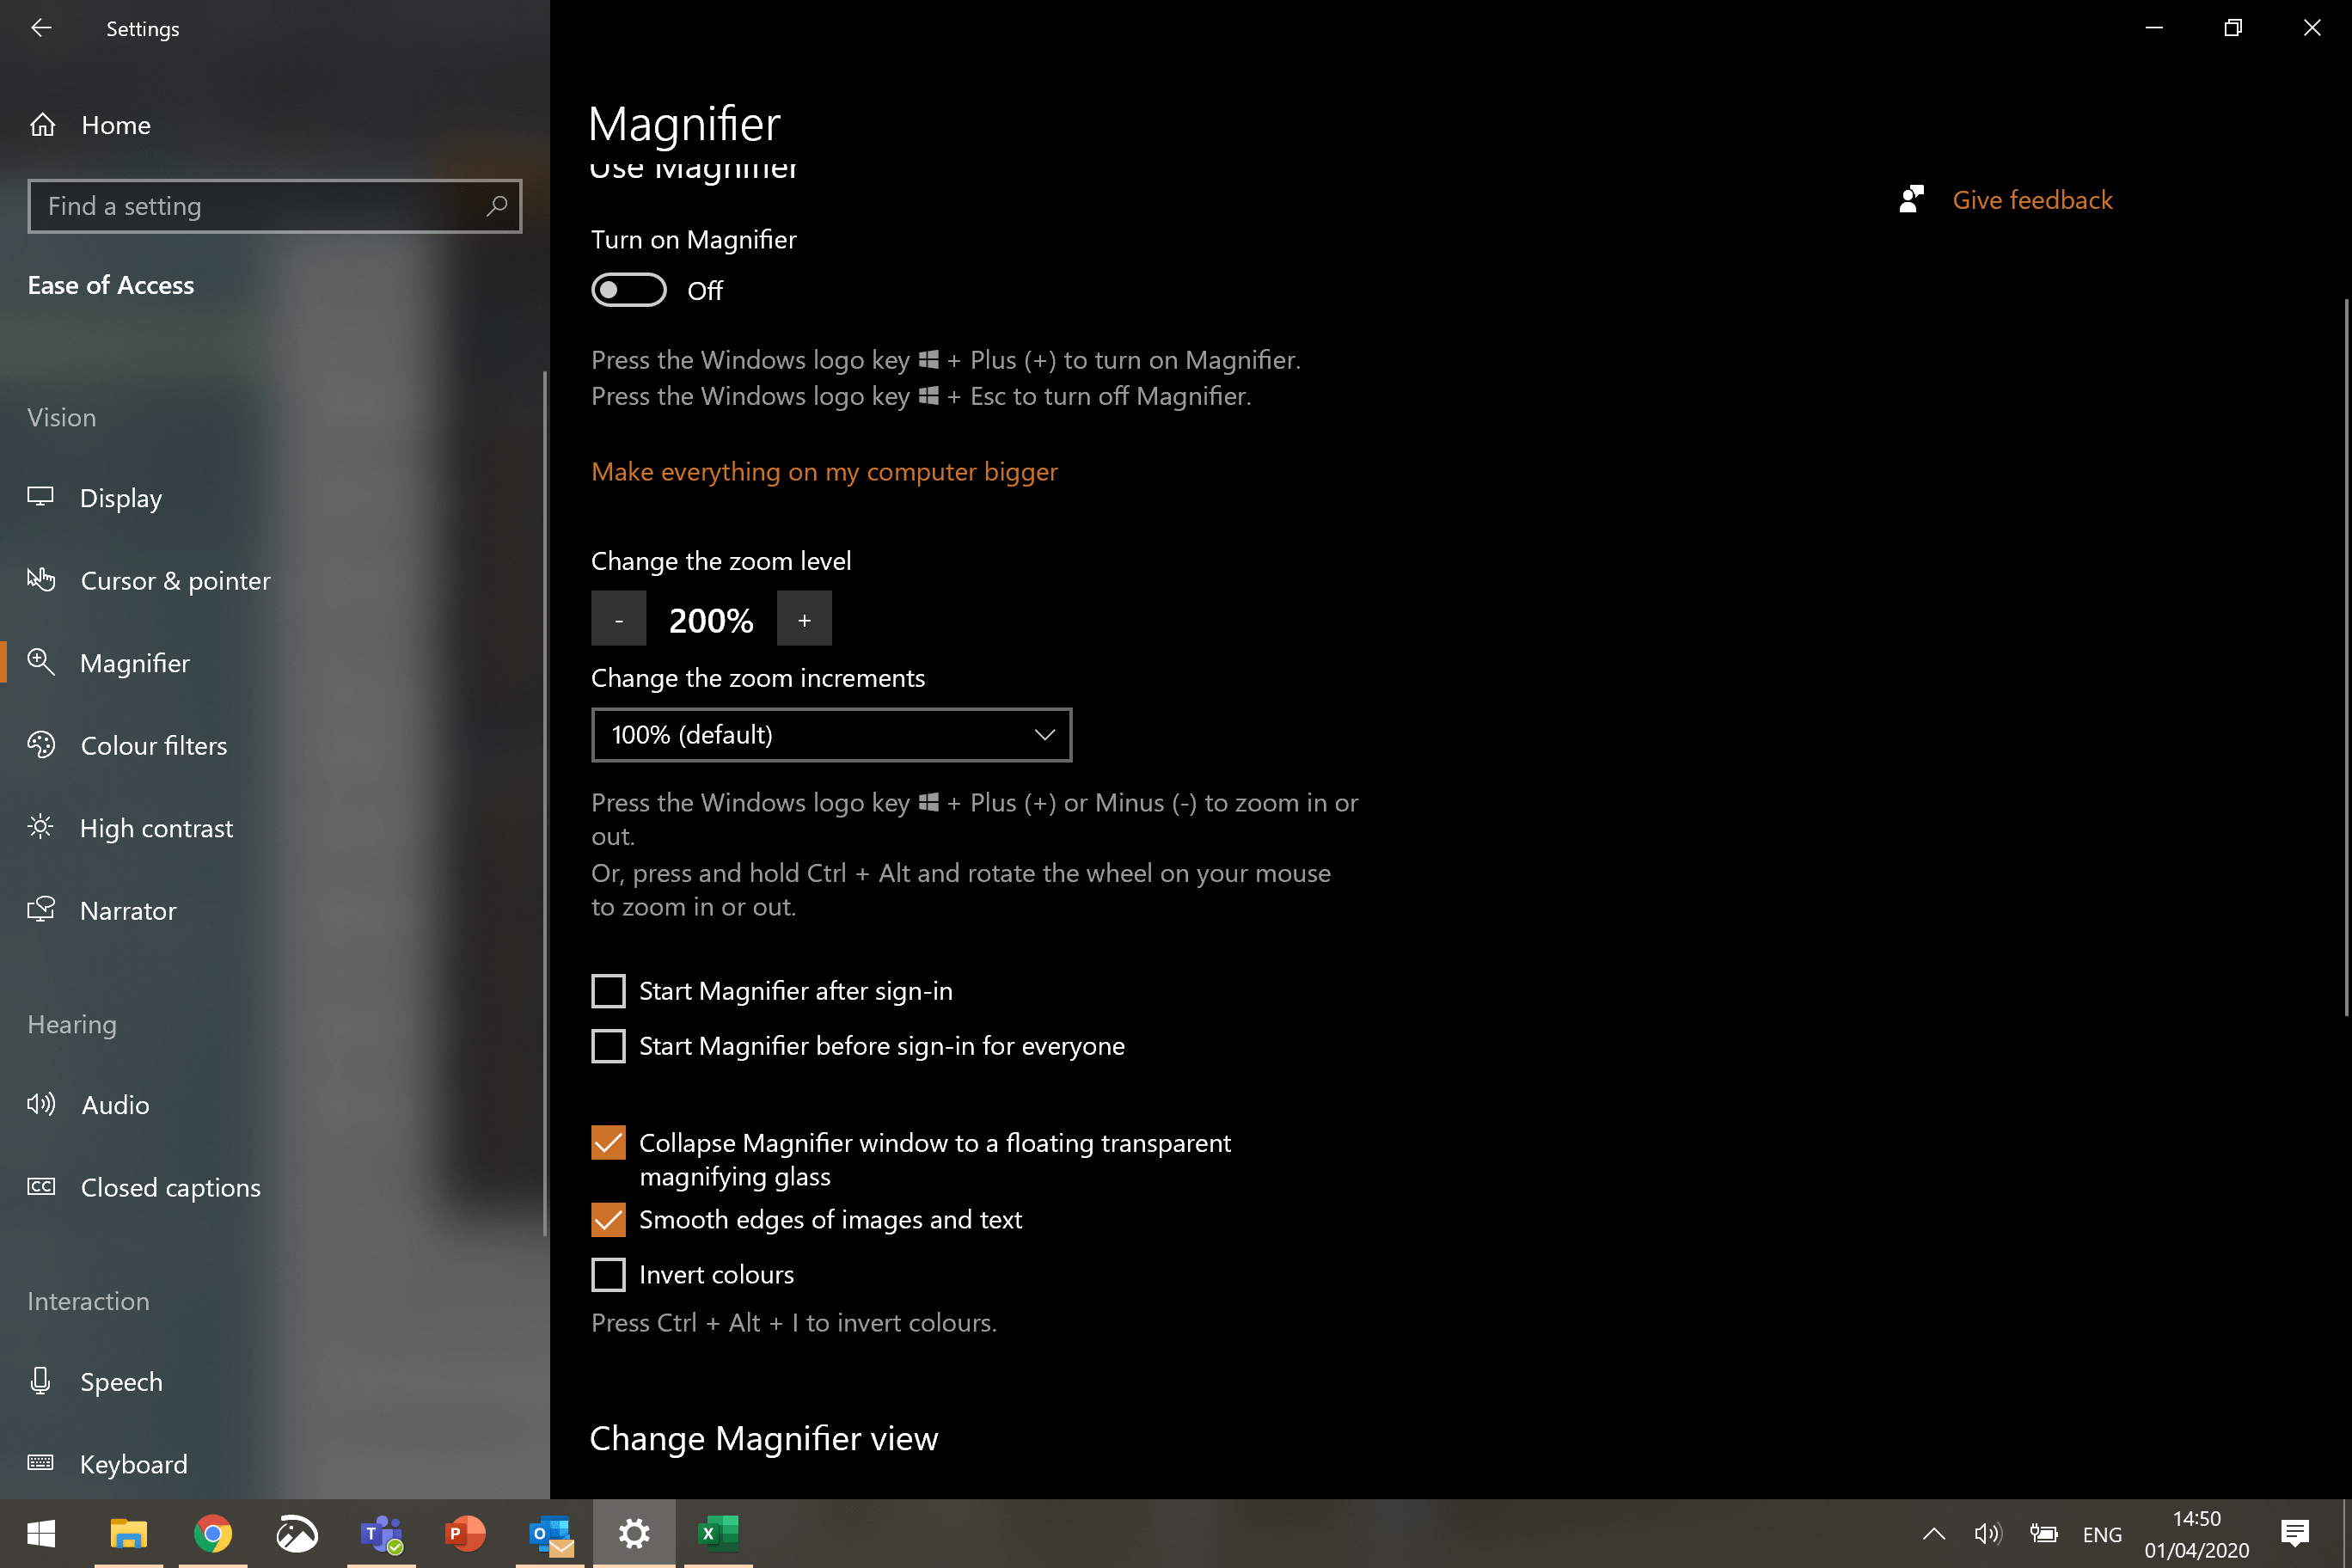
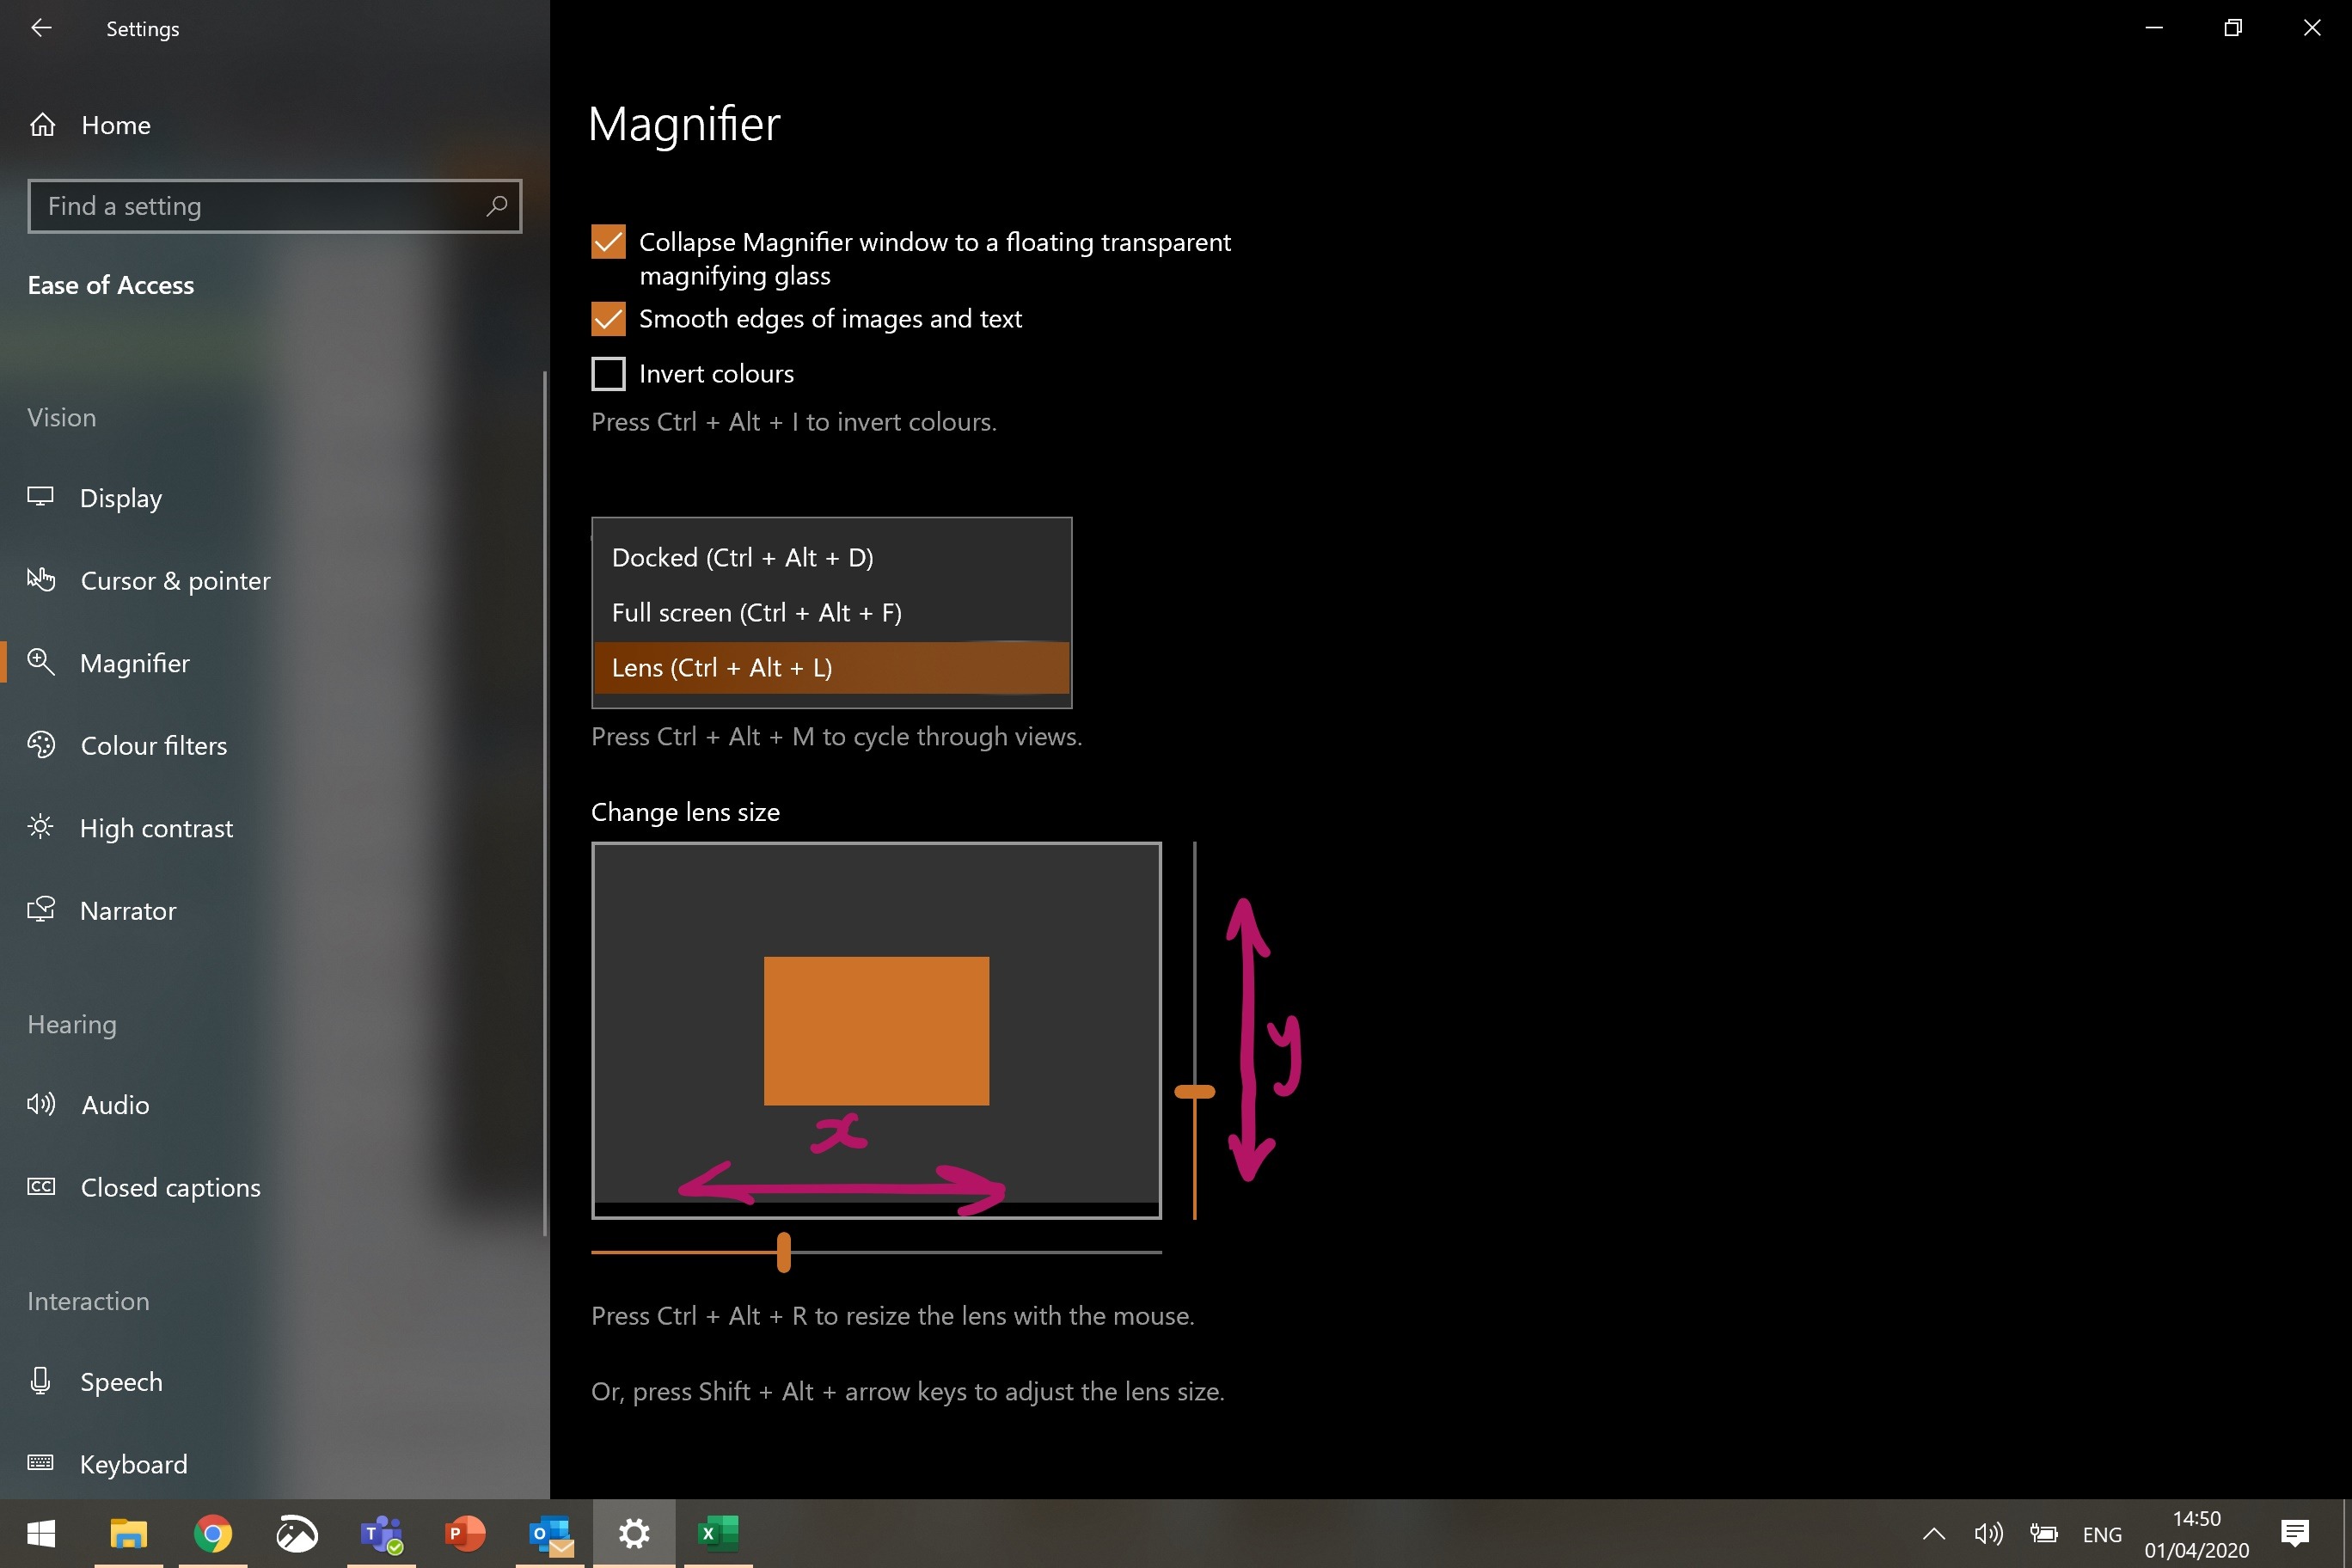
First, navigate to Settings, Ease of Access, and then choose Magnifier. You should see something like this menu:
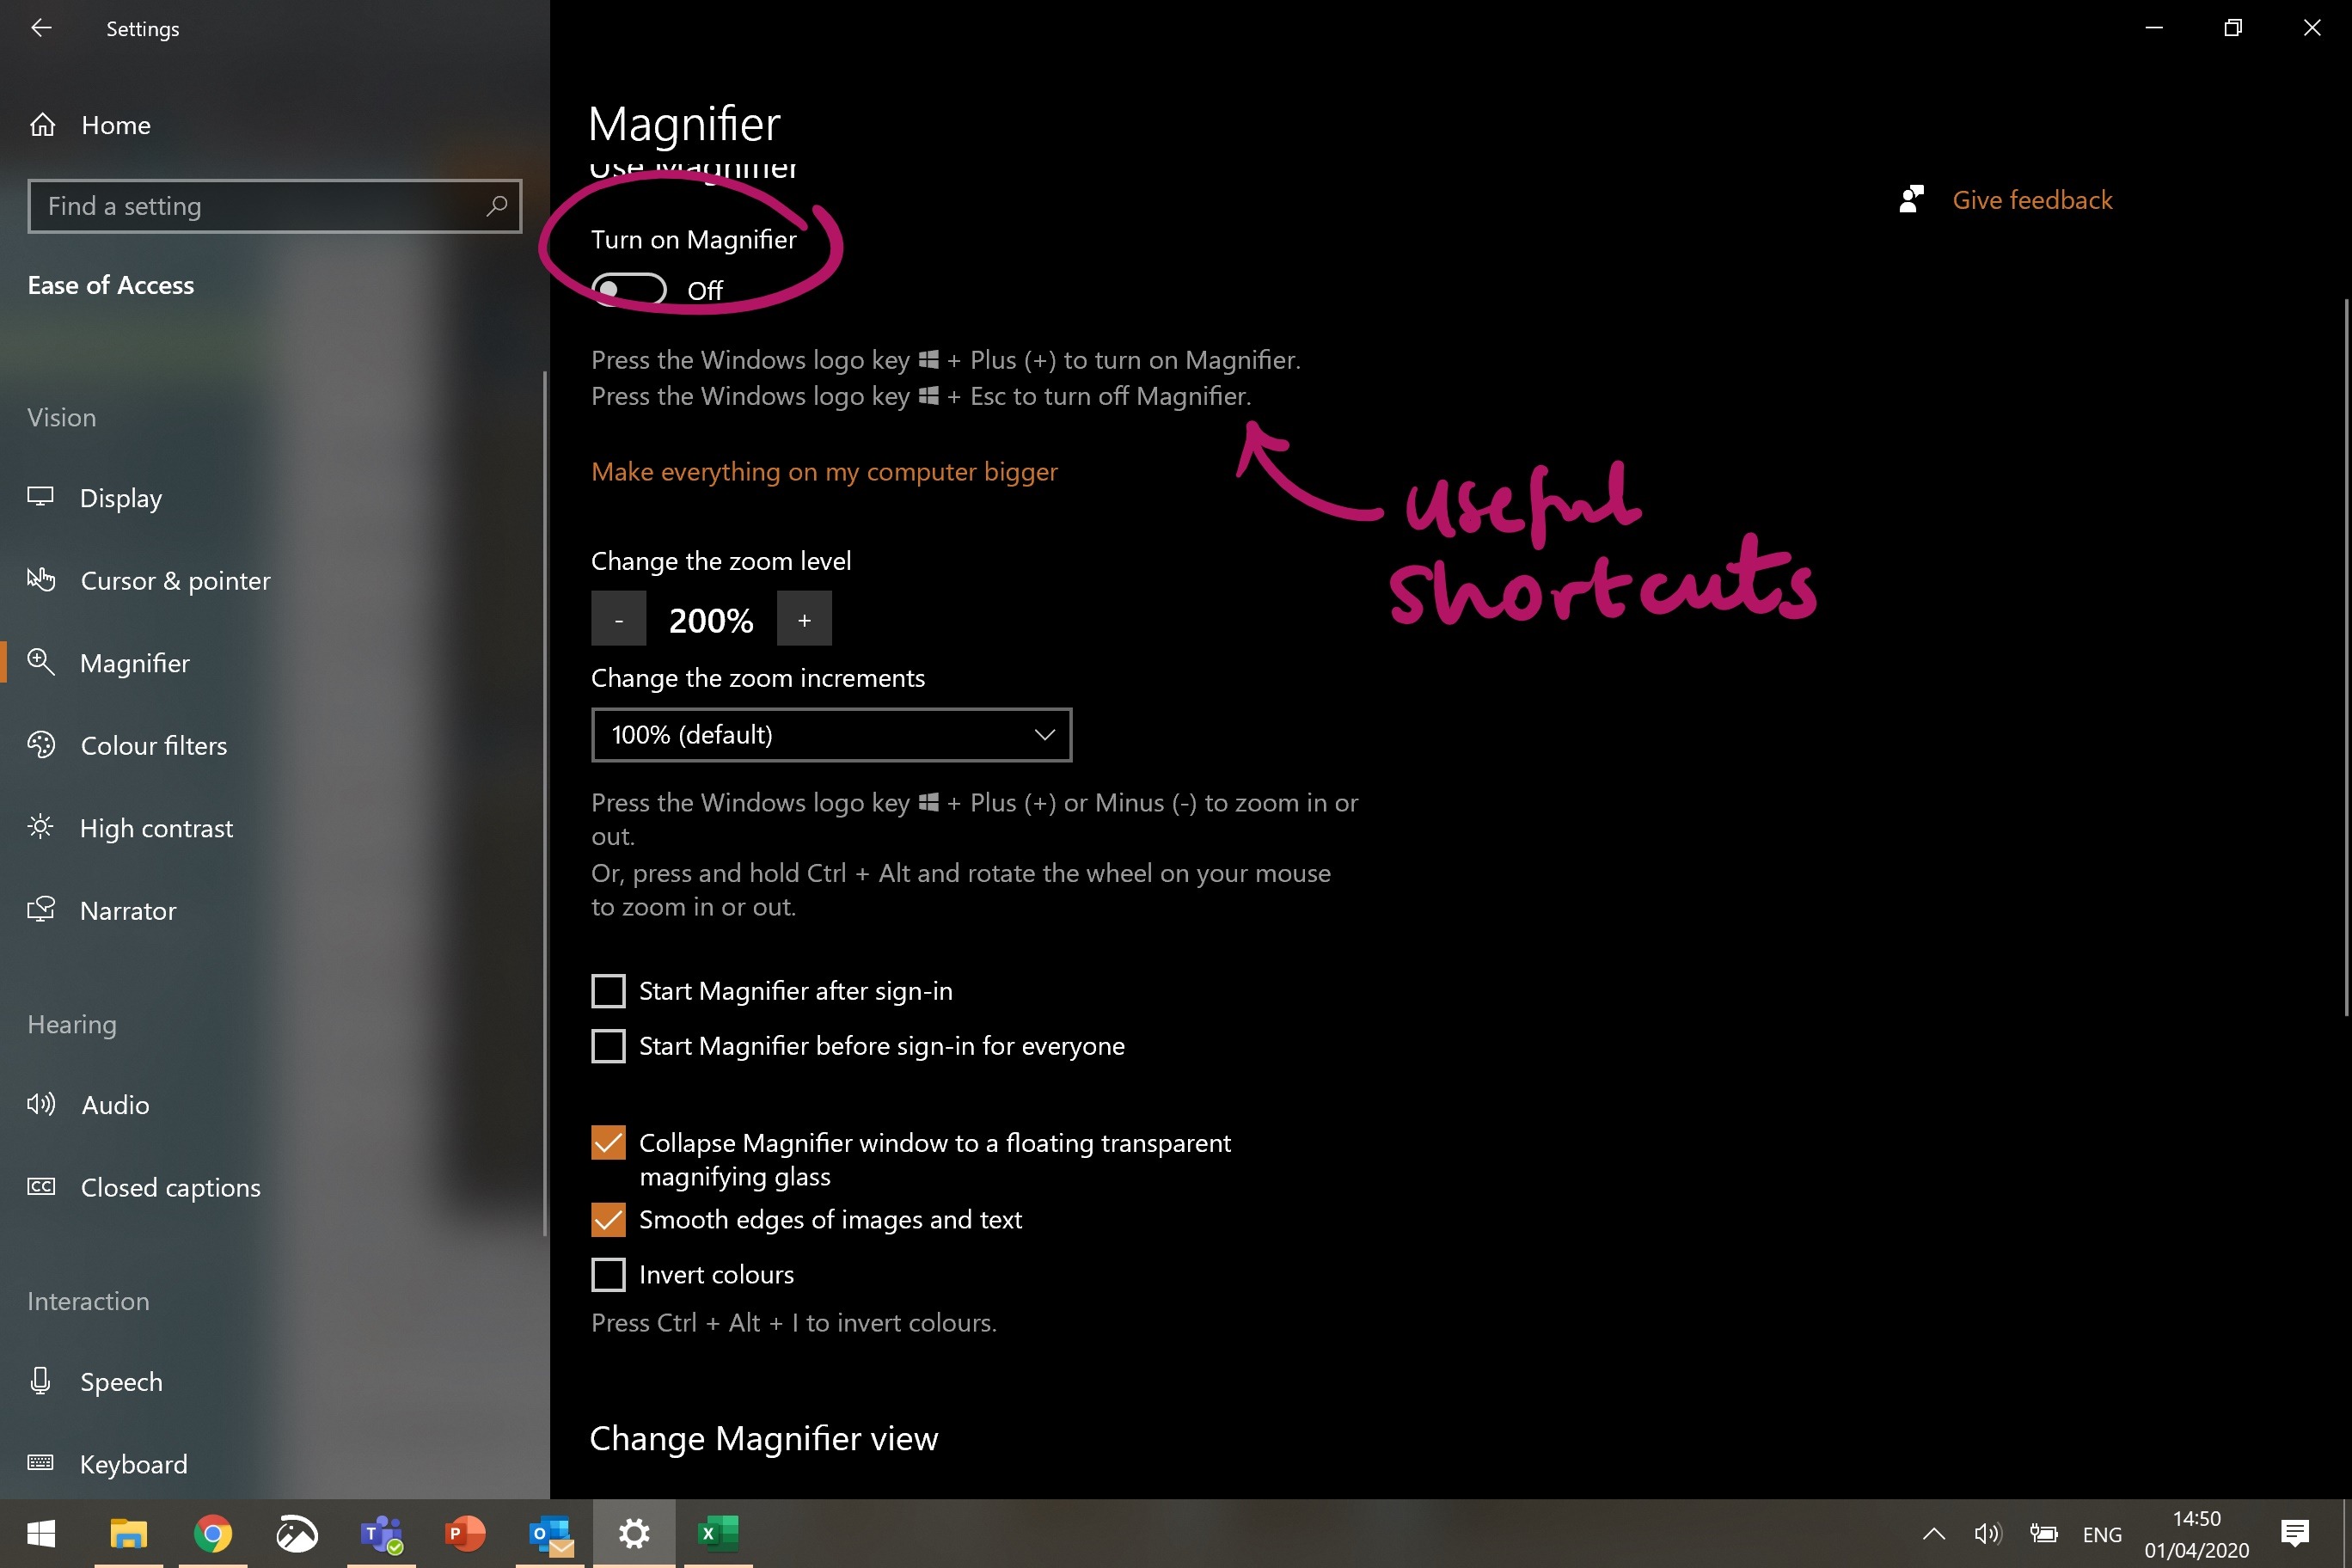
You can toggle the zoom function on and off using the switch circled here, but that’s not the most straightforward way to switch it on, especially if you’re in the middle of giving a demo. The shortcuts shown below are much more useful. Press Windows and + at the same time to make the zoom come up over your mouse – whatever screen you’re on – and press Windows and Esc to switch it back off again when you’re done.
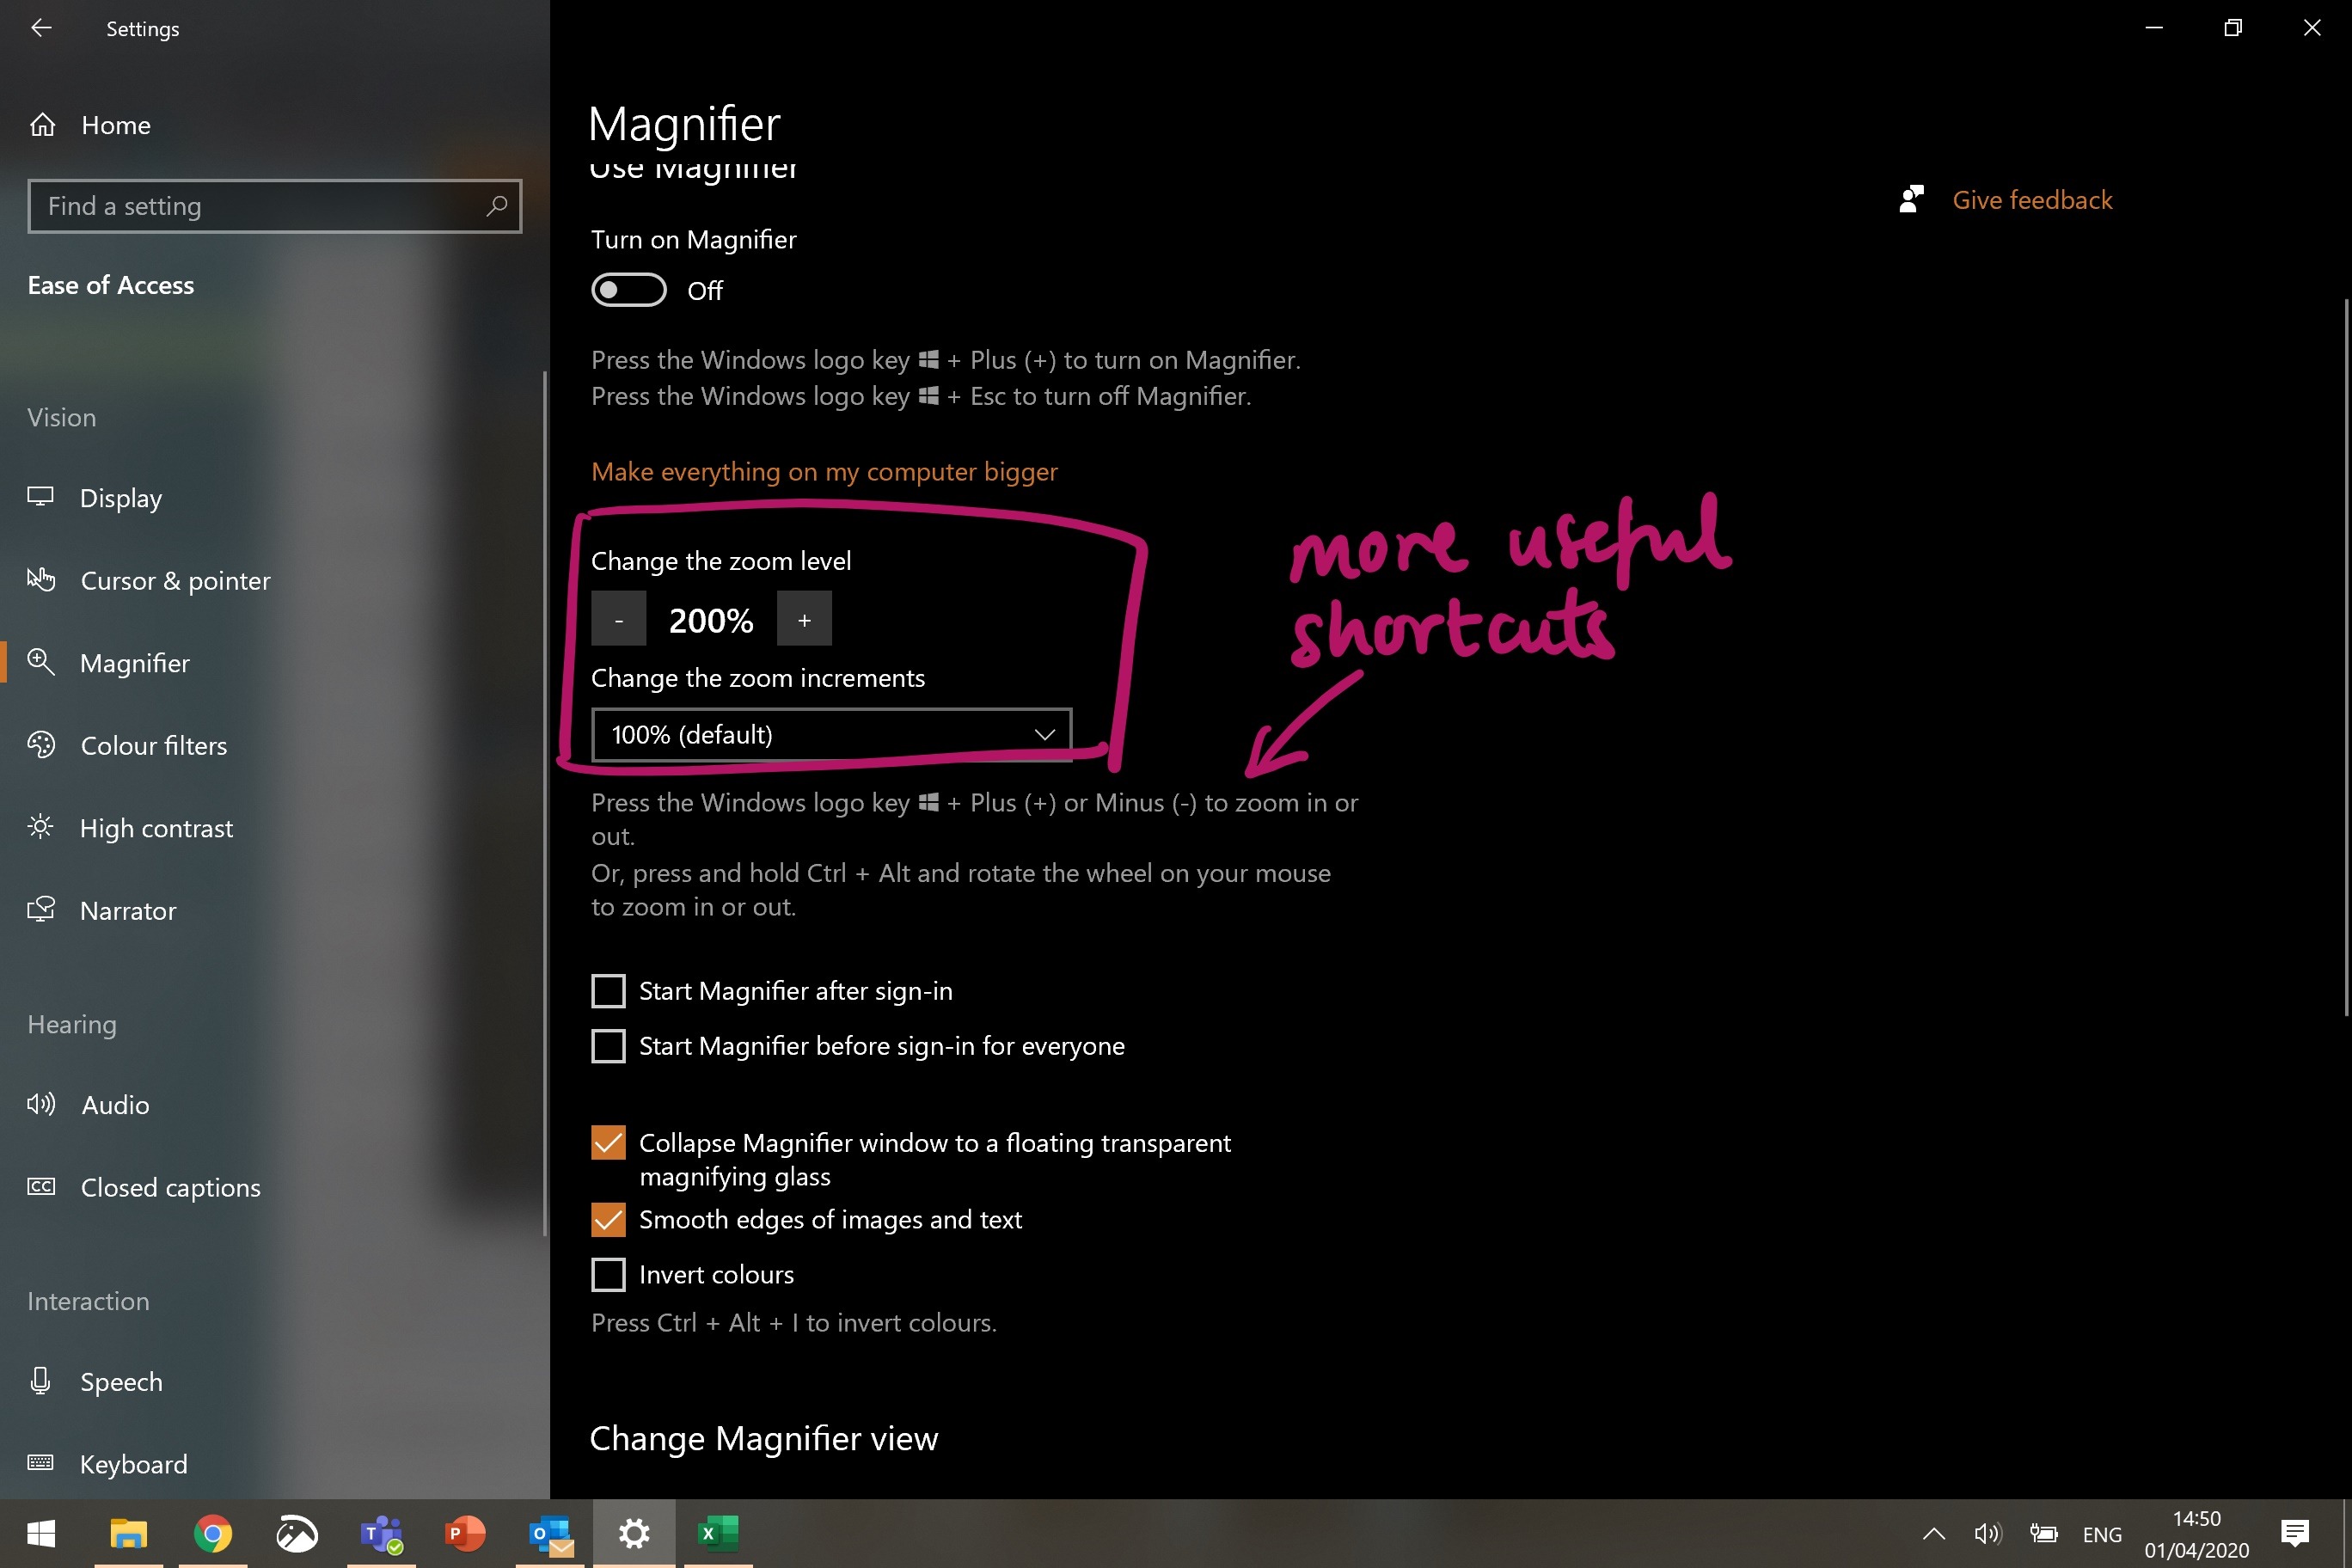
Scrolling further down the Magnifier page, you can also change the zoom level, depending on how close-up you want to show things on your screen. It’s also possible to do this using shortcuts, instead of always having to navigate to the Settings menu.
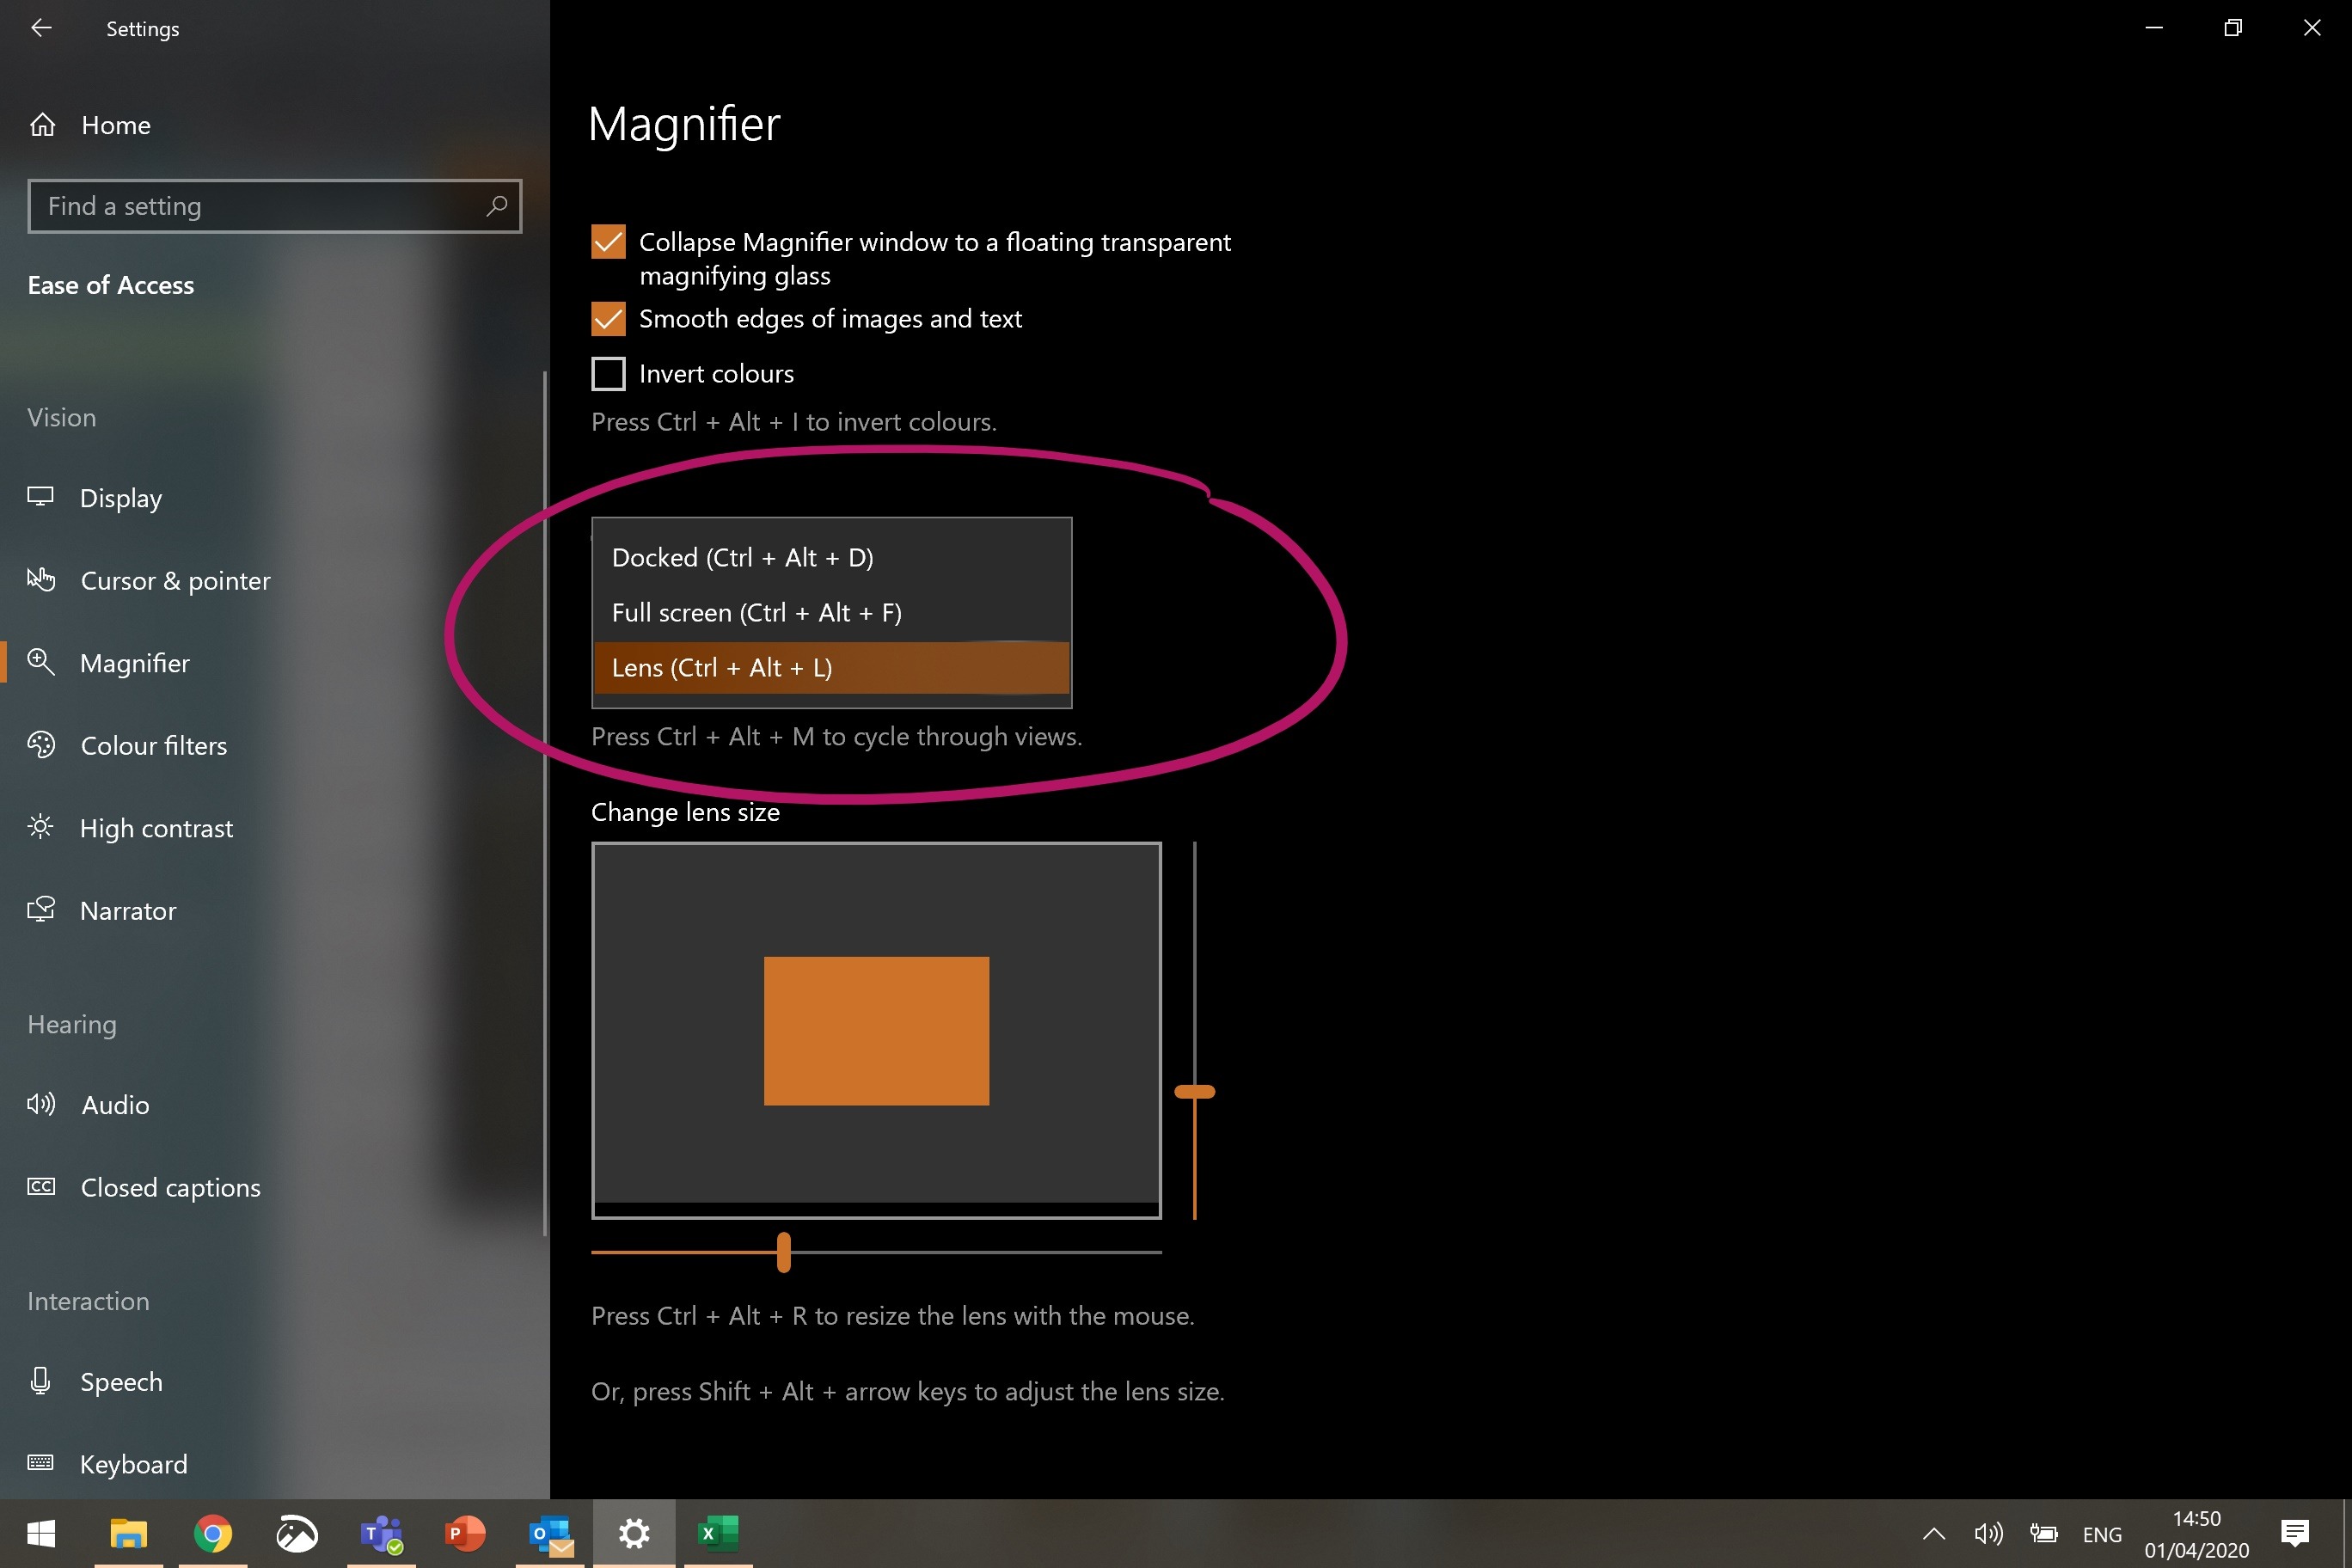
Finally, you’ve got three different options for the type of zoom you can use on your screen. Docked gives you a half and half view, so one side of your screen is normal, and the other half is zoomed in. Full screen brings up the zoom across your whole monitor. Lens (which in our opinion is the most useful for most scenarios) is a smaller box of magnification which follows your mouse around the screen, whilst the rest of the screen stays at normal magnification.
You can change the size of the lens using the sliders in the menu.
Zoom in on your PowerPoint presentation
In PowerPoint 2013 and 2016 there is a zoom function built in so you can focus on an area of the screen, but it’s not that great, it only gives a few levels of zoom and is only available when in PowerPoint show mode.
Zoom in on your whole screen using an app
Unless you take full control of it with your mouse, which you can do with the Microsoft Mouse and Keyboard Center (click here to download). This is a great application for getting more from your mouse and customizing its functions. With it, you can turn any of the buttons on your mouse into a hot button that launches and controls the magnify tool that allows you to zoom into your screen. It also means that you can change the size of the magnification lens and the level of zoom on the fly, so you can be really dynamic when showing something, and respond better to your audience.
Setting up the magnify hot button
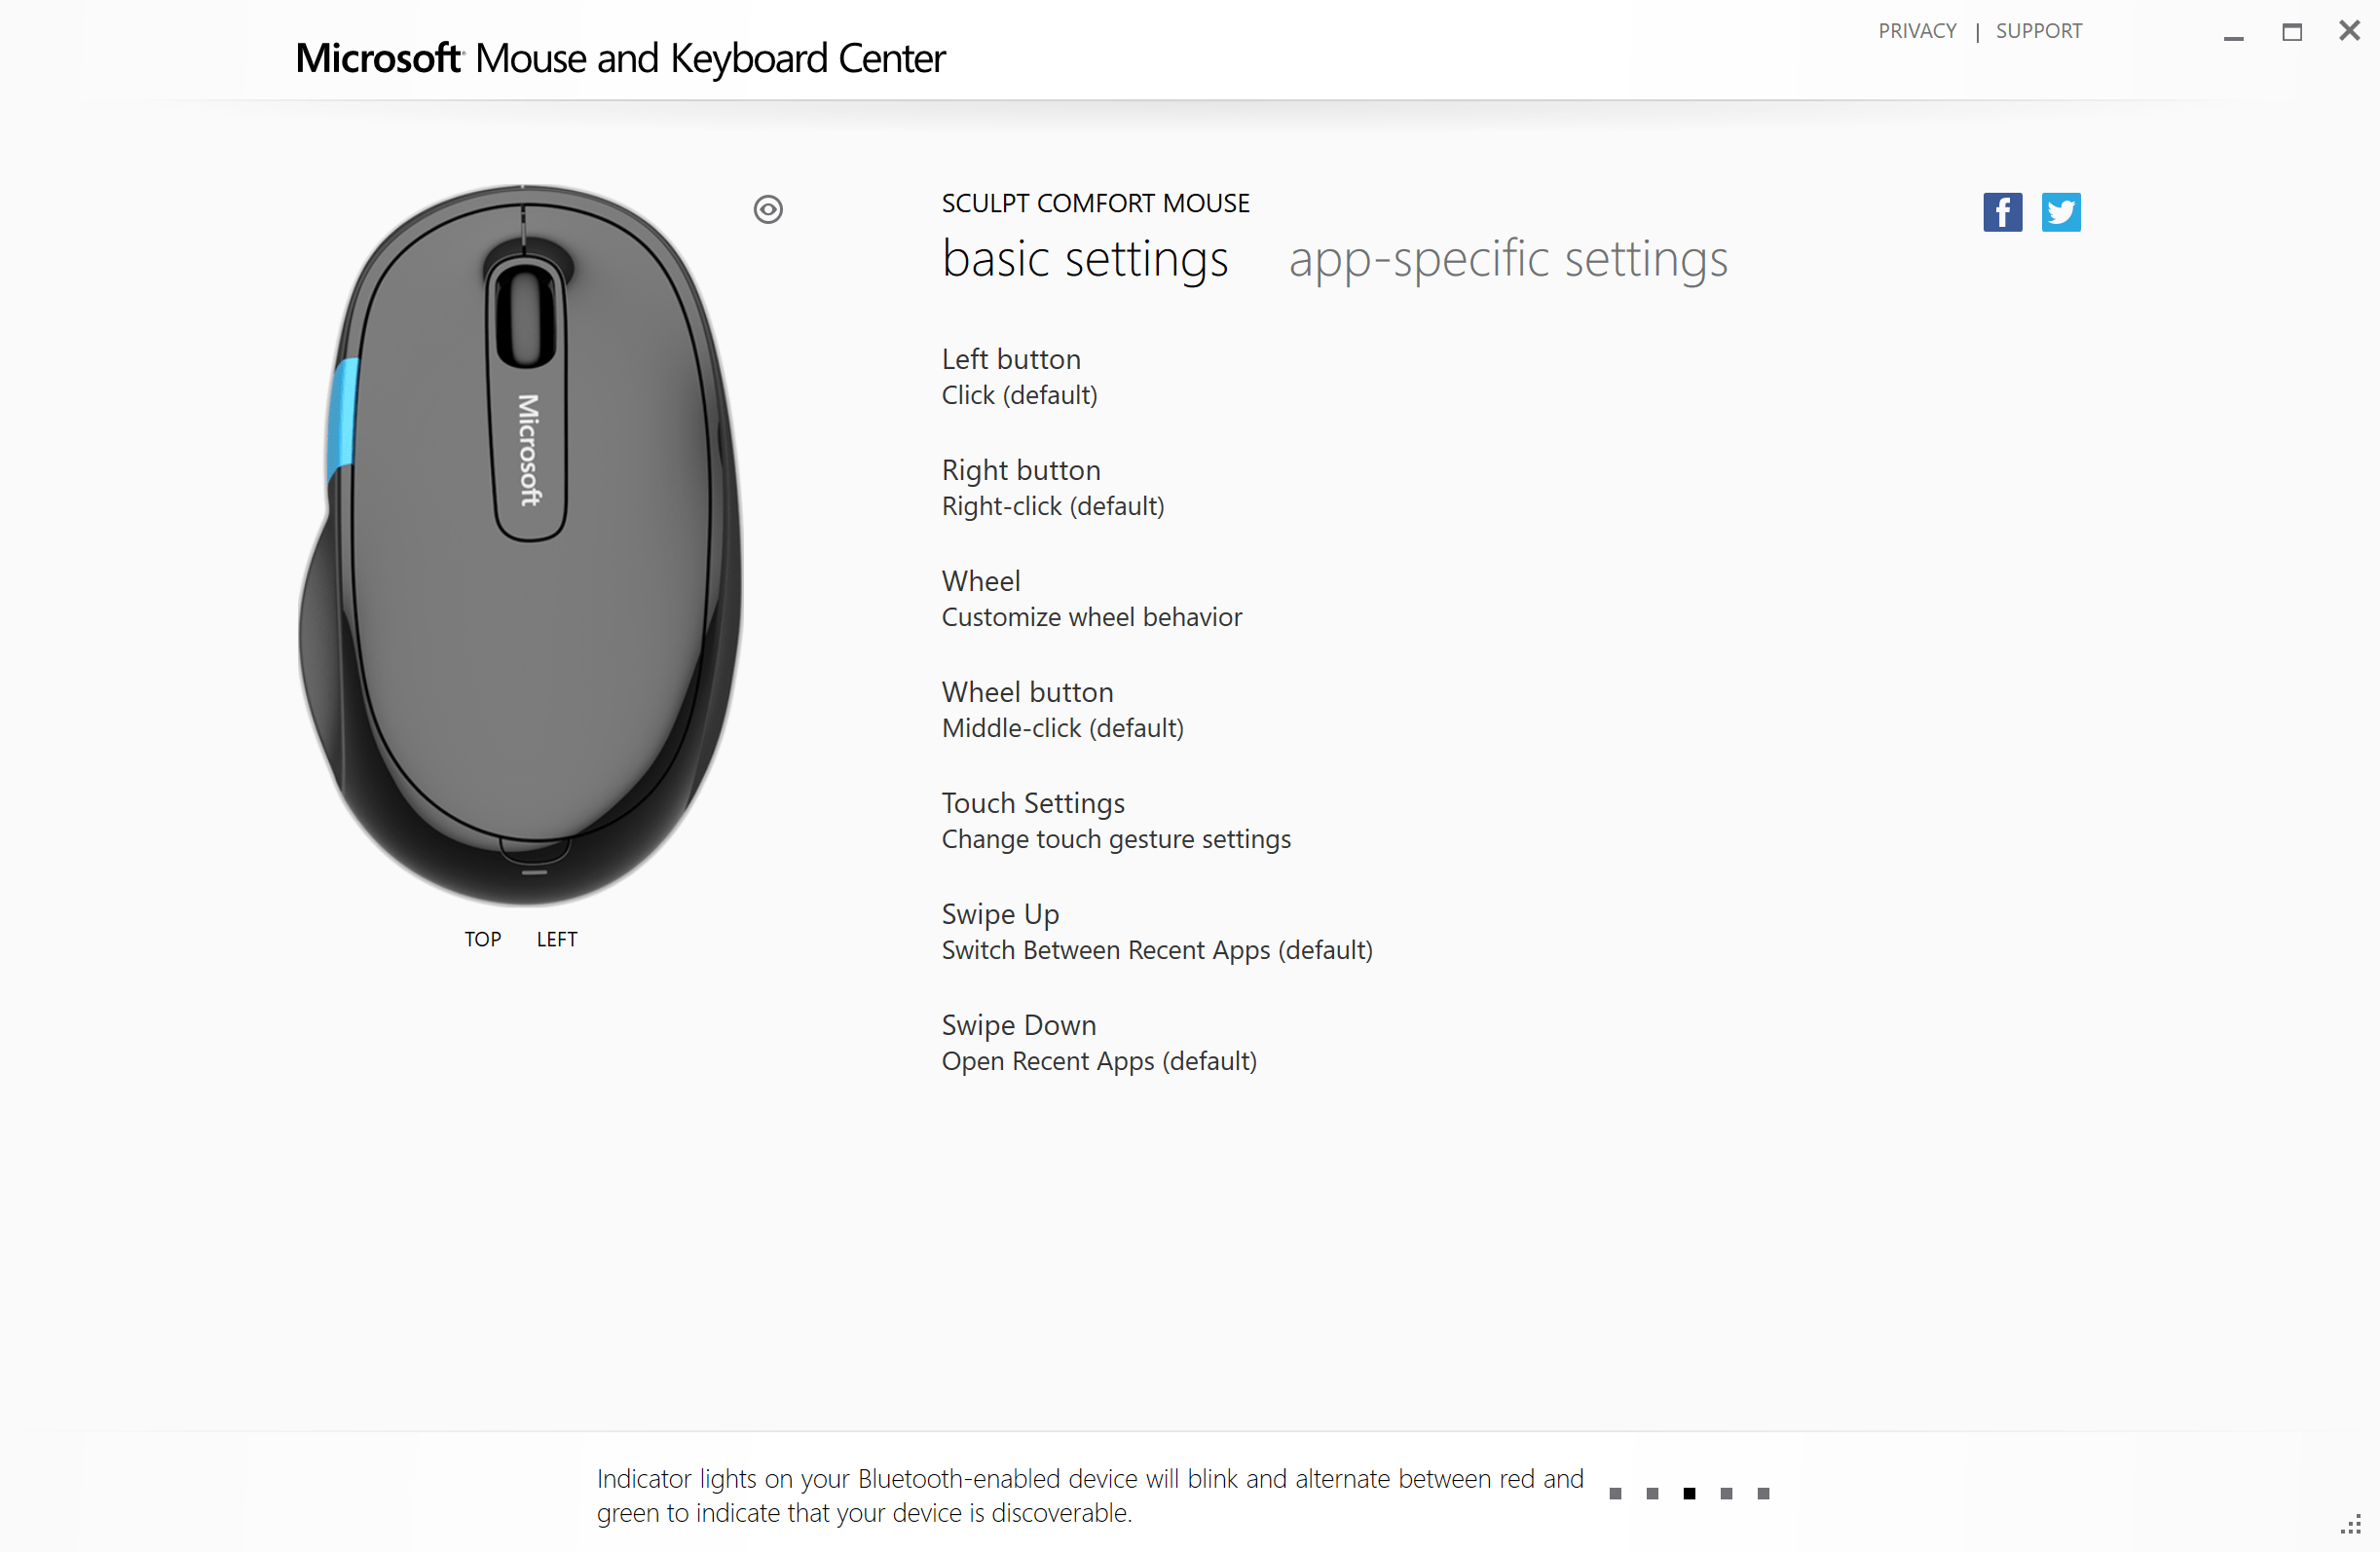
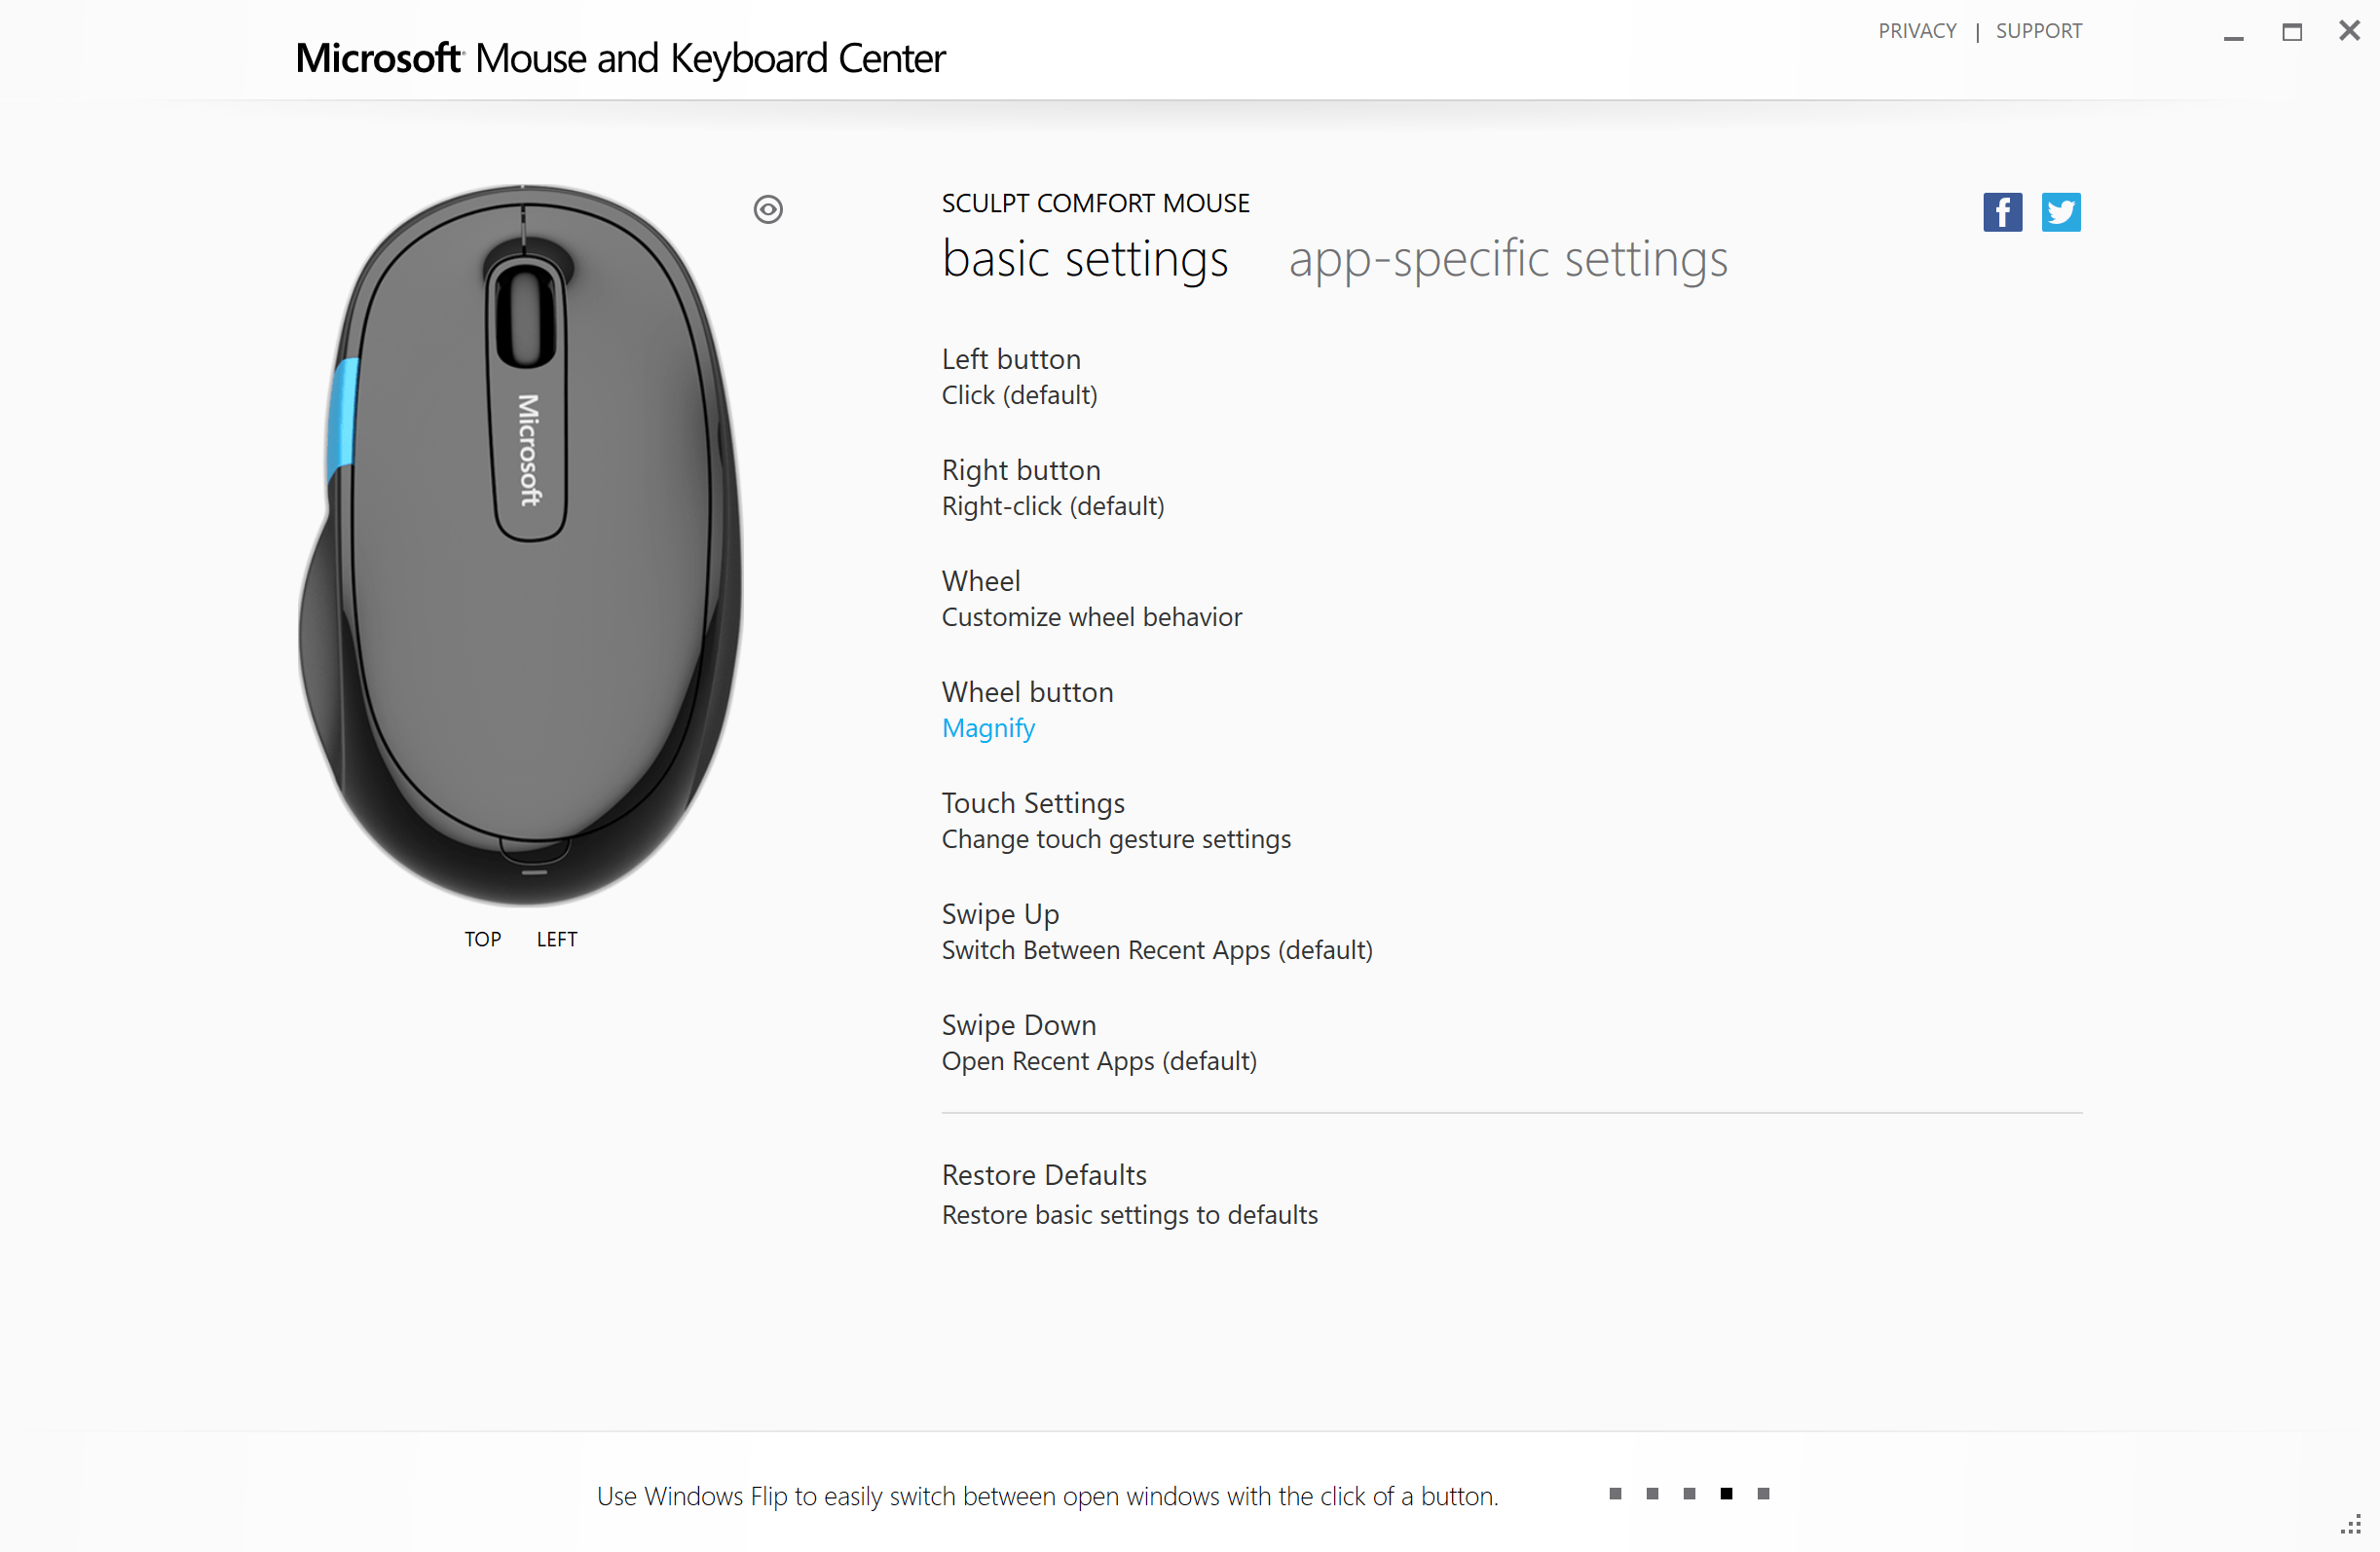
Once you’ve installed the program, open it and you’ll get an image of your mouse (or something similar to it), listing all of the buttons and options available. You can customize each button to do certain things. If your mouse only has the standard left and right mouse buttons and a scroll wheel, you’re OK, as the scroll wheel also has a click function that you can use.
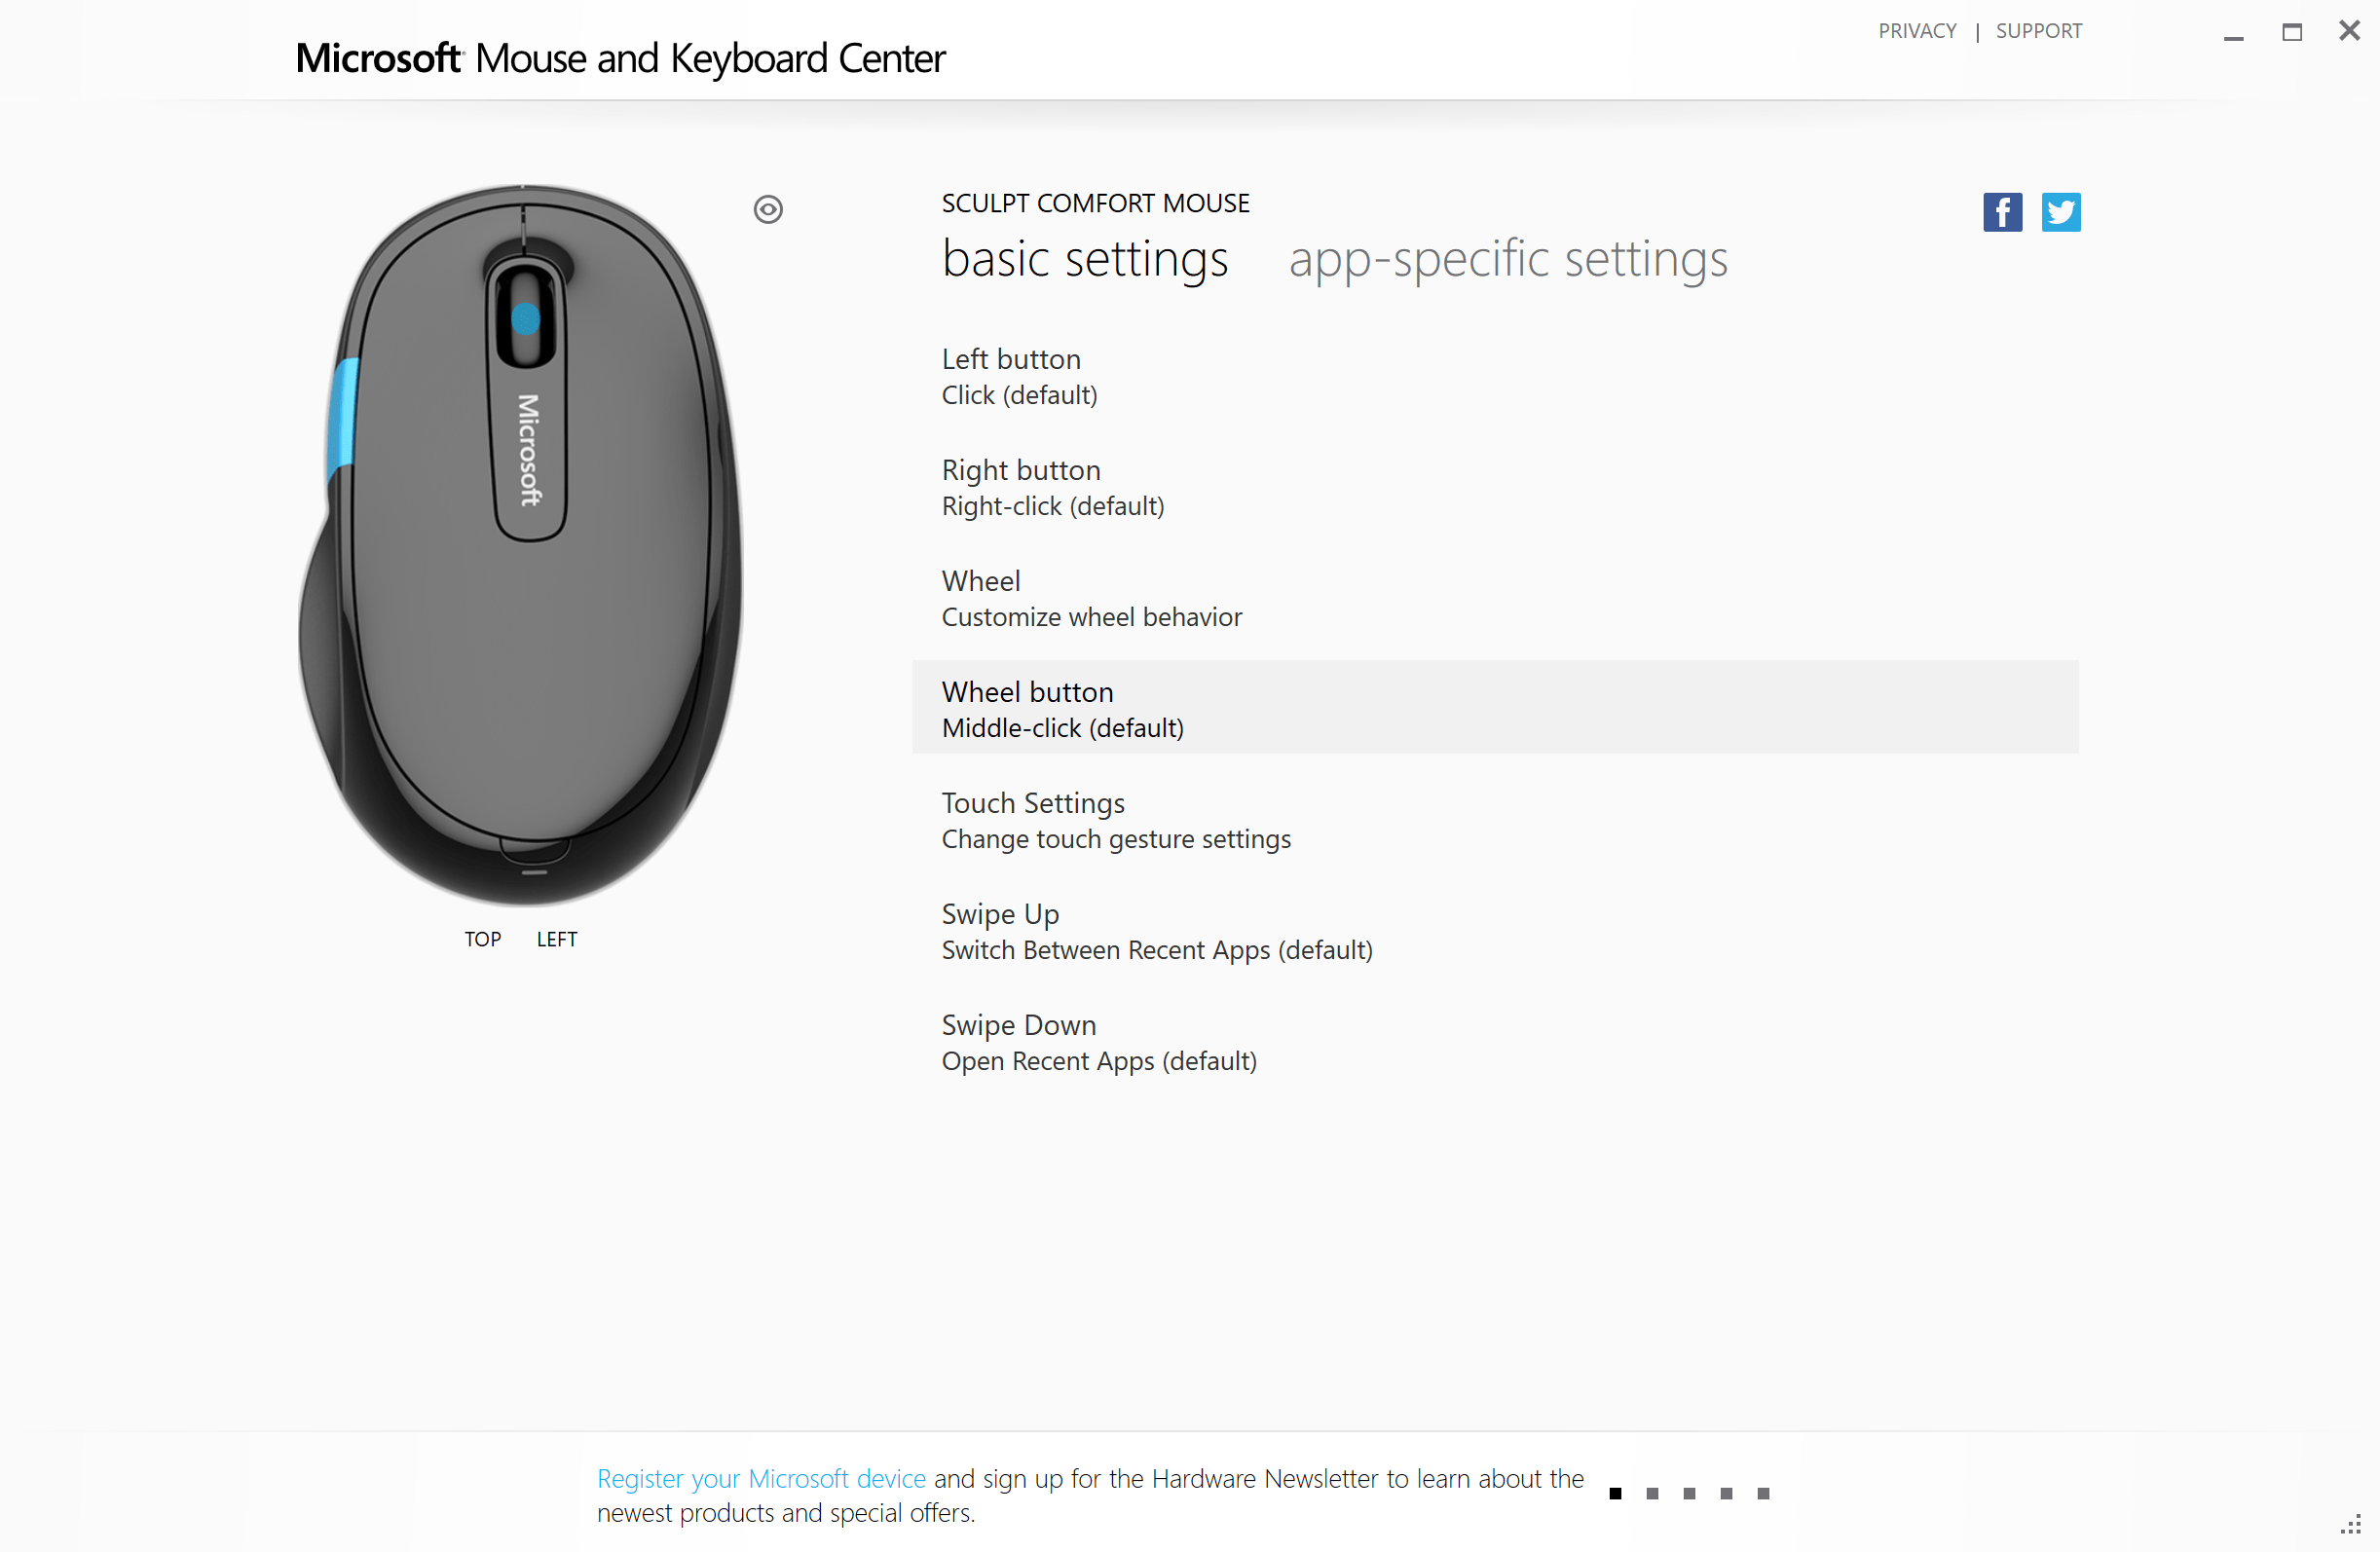
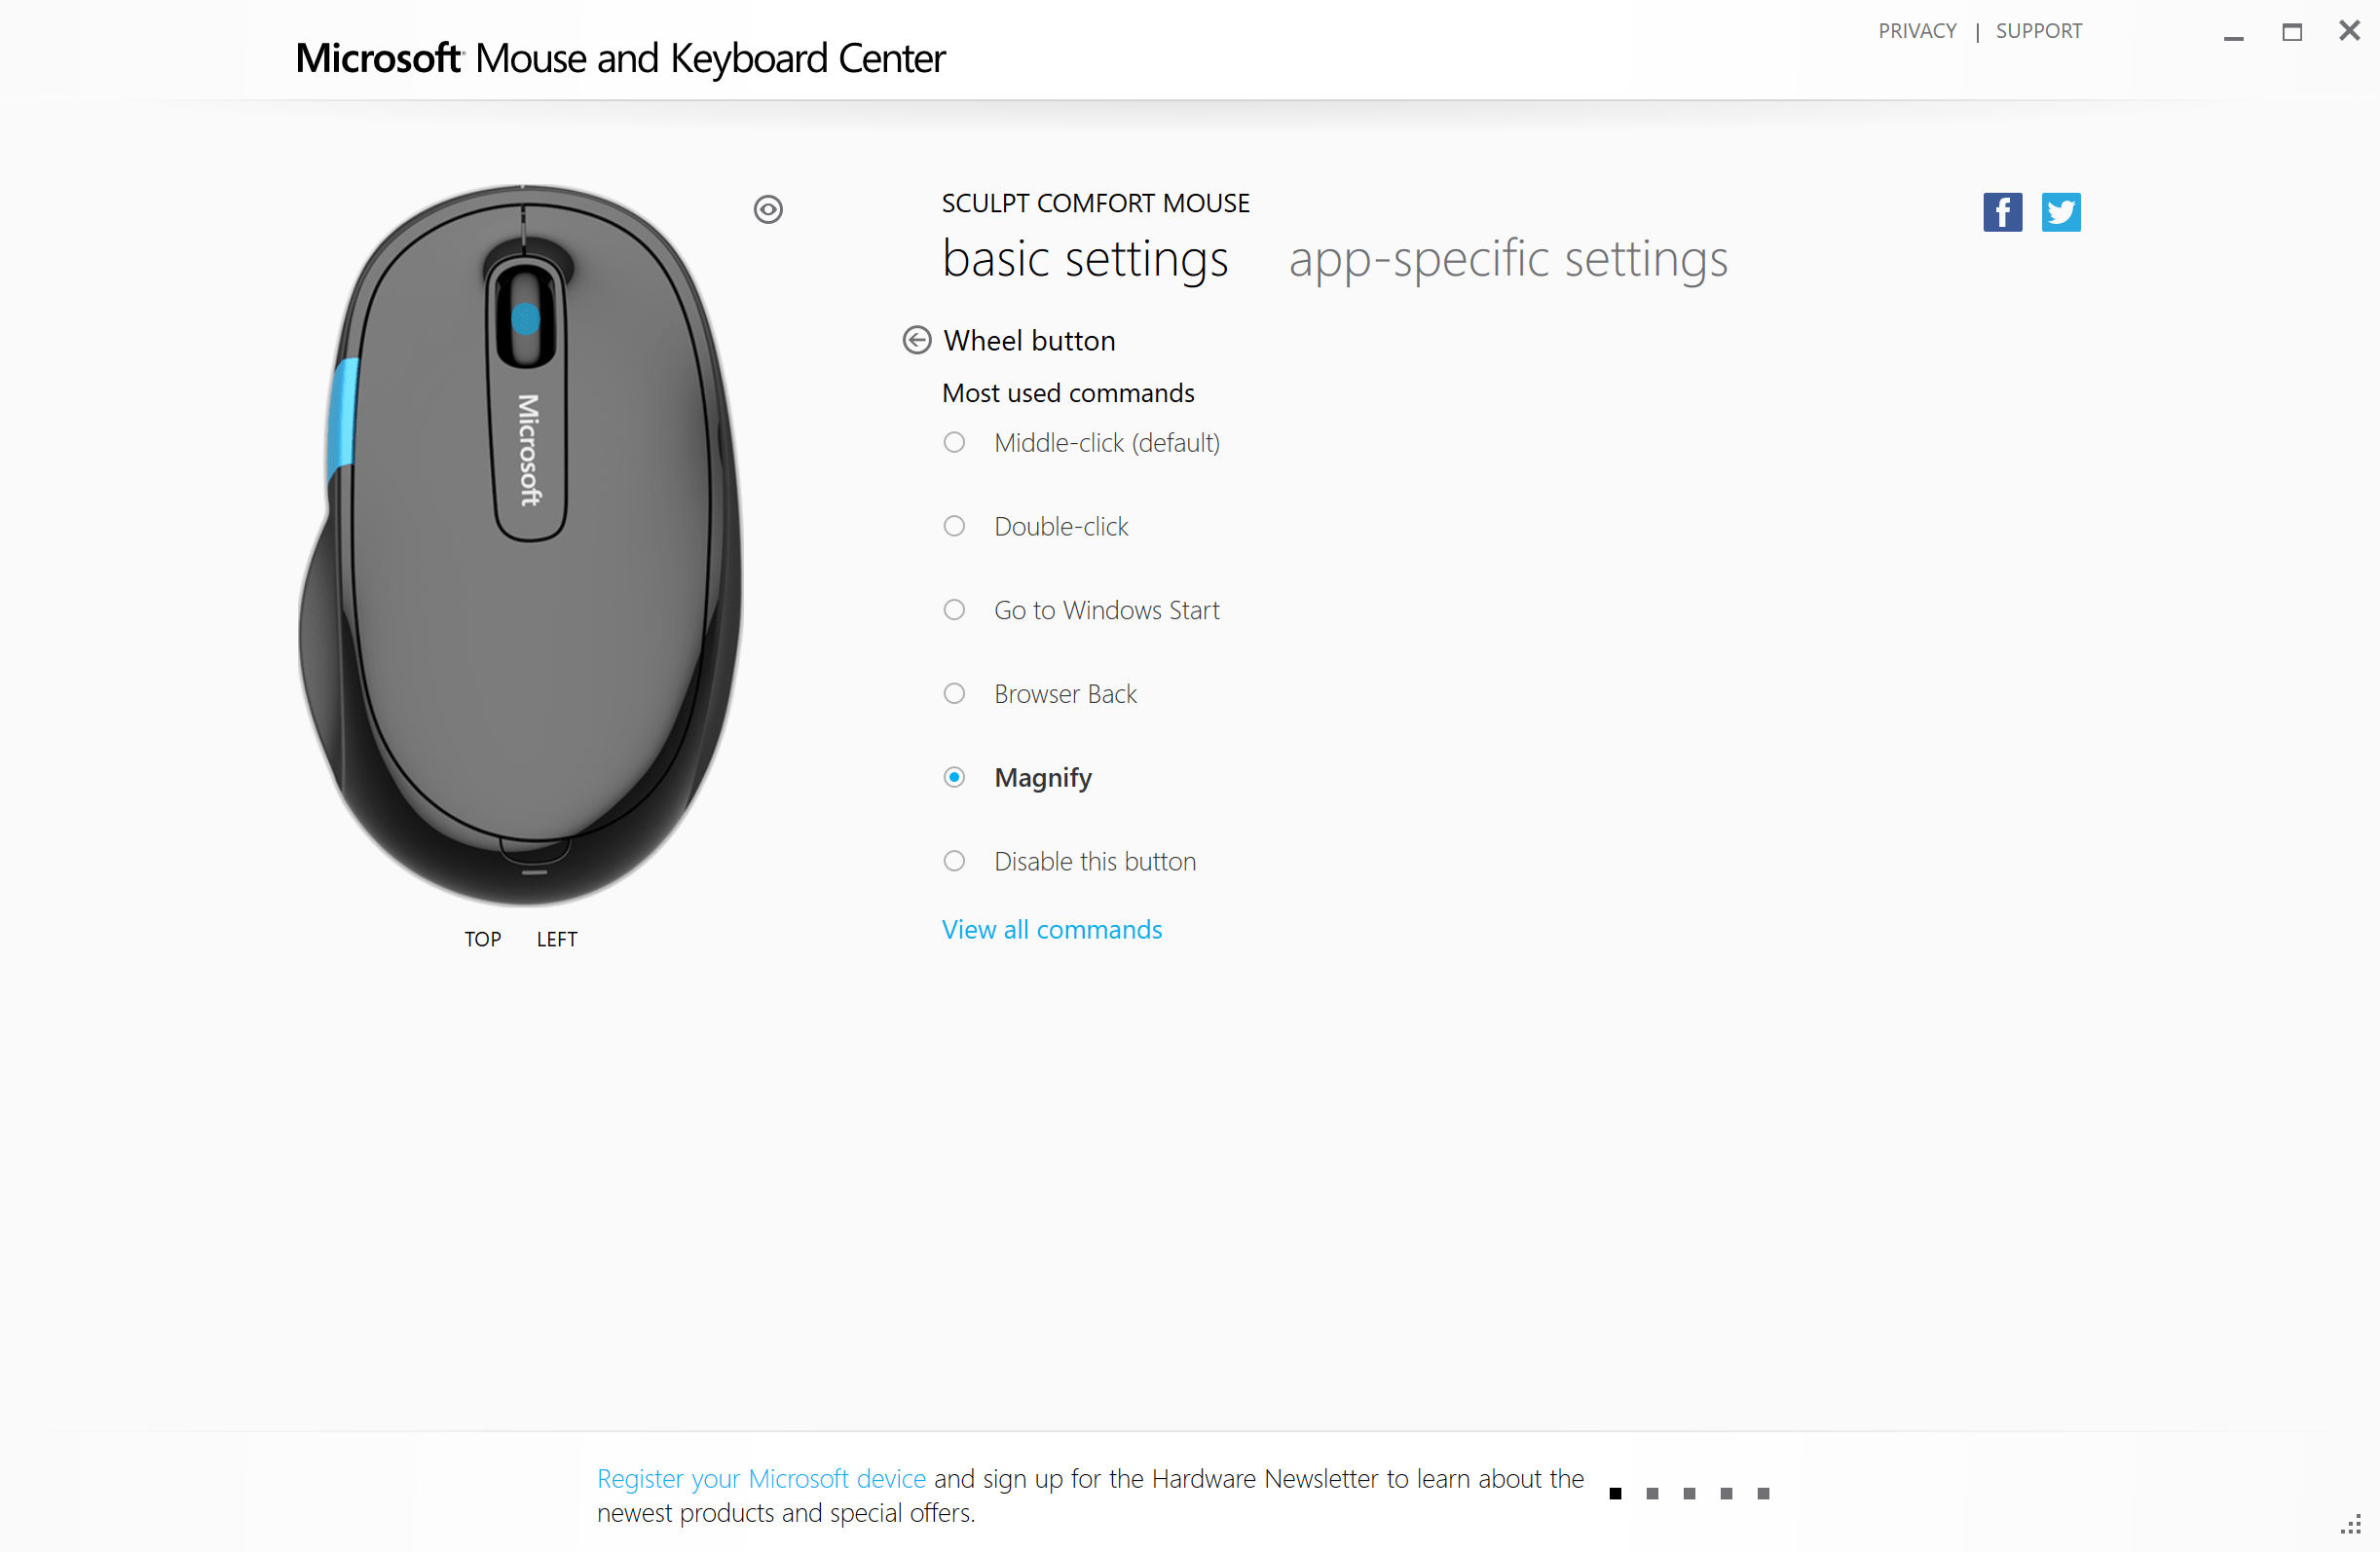
Select the button that you want to customize. In this case, the wheel button.
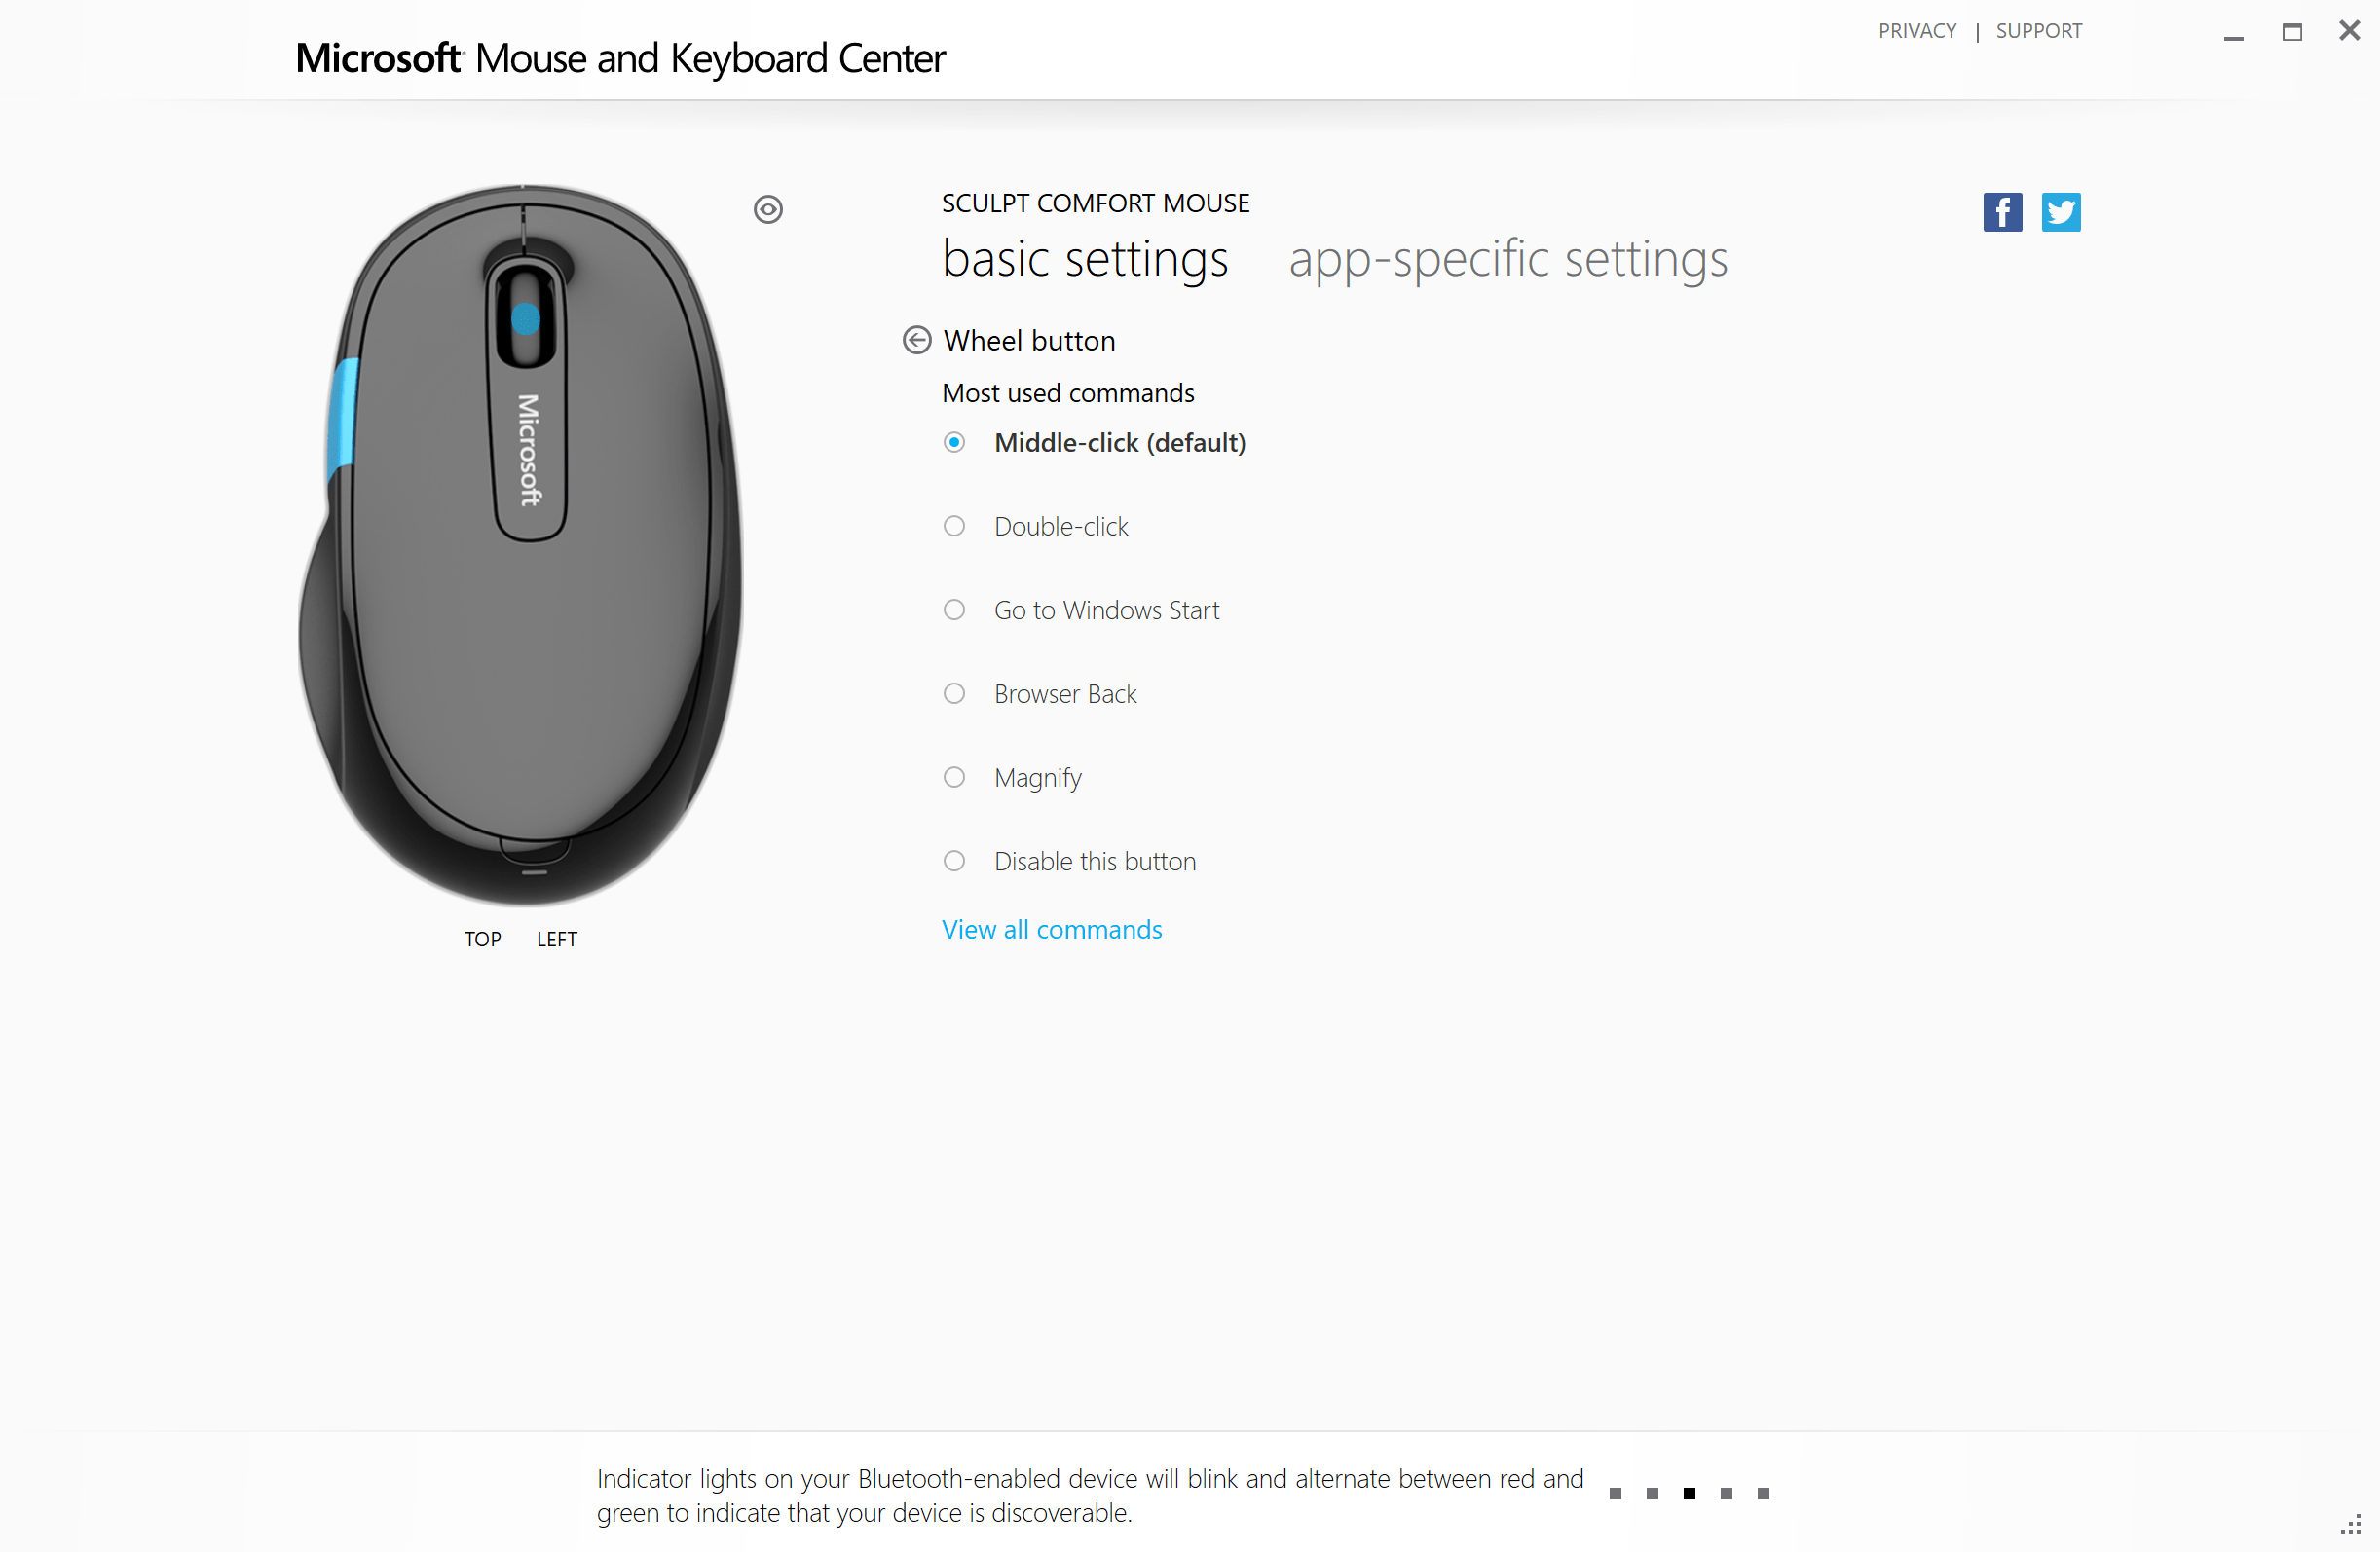
You’ll then see a list of popular commands (or possibly the ones Microsoft wants you to use), and Magnify is usually listed here. If you can’t see it, though, choose ‘View all commands’ at the bottom of the list, there are many more options.
Scroll down the list to the ‘Content commands’ section, and at the bottom of that, you’ll find Magnify. Select it and then click on the back arrow at the top of the list next to your chosen button.
You can customize all of the buttons like this, to perform different functions that are important to you, so the mouse becomes a much more useful tool.
Using Windows Magnifier
Now that you’ve got it set up, your button of choice can be clicked to activate magnification and clicked to close it down. There are three types of magnification:
Full screen (Ctrl + Alt + F)
Lens (Ctrl + Alt + L)
Docked (Ctrl + Alt + D)
With Full Screen, you can choose to preview the section of your screen that you want to zoom into first. When you zoom into it, you see just part of the window in full screen on your entire monitor. This is useful if there’s a lot of content to look at. Control the zoom level by clicking and holding your chosen button and scrolling up to zoom in and down to zoom out of your screen.
With Lens, you have a popup window that zooms into the area of the screen that your cursor is pointing to and moves as you move the cursor. You can control the area of the magnification and clicking and holding the hot button on your mouse and then moving the mouse up, down, left, or right to resize and reshape the lens. Control the zoom as for Full Screen magnification.
With Docked, the screen splits, so that there is a permanent zoom area at the top of the screen, allowing you to show the whole element AND a zoomed in section on the screen at the same time. But, it’s only a fairly thin strip, so it works well for lines of text, but on the whole, not that flexible.
This is a great tool that’s really quick to set up and easy to use. Highly recommended.
Now you can zoom in on your screen, all you need is some cool content to show. In PowerPoint, make it visual and use these awesome PowerPoint tips to achieve it.
Does your PowerPoint run really slowly? Mine did. Particularly the animation pane, and slides with lots of graphics (especially vector graphics). Office 2013 was fine, then Office 365 (with PowerPoint 2016) was ridiculously slow. There might be a simple fix to help...
Presentations are moving on, becoming more visual, animated, and interactive, but most of us are still stuck with using the same presentation remotes that we’ve had for years. There are quite a few alternatives available now, so are any of them worth using over the standard clicker?
If you travel through US airports you’ll have noticed a store called Brookstone that sells everything you never thought you wanted, but simply have to have. Occasionally though, you find something actually useful, and one such example is the HDMI Pocket Projector. Here are our thoughts.


thanks a lot .Its really helps.