As the old saying goes, a picture is worth a thousand words, right? This is definitely something we live by here at BrightCarbon as we always aim to use less text and more visuals to make our presentations powerful and engaging. So, if you’re looking for new ways to enhance your presentations, why not start with the pictures? Both PowerPoint and Google Slides offer some great image editing tools that are so easy to use you don’t need to be an expert to make your presentation look striking, but we’re going to focus our time today on what Google Slides image editing can offer.
Before we get started, if you need quality stock photos for your presentation, you can try sites like Unsplash or Pexels, as they offer a large online library of copyright-free, high definition images.
Now, with that sorted, here are six very simple and effective editing tips to help take your presentation to the next level.
1. Cropping and masking
The crop tool allows you to trim the edges of an image or remove any unwanted sections. Cropping helps bring focus to the relevant part of the picture and can also help develop a style or theme in your deck. For instance, you could crop all your images to a square for a consistent design identity.
How: To start, open a presentation and go to Insert on the menu bar, scroll down to Image and select Upload from computer. Choose the image you want to insert and click Open. Now the picture has been inserted, let’s crop it. Double-click on the image and drag the black tabs to your desired size. Now hit enter to make the crop. Make sure you are dragging the black tabs and not the blue nodes, as those will change the size of your picture. If you accidentally pull the blue nodes, just hit the Undo button (Ctrl + z) and try again.
Cropping is one way to hide parts of a picture, another is masking. With masking you simply add shapes over the top of your picture to hide the unwanted parts.
Use cases
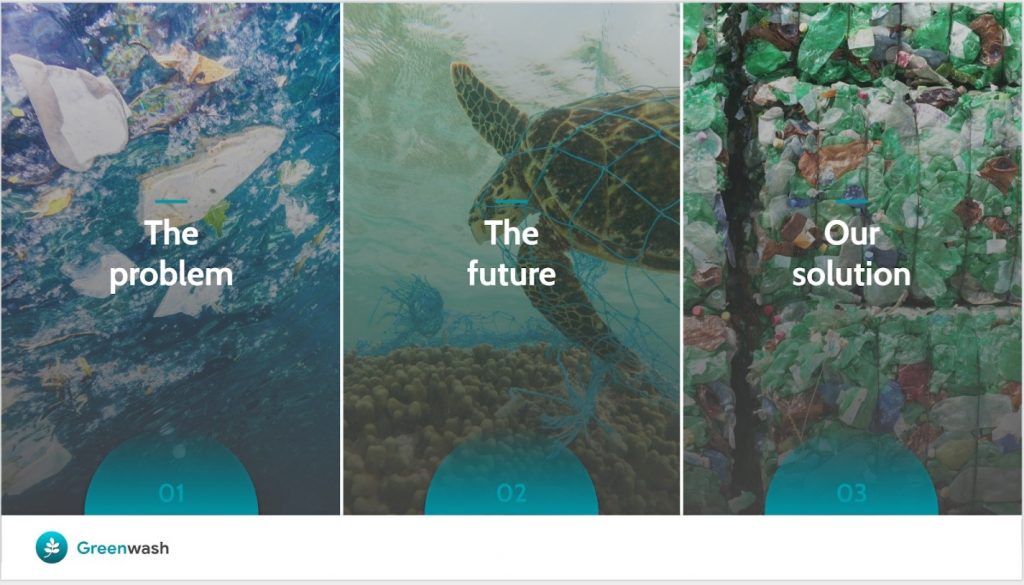
Sometimes simply cropping a picture or altering its dimensions can change the meaning of a slide completely. By simply cropping three images to equal rectangular shapes you can create an impactful agenda slide highlighting different sections in your presentation. Really simple, but so effective!
If you want to learn more about how to align your slides neatly using guides, check out this article.
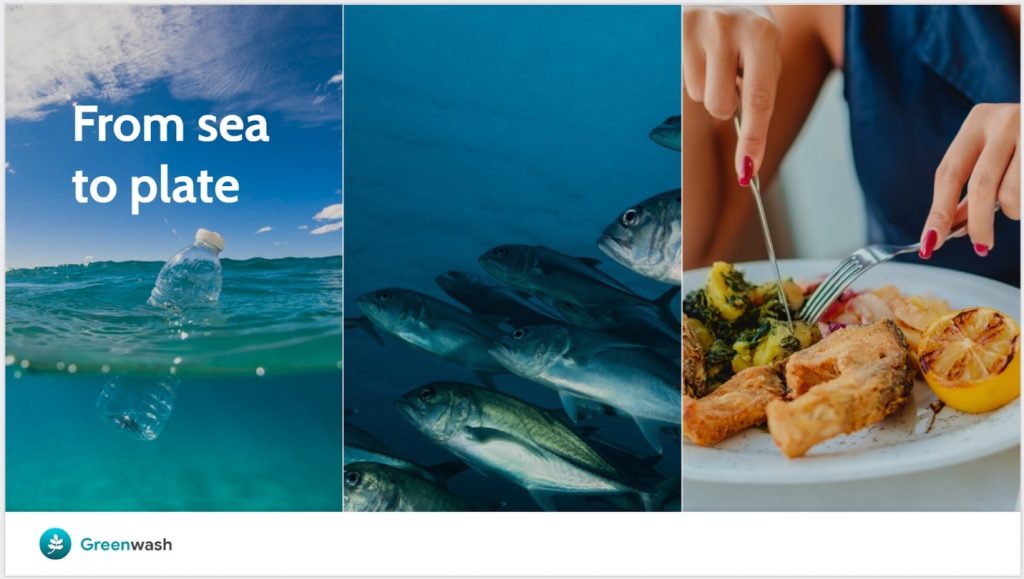
You can also use the same rectangle crop to demonstrate an evolution, sequence or timeline, as seen on the slide below which shows the step by step process of how plastic can end up on our plates.
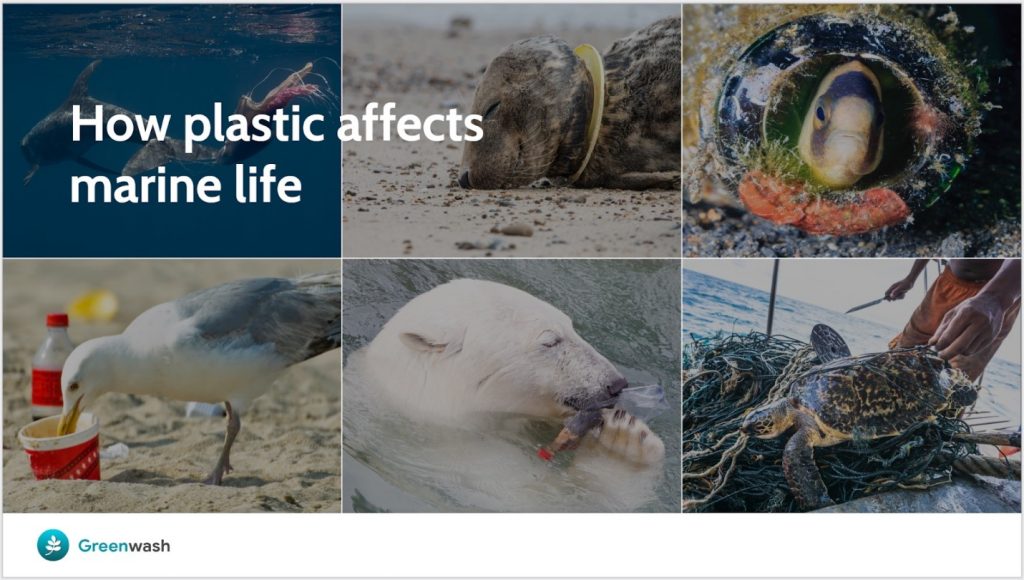
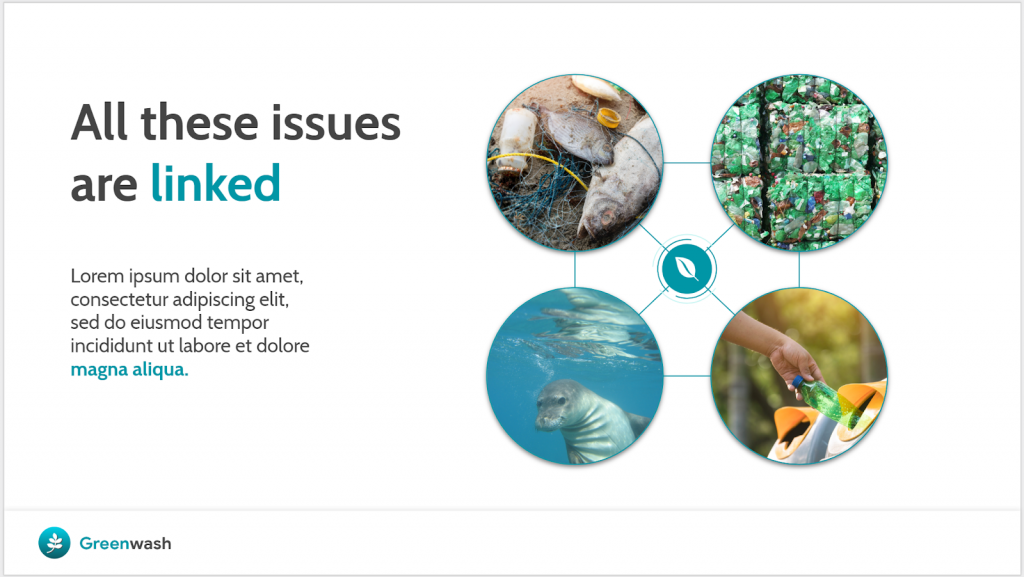
Next, by cropping various pictures to the same shape and size, we have created a collage effect. If you’re struggling to express your message with just one picture, a collage is a great alternative to bring various ideas together – in this case to show the different ways in which plastic can affect marine life.
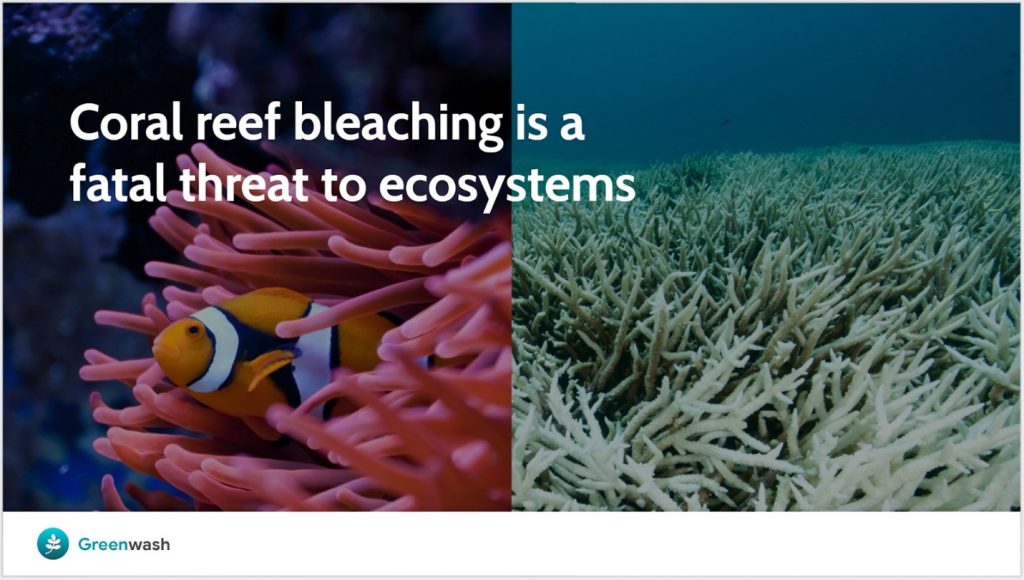
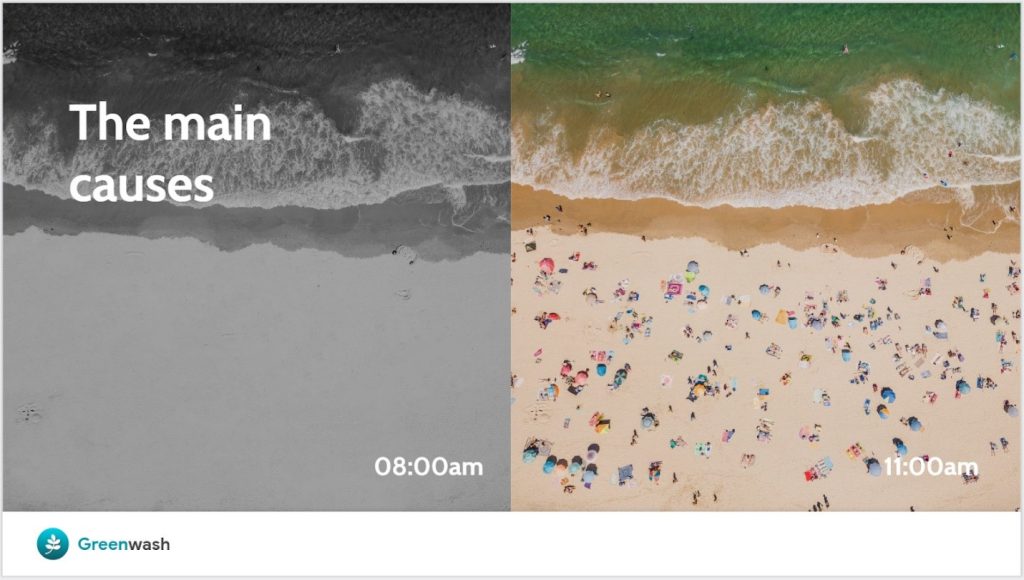
Placing two cropped pictures side-by-side is an easy way to make a comparison or show a before-and-after, as we did here.
2. Crop to shape
This Google Slides image editing hack is one of our favourites, will soon become a firm favourite in your toolkit. This nifty tool allows you to change the shape of your picture to a circle, triangle or star, for example.
How: To crop your image to a particular shape, click on the arrow next to the Crop image icon, scroll down to Shape and select the shape you want. There are lots of shapes, arrows and callout designs to choose from, like the heart example below.
If you want to avoid a warped or stretched image, you need to make sure your picture has equal proportions. To do this go to Format, scroll down to Format options and click the Size & Position box to make sure the width and height are equal.
Use cases
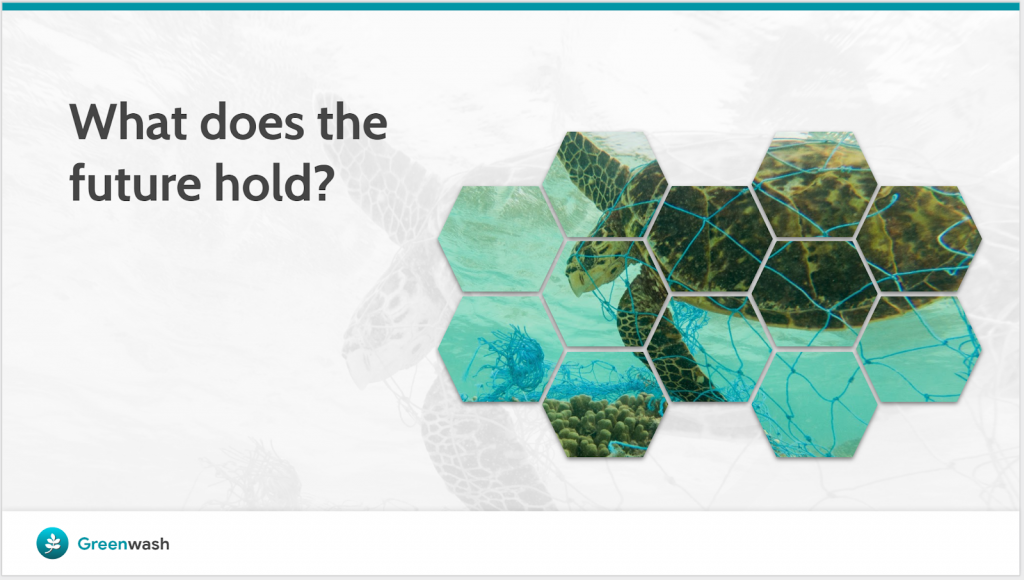
Images cropped to shape can become much more compelling. By cropping different parts of this picture to hexagon shapes to resemble the net that’s trapping the turtle.
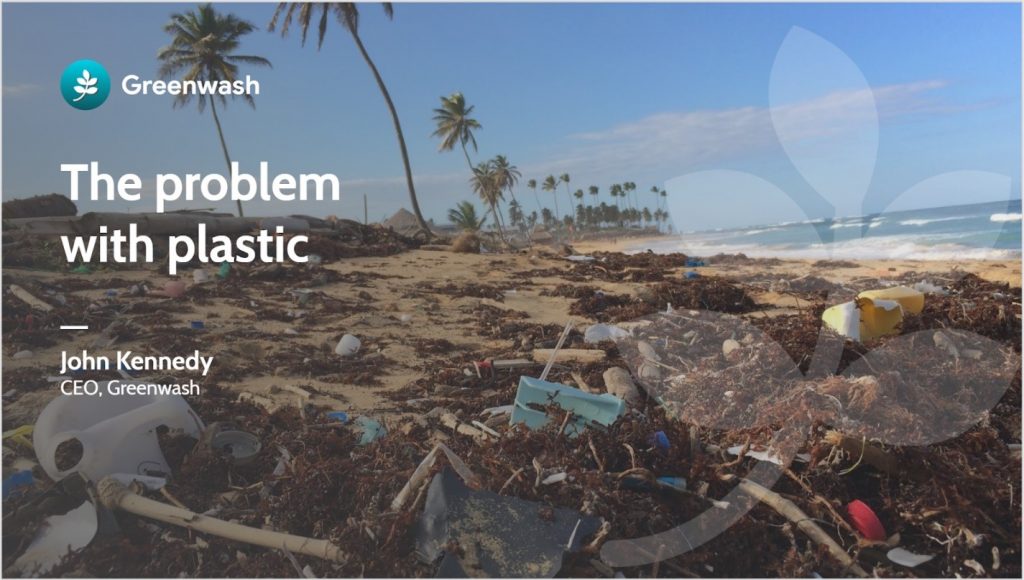
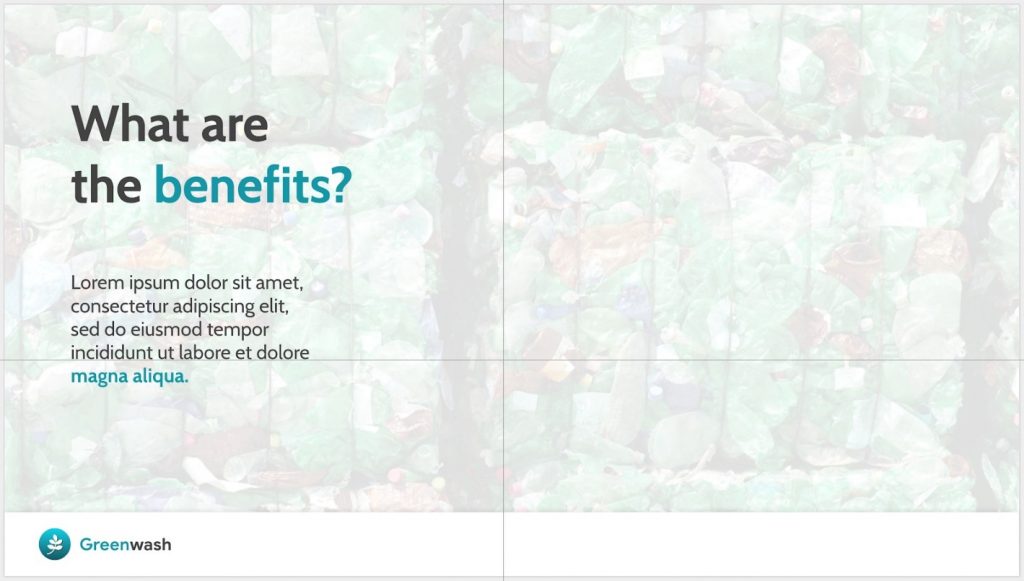
Here, by cropping the picture to a pentagon shape, you can create a slicker, more professional looking title slide.
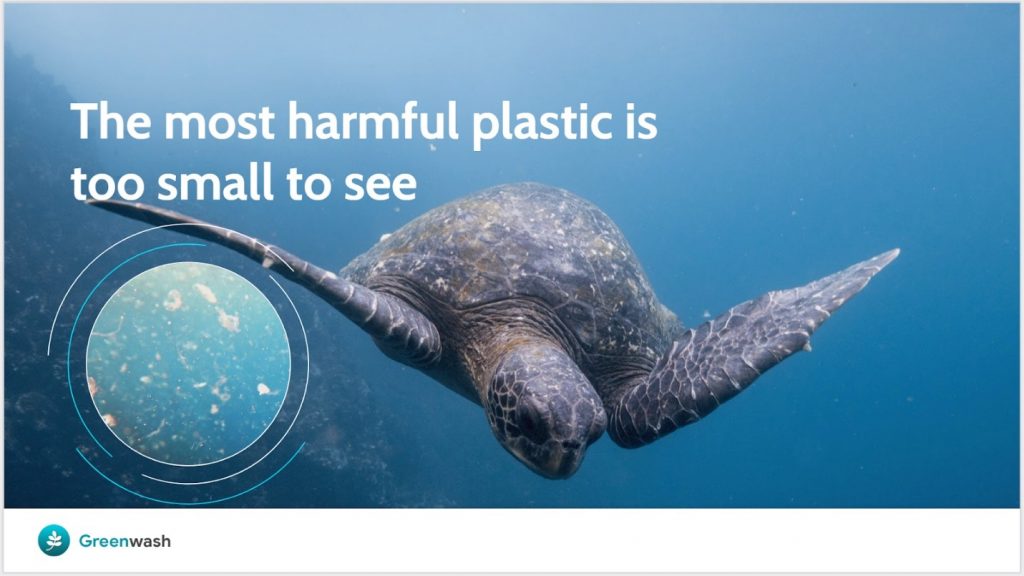
By cropping a slightly different image to a circle and layering it on top of another image, you can easily create a magnifying glass effect- a great way to show a larger scene without missing important details.
3. Add a border
Adding a simple border around your images can sometimes help them look more polished. Having an element like a border consistently throughout your presentation, gives it a strong identity and style.
How: Select your image then go to the menu bar and click on the Border Color icon to select the colour you want. If you want to make the border thinner or thicker, click on the Border weight icon and select your desired weight.
4. Image Callout
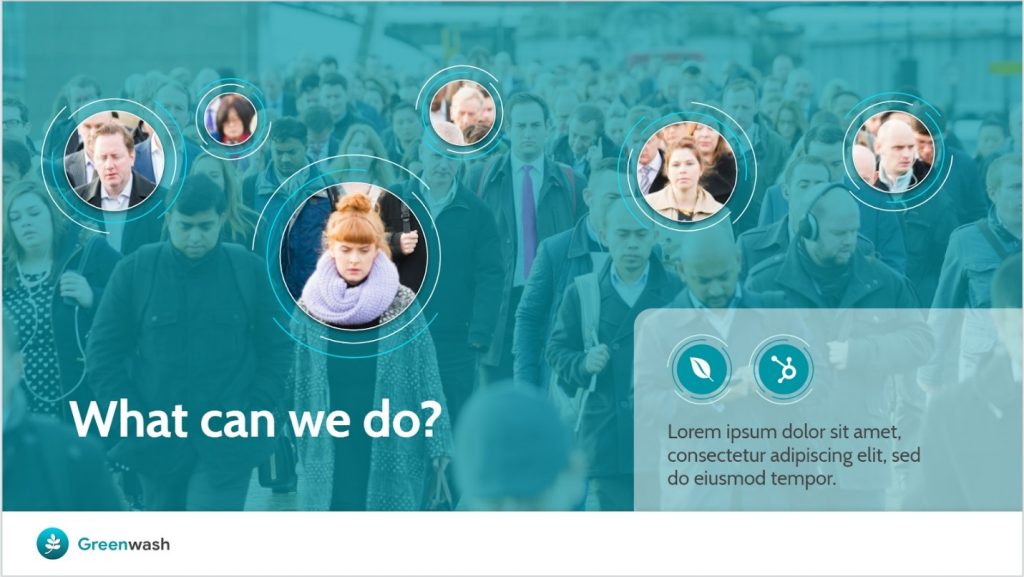
Image callout is a design must-have as it is so incredibly useful and visually powerful. In a callout, you cut out a circle to a specific part of the picture, to draw attention to it. We have highlighted the faces in the crowd to create focus points on the image.
In order to achieve this effect, you need to go through a few more steps.
How: Firstly, Copy and Paste the image you want to edit, then overlay it over the original image. Click the drop-down button next to the Crop tool, scroll down to Shapes and select the oval shape. Once this is done, go to Format, scroll down to Format options and click the Size & Position box in the format options and make sure the width and height are equal to create a perfect circle. On the original image, click on the adjustment box in Format options and reduce the brightness. This will make sure that your callout stands out against the original image.
Positioning text over images can look very effective… if done well. Text can easily get lost on top of a busy image and become hard to read, but we’ve got a handy trick you can use to get around this problem – image overlay! This means adding a translucent rectangle on top of an image: it should be dark enough so that you can read the text, but clear enough that you can see the picture.
How: Go to Insert on the menu bar, scroll down to Shape, then Shapes and choose the shape you need. In most cases it’s a rectangle. Grab the corners and drag until your rectangle is the exact size of your picture and perfectly positioned on top of the image. Then go to the Fill color icon button on the menu bar. Select the black colour option and then click Custom at the bottom. A small window will open with two bars – one for the colour of your shape and the other for the transparency. Lower the transparency until it’s almost fully transparent: it needs to be just dark enough to read the text, whilst making sure the picture is still clear.
See how this simple and subtle image overlay helps the text stand out.
Use cases
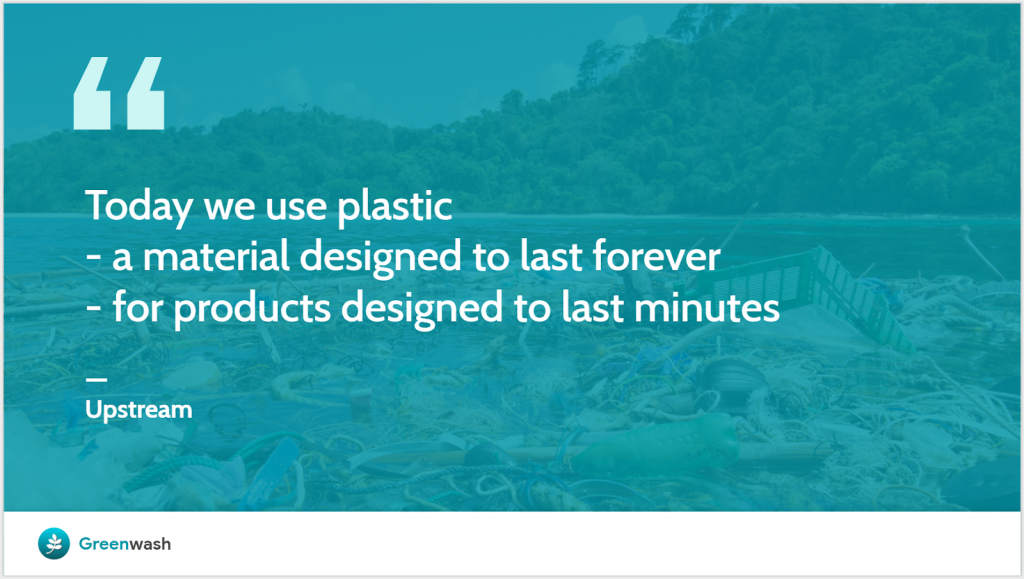
You can also choose a custom colour overlay like on the slide below. Using a shade of blue that fits with the theme of the deck helps to maintain brand identity, whilst also slightly muting the image so that the focus is on the quote instead.
6. Format Options
Once you’ve decided on the size and shape of your picture, you can start playing with its format. With Google Slides you can adjust the transparency, brightness, and contrast of your images, as well as change their colour. These simple alterations can make your presentations much sharper – and you don’t need to be a Photoshop expert to be able to do them!
How: To start, click the image then go to Format on the menu bar. Scroll down to Format options… and a sidebar will pop up containing the following tools.
Recolour
Using recolour you can change the colour of your image to either match the theme of your presentation or, as in this case, to create some contrast.
Transparency
This is a useful feature that can be used on both images and shapes. Transparency works a treat for background images, as it helps fade back the image so that the text becomes the focus and is easier to read.
How to: Once you have opened the Format options bar, click on Adjustments and you will see the Transparency cursor. Move it up to your preferred level. Then once you are satisfied, you can click on your image and pull the corners until it fills the slide.
Adding transparency to shapes can be useful too, particularly for overlaying text boxes on top of images.
This tool is handy if your original picture is dark or faded. This simple adjustment can highlight the best features of your photo and give it a more professional look.
Drop Shadow
Drop Shadows are a tiny detail that can make a world of difference. It’s the simplest way to add depth and space between layers of shapes and images on the slide. The drop shadow effect on the circles below create a more realistic, 3D-like appearance.
As you can see, there are some great Google Slides image editing hacks out there, that let you create beautiful slides, quickly and easily, without having to get trained in graphic design first. So go on, get started today!
If you're using Google Slides regularly then it's worth getting to know how you can integrate it with your other favorite Google Workspace programs - this time, Google Keep!
If your organization is considering using Google Workspace it will impact the way you create presentations. Microsoft PowerPoint will no longer be your default and you’ll need to count on Google Slides. Before you make a change like this, it can be hard to know what to expect. How might your business benefit? What are the potential downsides? How can you make the transition as smooth as possible? Let's find out!
Thank you so much for this article. I’ve been looking for something like this and could not find it. I am brand new to using Google slides and your explanation is clear and straightforward.
I have a question though, how to crop to shape in different parts of the image?
Hi Solange. I’m glad the article has been useful for you. Could you please give us a bit more information on what you’re trying to do, so we can make sure we are helping you effectively. Many thanks!
I can’t find a way to adjust images that are placed as background images (for master pages). When I place an image as a background image it constrains the image to the slide proportions which results in squishing the photos. Is there any way to fix this?
Hello Katie, A solution could be to set a background image in the master. You can do this by clicking on the toolbar at the top on View > Master. In here click on one of the slides from the layouts (or you can create a new one if you want) and insert a new image from your computer. Position, crop and resize the picture so it covers the entire slide. Close the master by clicking on the “x button” at the top right of the slide. Once you are back to “normal view” you can right click on the slide and select “Apply layout”. You can choose the layout you just created with the BG image from here.
Hi Allun, Unfortunately at the time of writing it is not possible to crop images to a shape imported from Illustrator. You can only crop images to the default shapes offered by Google Slides. Many thanks!
When I transition my slide, how do I make the image disappear from view before the transition, as when it transitions you can see the picture and then it disappears when the transition ends. How do I make it disappear before that? Please get back to me before 11/7/19
Hi Mary, Sorry I’m not too sure what you mean. Could you provide a bit more information on what you are trying to do, so we can make sure we’re helping you effectively! Many thanks.
Great ideas, is there any way to remove the cropped portion of the image from the file so the images don’t blow up the file size and make the document load really slowly?
Hi Shannon, Unfortunately there currently isn’t a way to do this within Slides. If you have any image editing software such as Photoshop then you could always crop the image within this software and upload just the section of the image you need. Hope this helps! Many thanks.
Greetings! Awesome ideas. The slide above with the turtle divided into a bunch of hexagons… how do you do that? I’m having fits. The masking tool just wants to make my whole image into a poorly proportioned hexagon instead of cutting out a portion of it like a cookie-cutter. Thanks!
Hi Dan, Glad you enjoyed the article! I’ve had this issue in the past so I know how annoying it can be. The way I do it is to have the image in the background, then using the hexagon shape tool I would place it over the part of the image I want cropping. Finally, simply copy and paste the image directly on top of the original and crop it down using the hexagon. This means that when you click to crop the image within the hexagon you can adjust the proportions to that of the original image.
I have used https://theclippingpathservice.com and have loved them for image cut out service and their customer service. I would love to know what others would recommend!
This article has been extremely helpful in upping my knowledge of how to use Google Slides. I’d really like to know how you did the different colored circles around the Image Callouts in #4 and the “microscopic” image with the turtle. They really add to the pop of the images but I can’t seem to figure out how to do these in Google Slides.
Hi Liz. You place an image on the slide and then overlay the same image again and using the circular crop tool you crop to the section you want highlighting. Then you can recolour the background image so that the cropped image stands out. Once that’s done, if you want to change the colour of the circle border. Just click on the cropped photo and click on border colour on the toolbar to select the colour you want. Many thanks!
Google Slides converting specific images to circular will only make it oval.
I have many pictures within a slide presentation, and some will not convert to circular, they will form into an oval shape instead and only. I tried resizing the original picture to square, but this has not solved the problem. Can anyone help please?
Hi Susan. When you follow our step by step of “Crop to Shape” and your original photo is a landscape, it will crop as oval. So you need to double click the photo, so you get the crop, and then go to Format > Format Options and adjust the dimensions, make sure the height and width are the same.
Hi, super helpful tips. Thank you. I’m transitioning from Powerpoint and finding Slides a bit limiting, so these tips are awesome.
One thing I face often with Slides is where someone has put a picture in to the slide, and I want to make it a background so it can go full screen, and the other images in the slide master can still be seen over it.
In powerpoint, I’d literally Crtl+X the image, and then go to ‘change background’ – and hey presto, one option was ‘use clipboard’ – and the image I had cut would become the background image.
I can’t find any way to easily do this in Slides other than saving the image to a file, then re-uploading it as the background image.
Hi Paul. Thanks for the lovely feedback. Regarding your question, I’m afraid that’s the only way we know how to make a picture a background too. Sorry we can’t be more helpful.
Nice Tips; Thanks! I have a Google Slides deck that is full of pictures, and almost half a GB. Is there a way to compress all the images in Slides the same way as it can be done in PPT?
Hi Allen. Unfortunately there is no ‘native’ way to compress with Google Slides. My advice would be to compress the photos on a third party software before bringing them onto Google Slides or export the presentation to PPT, then compress and either re-upload, or drag the compressed images into slides. Hope this is helpful!
Is there a method to smooth the edges of an image in Google Slides, creating a blend with the background? visit for more information: https://verticalclipping.com/
Great tips! I had no idea you could use Google Slides for such advanced image editing! The hack for cropping images into custom shapes is a game-changer for me—I’ve always struggled with making my images look polished. The transparent background trick is also really useful; I can’t wait to use that for my presentations. Thanks for sharing these awesome hacks!
BrightCarbon provided us with a fantastic service ... and left us with a presentation that secured us a £4 million contract. BrightCarbon is our first choice for presentations in the future.


Thank you so much for this article.
I’ve been looking for something like this and could not find it.
I am brand new to using Google slides and your explanation is clear and straightforward.
I have a question though, how to crop to shape in different parts of the image?
Thank you in advance,
Hi Solange. I’m glad the article has been useful for you.
Could you please give us a bit more information on what you’re trying to do, so we can make sure we are helping you effectively.
Many thanks!
I am not sure there is a way to, but tell me if you figure out how!
Thanks, Cecelia.
I can’t find a way to adjust images that are placed as background images (for master pages). When I place an image as a background image it constrains the image to the slide proportions which results in squishing the photos. Is there any way to fix this?
Hello Katie,
A solution could be to set a background image in the master. You can do this by clicking on the toolbar at the top on View > Master. In here click on one of the slides from the layouts (or you can create a new one if you want) and insert a new image from your computer. Position, crop and resize the picture so it covers the entire slide. Close the master by clicking on the “x button” at the top right of the slide. Once you are back to “normal view” you can right click on the slide and select “Apply layout”. You can choose the layout you just created with the BG image from here.
Awesome tips, so useful, I have a question, how do you insert images into shapes that you have imported from illustrator, into Google slides?
Hi Allun,
Unfortunately at the time of writing it is not possible to crop images to a shape imported from Illustrator. You can only crop images to the default shapes offered by Google Slides. Many thanks!
This is not true. It is possible as you can see here:
https://docs.google.com/presentation/d/17Lo7yzWGoQTM30vEPTv7DsPMumhm0kOvTQ7LBdJl0zM/edit
But nobody seems to know how.
When I transition my slide, how do I make the image disappear from view before the transition, as when it transitions you can see the picture and then it disappears when the transition ends. How do I make it disappear before that?
Please get back to me before 11/7/19
Hi Nate,
Sorry for the late reply! You could add a simple fade out animation and then click to transistion the slide.
Hope this helps! Many thanks.
thank you, that also helped me to!
hi im mary how do u do the hack to make your picture move
Hi Mary,
Sorry I’m not too sure what you mean. Could you provide a bit more information on what you are trying to do, so we can make sure we’re helping you effectively!
Many thanks.
Woah! I’ve never thought of how useful Google Slides would be! You can make graphic designs with it! Thanks!
Hi Rhyme,
Glad this article has been useful for you!
Many thanks.
Great ideas, is there any way to remove the cropped portion of the image from the file so the images don’t blow up the file size and make the document load really slowly?
Hi Shannon,
Unfortunately there currently isn’t a way to do this within Slides. If you have any image editing software such as Photoshop then you could always crop the image within this software and upload just the section of the image you need.
Hope this helps!
Many thanks.
Greetings! Awesome ideas. The slide above with the turtle divided into a bunch of hexagons… how do you do that? I’m having fits. The masking tool just wants to make my whole image into a poorly proportioned hexagon instead of cutting out a portion of it like a cookie-cutter. Thanks!
Hi Dan,
Glad you enjoyed the article! I’ve had this issue in the past so I know how annoying it can be.
The way I do it is to have the image in the background, then using the hexagon shape tool I would place it over the part of the image I want cropping. Finally, simply copy and paste the image directly on top of the original and crop it down using the hexagon. This means that when you click to crop the image within the hexagon you can adjust the proportions to that of the original image.
I hope this helps!
Thanks.
Hi Andy, I have been trying to do it but I cant figure it out. Could you possibly make a video on this skill?
Very useful! Many thanks.
Glad you found this useful! 🙂
Thank you so much this helped me complete my work papers and get a job. This article was really a lifesaver. You are too. ❤❤😄😄
So much thanks
That’s lovely to hear! So glad this was helpful!
I have used https://theclippingpathservice.com and have loved them for image cut out service and their customer service. I would love to know what others would recommend!
This article has been extremely helpful in upping my knowledge of how to use Google Slides. I’d really like to know how you did the different colored circles around the Image Callouts in #4 and the “microscopic” image with the turtle. They really add to the pop of the images but I can’t seem to figure out how to do these in Google Slides.
Hi Liz. You place an image on the slide and then overlay the same image again and using the circular crop tool you crop to the section you want highlighting. Then you can recolour the background image so that the cropped image stands out. Once that’s done, if you want to change the colour of the circle border. Just click on the cropped photo and click on border colour on the toolbar to select the colour you want. Many thanks!
Super helpful, thank you!
So happy you found this helpful! Many thanks!
This is very informative and useful post. Thanks for sharing!
Hi there,
Google Slides converting specific images to circular will only make it oval.
I have many pictures within a slide presentation, and some will not convert to circular, they will form into an oval shape instead and only. I tried resizing the original picture to square, but this has not solved the problem. Can anyone help please?
Hi Susan. When you follow our step by step of “Crop to Shape” and your original photo is a landscape, it will crop as oval. So you need to double click the photo, so you get the crop, and then go to Format > Format Options and adjust the dimensions, make sure the height and width are the same.
GREAT article. Thank you!
Hi, super helpful tips. Thank you. I’m transitioning from Powerpoint and finding Slides a bit limiting, so these tips are awesome.
One thing I face often with Slides is where someone has put a picture in to the slide, and I want to make it a background so it can go full screen, and the other images in the slide master can still be seen over it.
In powerpoint, I’d literally Crtl+X the image, and then go to ‘change background’ – and hey presto, one option was ‘use clipboard’ – and the image I had cut would become the background image.
I can’t find any way to easily do this in Slides other than saving the image to a file, then re-uploading it as the background image.
Any ideas?
Hi Paul. Thanks for the lovely feedback. Regarding your question, I’m afraid that’s the only way we know how to make a picture a background too. Sorry we can’t be more helpful.
This is super helpful. Thanks!
very helpful image editing slider tutorial..
How to achieve a custom shape mask like in this example:
https://docs.google.com/presentation/d/17Lo7yzWGoQTM30vEPTv7DsPMumhm0kOvTQ7LBdJl0zM/edit#slide=id.p3
Very helpful article. Thanks for sharing a good article.
This was so cool and helpful1 Thank you so much!
Nice Tips; Thanks!
I have a Google Slides deck that is full of pictures, and almost half a GB. Is there a way to compress all the images in Slides the same way as it can be done in PPT?
Hi Allen. Unfortunately there is no ‘native’ way to compress with Google Slides. My advice would be to compress the photos on a third party software before bringing them onto Google Slides or export the presentation to PPT, then compress and either re-upload, or drag the compressed images into slides. Hope this is helpful!
Is there any way to soften the edges of an image in google slides? Like make the edges blend into the background?
I’m trying to figure that one out as well!
how do i add an image like an x in a science project?
Hi Shaun. Do you mean like the x used in an equation? If so, just click ‘Insert’ and then ‘special character’ and find the x.
How do you put a picture on top of a different picture if it is too over crowded?
Hi Mya. I’m afraid I don’t quite understand what you mean, could you please clarify? Many thanks!
Is there a method to smooth the edges of an image in Google Slides, creating a blend with the background?
visit for more information: https://verticalclipping.com/
You’re a WIZARD!
Great tips! I had no idea you could use Google Slides for such advanced image editing! The hack for cropping images into custom shapes is a game-changer for me—I’ve always struggled with making my images look polished. The transparent background trick is also really useful; I can’t wait to use that for my presentations. Thanks for sharing these awesome hacks!
Informative and easy to understand. Valuable info.
This was really useful!