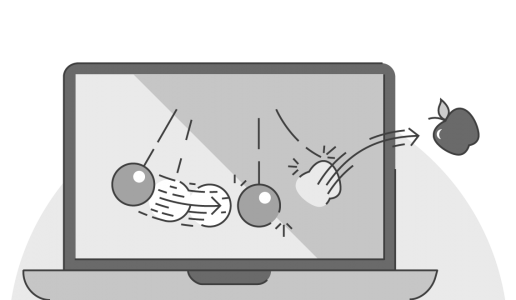
One trick I seem to be using an awful lot in PowerPoint recently is a hidden pivot. Yesterday my colleague shared a video he’d found of a set of pendulums carefully created to produce a really elegant and beautiful display when you set them all off together. Of course it didn’t take someone long to say “Now let’s do this in PowerPoint”, which I’m hoping was tongue in cheek!
However for some bizarre reason I felt like the best way to unwind after working on PowerPoint projects all day, was to make another animation in PowerPoint…
…and, this was the result:
Compared to the original:
Once I looked at the video, and the description that included the details of how they got the pendulums to work, I thought it would be fairly easy to create the effect in PowerPoint. But that was because I was banking on using hidden pivots, rather than going crazy with motion paths. When I tried to explain that I didn’t think the animation was particularly complicated, no one seemed convinced, so here’s an explanation of how it works.
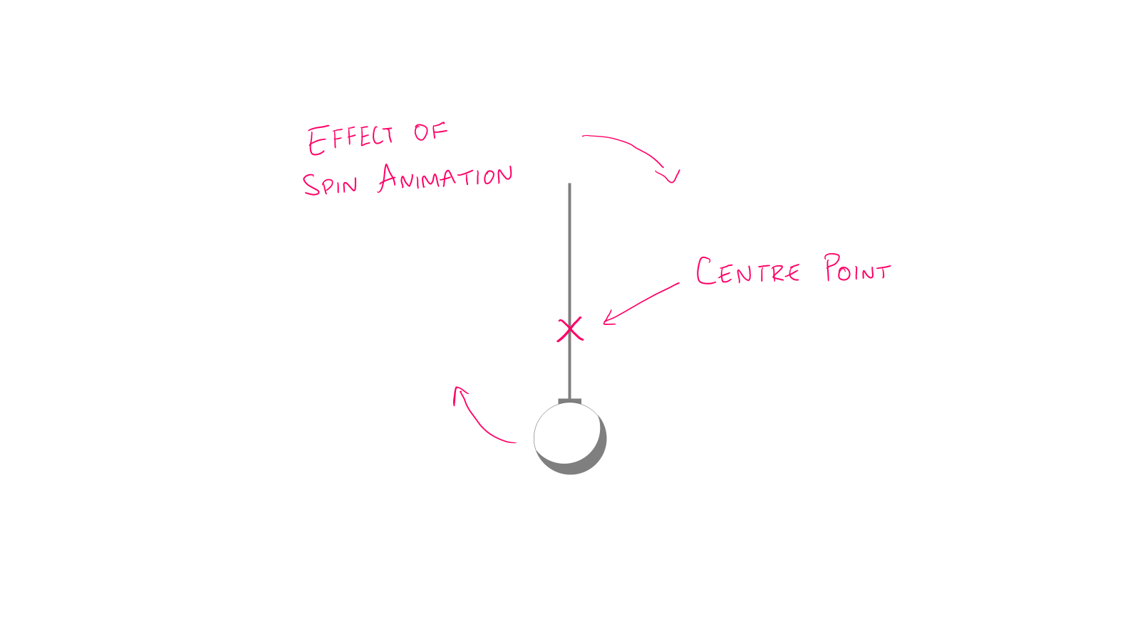
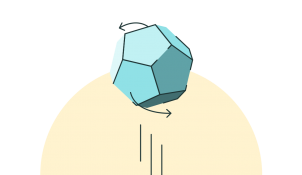
Most of the cool animations in PowerPoint are anchored on the centre of the object you are animating. For some animations it doesn’t really matter where the animation is anchored, but for others, in particular the spin animation, the centre point is crucial. Spin always turns the object about the centre point, which is great for creating something like a turn wheel or cog. But this is less useful if you want to have something swinging, like a pendulum for example. However there is a trick you can use to move the centre point of an object.
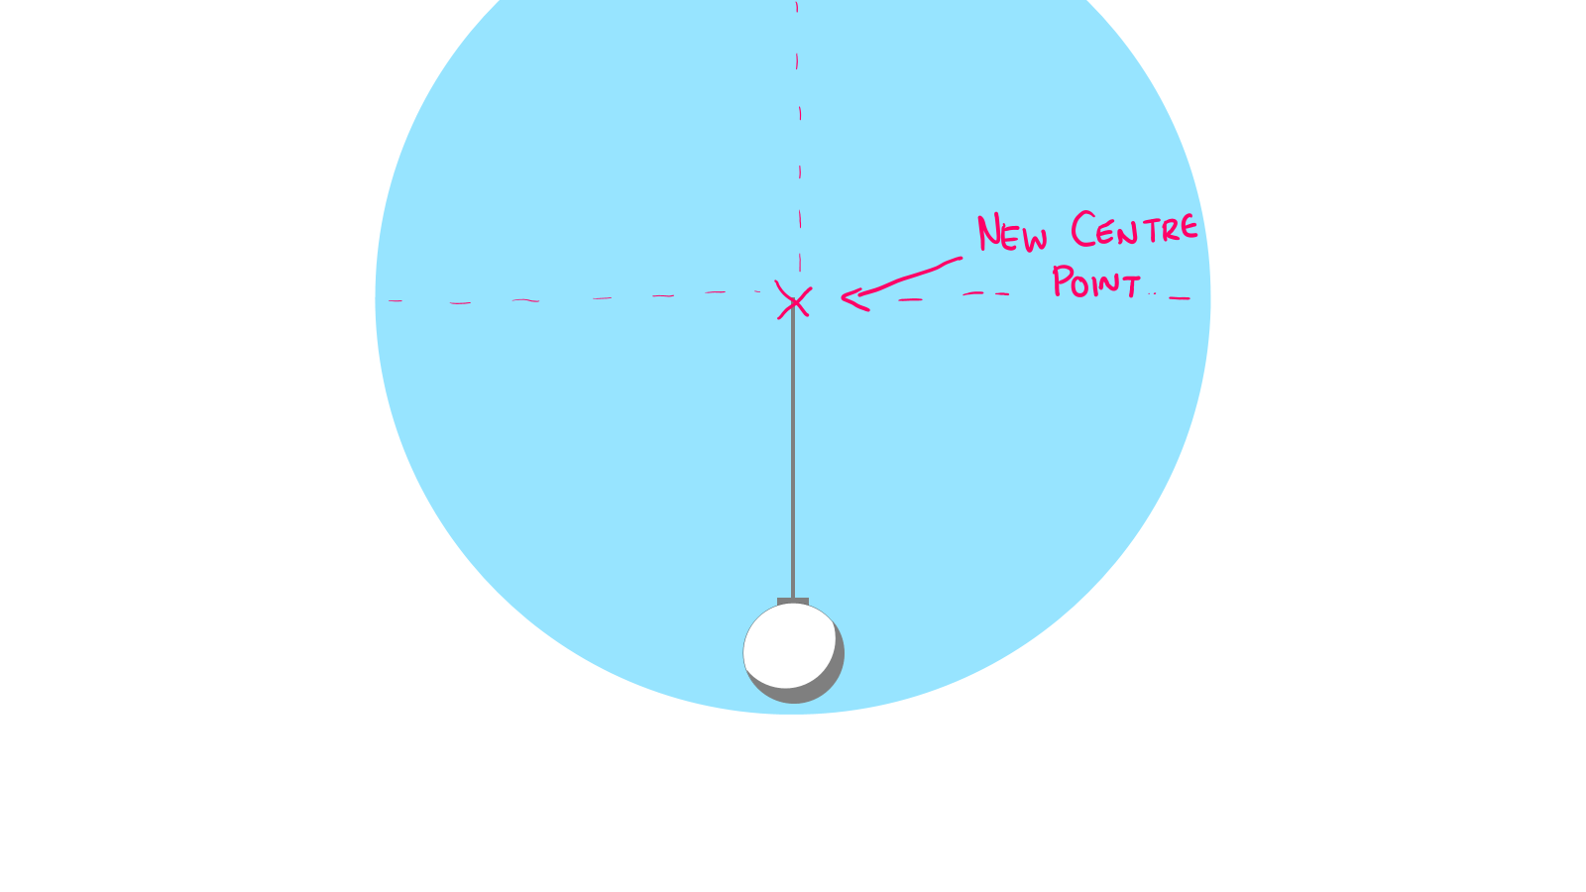
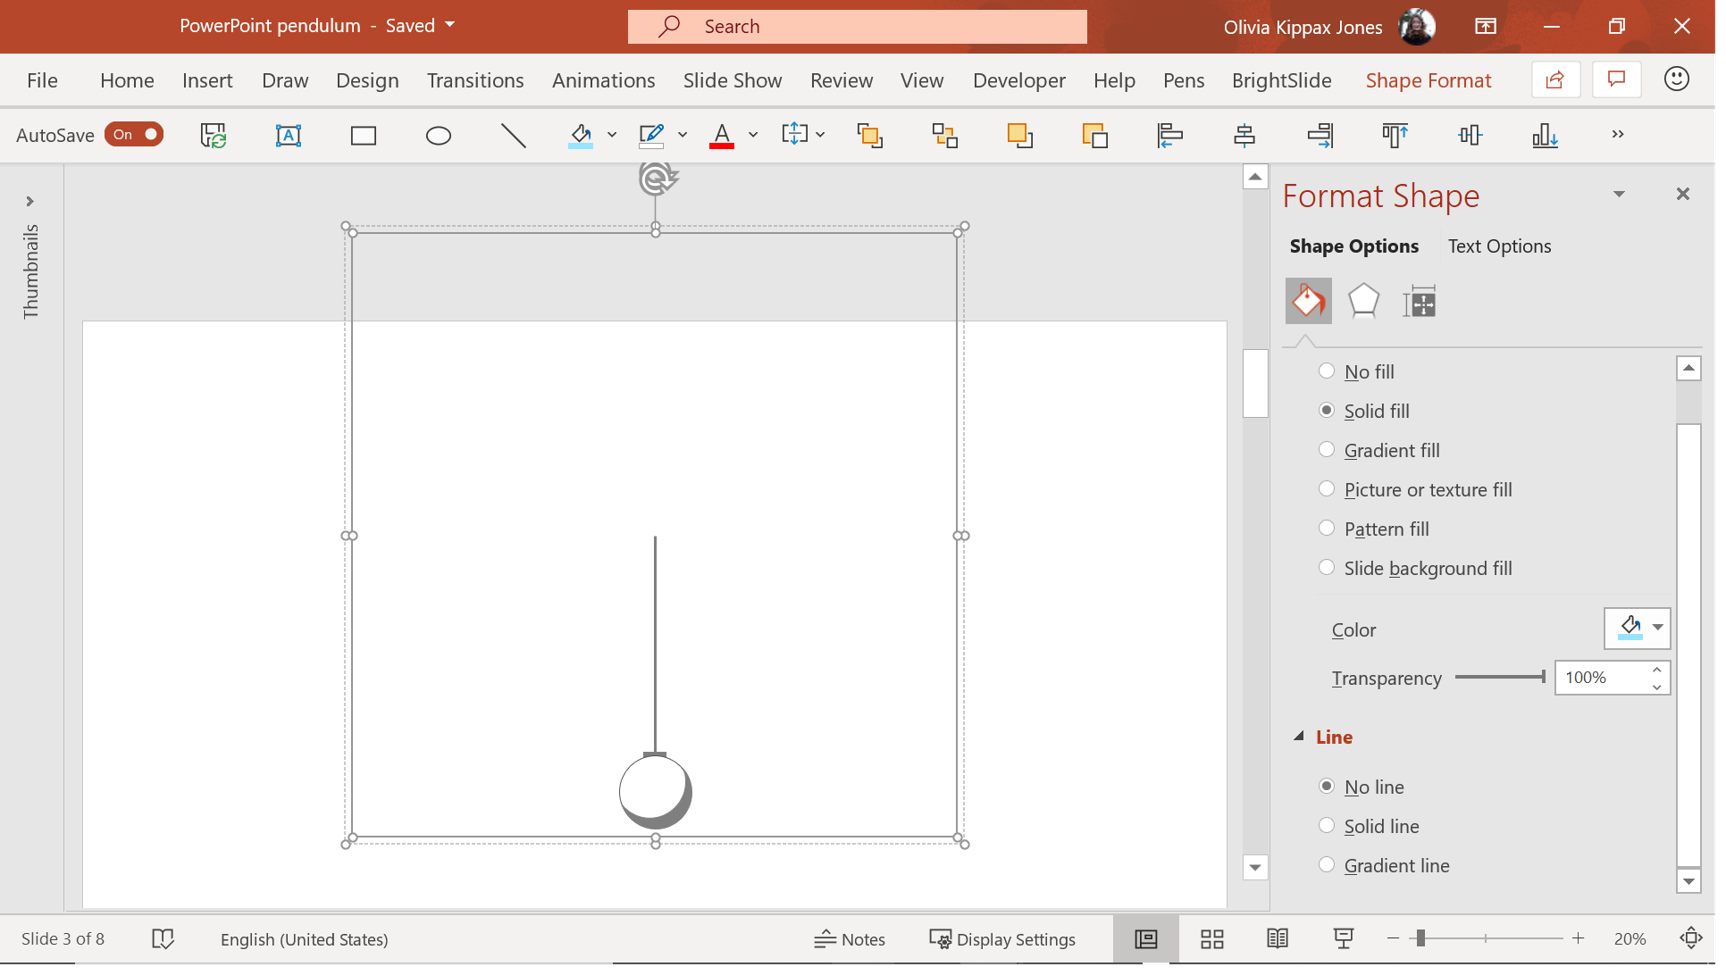
What you do is create a large shape centred where you want the new centre point to be, that covers the entire object you want to move the centre point for. Next you group your original object with the new shape, creating a new group with a centre point correctly positioned for spinning the original object.
After this you select the large shape you created and format it so that the fill and line colours are 100% transparent, and voila! You have something that looks like the original object you wanted to apply a swinging motion to, but with a centre point that lets you swing it with the spin animation.
One word of warning, this can create large areas of transparent objects all over you slides, which can make it difficult selecting anything below it. I have two suggestions to help with editing and arranging your slides.
Using the Selection Pane, rename your groups. I numbered mine so I knew exactly which group was which.
Download our free add-in BrightSlide. BrightSlide allows you to show and hide objects without opening up the Selection Pane every time, meaning you can quickly make edits without messing up your layouts. perfect for complicated slides like this!
Now animate this group with the Spin animation. You’ll want to play around with the timings to get it just right. To edit the Spin animation, open the Animation Pane, right click the animation you want to edit then select Effect Options… from the drop down.
Unfortunately, I think PowerPoint can’t quite do timings precisely enough to make the animation look perfect, but I guess that is what physics is for in the real world.
I asserted that PowerPoint couldn’t do this... My conversational partner claimed I was wrong, this option was hidden in the settings and I just hadn’t looked hard enough! Quick - to the nearest PowerPoint equipped PC...
PowerPoint doesn't do 3D, but it would be cool if it could. For a long time I’ve really struggled to develop a method creates an illusion of three dimensions (and looks good) with just the tools PowerPoint provides. Here's two ways I've come up with to do it.
A PowerPoint template is the only brand element you put in the hands of the whole organisation – regardless of computer literacy, or design skill: it has to be robust enough so that it can’t be broken, but strong enough to carry your brand voice into every meeting, or leave-behind, or proposal it gets used for. Read on for a list of the essential elements every PowerPoint template needs to have.
I wonder if you could answer a quick question as I seem to be having trouble getting objects to spin around their central axis. I thought it was because I hadn’t aligned things correctly. I tested this by creating a plain circle and spinning this, but I found that the circle appears to spin around a pivot which is slightly off center…. completely stumped as to why this would be. Any ideas?
As for the off centre spin, I’ve definitely encountered it a few times when animating groups of objects, with seemingly no reason why it should be happening. One solution I’ve found is to set the transparency of the largest object in a group to 99% transparency (rather than 100%) you still cannot see it, but the animation seems to work better if the object isn’t entirely invisible.
Does that answer you question? Or are you encountering this with individually animated objects?
Thanks for replying! Well originally, I was using a group of objects (three arc separated by 120 degrees – imagine the circumference of a radiation symbol) but these were merged so they should be acting as a single part. I figured I’d just misaligned the arcs so I redrew it until I was convinced it wasn’t me anymore. At which point I tested a circle (held shift down when i drew it to ensure it wasn’t an ellipse) and it’s happening on that too!
Just done a little more work on this and I’m not 100% sure but I think it might be down to where on the screen the shape is located. I’m wondering whether this is a trick of the display and widescreen or something similar. I know I’ve had frequent frustrations when I’ve lined something up when zoomed in only to zoom out and have it look slightly off due to the pixels etc.
I’ve definitely been there! One way to check if something rotating correctly is to draw lines around it so you can see if the animations move it out of the box and therefore off centre.
As for resolving the problem you’re encountering, I’m not sure why a single object is rotating off-centre, that is really strange. I don’t think I’ve ever had it with just a single object so don’t know what to suggest, sorry!
But with the grouped object, if you’ve rotated some of the component parts before grouping them, then sometimes their boundary boxes extend beyond the main shape you have. But unhelpfully it doesn’t take that into account when showing the boundary box of the group if you select it. That then throws off the centre point. To fix this you need to make the base shape larger to cover all of the extremes of every boundary box of every shape in the group. That should allow you to control the centre point, though it is a pain having to do this!
If that doesn’t work I find the solution of last resort is to cut the group and paste it as a picture, then crop into so that the centre point is where is needs to be. The problem with is of course that you lose editability and scaling it can cause problems, but sometimes needs must!
Thanks for this. Yeh I didn’t believe it at first either. I drew a box around the circle to check it and it was definitely wobbling! Mind you, it’s not THAT bad.
I had no idea about the group bounding box so maybe that’s what’s throwing off my groups. Thanks for that, I’ll check that one out. I have done the image thing in the past too – needs must eh?!
Cheers again for all the help – I do appreciate you taking the time.
I tried to download the Power Point file but it didn’t work. My English is limited so I think can understand how to make one like that if I see the example. Can someone pls help?
I’ve checked the link and it’s working as expected. try right-clicking the link in the blog post and choose save link as… to save he file to your computer.
Or try copying and pasting the direct link below into your browsers address bar to access the file.
I ‘m French and i seach nearly one hour to move with a fixe point. Thank a lot for your advice. When I see your pendulums, i was so nice and i want to say to you congratulation for you job !.
Chris, Very cool, thanks much! Any chance you know how I can apply the same timer to all slides such that it appears on all slides (maybe except the Title and if so, that’s OK too) but the same timer keeps time for the length of the presentation rather than an individual slide? Once a month I host a forum where presenters come in they have 10 minutes from the time I start their slides to exit the stage. Often times, they can’t see the clock and I have to tell them “1-minute”….. “time is up”. Which means I also have to pay attention to the time rather than the presentation. I’m looking for a timer to embed that works across all slides. Any ideas? Thanks!
Robert – I think that your comment came through on the wrong article – unless you want a timer based on an old pendulum clock.
Anyway – I think that your two (most obvious?) options are (i) to use Presenter view so that the time spent presenting displays as a clock on the secondary monitor or (ii) to embed a Flash timer. I don’t think that this could be done – across slides – in native PowerPoint.
Hi, I’m using this to create some clocks for my students to practice telling time. However it’s spinning anti-clockwise. Is there any way to change the animation so that it spins clockwise?
It’s strange that the animation is spinning anti-clockwise, the default should be clockwise!
You can change it by first selecting the object with the animation, then going to the animations tab on the ribbon. The second section from the left of the tab (also called Animation) has a button called “Effect Options”. Click on that and it should give you the choice to set the spin direction.
If you’ve added more than one animation to the object you will need to open the animation pane (you can find this in the advanced animation section of the Animations tab), then select the individual animation you need to edit. This will let you use the “Effect Options” to change the effect.
I was using an entry spin, and it doesn’t seem to have that option. However once I changed to an emphasis spin I could see the direction option. Thanks a lot! My clocks are looking much more realistic now.
I ‘m Indonesian and i seach nearly one hour to move with a fixe point. Thank a lot for your advice. When I see your pendulums, i was so nice and i want to say to you congratulation for you job !.
Nice Job! One tip I might add for your readers is that rather than using a transparent object, I make a circle with a visible line, and no fill larger than my entire slide with a center of where I would like the animation to rotate around. If you have a lot going on, you can even color code the circles. Depending on your work flow, that may make more sense, and be less confusing about what object your are working with. Thanks for your nice write up of how to do this. –ted
Hi Ted, thanks for the tip! It’s always good to try new ways to make things work with PowerPoint animations so you can find the way that works best for you! The colour-coding seems like it could be useful when the animations are getting busy.
Well, I’m using this to create some clocks for my students to practice telling time. However, it’s spinning anti-clockwise. Is there any way to change the animation (https://animationsharks.com/) so that it spins clockwise?


Hey Chris,
This is a great animation – mesmerizing to watch!
I wonder if you could answer a quick question as I seem to be having trouble getting objects to spin around their central axis. I thought it was because I hadn’t aligned things correctly. I tested this by creating a plain circle and spinning this, but I found that the circle appears to spin around a pivot which is slightly off center…. completely stumped as to why this would be. Any ideas?
Thanks!
Hi Nathan,
Thanks for the comment!
As for the off centre spin, I’ve definitely encountered it a few times when animating groups of objects, with seemingly no reason why it should be happening. One solution I’ve found is to set the transparency of the largest object in a group to 99% transparency (rather than 100%) you still cannot see it, but the animation seems to work better if the object isn’t entirely invisible.
Does that answer you question? Or are you encountering this with individually animated objects?
Chris
Hi Chris,
Thanks for replying! Well originally, I was using a group of objects (three arc separated by 120 degrees – imagine the circumference of a radiation symbol) but these were merged so they should be acting as a single part. I figured I’d just misaligned the arcs so I redrew it until I was convinced it wasn’t me anymore. At which point I tested a circle (held shift down when i drew it to ensure it wasn’t an ellipse) and it’s happening on that too!
Struggling here… 🙁
Just done a little more work on this and I’m not 100% sure but I think it might be down to where on the screen the shape is located. I’m wondering whether this is a trick of the display and widescreen or something similar. I know I’ve had frequent frustrations when I’ve lined something up when zoomed in only to zoom out and have it look slightly off due to the pixels etc.
Hi Nathan,
I’ve definitely been there! One way to check if something rotating correctly is to draw lines around it so you can see if the animations move it out of the box and therefore off centre.
As for resolving the problem you’re encountering, I’m not sure why a single object is rotating off-centre, that is really strange. I don’t think I’ve ever had it with just a single object so don’t know what to suggest, sorry!
But with the grouped object, if you’ve rotated some of the component parts before grouping them, then sometimes their boundary boxes extend beyond the main shape you have. But unhelpfully it doesn’t take that into account when showing the boundary box of the group if you select it. That then throws off the centre point. To fix this you need to make the base shape larger to cover all of the extremes of every boundary box of every shape in the group. That should allow you to control the centre point, though it is a pain having to do this!
If that doesn’t work I find the solution of last resort is to cut the group and paste it as a picture, then crop into so that the centre point is where is needs to be. The problem with is of course that you lose editability and scaling it can cause problems, but sometimes needs must!
Hope that helps you solve this one!
Chris
Hi Chris,
Thanks for this. Yeh I didn’t believe it at first either. I drew a box around the circle to check it and it was definitely wobbling! Mind you, it’s not THAT bad.
I had no idea about the group bounding box so maybe that’s what’s throwing off my groups. Thanks for that, I’ll check that one out. I have done the image thing in the past too – needs must eh?!
Cheers again for all the help – I do appreciate you taking the time.
N
I tried to download the Power Point file but it didn’t work. My English is limited so I think can understand how to make one like that if I see the example. Can someone pls help?
Mato,
Jakarta
Hi Mato,
I’ve checked the link and it’s working as expected. try right-clicking the link in the blog post and choose save link as… to save he file to your computer.
Or try copying and pasting the direct link below into your browsers address bar to access the file.
https://www.brightcarbon.com/wp/wp-content/uploads/2012/12/Simple-Harmonic-and-non-harmonic-Motion-01.pptx
Hope that helps!
Karl
I ‘m French and i seach nearly one hour to move with a fixe point. Thank a lot for your advice. When I see your pendulums, i was so nice and i want to say to you congratulation for you job !.
Thank a lot
Chris,
Very cool, thanks much! Any chance you know how I can apply the same timer to all slides such that it appears on all slides (maybe except the Title and if so, that’s OK too) but the same timer keeps time for the length of the presentation rather than an individual slide?
Once a month I host a forum where presenters come in they have 10 minutes from the time I start their slides to exit the stage. Often times, they can’t see the clock and I have to tell them “1-minute”….. “time is up”. Which means I also have to pay attention to the time rather than the presentation. I’m looking for a timer to embed that works across all slides.
Any ideas?
Thanks!
Robert – I think that your comment came through on the wrong article – unless you want a timer based on an old pendulum clock.
Anyway – I think that your two (most obvious?) options are (i) to use Presenter view so that the time spent presenting displays as a clock on the secondary monitor or (ii) to embed a Flash timer. I don’t think that this could be done – across slides – in native PowerPoint.
Great Job !! Thanks for uploading.. I got one of my problems solved with this
OMG OMG OMG I LOVE YOU. A whole new world of possibilities…. YOU ROCK. THANK YOU.
Hi, I’m using this to create some clocks for my students to practice telling time. However it’s spinning anti-clockwise. Is there any way to change the animation so that it spins clockwise?
Hi Jake,
It’s strange that the animation is spinning anti-clockwise, the default should be clockwise!
You can change it by first selecting the object with the animation, then going to the animations tab on the ribbon. The second section from the left of the tab (also called Animation) has a button called “Effect Options”. Click on that and it should give you the choice to set the spin direction.
If you’ve added more than one animation to the object you will need to open the animation pane (you can find this in the advanced animation section of the Animations tab), then select the individual animation you need to edit. This will let you use the “Effect Options” to change the effect.
Hope this helps!
Chris
Cheers Chirs!
I was using an entry spin, and it doesn’t seem to have that option. However once I changed to an emphasis spin I could see the direction option. Thanks a lot! My clocks are looking much more realistic now.
I ‘m Indonesian and i seach nearly one hour to move with a fixe point. Thank a lot for your advice. When I see your pendulums, i was so nice and i want to say to you congratulation for you job !.
Thanks
Genius! Your blog is great, so many helpful tips!
Nice Job!
One tip I might add for your readers is that rather than using a transparent object, I make a circle with a visible line, and no fill larger than my entire slide with a center of where I would like the animation to rotate around. If you have a lot going on, you can even color code the circles. Depending on your work flow, that may make more sense, and be less confusing about what object your are working with.
Thanks for your nice write up of how to do this.
–ted
Hi Ted, thanks for the tip! It’s always good to try new ways to make things work with PowerPoint animations so you can find the way that works best for you! The colour-coding seems like it could be useful when the animations are getting busy.
Chris
Thanks for the tip. I think you did a great job of explaining how to accomplish changing the spin center.
Rick
Well, I’m using this to create some clocks for my students to practice telling time. However, it’s spinning anti-clockwise. Is there any way to change the animation (https://animationsharks.com/) so that it spins clockwise?
such a nice technique. i’ve had a hard time trying to do such thing. thank you !!
Thank you so much!!!