One question our incredible Google Slides experts are asked all the time is ‘how do I add a timer to Google Slides?’. And, as we love to delight clients and fellow presentation enthusiasts alike, we’ve come up with an answer!
Now, if you’re not one of the people who’ve asked us this question, you might be wondering why you’d need a timer in Google Slides. Surely, it’s just a case of clicking through each slide as you talk, right? Not so! Our curious questioners have a good point. What do you do if you want to stay on a slide for a set period of time? Perhaps to let your audience engage in a discussion or answer a question? Or what if you want to set a countdown on your screen so your audience know how long their coffee break is?
Sounds great, where do I find the Google Slides timer function?
Erm, we hate to break it to you, but this is a question with no easy answer. Essentially, there are two options. Option A is the in-built autoplay function in Present mode, which allows you to set your deck to switch from slide to slide at set intervals, with no visible timer on the screen. If you want a visible timer on your slides, the only current option is to embed a YouTube video of a timer directly onto your slide. The option you choose will depend on what kind of timer you’re after. We’ll look at the autoplay function first, and then tackle the slightly more complex art of embedding a video.
Using the Autoplay function in Google Slides
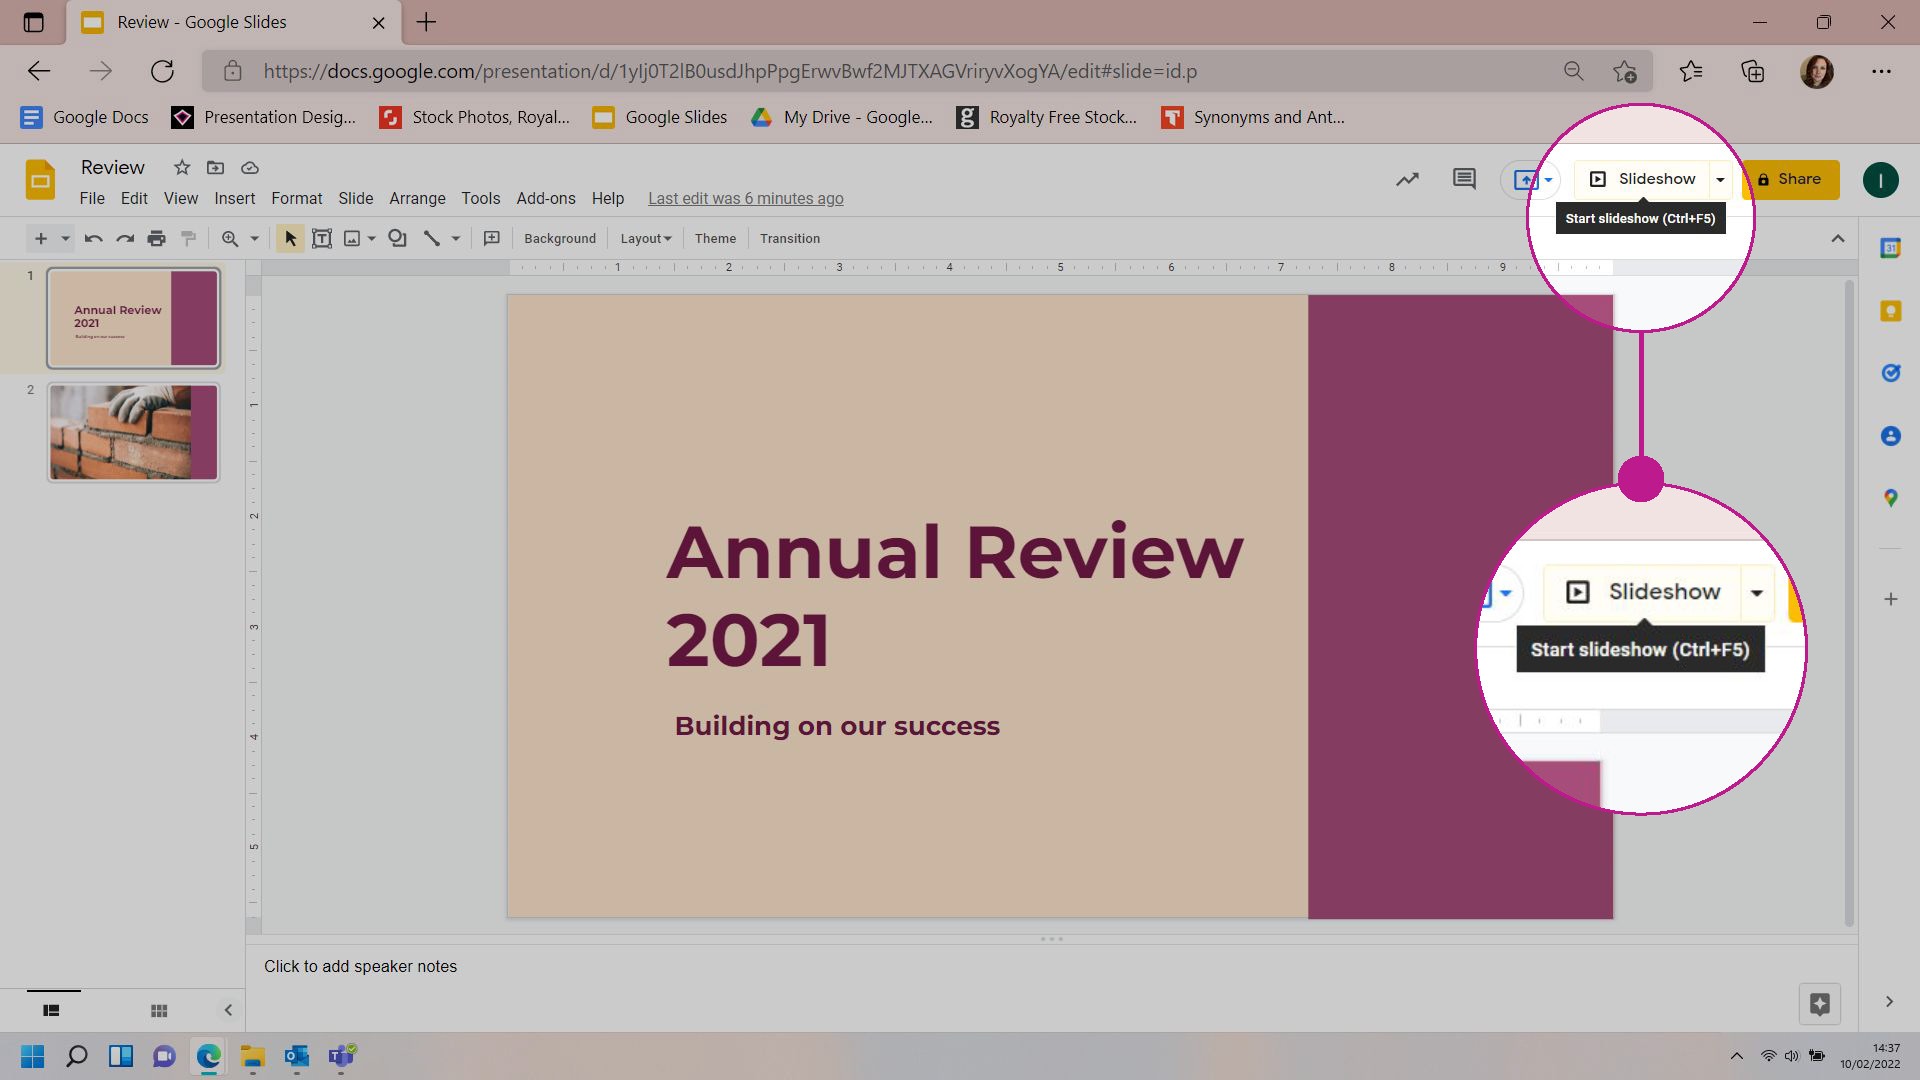
Step 1: Enter Present mode
Open up Google Slides and put your chosen deck into Present mode. To do this, either press Ctrl+5 or click on the Slideshow button in the top right-hand corner of your screen.
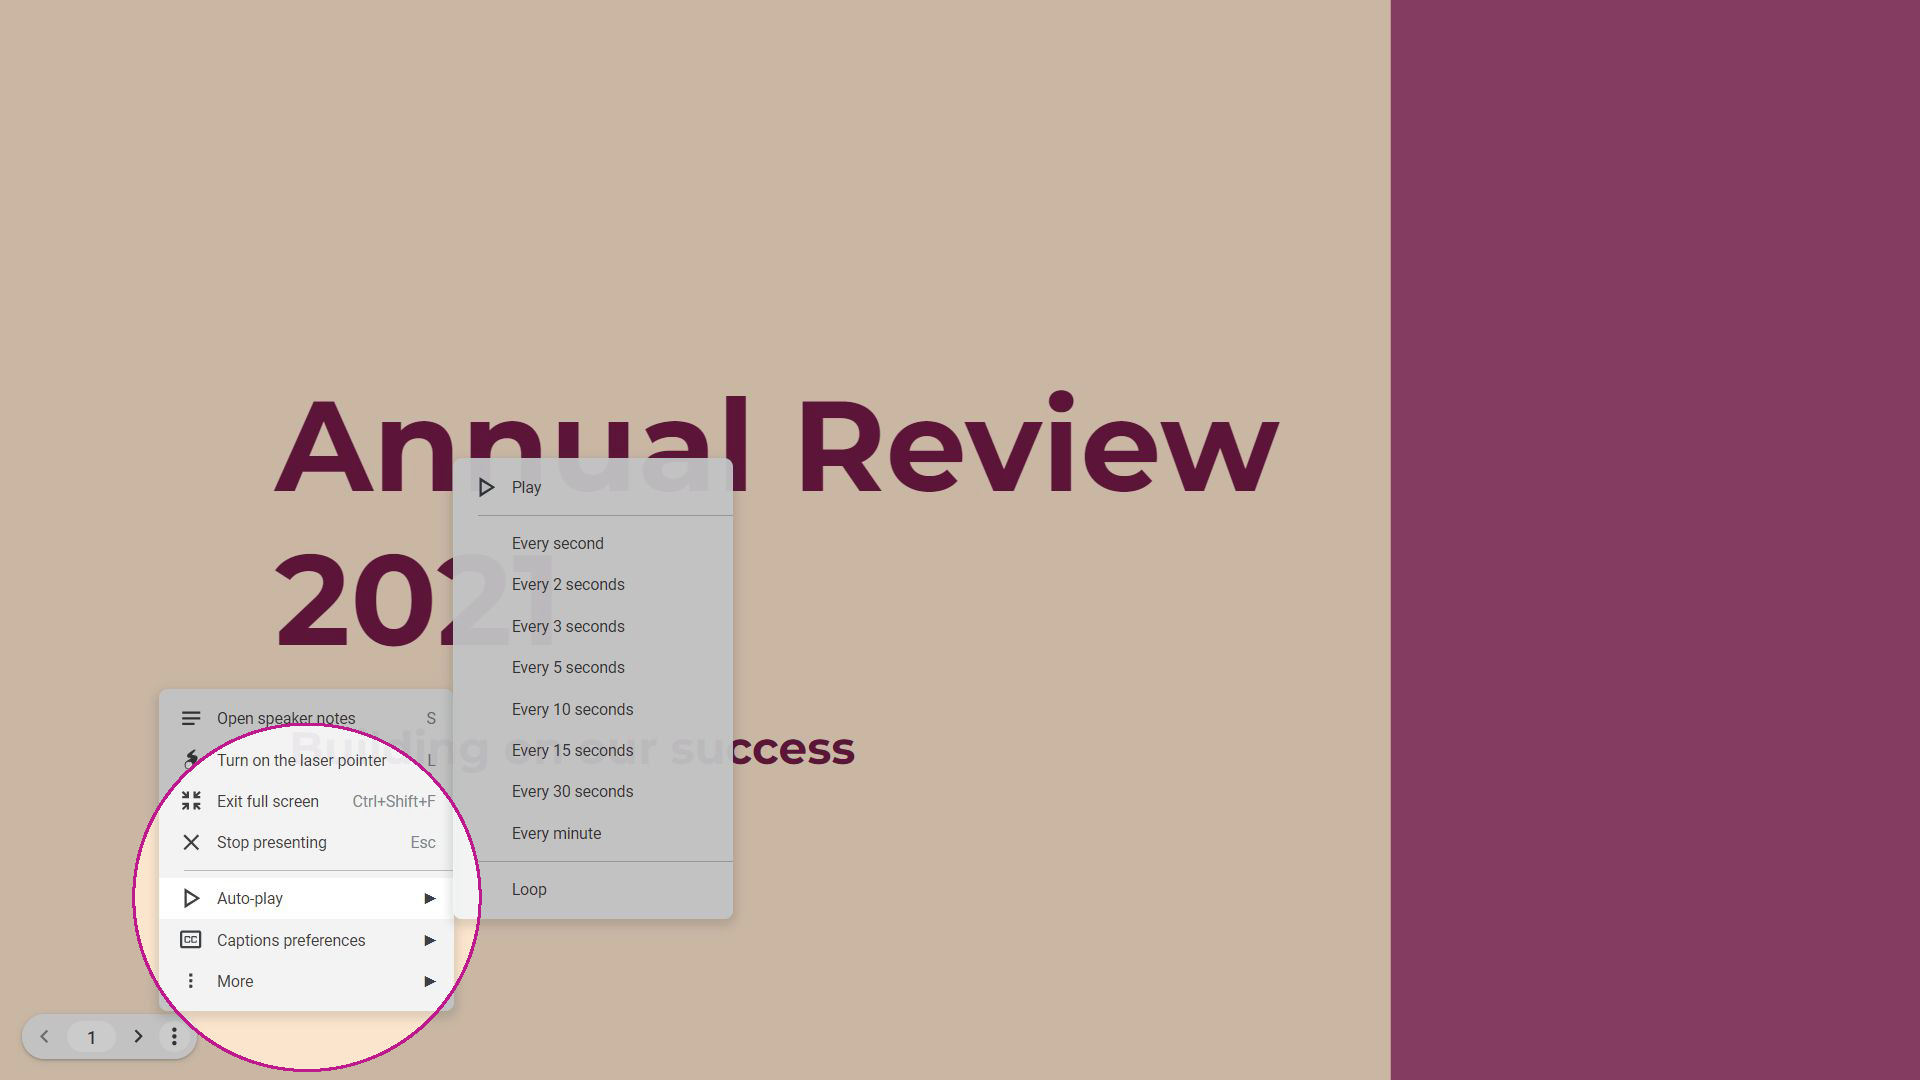
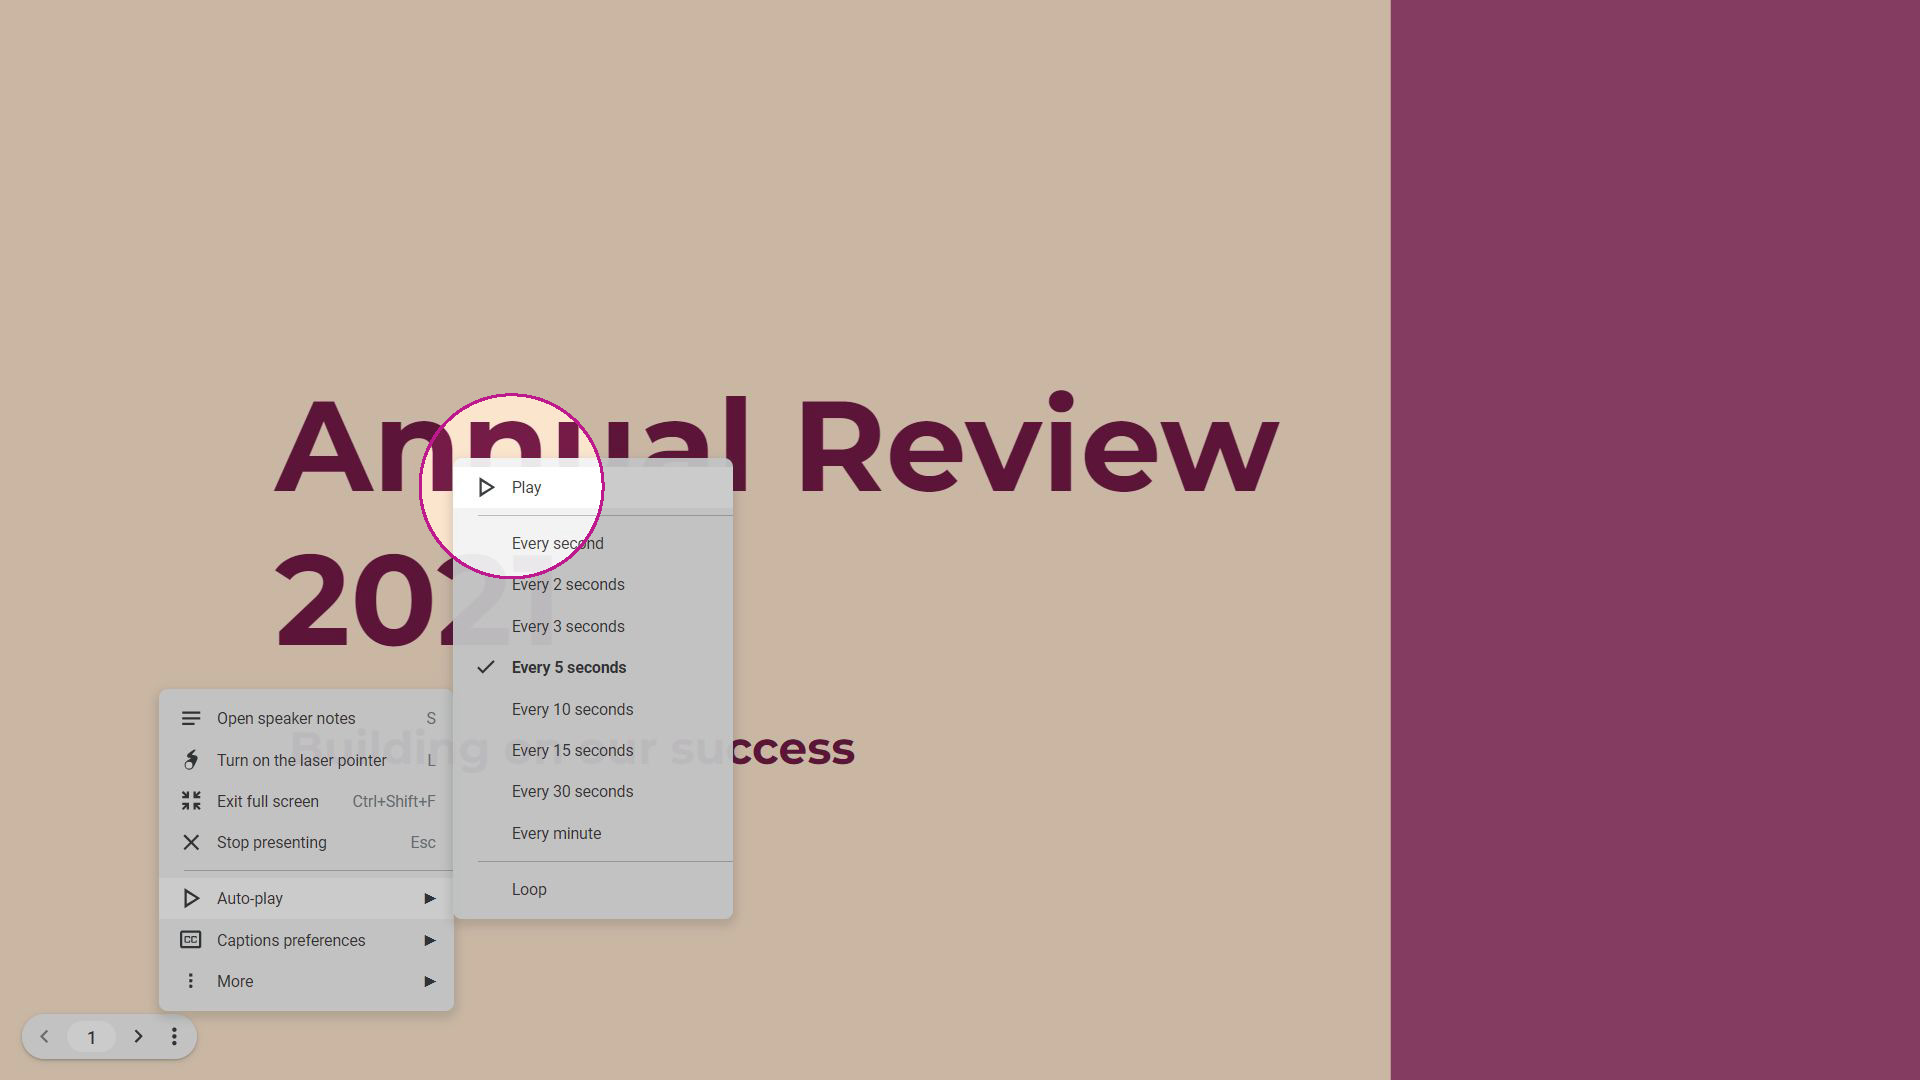
Once you’re in Present mode, hover over the three dots in the bottom left of your screen and you’ll see a box that says Open the options menu.
Click on the dots and a menu will appear.
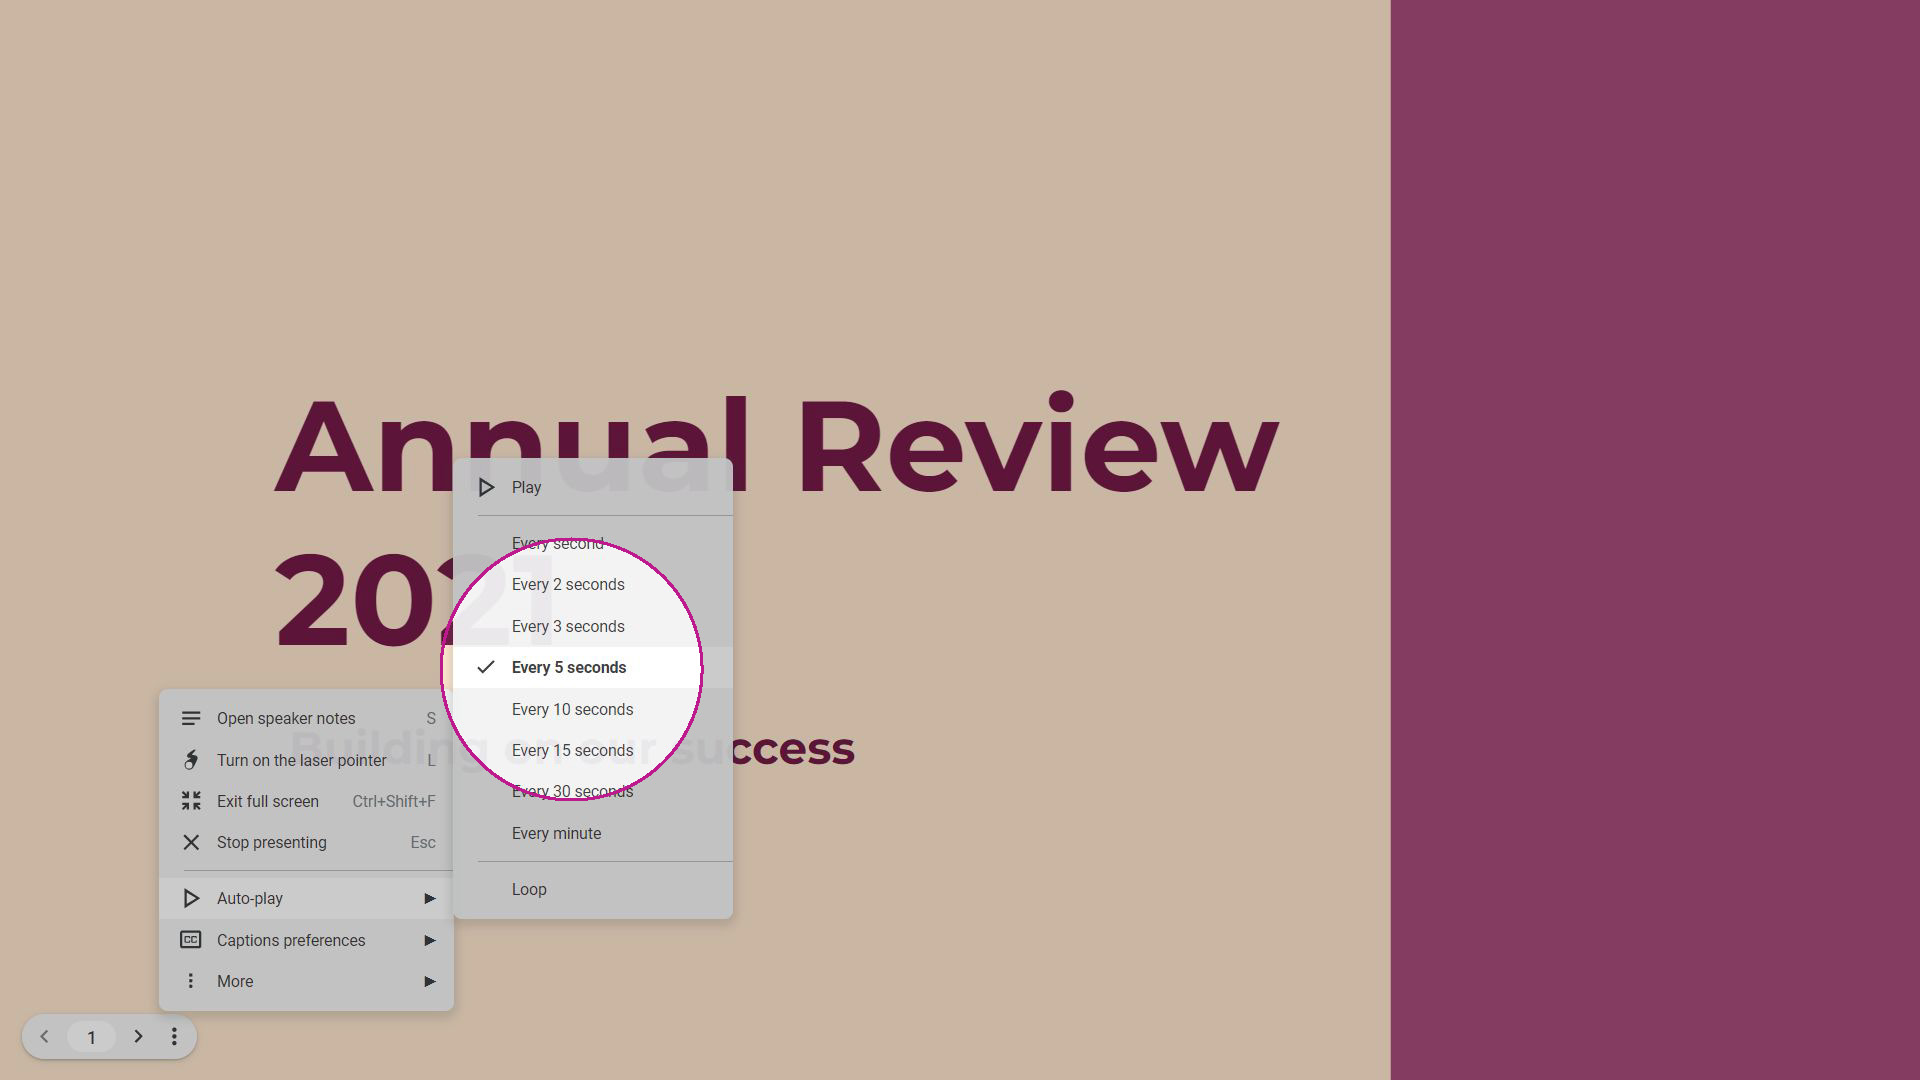
Step 3: Choose your timings
You can then choose how frequently you’d like your slides to move on, ranging from once a second to once a minute.
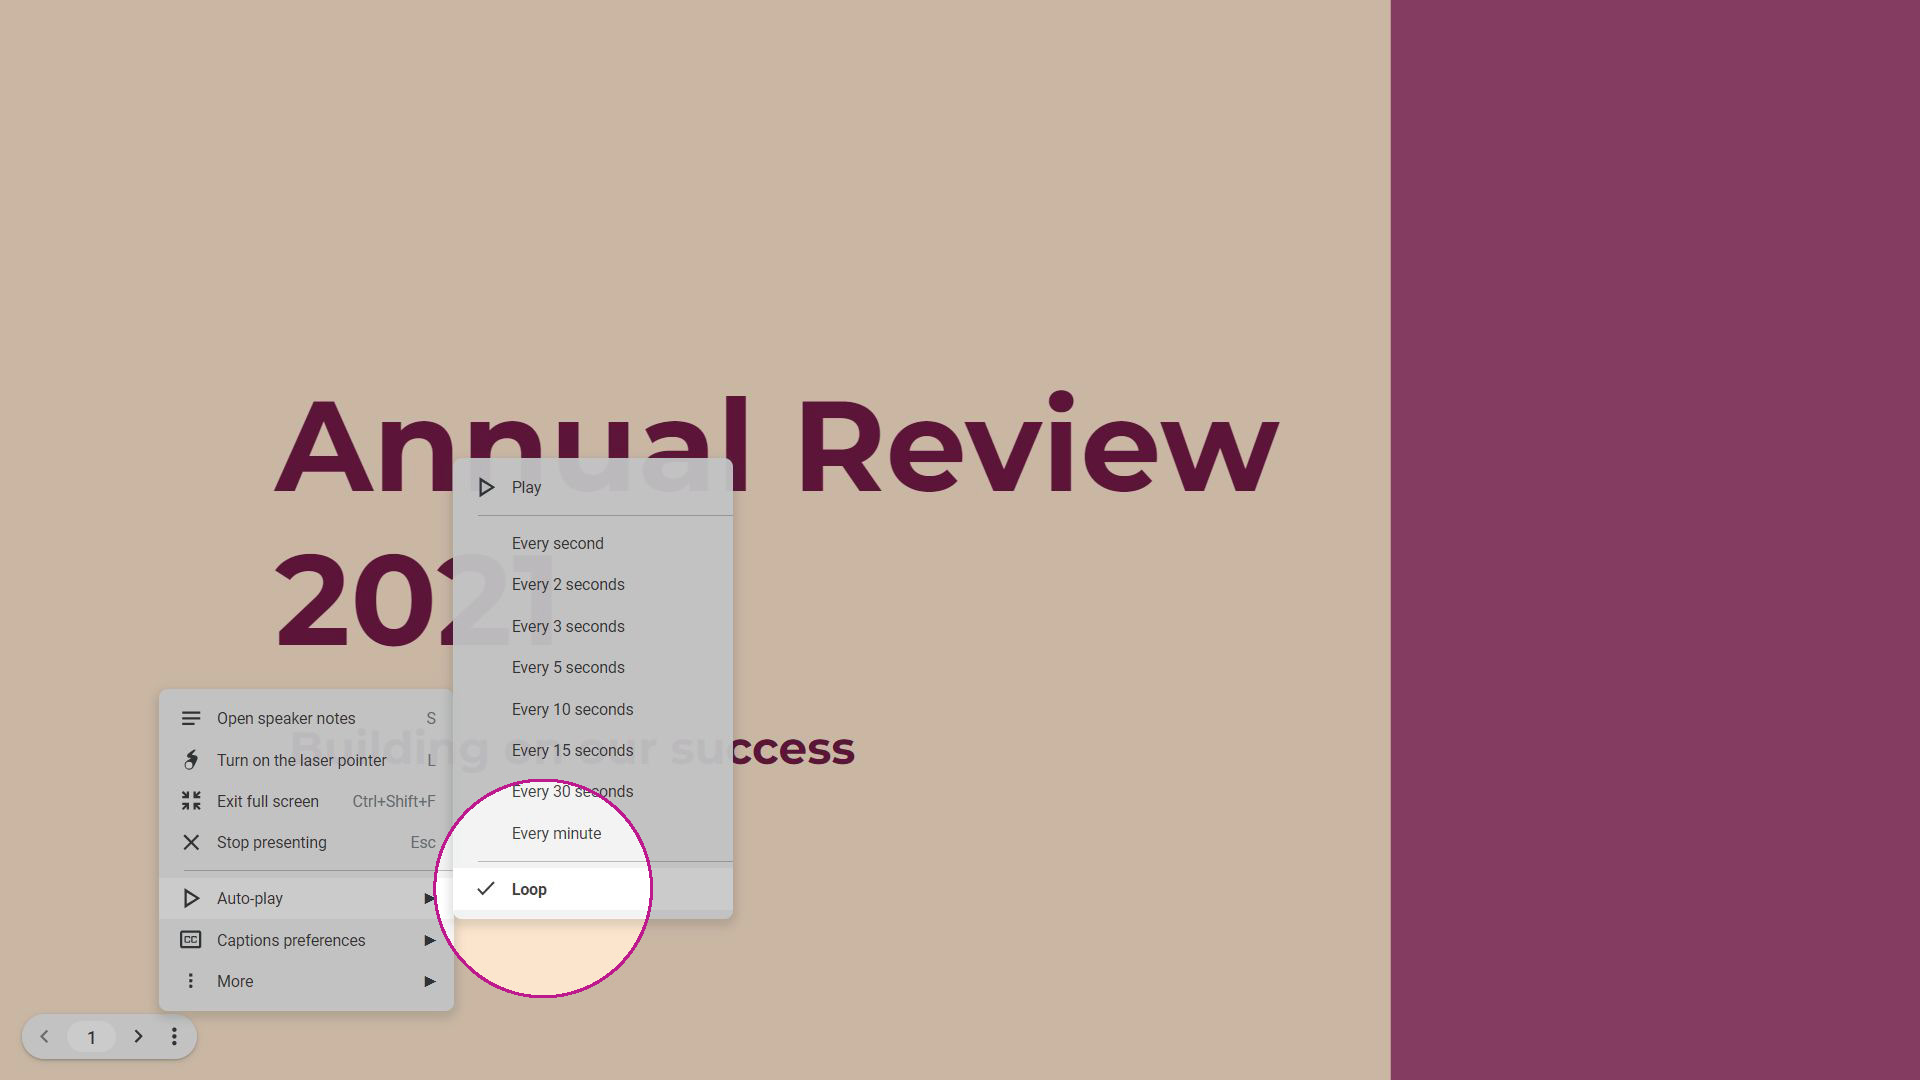
You can also choose to play them on a loop, which is handy if you want to play something like a photo presentation in the background during an event.
Step 4: Play your presentation
Once you’ve chosen the timing settings you want, click Play at the top of the pop-up menu.
And that’s it! Your presentation will play automatically following the timings that you’ve specified.
Embedding a timer on screen in Google Slides
If you want to add a visible countdown timer to your slide to give your audience a set period of time for a break or a group activity, the easiest way to do this (at the time of writing) is to head over to YouTube and search for a timer video (yes, these are a thing!).
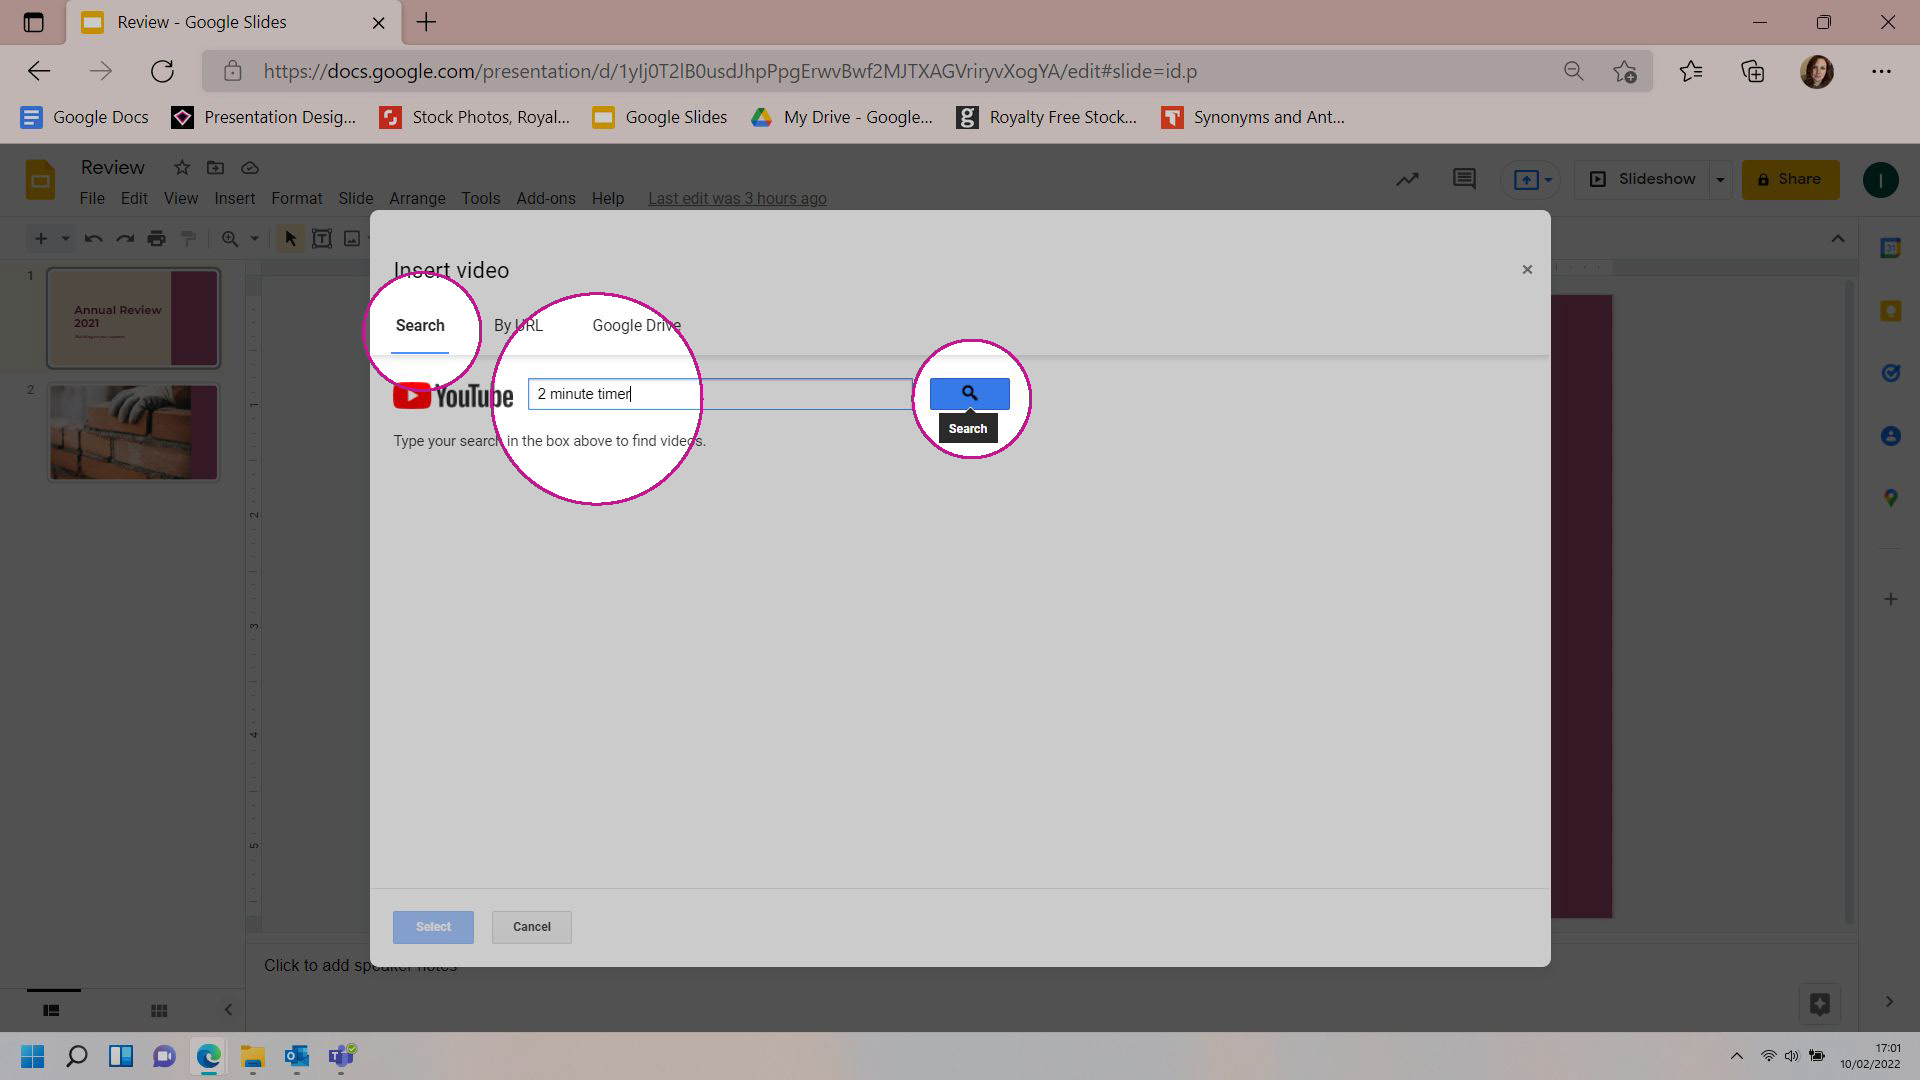
Step 1: Search for a timer video on Youtube
You can do this without leaving Google Slides. To start, go to Insert in the toolbar and then select Video.
A pop-up will appear that allows you to search YouTube. Type the length of timer you want into the search bar and click the blue Search button. A range of options will pop up. You can choose from different backgrounds and even different music options, but for the purposes of this tutorial I’m going to choose a two-minute timer with a plain black background.
Step 2: Insert the video into your presentation
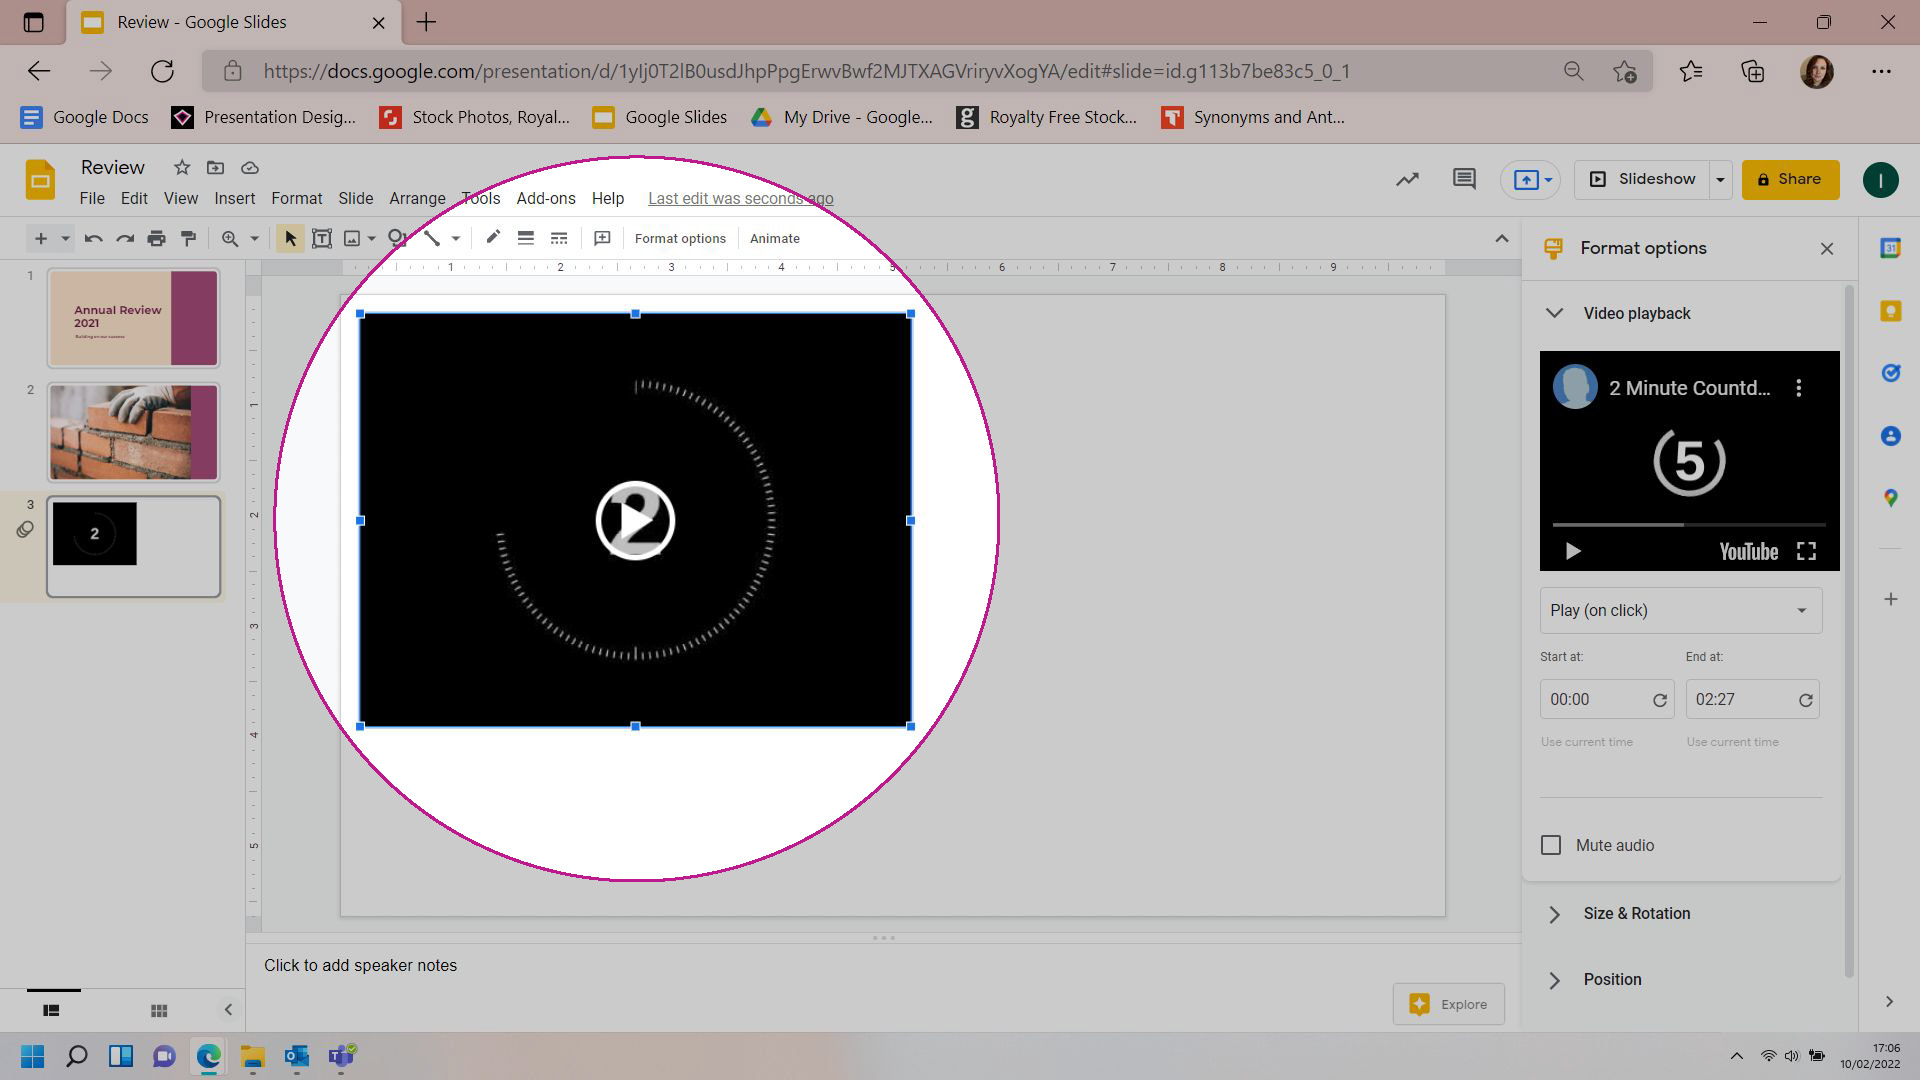
Click on the video you want to insert and then click Select. The timer will appear on your slide, along with a Format options box to the right of the screen (we’ll cover this in a minute).
You can resize the timer to suit your needs; here, I’ve resized it to fit the slide.
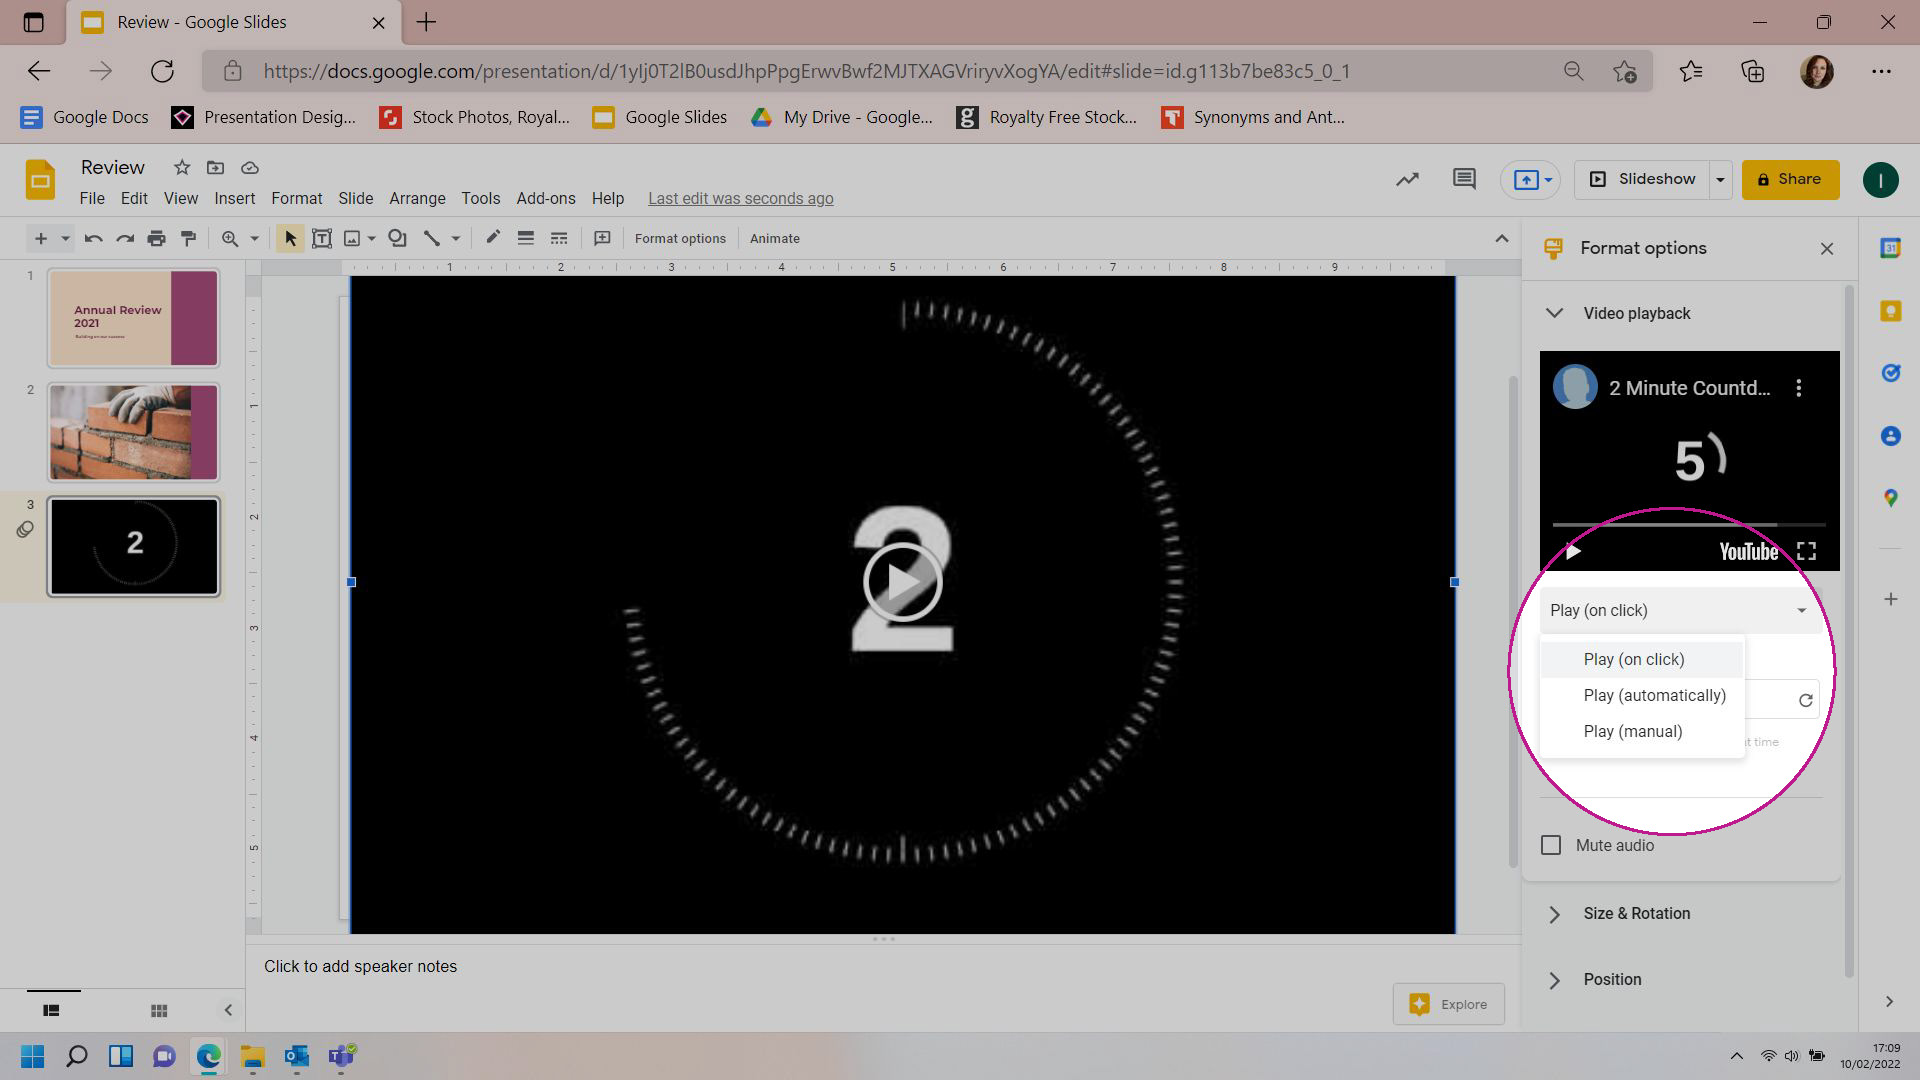
You can use the Format options bar to choose how you want to start the timer – either on a click, automatically, or manually by pressing play.
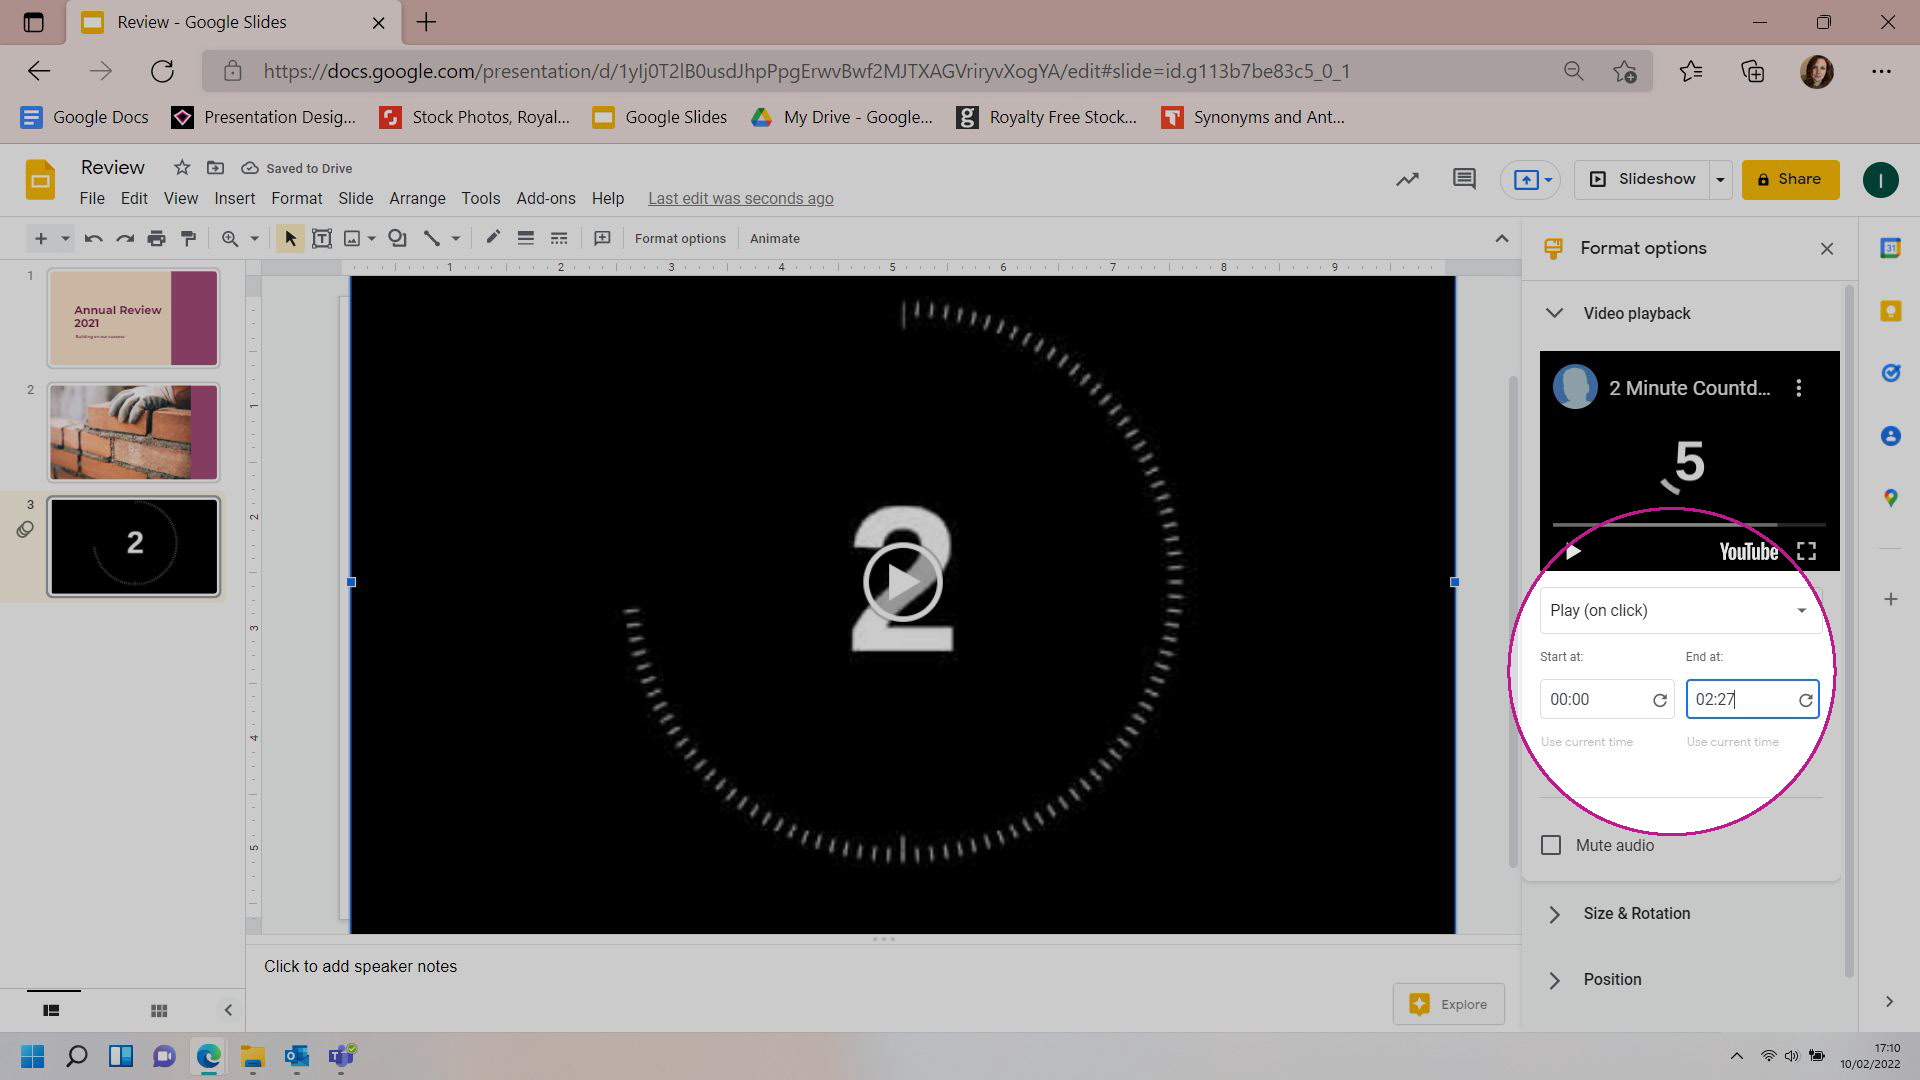
You can also adjust the exact start and end times of your video.
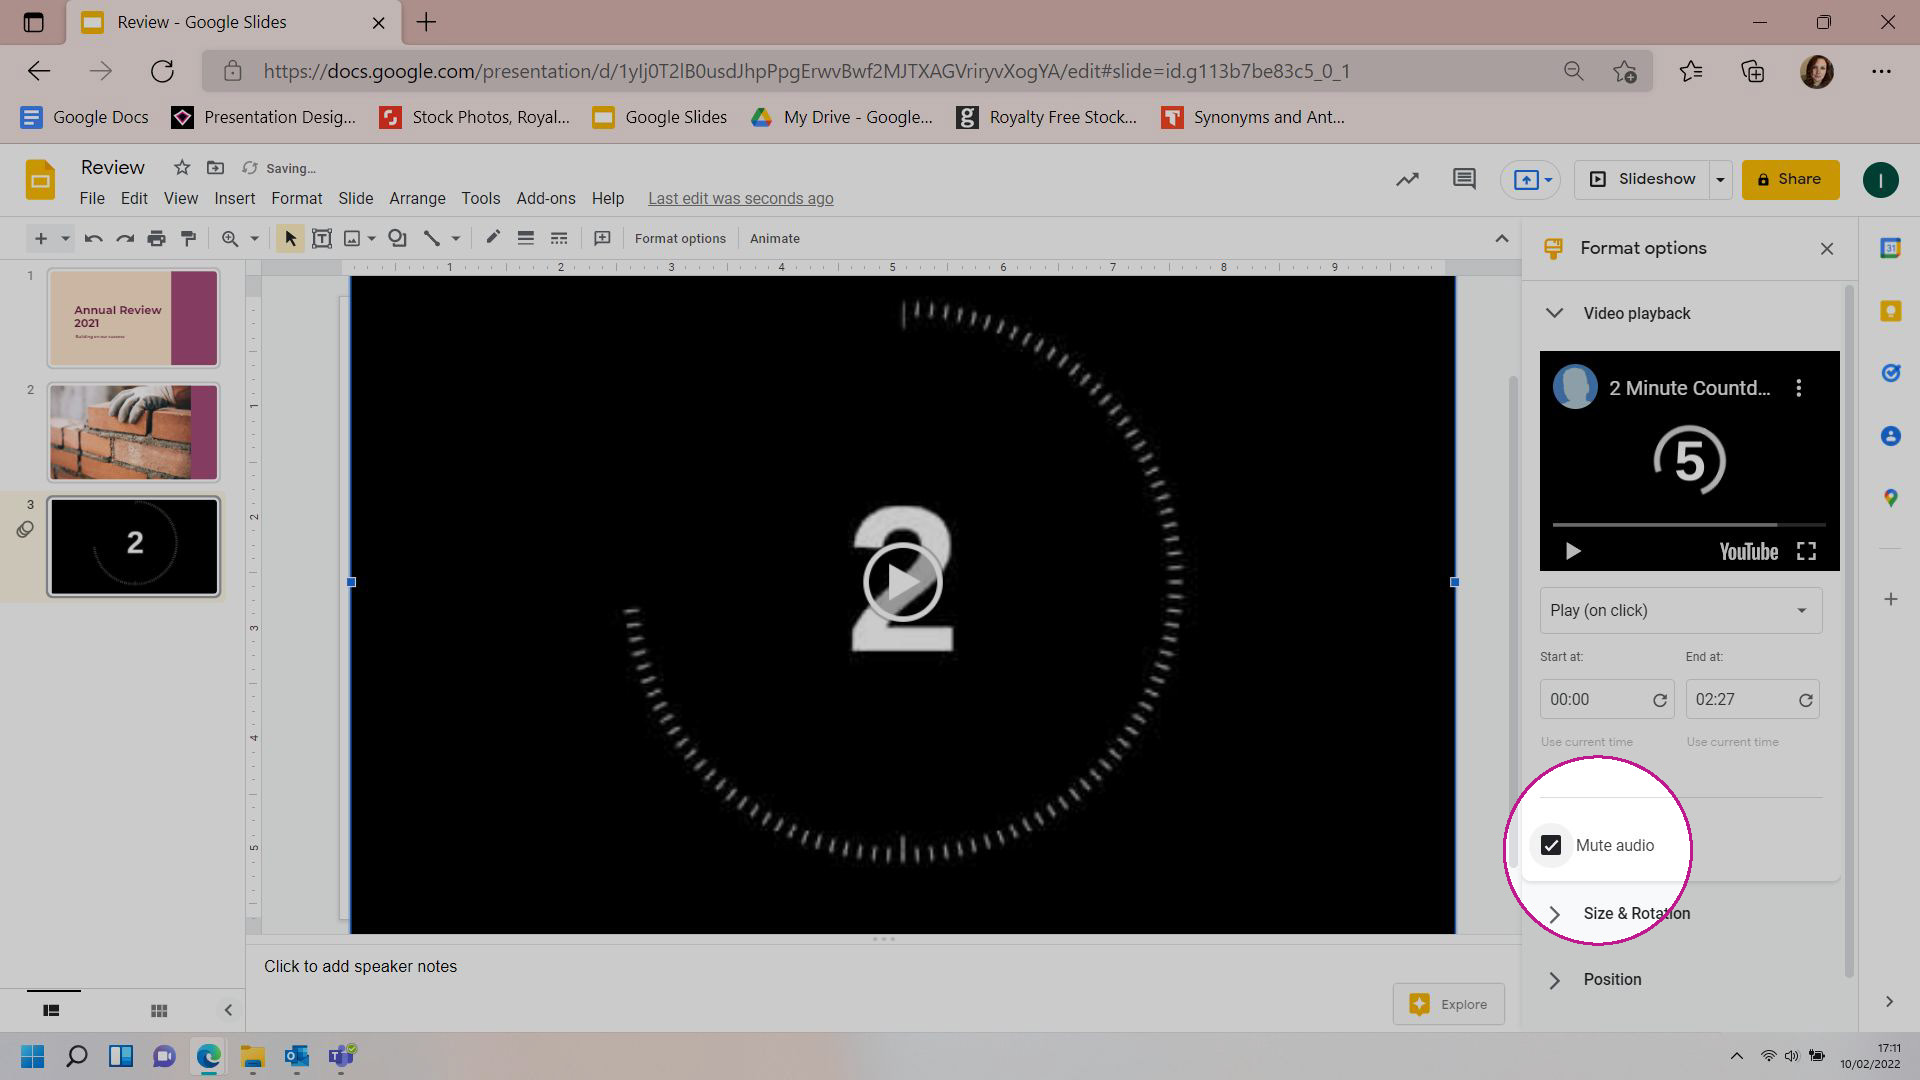
And finally, if your ideal timer is cursed with irritating background music, you can choose Mute audio (but remember that, if you do mute the video, you won’t be able to hear any audio signals when the timer hits zero).
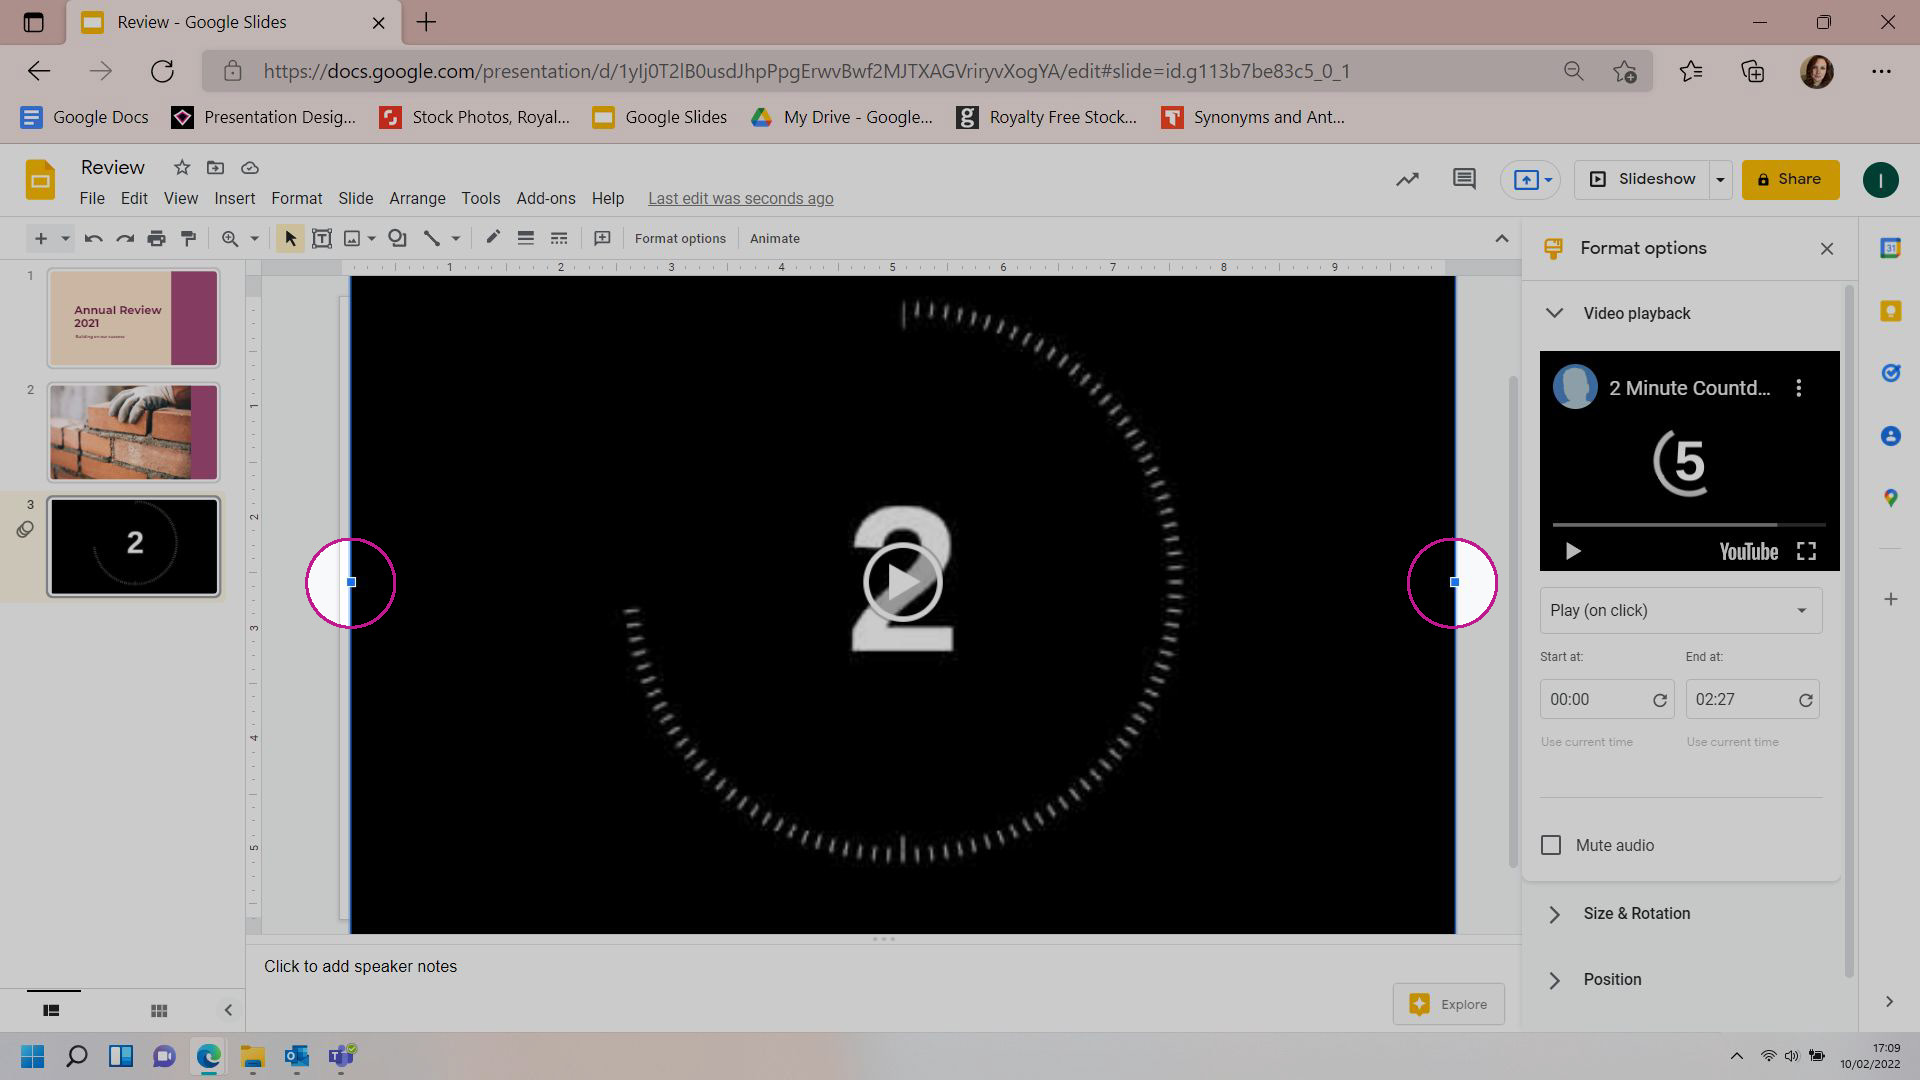
Voila! One countdown timer to keep your audience on track.
The verdict
Autoplay in Google Slides offers a really straightforward way to pace your presentation if you don’t want to rely on manual clicks to move between slides. However, it’s not visible, so your audience won’t know when the slide is going to advance. Embedding a video timer offers you an easy way to let your audience know what’s happening and when. It’s worth playing around with both functions to see which best meets your needs. The drawback here is that you have to rely on the options available on YouTube, so it’s less customizable. Whichever option you go for, it’s important to rehearse your entire slideshow beforehand to make sure that all the timings fit together as planned. Everyone gets pre-presentation nerves; but practice makes perfect! Visit our ULTIMATE guide to powerful, panic-free presenting for tips that’ll make your next presentation smooth, straightforward, and (dare I say?) enjoyable.
We’ve found there’s no hard-and-fast rule for how big or small text on slides should be. Each presentation has its own unique requirements – it all depends on what you’re using the slides for, what you’re hoping to achieve with them, and how your audience will be viewing them. That said, we do have a few best practices for you to consider.
At BrightCarbon, we're always excited to find features that make presenting a more seamless experience! This blog post covers how to use the 'Present to a meeting' button in Google Slides.
It takes time to create engaging, visual slides, so why undermine all your effort at the crunch point? Delivering a presentation properly really isn’t that tricky! With Google Slides’ Present mode toolbar, it’s super easy to present in Google Slides navigating your presentation effortlessly.
It is, quite simply, the best deck we have. I did a nice presentation with it yesterday and would like to do the same next week... I am sure it will get a lot of use. The visual impact and flow are compelling!


thanks dude
Thanks that helped me a lot!!!!!!!!!!!!!!!!!!!1
How can I get my slides to transition by itself after 15 minutes. I have a timer embedded, but I have to click to go to the next slide.
hi thanks for the help