Countdown timers can be really effective ways of filling time in breaks at conferences or training sessions, or to give people a time limit to do an exercise or have a discussion. Follow these easy steps to create your own that is completely editable and see how easy it is to create a slick, branded countdown timer just using PowerPoint.
The premise behind this countdown timer is really simple: it’s a wheel animation that disappears over the course of a minute, and transitions to a new slide with a different figure on. Easy huh. The clever bit is that in the background there is an image that tracks – very slowly – so there is a gentle sense of movement to add a bit of interest.
What you’ll need
PowerPoint
An image (if you don’t want to buy expensive stock photography, why not get it for free at sites like Unsplash) – we think portrait orientation works best
A circle (you can make this yourself, or use the hand-drawn one we have in the download)
Figures (again feel free to type your own, or use ours)
Step 1: the countdown
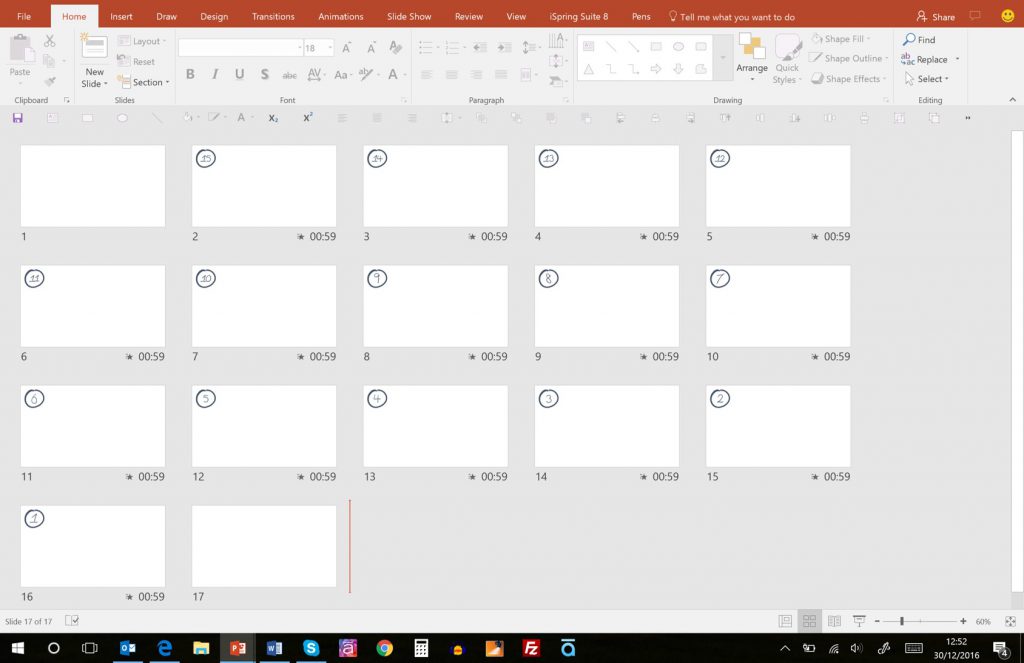
Open up PowerPoint and get yourself a blank slide. Duplicate (ctrl+d) as many slides as you’ll need minutes, and then add two more (these will sit at the beginning and the end as static slides). Highlight all of these slides and add a fade transition to each of them (that’ll make it look nice and smooth).
At this point deselect the option to have the slide transition On Mouse Click, and instead choose After, and type in 59.00. (Do this for all but the beginning and end slide.)
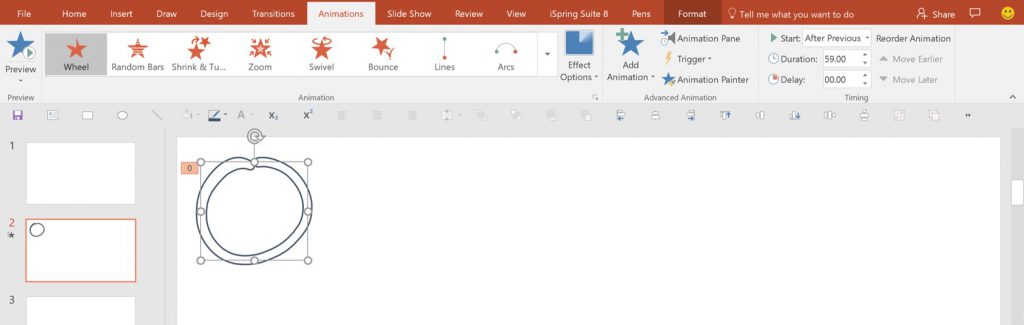
On your second slide draw (or paste in) your circle. Navigate to your animation tab and choose wheel as an exit animation (red star). You’ll see the default animation length is two seconds, we want to change this to 59 seconds (PowerPoint doesn’t support animations longer than 59 seconds).
In the centre of your circle add your minutes. In this example our countdown is 15 minutes, so that’s what we put in here. (With the fade transition, we don’t need an animation on this.)
Copy this animation onto each of your subsequent slides, changing the figure as you go.
This is your countdown done!
Step 2: the picture
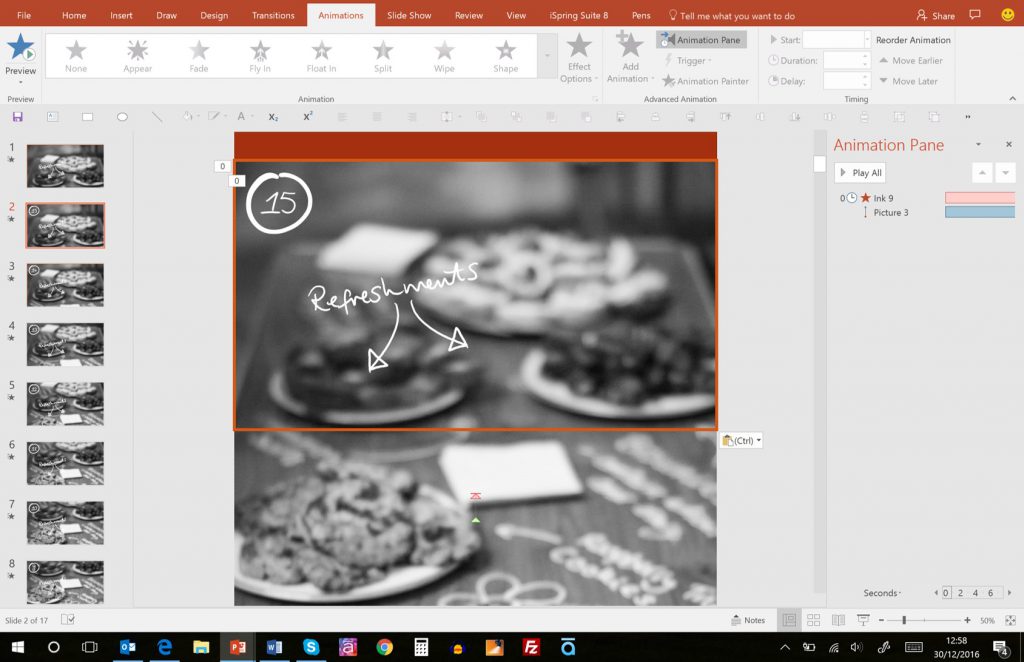
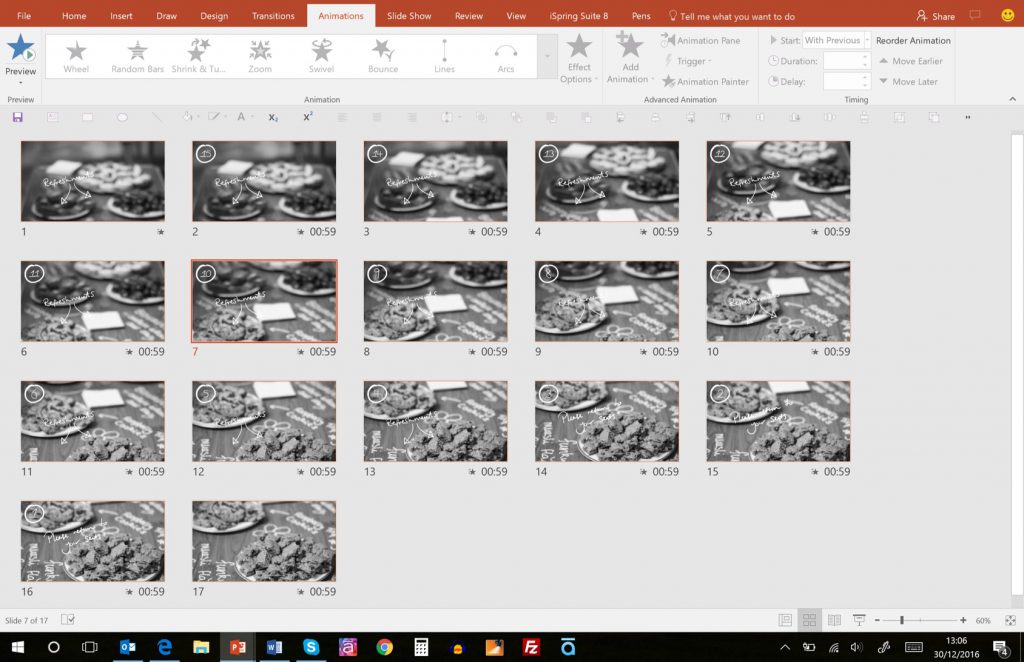
But if you want to level-up your countdown here’s how to add a picture in the background. As we said earlier, a portrait picture works best, and ideally it’d be something that doesn’t have a particular area of focus.
This picture of a table of cakes works well because it begins with an abstract, soft-focus feel, because as the time ticks on the foreground comes into sharper focus.
Insert the picture on your first slide (remember this is the one that will transition manually to begin the countdown). Align it with the top of the slide (if it will track up) and the bottom of the slide (if it will track down).
Now copy this picture onto your next slide. Create a thin box and align it so it sits below the picture. Now add a motion path going up (open up the effect options and make sure there is no smooth start or end). Line up the motion path so the image will track up and finish at the top of the box you’ve just created (try and get this as exact as possible).
Set this animation to happen over 59 seconds with previous (the disappearing wheel).
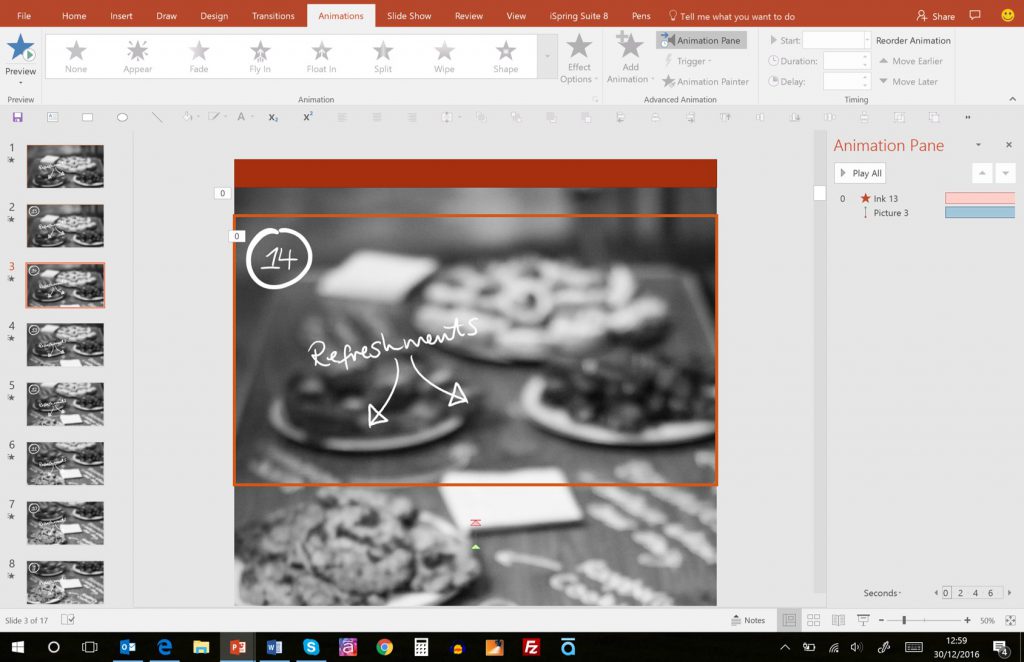
Now, copy this image and the box and paste them onto your next slide. Using the alignment tools, line up the top of the picture with the top of the box. As the animation is already set, you can move to your next slide.
On this slide move the box to line up with the top of the picture, and then move the picture up. Repeat this process for all the slides you have. You should see the image move up as you’re going.
Run it in show mode and stand back to admire your work!
And the best news is that even with a hi-res picture on each slide, because it’s the same image, file size is relatively small. (The file I’ve created here is only 3MB!)
Try this tutorial out for yourself and let us know how you get on! If you want to get a head start, or take a look at the mechanics, download the file here.
When it feels like the call is to make more and do it faster, design smart and build a presentation toolkit packed with effective layout slides. We show you how to start off by building five of your own.
This article is dedicated to the bit hitting combination of PowerPoint and PDFs, and three particular use cases that will have these two giants working together in perfect harmony: how to convert PowerPoint to PDF on Windows and macOS, how to convert PDF to PowerPoint, and how to insert a PDF into PowerPoint.
Masking effects are a great way to jump-start your image slides in PowerPoint. They not only look great, but also serve many a practical purpose. We've come up with a few ideas for creative ways to combine masking and animation in your presentation.
Hi there, really interesting article guys. I just wanted to point out that PowerPoint does support animations longer than 59 seconds. If you go to the Advanced Animation Pane, right click on the object you are animating and choose Timing. Then set the Duration to any number of seconds you want ( I have a 3.5 minute countdown on a presentation of mine, so I entered 210 seconds) then click OK. The Duration will appear as Auto in the Timing section at the top right of the screen, but the object will animate for the number of seconds you entered, even if that is greater than 59. Cheers
Using your instructions, creating the “timer” was easy. I set it to advance on 1 second because I didn’t want to wait for a full minute to see the slide in action. However, I don’t get the formatting and “motion” of the picture. Every portrait picture I attempt to insert just lines up with the top and bottom of slide, so there is no change.
The scrolling background can be complicated, but once you get the hang of the position of the picture in relation to the motion path, it’s fairly simple. Having not seen your file I’m not sure what your exact problem is, but I’d recommend downloading the file at the end of the article You can either swap out the image for one of your own, or examine the mechanics in more detail to apply to your own version.
I wanted to make sure I send you both a HUGE thank you for making this story come to life and creating amazing graphics to help. We really appreciate BrightCarbon for stepping up our presentation game massively!


Hi there, really interesting article guys. I just wanted to point out that PowerPoint does support animations longer than 59 seconds. If you go to the Advanced Animation Pane, right click on the object you are animating and choose Timing. Then set the Duration to any number of seconds you want ( I have a 3.5 minute countdown on a presentation of mine, so I entered 210 seconds) then click OK. The Duration will appear as Auto in the Timing section at the top right of the screen, but the object will animate for the number of seconds you entered, even if that is greater than 59.
Cheers
Mal
Using your instructions, creating the “timer” was easy. I set it to advance on 1 second because I didn’t want to wait for a full minute to see the slide in action.
However, I don’t get the formatting and “motion” of the picture. Every portrait picture I attempt to insert just lines up with the top and bottom of slide, so there is no change.
Hi Kevin, glad you could make the timer work!
The scrolling background can be complicated, but once you get the hang of the position of the picture in relation to the motion path, it’s fairly simple. Having not seen your file I’m not sure what your exact problem is, but I’d recommend downloading the file at the end of the article You can either swap out the image for one of your own, or examine the mechanics in more detail to apply to your own version.
I hope this helps!