One-click visualisation in PowerPoint? It's now possible with Copilot's 'Visualise this slide' skill, but is it any good? Take a look at our experiments and see if you can get content that feels corporate chic rather than community kitsch
Blog 

14th Aug 2026
How to create a dolly zoom effect in your presentations using PowerPoint
- Written by: Hannah Harper
- Categories: PowerPoint design
In a world that clamours for your attention at every verse end, who needs another slide deck filled with bullet points and stock images? Your presentation audiences certainly don’t. And even if your content is good and meaningful, you might be getting shakes instead of nods simply because of the way your content looks. What content creators need isn’t ways to make more bullet point slides, they need ways to think outside the box for more creative visual sequences.
Let’s take a leaf out of our free time. Do you typically spend 1-2 hours a night watching static presentations, or do you spend that time watching compelling stories told cinematically on your favourite streaming platform?
Imagine if your PowerPoint decks could embody the latter instead of the former. Well, today we’re going to set you on the path with a tutorial to make a dolly zoom in PowerPoint.
What is a dolly zoom, and why does my presentation need one?
If you just want to get stuck in, skip down to the tutorial below.
A dolly zoom is a cinematic effect that pushes the background and the foreground in opposite directions. As an object in the foreground moves closer to the camera, the background moves away (or vice versa). It’s typically used in cinema for building tension or showing some sort of emotional turning point, and it’s a great way to zero in on a particular character to focus the audience’s attention.
Read more about the dolly zoom here.
But we don’t typically have these huge turning point moments in presentations. In fact we don’t tend to have huge character-based stories in presentations at all. So why would we even consider using a dolly zoom?
The dolly zoom is effective for focusing an audience’s attention on a specific object (in most cases a person). It’s a great tool to refocus your viewers on what’s important, and in a presentation deck it’s all about the attention economy: how can you help your audience focus on the right thing at the right time so that you can best make your persuasive and compelling points.
There are two main ways you’ll likely use this in practice:
- Break the flow of a typical presentation: Your slides look like [beautifully designed] PowerPoint, but suddenly you transition to something that doesn’t look like PowerPoint at all. You focus the audience’s attention and they’re ready for you to make a really significant, climactic point.
- Guide the audience in a cinematic presentation: It might be that you’re presenting an already-dynamic keynote and the dolly zoom effect doesn’t stand out quite in the same way as in the previous example. That’s okay, it’s doing a different job. Use it here like a cinematographer would. Focus in on a character, show tension or a turning point in your content.
Three stories you can tell using a dolly zoom effect
Let’s have a think about this in practice. Here are three story beats the dolly zoom effect can help you tell.
- Focus – positive: You want to create a positive focus on a particular person in your presentation story. You want them to come closer to the audience to create a stronger connection. This works particularly well for customer stories as it move the client or prospect closer to the customer.
- Focus – tension: You want to heighten a moment of tension. Maybe you’re telling the story of how someone’s life has been disrupted by an event and you’re using the dolly zoom to create that feeling of disorientation and disruption.
- Focus – object: Sometimes you need to focus in on an object. Maybe it’s some training about the hidden dangers in a lab, or something where there are so many product you don’t know what to choose. This is a great technique to add some drama to that big reveal.
How to make a dolly zoom effect in PowerPoint
Now we know where any why to use dolly zoom, let’s see how you can use PowerPoint to make it happen.
Choose your image
You’ll want something with a clear subject. Duplicate it so you have two copies and make them slightly larger than your slide. The easiest way to do this is to hold Ctrl + Shift as you do this and your image will resize in proportion from a centre point.
Isolate the foreground using PowerPoint’s AI-powered Edit Picture tool
Historically there have been many ways to isolate an object in PowerPoint. There is the decades old ‘Remove Background’ feature which was always a bit hit-and-miss, there was the manual workaround that used a combination of the Freeform Shape tool and the Merge Shapes tool to cut out a piece of an image. But now there’s a third AI-powered option.
Head to the Picture Format ribbon and click Edit Picture.
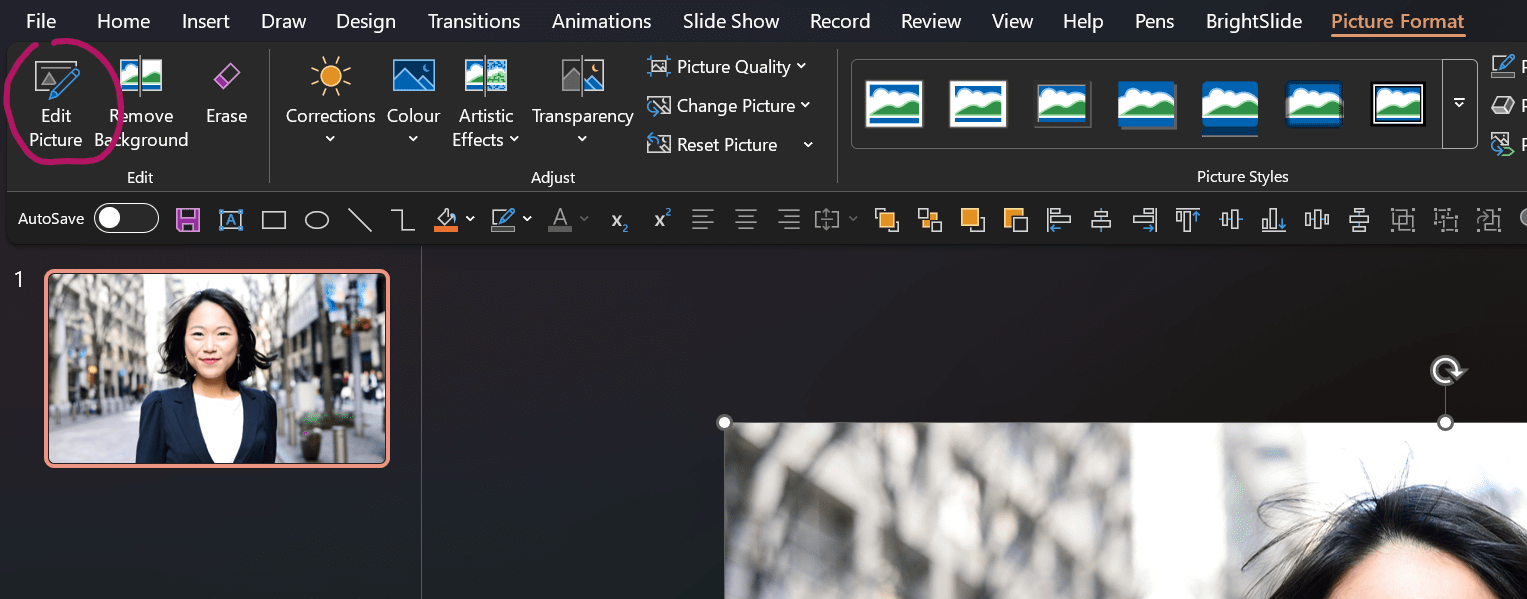
You’ll see a number of options when you open this new window.
- You can Erase portions of the picture – the AI tool will fill in a likely background.
- You can Upscale an image to increase its resolution or quality.
- You can Edit object for greater control over what you edit. You can lasso or brush part of your image.
- You can Remove background – we’ll be coming back to this one in a moment.
- And you can add Effects, Text, or Crop your image too.
Click Remove background. The AI tool analyses the image and removes what it identifies as background. You have the option to select or brush areas you want to keep or remove, and once you’re happy you can click done. Clicking Save replaces the original image with the new one and places it on your slide.
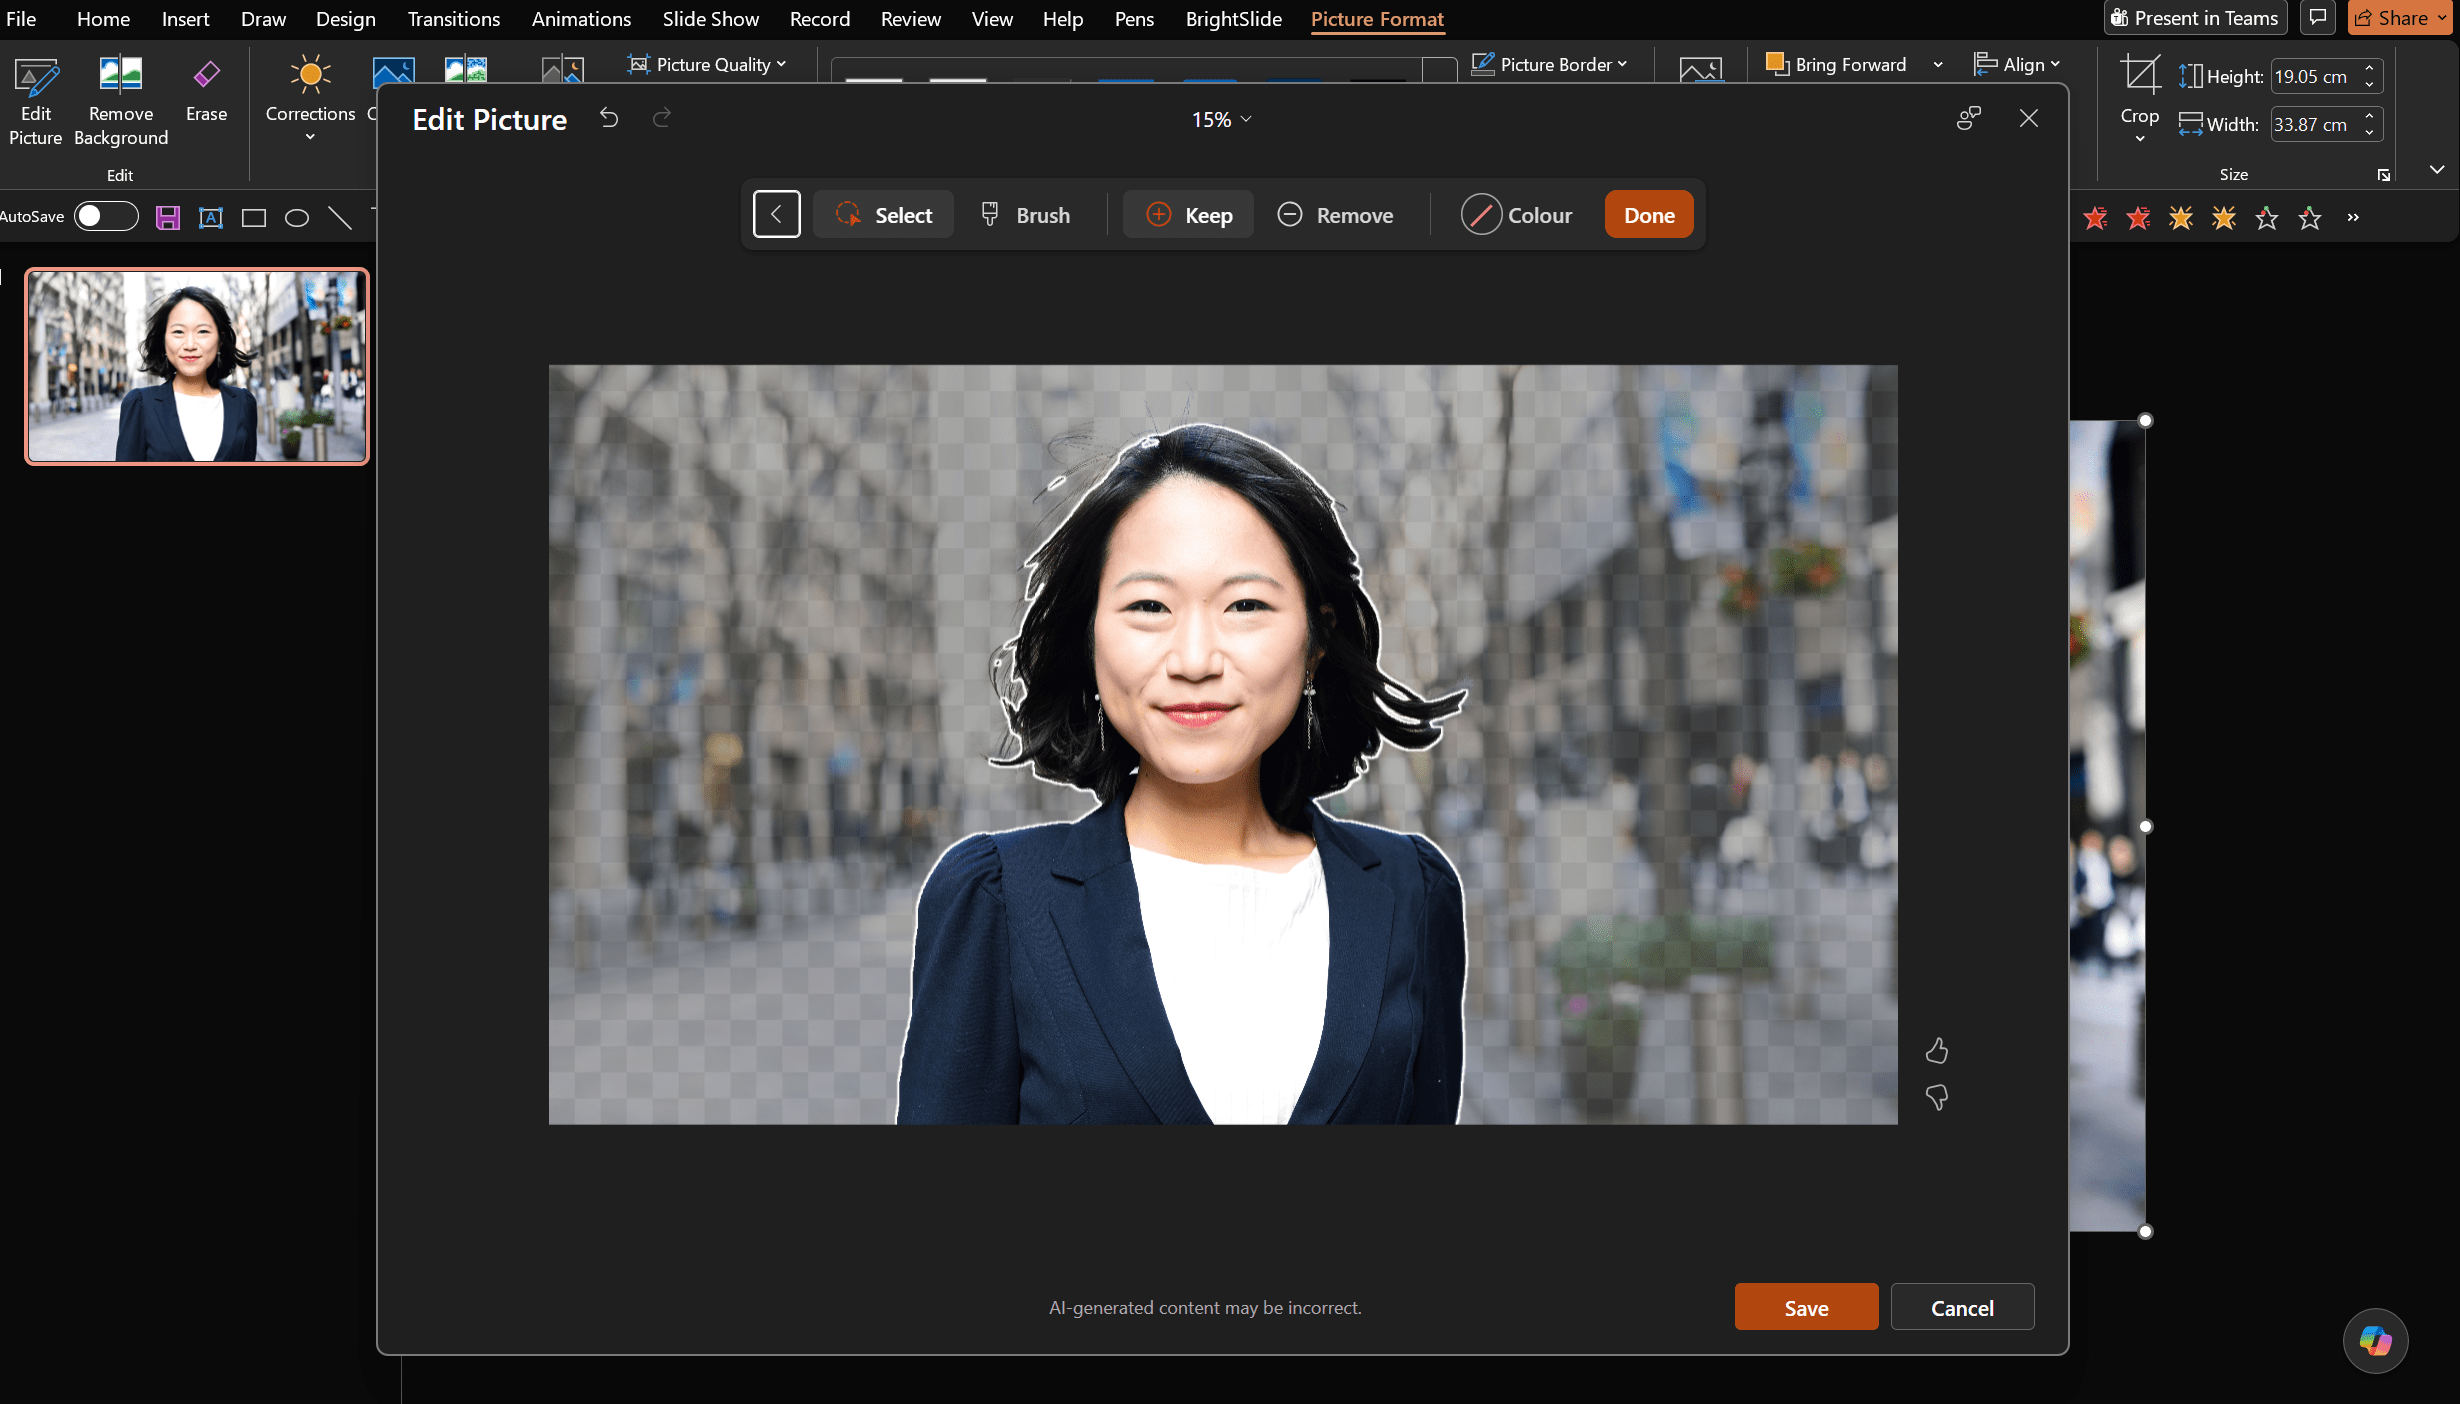
Quick tip: You may want to crop the transparent portions out of your new image to make it a little easier to deal with.
Create a background layer with Edit Picture
Now you have your object isolated you can create the zoom effect with these two layers, but sometimes it’s useful to have a clean background layer depending on which way you want to zoom.
Click the second copy of the image and this time click Edit object. You can use Erase, but Edit object gives you a bit more precision.
Hover over the image. As you do you’ll see suggested shapes appear around object in your image. Clicking on an object locks in the suggested shape. If you keep clicking you can add to the selected area. You can also add to the area by using the brush tool.
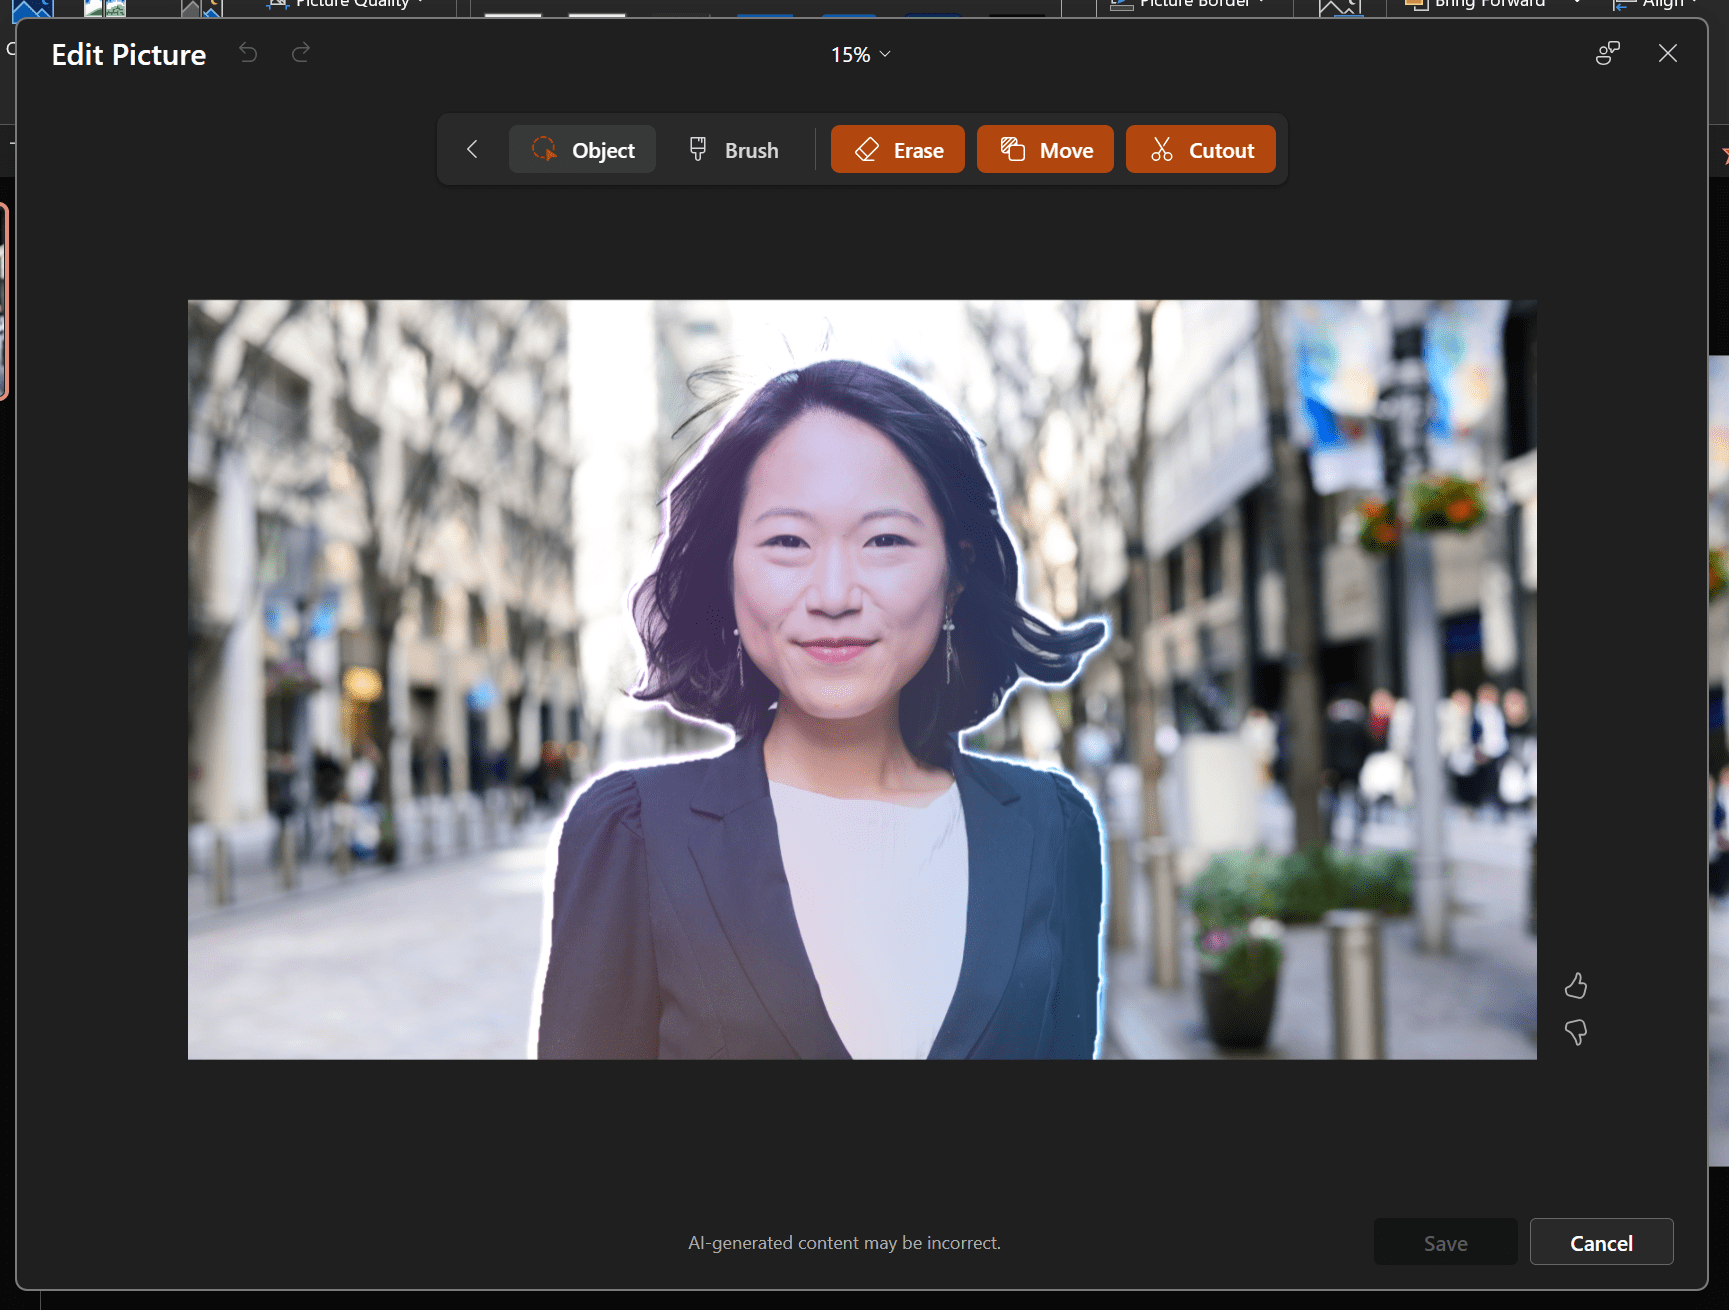
Once you’re happy with the area you want erasing, click Erase.
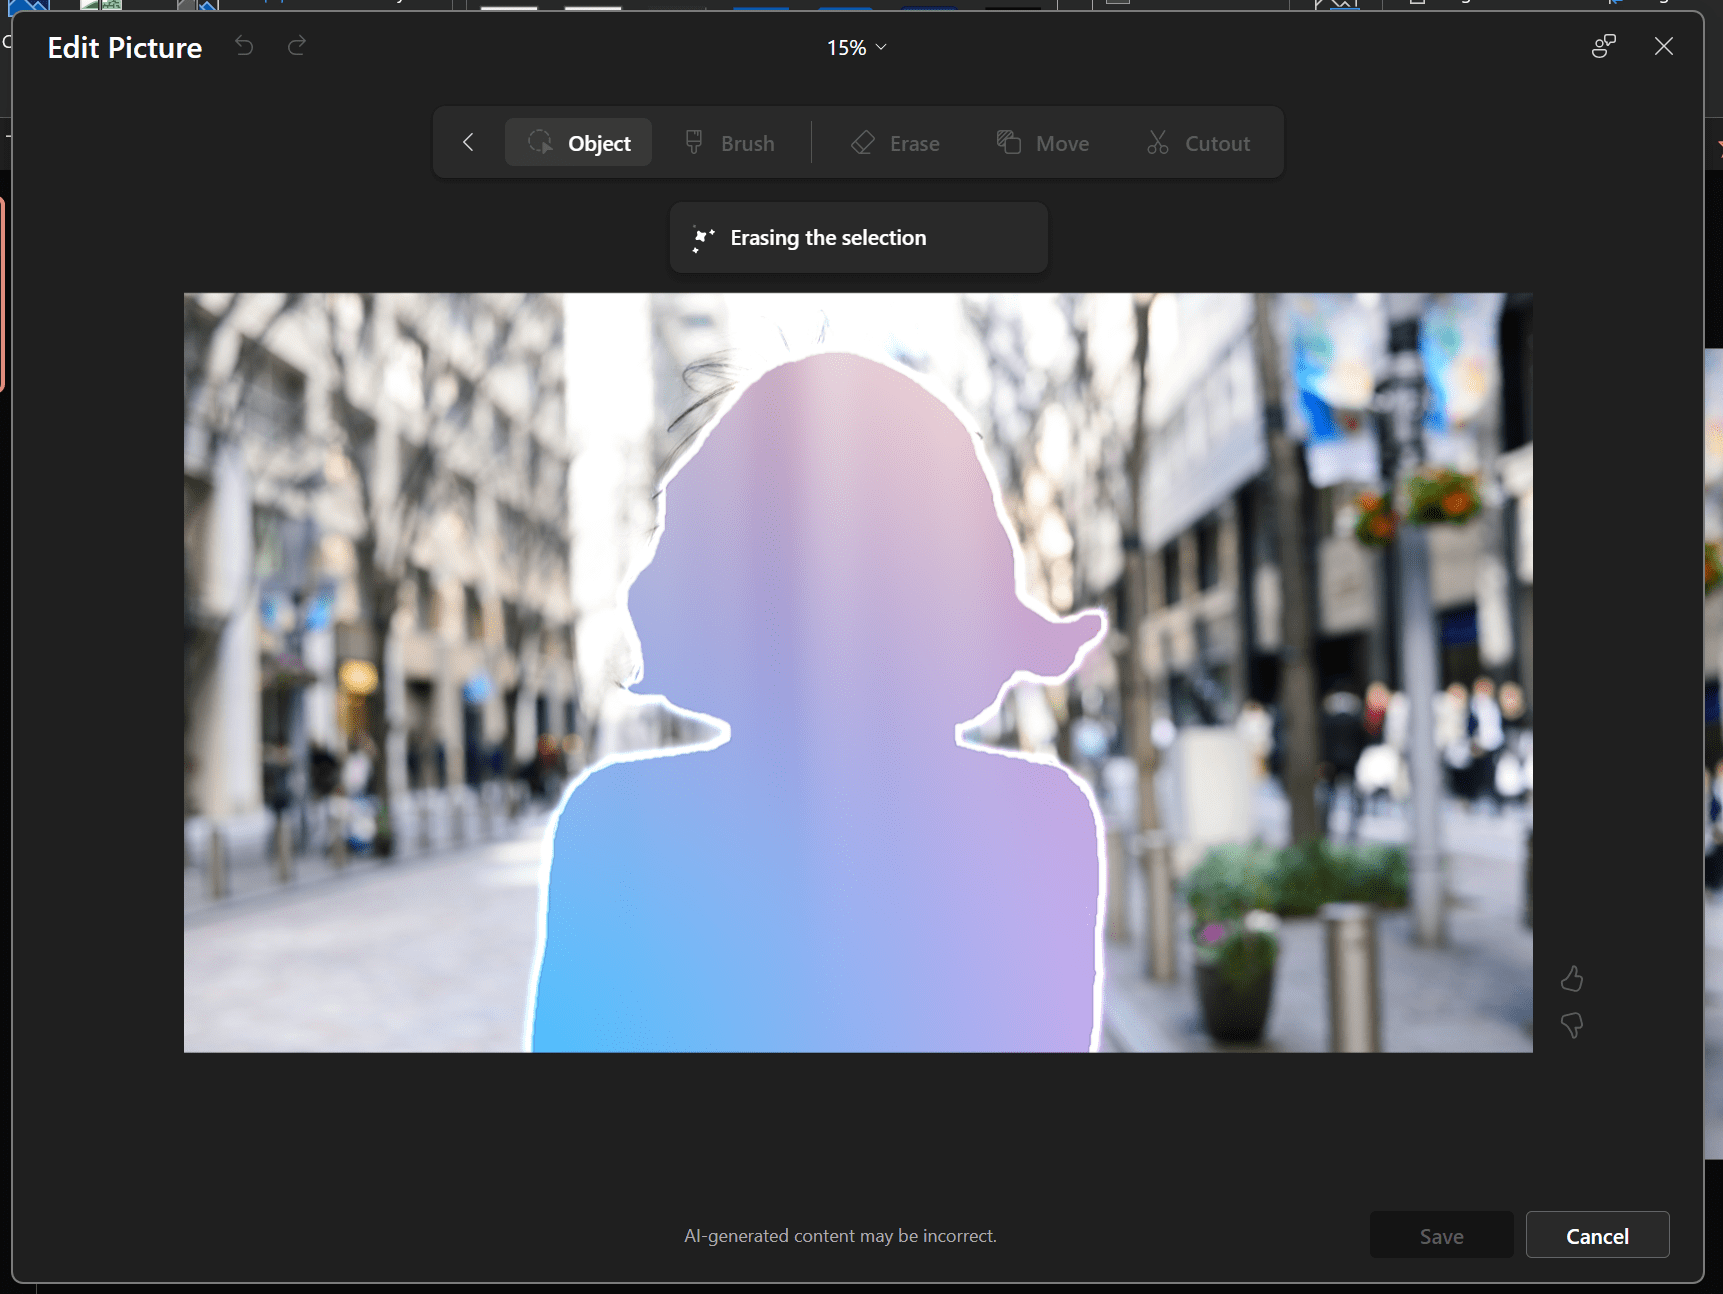
The tool will replace your object with a blurred mass. A note on that. If you’re looking to take bystanders out of your holiday photos, this isn’t the tool for you. But if you need a 2-click option to create two different layers in your image, this tool is great.
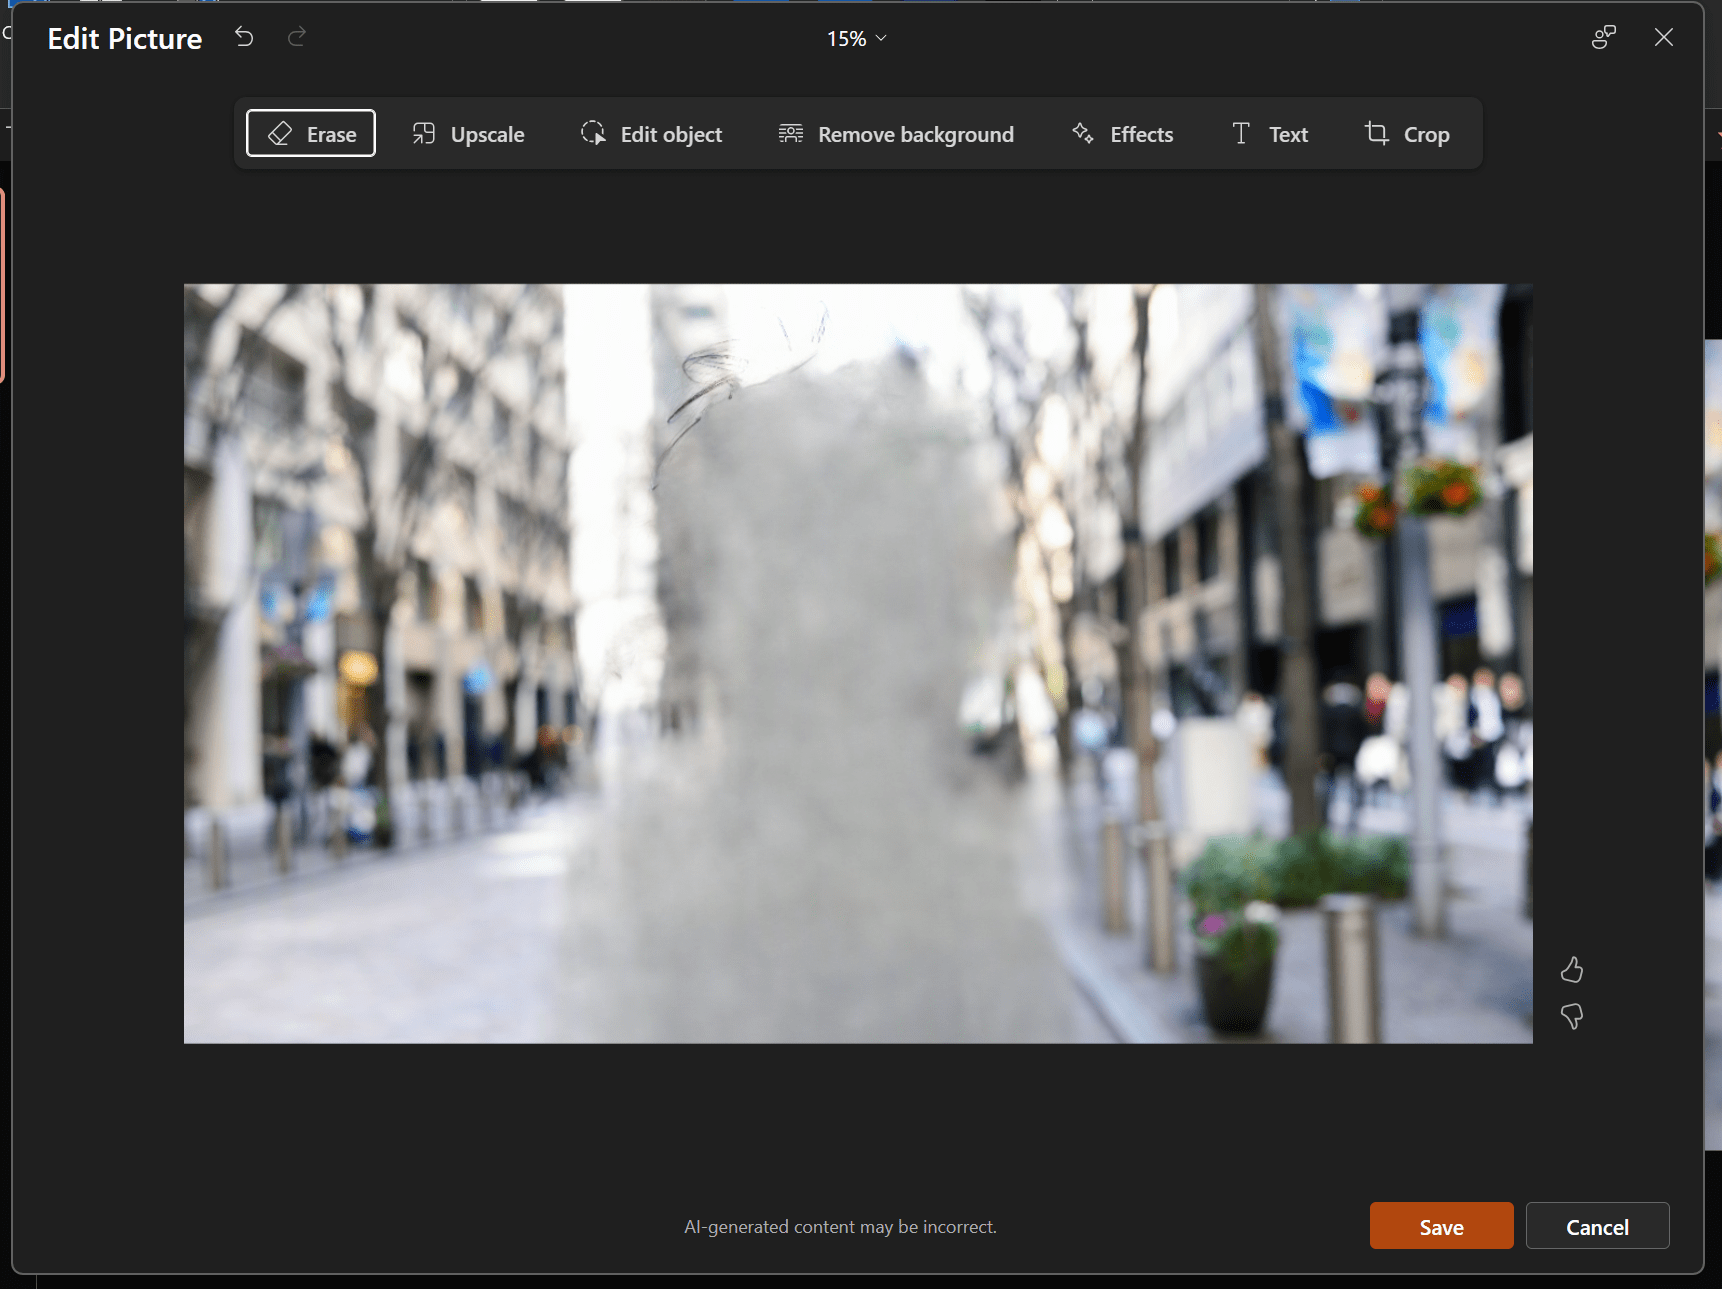
Click Save again to drop that new image into your deck.
Animate using the Morph transition
In days of old there now used to be a complicated process to work out the percentage size change needed in a Grow/Shrink animation, but every since the inception of the Morph transition, we can make those adjustments quickly and easily.
Duplicate your slide.
On the second slide adjust the size of your two layers. Make the background smaller and your object bigger, or vice versa. Again hold down Ctrl + Shift as you do this to keep proportions and your centre point fixed.
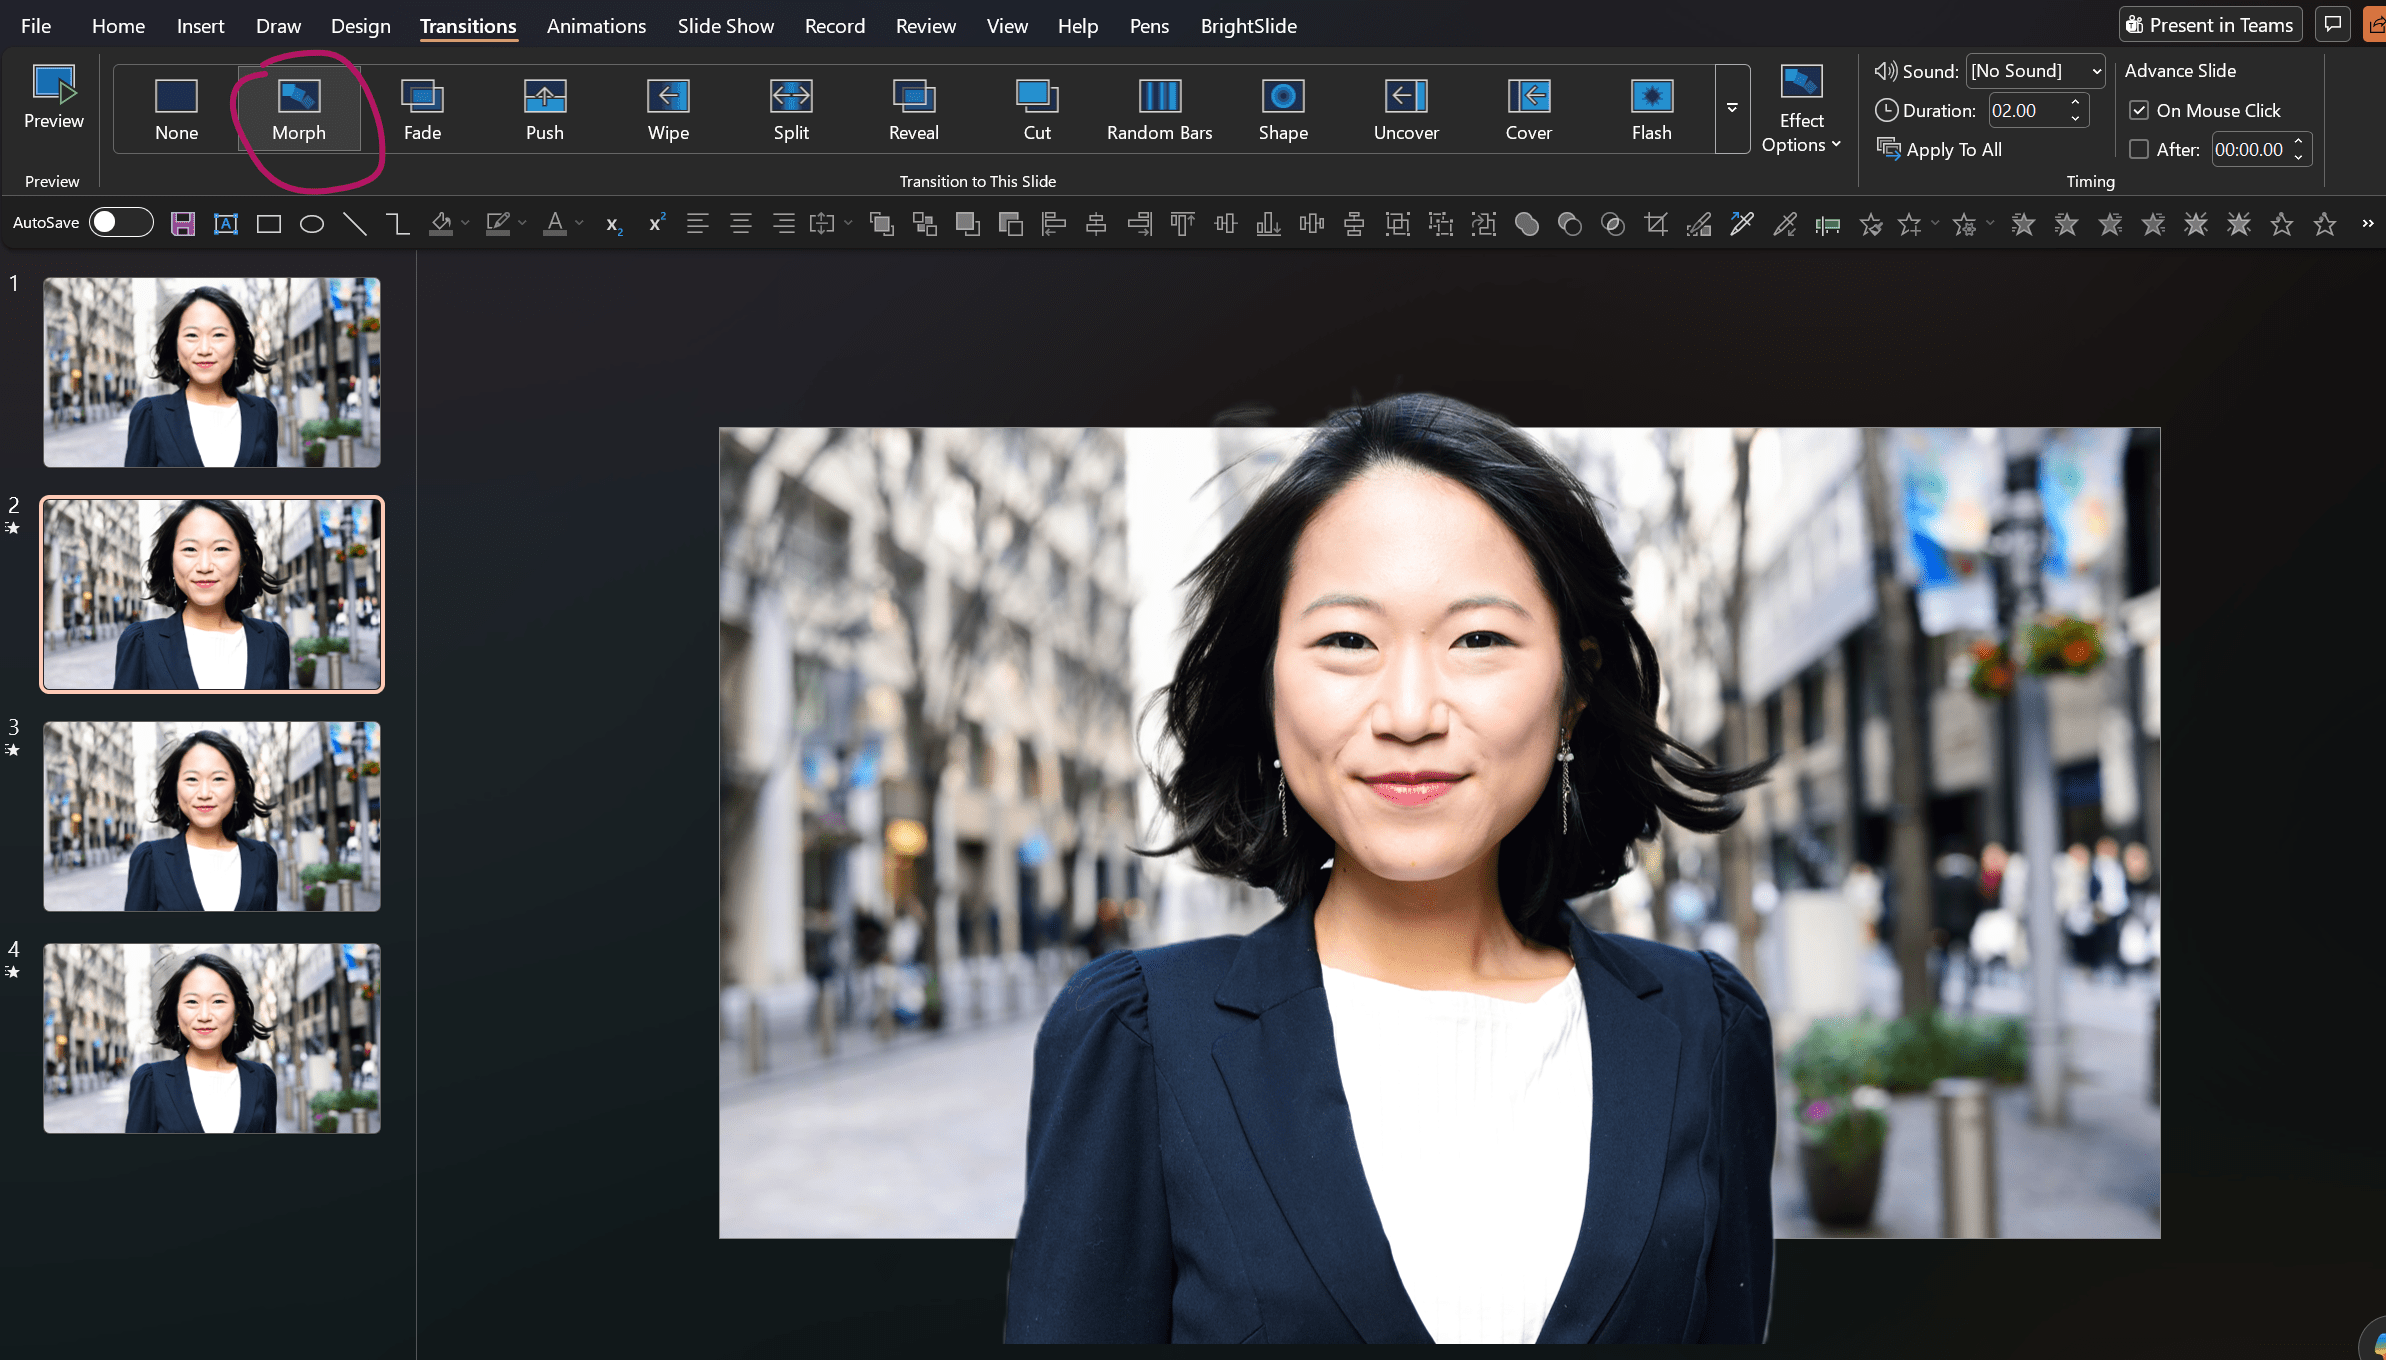
Navigate to the Transitions tab in the ribbon and click Morph. Put your deck into show mode and watch the magic happen!

A couple of caveats
This is a fairly new tool and it isn’t perfect. In fact I had quite a few failed attempts to get my images onto my slide. I couldn’t figure out what kept making it fail, but it did take about 10 minutes of troubleshooting.
If you want perfect results try Photoshop. The Edit Picture tool may leave you with a few fuzzy edges, though even in the time I’ve been using it I’ve noticed the quality improve. If you’re relying on this technique in a high-impact presentation you’ll probably want to use something like Photoshop to make sure the cut-out remains crisp, but with a well-chosen image the Edit Picture tool will still give you great results without the licence.
What next?
Give it a go and let us know how you got on in the comments below.
Level-up your presentations with more of these cinematic effects using Morph.
Leave a commentRelated articles

26th Aug 2025
How to make a logo wall in PowerPoint
Logo slides are a regular fixture of presentations, but they're often ugly and messy and tend not to do too much to build the credibility they're supposed to. Follow along to learn how to make a logo slide look neat and tidy, and if you want a stretch task, get inspired by some competitor-trouncing alternatives

07th Jul 2025
How to build layout slides for a presentation toolkit
When it feels like the call is to make more and do it faster, design smart and build a presentation toolkit packed with effective layout slides. We show you how to start off by building five of your own.

Join the BrightCarbon mailing list for monthly invites and resources
Tell me more!BrightCarbon are a great partner in our growth. They are great to work with, very consultative, and professional. I could not recommend working with them more highly.
Neil Davidson Deltek