
30th Oct 2023
How to create PowerPoint templates that work
Without a proper PowerPoint template, presentations can be a bit of a mess. Here are the building blocks for developing a PowerPoint template that works!
I recently discovered that it was National Sibling’s Day – two days late. However, with a spare hour on a Saturday morning, I decided to celebrate it anyway and do something for my sister. She lives in Manila, Philippines, and I’m in Boston, USA, so 8,000 miles and 13 hours difference meant that it had to be a digital celebration.
I did what most people have done in similar situations, and decided to create a sequence of photo highlights of her over the years – the kind of thing that you see at birthdays, weddings, and funerals, along with more corporate events such as sales meetings, conferences, and dinners. Normally such things are pretty mundane – photos thrown at a PowerPoint slide, with no embellishments at all. In fact, it is pretty easy to create dynamic movie sequences to make the whole thing come alive, using a few simple PowerPoint tricks.
The first trick is about keeping things simple. You can create an exciting photo presentation where everything is different and each photo animates in a unique way, but life is usually too short. Instead, if you can create an animation template for one photo, you can duplicate it and still get some great results. In my example, I wanted the photos to zoom across the slide, but slow down in the middle of the frame so that you can see them, and all it takes is three animations – a Fly In (From Left), a Motion Path (Right), and a Fly Out (To Right). Tweak the timings and the smooth start and smooth end settings and you’ve got the core of your photo sequence.
Place your photo on the slide just to the left of centre so that the Fly In animation will bring it to that point. Then add your Motion Path and alter the length of it by using the grab handles on the red arrow end to make it the right length – ideally so that it’s just right of centre. If you double click on the motion path in the animation pane timeline, you can adjust the timings, so that the photo moves slowly across the screen when in the centre – two seconds is probably fine, but it’s your choice. You’ll also need to remove the smooth start and smooth end times by taking the sliders down to zero, so that you get a slick transition between the fly animations and the motion path.
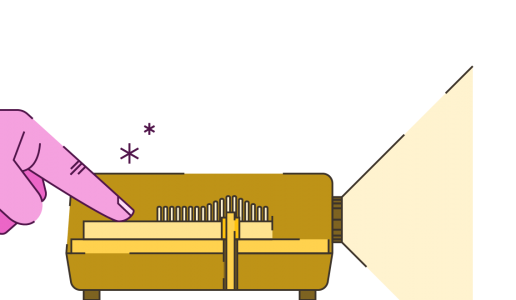
I added a further embellishment by having a series of stars circle around the photo, which is also easy. I created a star shape and put it just off the top edge of the slide in the middle. Then add a circle motion path to it and re-size the motion path using the grab handles so that it extends down below the bottom of the slide. This will have the star move down out of sight and then back up again. Copy and paste the star four times (so there are five in total) and place them on top of each other. Use the animation timeline pane to reduce the duration to 1.5 seconds and add a 0.1 second delay to the start of each star’s motion path animation compared with the previous animation (you’ll have a total of 0.5 seconds of delay with all five stars). If you copy all of the stars and place them at the bottom of the slide, you can achieve the same rotating effect but re-size the circle motion paths so that they move up above the top of the slide.
So that it didn’t become too repetitive, I created a second sequence where the photo moved from right to left, using the same animations, but in the opposite direction. The stars are exactly the same.
That all looks like a fairly complex explanation, but it really doesn’t take long to do, and if you’re slightly familiar with PowerPoint and animations, it will take only a few minutes. What’s more, you’re pretty much there.
A very quick alternative that is a lot simpler, but not quite as good, is to use Dynamic Content slide transitions. These transition just the content (photos) and leave the background still, so you don’t need to bother with animations. However, you can’t achieve quite the same effects, and the only movement comes during the transition, rather than when the photo is on show. The Pan, Conveyor, and Orbit transitions probably give the best results. You can also alternate them from left and right using the Effect Options button on the Transitions tab
To make it look the part, I used some of the default PowerPoint formatting options. Click on the photo, and using the Picture Tools Format tab on the ribbon, you can apply a 3D effect to the images, which when combined with a slight bevel and reflection, help to make it look great. Three clicks and you’re done – although you can endlessly tweak these settings if you want to. Use a different 3D angle for your two different templates so that they look more natural when moving around.
So you’ve done your template for two images. Rather than have to redo that for each new image, you can duplicate the slide and then right click on the duplicated photo and choose Change Picture from the popup menu. Simply select the new image from your computer and all of the animation and formatting will remain with the new picture. Duplicate your slide sequences as many times as you need and change the pictures, so that in minutes you’ll have everything done.
Music can make a big difference, so I suggest that you use some. It’s really simple – just use the Insert tab in the ribbon to add Audio from File and select an mp3 or other audio file to your first slide. Click on the audio speaker symbol that appears on the slide and select the Audio Tools Playback menu on the ribbon. In the Audio Options, you’ll need to hide the symbol during playback using the check box. It’s also important to select the Play across slides option from the Start drop down menu, otherwise the next slide won’t appear until the music has finished.
To make it a bit more versatile, you can use PowerPoint (2010 onwards) to convert anything into a video format. Go to the File menu, Save & Send, and then Create a Video. You can choose your resolution (the medium setting – Internet & DVD produces a good balance of file size vs quality) and set it to work. Once converted, you’ll have a WMV file that you can play on pretty much any device. If you want to take it further and compress the data rate to reduce the file size, or convert to a different video format, I recommend using the free tool Any Video Converter.
While not critical, I suggest that before you start any of this, make sure that you’re using a widescreen (16:9) slide template, as you will inevitably be using your photo video sequence on a widescreen monitor. Just go to the Design tab on the ribbon and Page Setup to choose On-screen show (16:9). Keep the background simple, so that the focus is on the photos themselves. A dark background – maybe a black/grey centre gradient works well, or a very blurred photo in the background (perhaps fireworks or fields) will set things off nicely.
While it really shouldn’t take you long to do, if you simply can’t wait, you can download the PowerPoint Photo Animation Video Template here. Duplicate each sequence as many times as you need and add in your own photos using the Change Picture function. Enjoy and have fun!
Leave a commentWithout a proper PowerPoint template, presentations can be a bit of a mess. Here are the building blocks for developing a PowerPoint template that works!
By applying some key principles of presentation design, you can make your PowerPoint design really standout and deliver both a more ‘popping’, but also more effective presentation.
Most presentations are a cascade of text-heavy Death-by-PowerPoint slides. Online learners suffer the torture of brochures converted to click-through-eLearning. Most people now recognize that using visuals is the way to go. But how do you make visual presentations and eLearning that work? We think there are six steps you need to follow.
Join the BrightCarbon mailing list for monthly invites and resources
Tell me more!We have worked with BrightCarbon for over 5 years, across a number of healthcare divisions, where they have been a very important part of our bid programme, supporting numerous awards of new contracts.
Sarah Appleton Brown Practice Plus Group


Great software! Going to try this program out for my presentations. The animation templates look great.
Michael, really glad that you like it. It’s worth noting that it’s all standard PowerPoint, so nothing different to the software that pretty much everyone has on their computers already. It’s just about pushing PowerPoint animations and PowerPoint graphics to their full extent really – perhaps with a little skill and creativity thrown into the mix!
I need a video made of me